• TalkBass has been independent since 1998. Add your voice.
    Create a free account to reply to discussions, view embedded media, and browse with fewer display ads.
    Join freeLog in
    Want zero display ads or expanded classifieds tools? Compare plans.

Winter Build Off 2022 - Curly Redwood 4 String

Greetings, Luthier's Corner! I'm entering the 2022 WBO with a scratch build.

After building a total of 6 basses in 2019 and 2020, I didn't build one at all in 2021 for various reasons. The last bass I made was this one, looks like I finished around the new year: RedLady 5: the sequel

I've had ideas and plenty of wood, hardware, and electronics, but haven't gotten down to building.
The garage shop space has filled up with stuff (as they will) and needs to be cleaned out and renewed for bass building use, and some of the tools could use a tune up.
Also, the 6 basses I've made were all more or less similar, based on the same body style, or design. This time I've drawn up a new design from scratch that'll be a new direction for me, so there is some renewal in that as well.

I'm ready for a bass-building renewal and rebirth!

I'm planning a neck-through 4-string bass with a maple and padauk laminated neck. It'll have a poplar body with a black veneer layer under a curly redwood top. I'm planning to use a very black ebony fretboard to hold 24 frets. It's easier to do oil finishes here in the cold months, so this one will have some kind of oil finish, which should look sweet with the redwood top.
Hardware is Hipshot and the electronics will be Aguilar super singles and an OBP-2.

I may not really be able to get started until the 26th or thereabouts, so there may not be much progress until next week.

Looking forward to seeing all the awesome builds! I built one in the 2020 WBO "Airspace" and had a great time, this will be a great motivator to get things rolling again in my little bass shop!
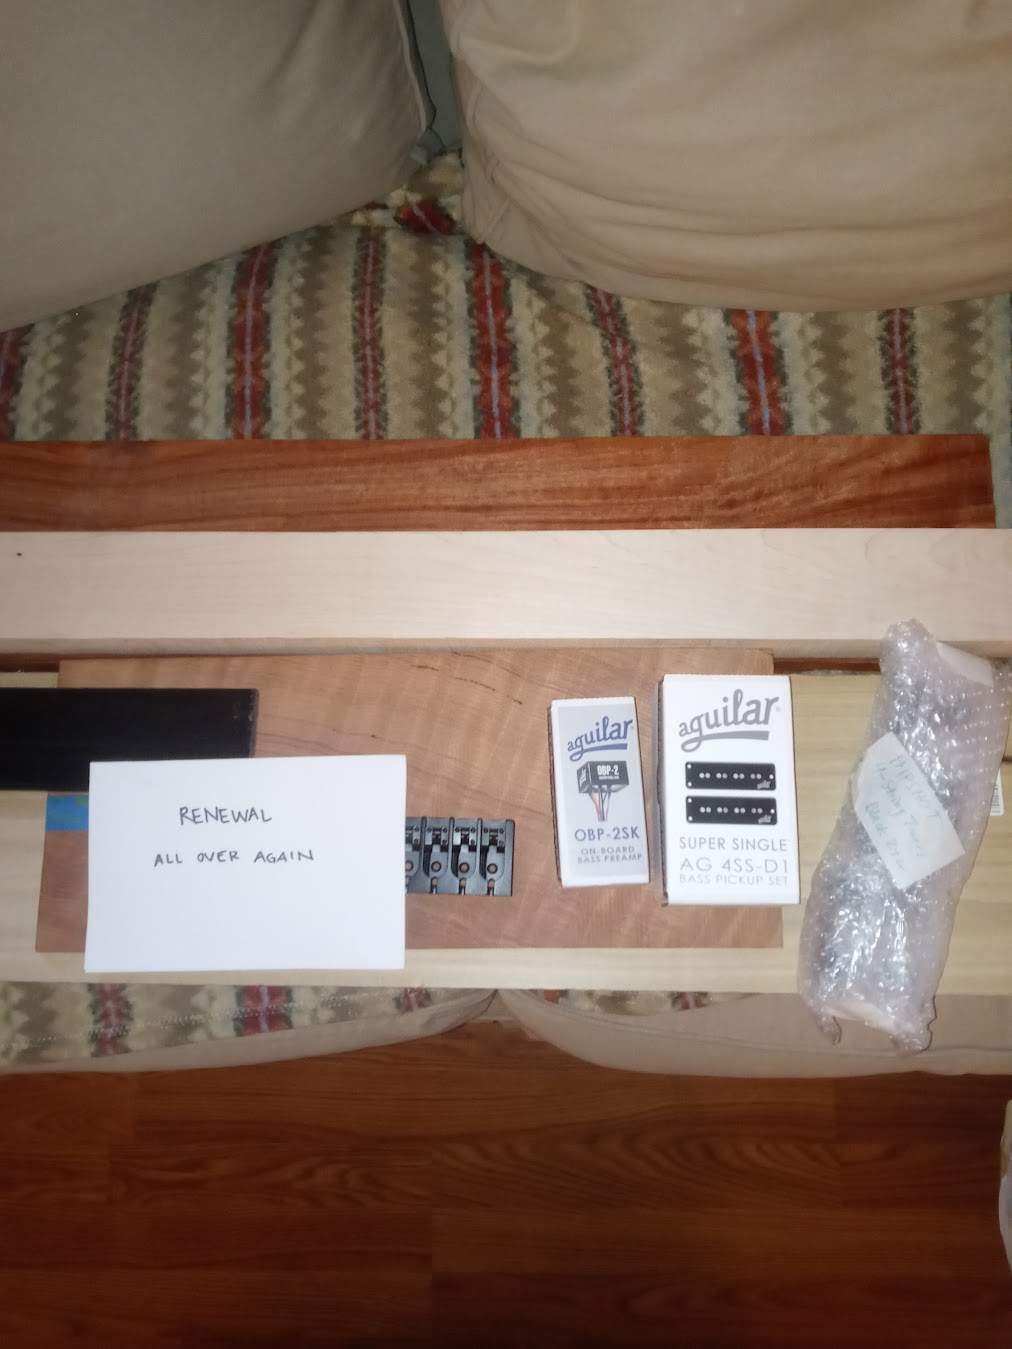


entry.jpg
 
Got out to the garage, straightened the place up a bit and got a start on this WBO bass.

I had made a 3-piece neck blank a couple of weeks ago, but rules are rules and I wanted this to be a legitimate scratch build, so I put that aside and started fresh. I made a 5-piece this time just to differentiate a little bit.

Neck stringers cut and thickness planed
cr01.jpg


The traditional clamp shot
cr02.jpg


Tomorrow I'll clean up this neck blank and do the next steps: cut the headstock angle and route the truss rod channel. We're finally underway, I feel like I'm already behind :eek:
I have some time off work, and the weather doesn't look too bad, so it should be a good week to get this neck and the fretboard to a good place.
 
Last edited:
Got in a good couple hours today. Now I don't feel behind anymore, but I have to keep the momentum up!

Here's the cleaned up neck blank. I do this by running one side across the jointer a couple times until it's flat and square, then using the thickness planer to clean up the opposite side. Then I chop the ends clean with the compound miter saw
cr03.jpg


Next up I make some measurements and do the tilt-back for the headstock. 10° for this one. I make the cut with the bandsaw and sand it flat and level with a flat bar and some 80-grit paper.
cr04.jpg


The next step was to route the truss rod channel and access. Until now, I've used stew-mac "hot rods".
This is my first time using a different model of rod, this one is from bitterroot guitars. It needed a wider rout around the adjuster nut, and a little extra space around the first half-inch or so where it's welded. The rest of the route is a standard 1/4". It seems like it'll work fine.
cr05.jpg


Forging onward, I started to prepare the fretboard. I'm using a nice black ebony board I got from Gilmer Wood.
I planed it down and cut the slots in my slotting jig.
cr06.jpg


Took some elbow grease with the fret saw, this ebony board is hard as nails
cr07.jpg


I should be able to get some shop time tomorrow. I'll shape up this fretboard and inlay some 1/4" inch pearloid dots I got from Philadelphia Luthier Supply. Maybe even glue the board down. We'll see...
 
I put in a little more work on this bass today. The three month time box is a great motivator!

I shaped the fretboard up with the bandsaw and some flat-bar sanding of the sides.

cr08.jpg


Time for dot inlay work. I use a 1/4" router bit in my janky little drill press. It's a tabletop Porter-Cable thing from Lowe's and if I were to upgrade any of my power tools, that thing is first on the list. But, for now, it works.
I use a little #10 thin superglue on the dots. I made a standard centered pattern with 2 dots on the octaves.

cr09.jpg


This is the point where I glue up the fretboard. I should have maybe taken some pics, but I was trying to get it done, and didn't really think about it until afterwards. I drill two registration holes to align the board with toothpicks, one each in the 2nd and 23rd frets. Then I put some masking tape down to cover the truss rod and spread the glue. Remove the tape, register the board into position with the toothpicks and clamp it down with a waste board to protect the ebony and to even out the clamp pressure a bit. This has basically worked well each time so far.

cr10.jpg


Once the glue dries, I'll start in on rough cutting and shaping the neck and headstock. Maybe tomorrow will be a good shop day and this thing will start looking like a bass neck! I want to get as far as I can this week, soon work demands and colder weather will start slowing down progress.
 
I had a good time in the shop today. Rocked out to the bluetooth speaker and got down to working on this neck.

I fired up the bandsaw and rough cut the neck blank, taking off quite a bit of material.
cr11.jpg


cr12.jpg


Then, I started in on cleaning it up a little. I take the top-bearing pattern bit in the router and use the side of the fretboard as the 'template' and cut the sides of the neck smooth. I had cut the headstock to close to the right thickness with the bandsaw and now I use my flat bar to sand the back smooth. I also use it to clean up the headstock shape a little bit. Now, it's more or less ready to carve the neck and shape the volute.

cr14.jpg


I finally bought a two-sided (coarse and somewhat less coarse) shinto style rasp and that made for a much less laborious neck carve than what I used to do. I tried to do some faceting this time, which is a new approach for me.

cr15.jpg


I need to work on that technique a little, but it seemed to help with the bulk removal. Once I got kind of roughed in, I kept grinding with the dragon rasp files. Then onto the 80-grit and 120-grit. Got the neck and volute pretty well where I wanted them.
cr16.jpg


cr17.jpg


One last thing before I hung it up for the day, I added a little ear material to the headstock.

cr18.jpg


Tomorrow is supposed to be pretty cold and good chance of snow. Hopefully, I can shape the headstock up and glue on the ebony veneer that I'm planning to put on the face of the headstock. That would be great progress for this first week. After that, I'll probably radius the fretboard and install the side markers, maybe get to that this weekend.
 
Yesterday was cold and snowing, which in a sense was a relief, those Colorado fires were not all that far away from here and everyone could use some moisture and cold to end that disaster.
But, it made for a short day in the shop with my heater blasting.

I shaped up the headstock ears. The headstock shape will get a little fine-tuning once the lamination is on the face.

cr19.jpg


Speaking of which, I rough cut the truss rod access and slapped on the ebony veneer. Still using Titebond I on everything so far.

cr20.jpg


Not sure that I'll get into the shop today, it's single-digits (F) here and there is at least 6" of snow laying about. Seems like a good time to wait for better conditions. I may yet get out there, I'd like to trim this ebony to shape and that wouldn't take very long. We shall see.
 
I couldn't resist cleaning up the headstock veneer and seeing what it looks like. Quick trip out the shop, with lots of hand-warming over the heater today.

I cut the veneer close with the bandsaw and then rasped and sanded it to shape.
cr21.jpg


Then I figure why not do the tuner holes?
cr22.jpg


The next operation will be to radius the fretboard. I'll be going to a 14" constant radius with a radius block and 80-grit. Not looking forward to it, but after that the neck will be close to good for a while and I can start thinking about the body.
 
I've been busy at work to start the new year and it's been snowy and cold, bass building work has slowed to a crawl.

I did manage to get out there and do a couple things. I measured the height of the bridge/saddles and the thickness of the top and offset the top of the neck from the fretboard so the string height will be good.

cr24.jpg


I also installed some white side dots

cr23.jpg


I'll need to add some wood to the back of the neck blank to build it back up to the right thickness. Once I do that, the neck will more or less be in a good place and I'll start to work on the body of this bass.
 
I got some time on this build after work today, it was too warm (~50° F) to waste the chance.

I didn't get good pics but I made a couple of pieces to add to the back of this neck to make it the correct thickness. One layer of maple, then a back piece of curly redwood. The back strap, and the control and battery covers will be curly redwood to match the top wood. Here's the glue-up: I put some wax paper between this purpleheart scrap and the redwood and used it as a caul of sorts to spread out the pressure.

cr25.jpg


Then I thought I'd start getting the top wood together. Here it is:
cr26.jpg


It's only 4mm thick and it's really kind of soft. I'm starting to wonder if an oil finish is a good idea, it may need a harder finish to protect it. I'm not sure how I'd spray Varathane in the temps I'll be seeing in March around here, but maybe there's a way if I heat the working space enough.
Anyway, I glued it together...

cr27.jpg


That joint won't be very strong, I'll have to handle this top carefully until I get it glued onto the bass.

At least some progress today. Next, I'll trim the back straps flush and start getting the body wood ready.



