

Enjoy the benefits of a premium membership!
Upgrade Account
-
TalkBass has been independent since 1998. Add your voice.
Create a free account to reply to discussions, view embedded media, and browse with fewer display ads.
Join free Log in
Want zero display ads or expanded classifieds tools? Compare plans.
You are using an out of date browser. It may not display this or other websites correctly.
You should upgrade or use an alternative browser.
You should upgrade or use an alternative browser.
Winter Build Off 2022 - Curly Redwood 4 String
- Thread starter dmarino
- Start date
More options
Who Replied?
It was 60°F today, which made for a good chance to get some stuff done. It's going to be around 1°F by Tuesday. Gotta love Colorado, you just never know what you're going to get!
Anyway, I wanted to get the remaining wood work done, so I had a lot of little tasks to do.
First up, set up the machine screw attachments for the control covers.
Here's the siting holes. I just marked the covers, installed them and drilled straight through the cover into the body.
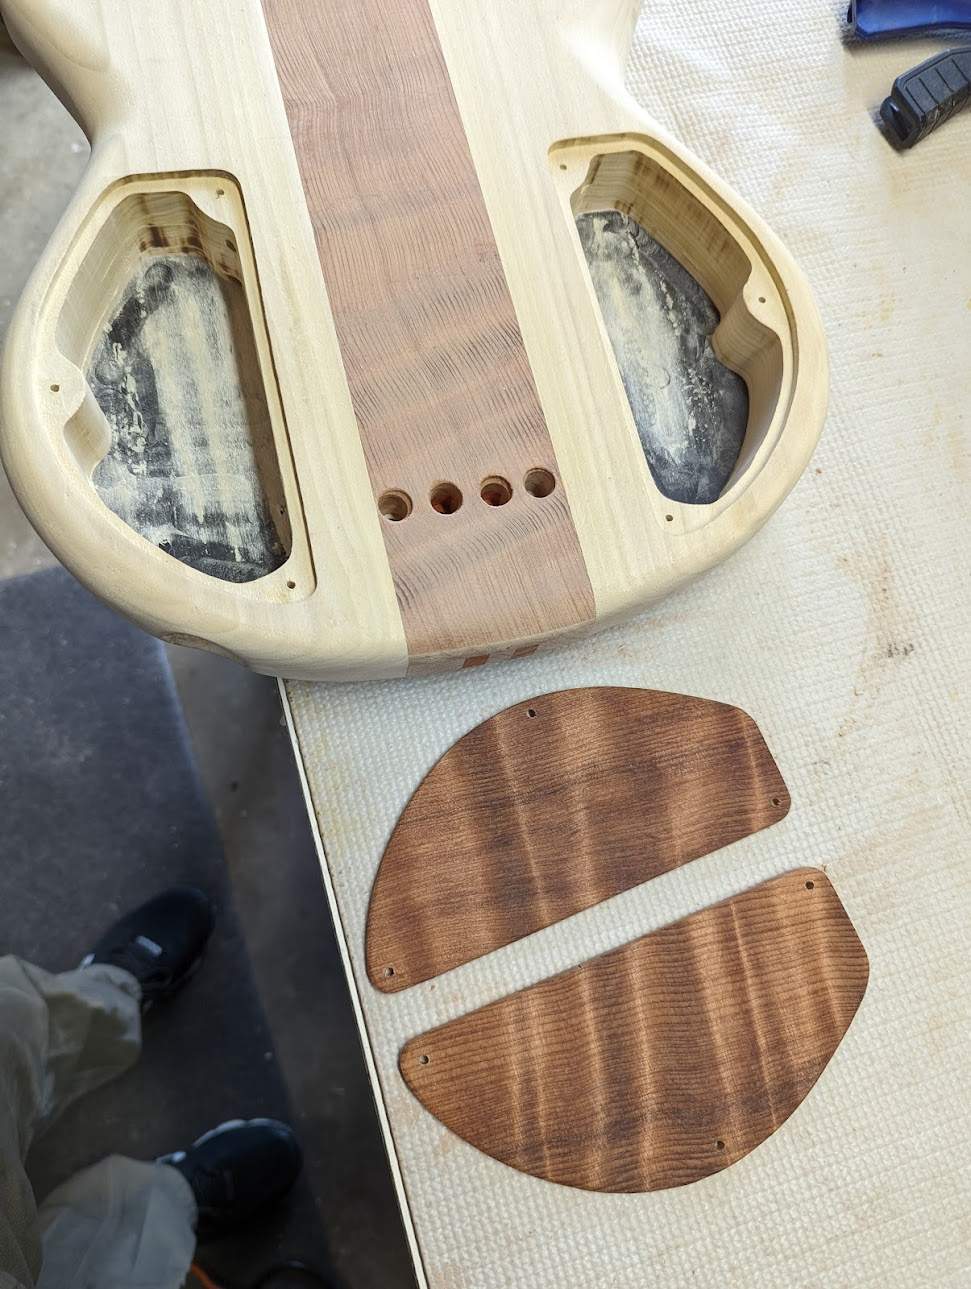
Then drilled out the thread housing recesses and screwed them in. You can see that my string-thru ferrule recesses weren't that clean. I still don't have a good process for that. Luckily they sit straight in there and that ugliness is hidden when the ferrules are in there.
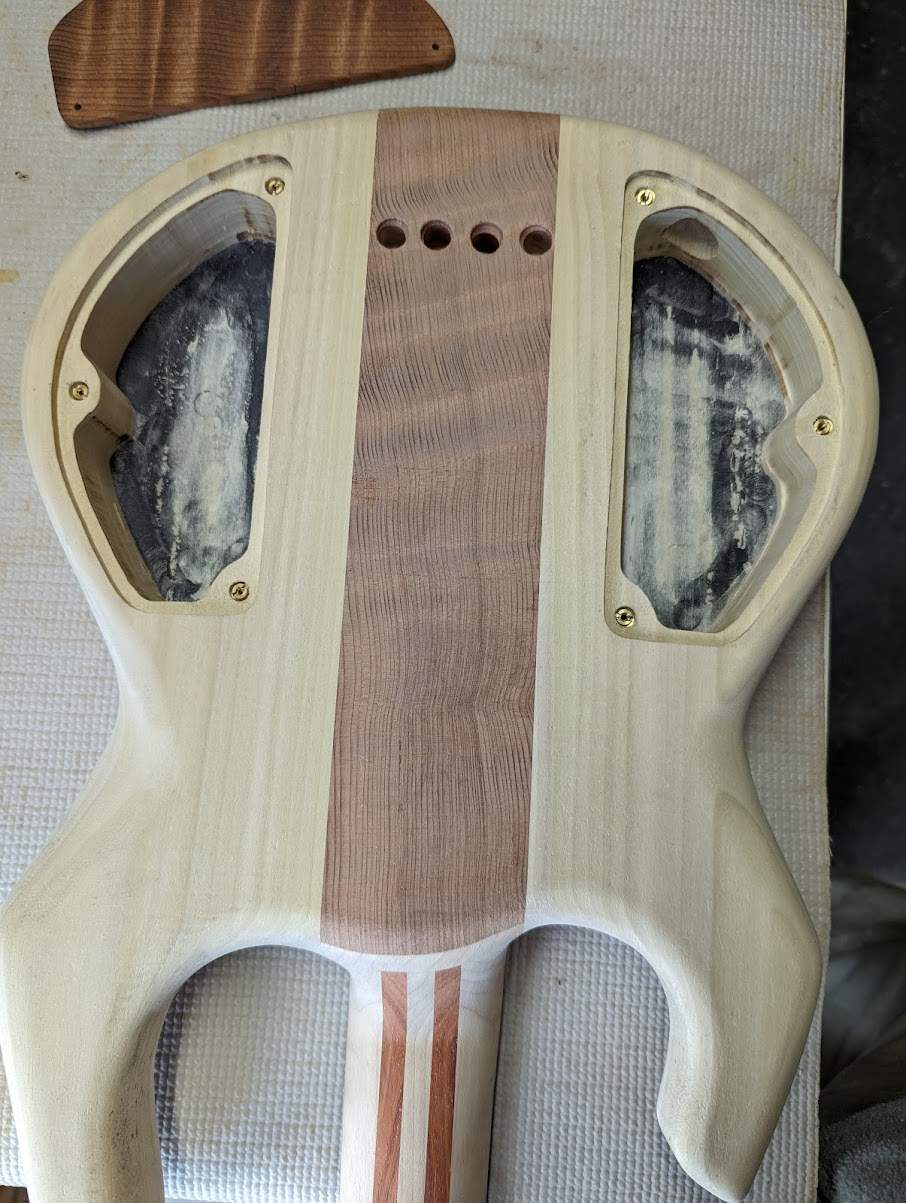
Counter-sunk the cover screw holes with the small counter-sink bit. It's the kind with 5 flutes, there's been some chat lately about these types of bits not working the best, but this wood is soft and I spun the drill slowish - it didn't make the hexagon shape. Actually I've never had that problem with these bits yet.
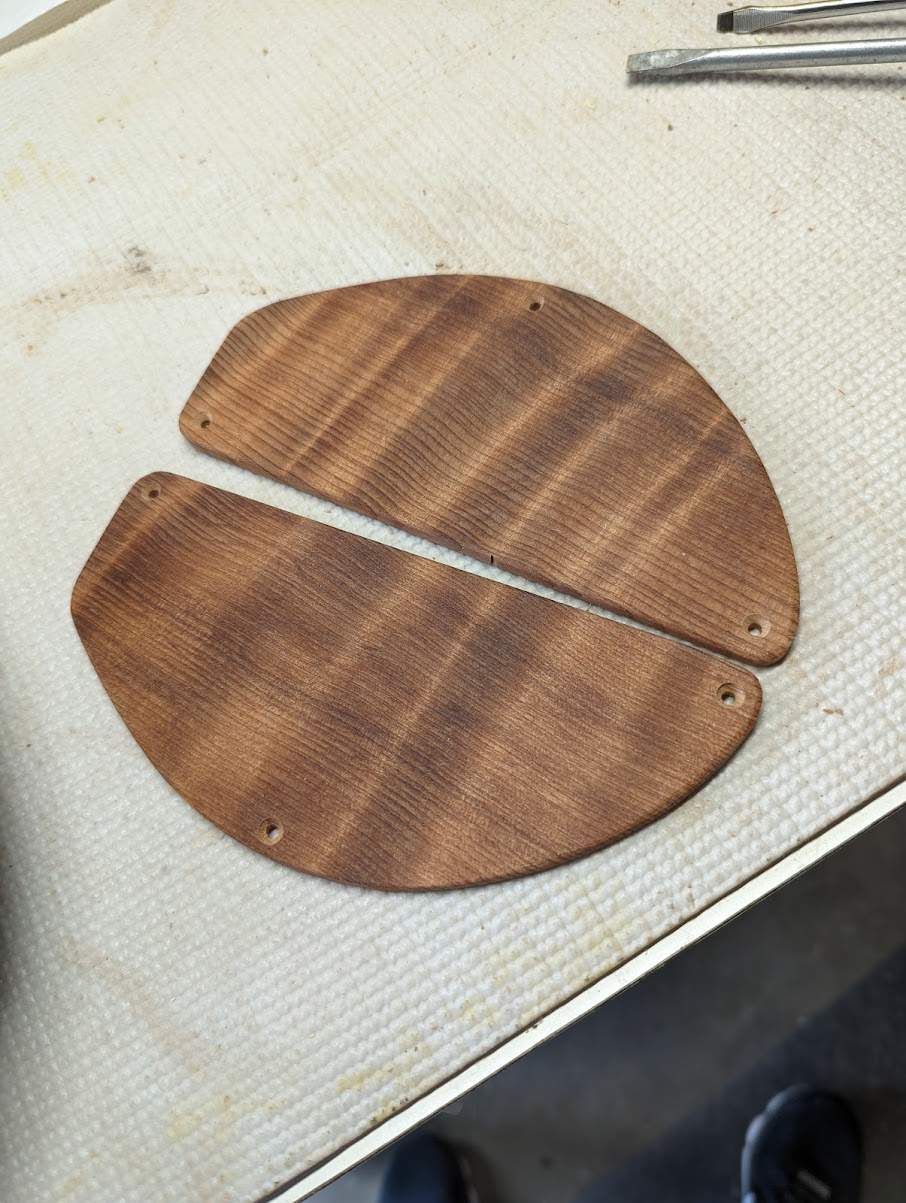
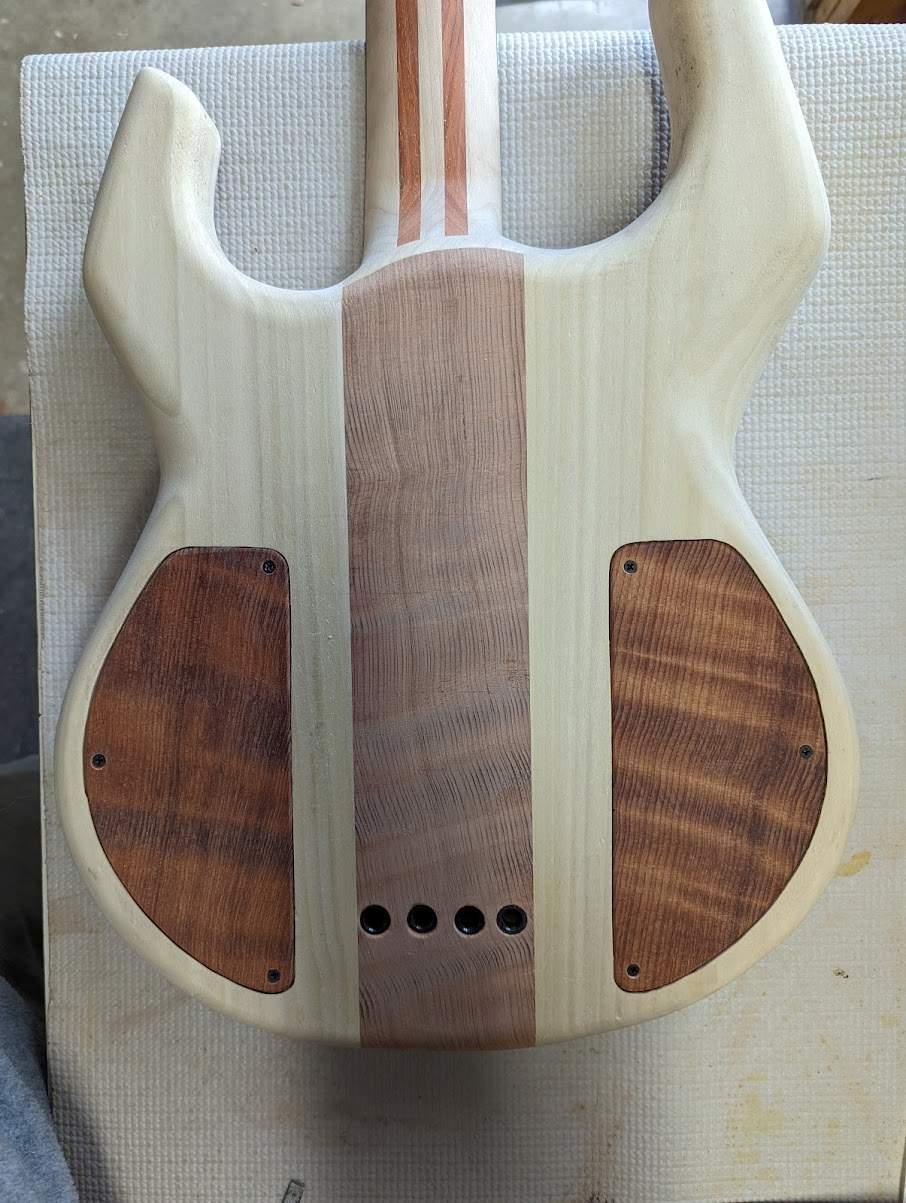
Covers test mounted, ferrules just placed in dry. The covers fit ok, the screws are fitting/working well. Everything back here is as-designed at this point.
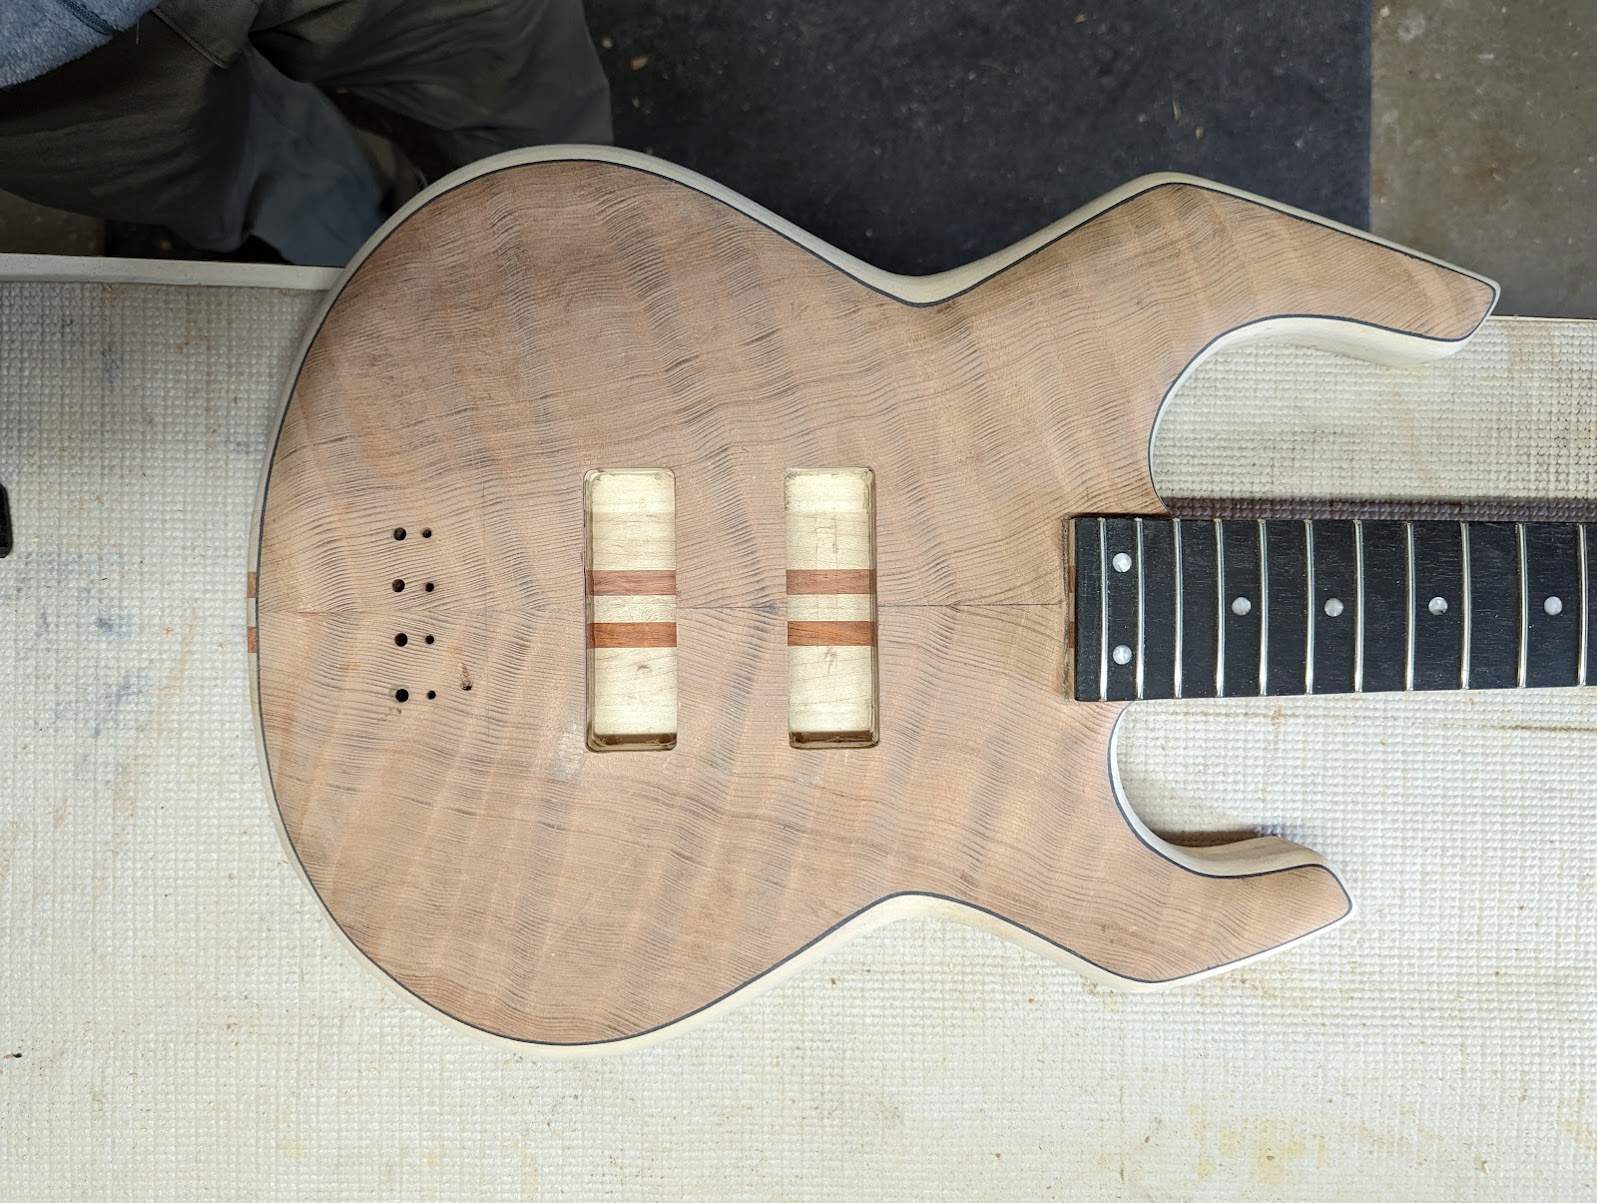
I measured and drilled out the bridge attachment screw holes.
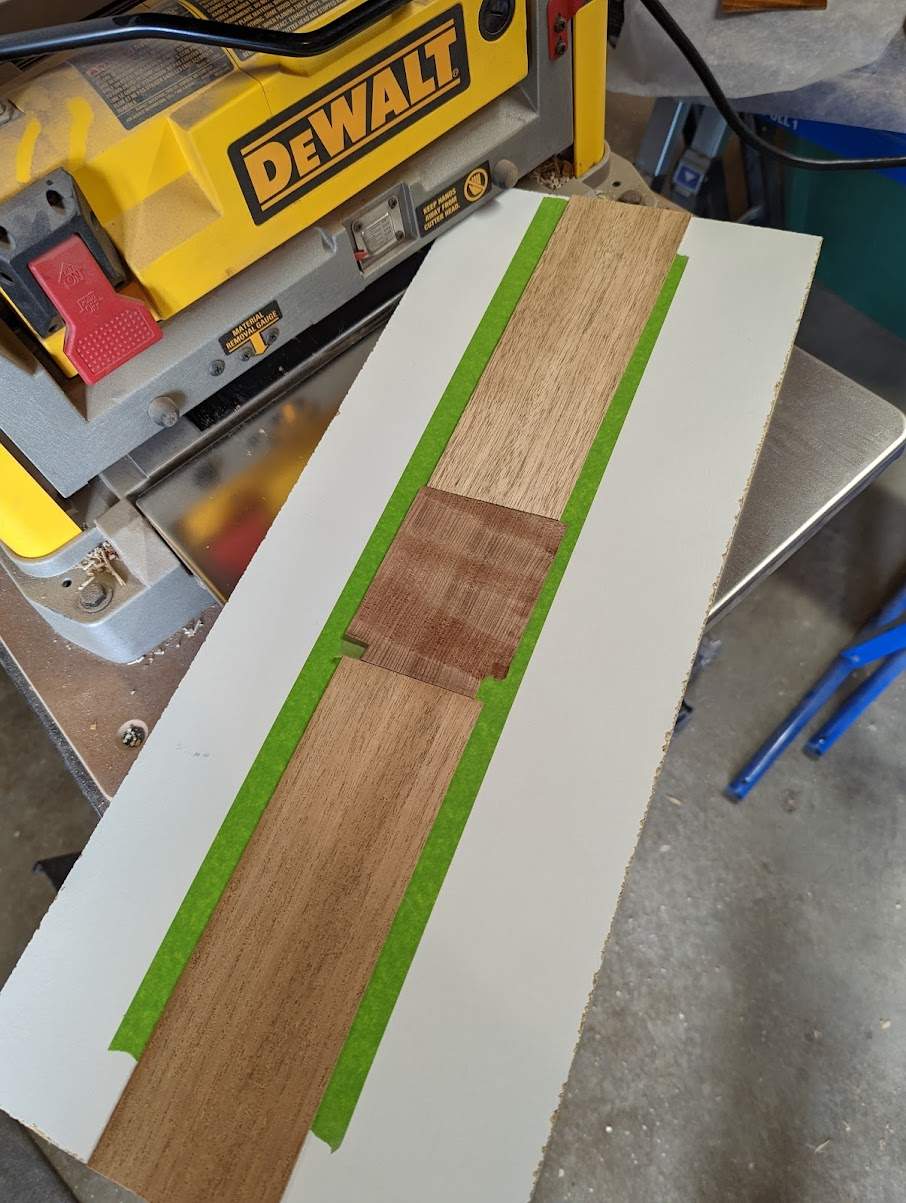
I took some curly redwood cutoff material and made this sled for the thickness planer to try to thin it down to the right thickness to make a truss rod cover.
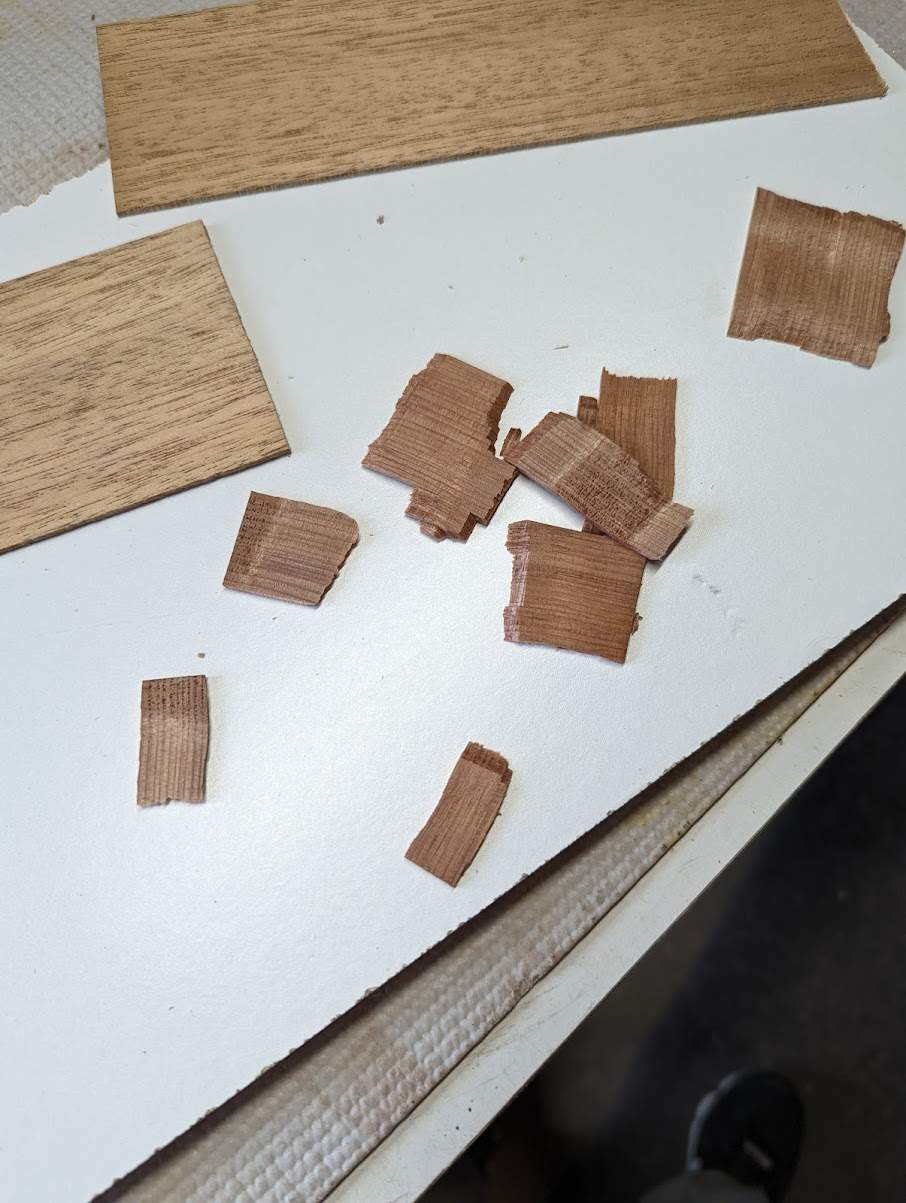
The sled worked, but the material was way too soft to remove from the backing, like not even close. It disintegrated. There won't be a redwood truss rod cover.
I made two more truss rod covers to evaluate. This one is African mahogany, it's not quite as reddish as the redwood, it's a little more reddish-gold, but I figured with an oil-type finish, it might darken up enough to make it look almost matchy with the top wood. I used the suggestion to mimic the headstock shape. I don't think I like that - it looks too off-center and unbalanced. And the wood probably won't match all that well. I think this one is out.
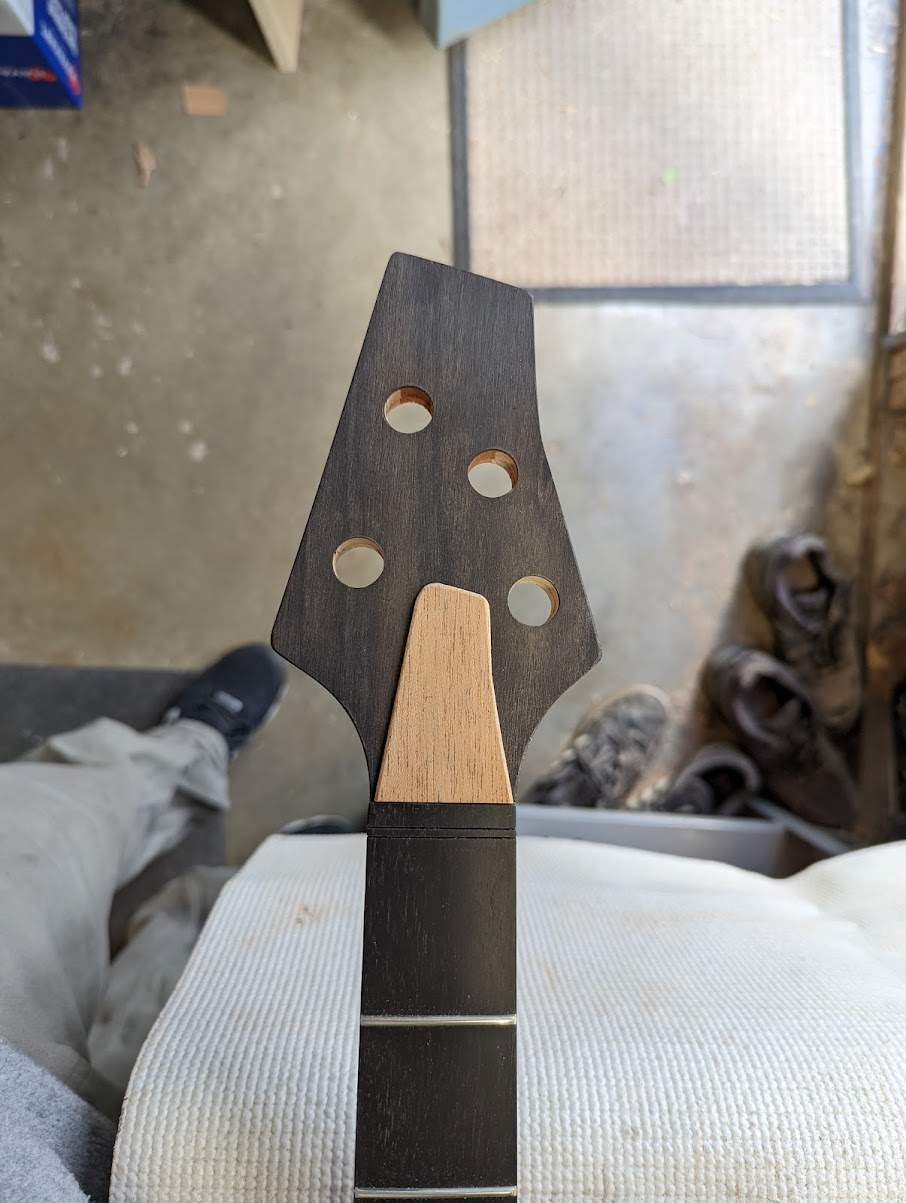
I still had some ebony pieces, so I made the same shape in ebony. Looks better, but still pretty unbalanced. I just don't know if I like it that well. Maybe, maybe not.
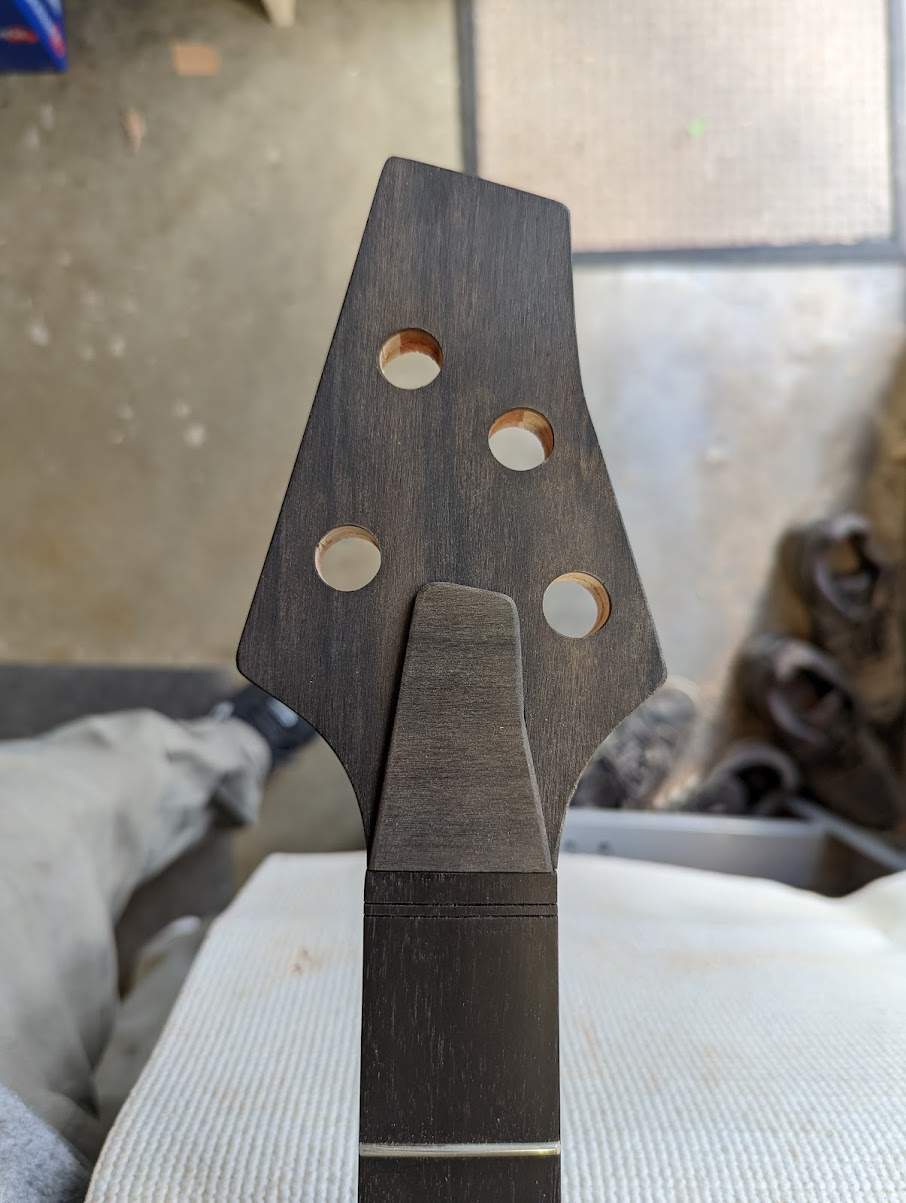
Here's the basic rounded one. I still think this is the best look. If I had to pick today, I'd pick this one.
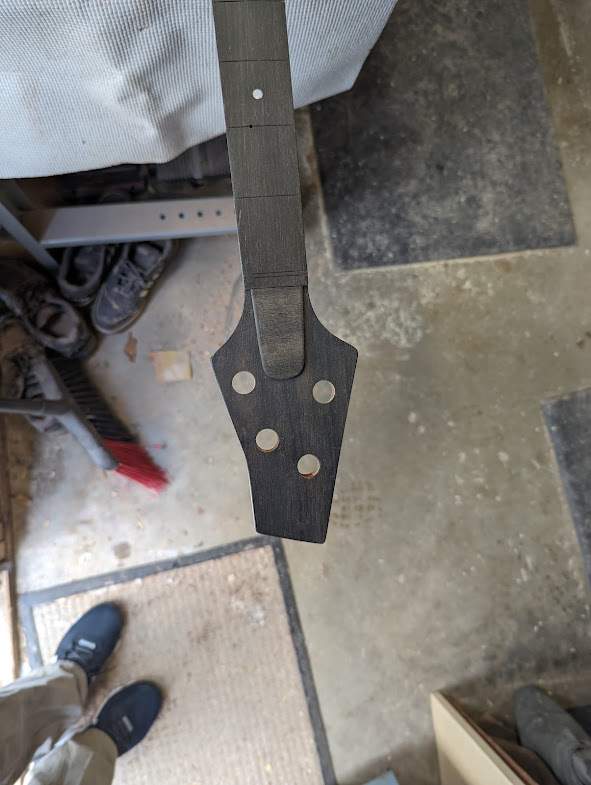
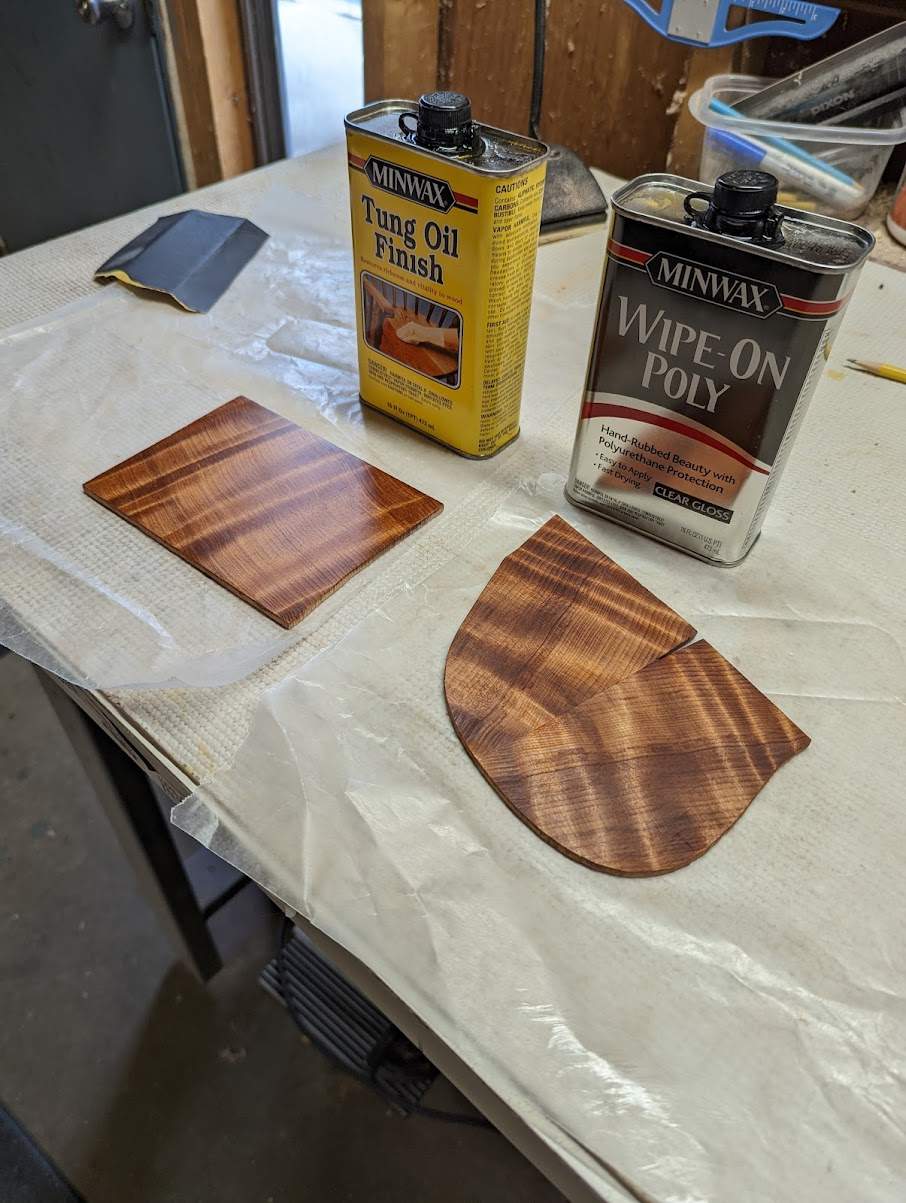
I wasn't entirely sure about the Minwax Tung Oil Finish. It's been building pretty slowly, and it wasn't as even and shiny as I hoped yet. I applied another coat this morning and wet-sanded with the oil finish and some 800 grit to try and smooth things out a little. Another coat over that this afternoon, and yeah - it's looking better and still building up a little. I'm starting to see that we're probably looking at like 16-20 coats to get a good glossy build. Still probably the best direction. It's starting to look pretty good. This is 7 or 8 coats.
I stopped by Ace and Lowe's to see if I could find some other options to experiment with. I was hoping to find some Tru-Oil or some Minwax Oil-Modified Water Base Poly. Neither were available. I grabbed a can of this Wipe-On Poly, this is 2 coats of that in the picture. I'll keep doing a few coats to see how this one comes along as well. Just another option to consider. I think this Tung-Oil finish will be good, it just will take a lot of patience. Still got a month I guess, that's the good news. So plenty of time to lay lots of coats.
That was about it for today. The very last piece of wood working will be to locate and drill out the pot holes in the top.
I'm ready for the finish sanding I think. It may not happen until this cold snap that's on the way passes.
Anyway, I wanted to get the remaining wood work done, so I had a lot of little tasks to do.
First up, set up the machine screw attachments for the control covers.
Here's the siting holes. I just marked the covers, installed them and drilled straight through the cover into the body.
Then drilled out the thread housing recesses and screwed them in. You can see that my string-thru ferrule recesses weren't that clean. I still don't have a good process for that. Luckily they sit straight in there and that ugliness is hidden when the ferrules are in there.
Counter-sunk the cover screw holes with the small counter-sink bit. It's the kind with 5 flutes, there's been some chat lately about these types of bits not working the best, but this wood is soft and I spun the drill slowish - it didn't make the hexagon shape. Actually I've never had that problem with these bits yet.
Covers test mounted, ferrules just placed in dry. The covers fit ok, the screws are fitting/working well. Everything back here is as-designed at this point.
I measured and drilled out the bridge attachment screw holes.
I took some curly redwood cutoff material and made this sled for the thickness planer to try to thin it down to the right thickness to make a truss rod cover.
The sled worked, but the material was way too soft to remove from the backing, like not even close. It disintegrated. There won't be a redwood truss rod cover.
I made two more truss rod covers to evaluate. This one is African mahogany, it's not quite as reddish as the redwood, it's a little more reddish-gold, but I figured with an oil-type finish, it might darken up enough to make it look almost matchy with the top wood. I used the suggestion to mimic the headstock shape. I don't think I like that - it looks too off-center and unbalanced. And the wood probably won't match all that well. I think this one is out.
I still had some ebony pieces, so I made the same shape in ebony. Looks better, but still pretty unbalanced. I just don't know if I like it that well. Maybe, maybe not.
Here's the basic rounded one. I still think this is the best look. If I had to pick today, I'd pick this one.
I wasn't entirely sure about the Minwax Tung Oil Finish. It's been building pretty slowly, and it wasn't as even and shiny as I hoped yet. I applied another coat this morning and wet-sanded with the oil finish and some 800 grit to try and smooth things out a little. Another coat over that this afternoon, and yeah - it's looking better and still building up a little. I'm starting to see that we're probably looking at like 16-20 coats to get a good glossy build. Still probably the best direction. It's starting to look pretty good. This is 7 or 8 coats.
I stopped by Ace and Lowe's to see if I could find some other options to experiment with. I was hoping to find some Tru-Oil or some Minwax Oil-Modified Water Base Poly. Neither were available. I grabbed a can of this Wipe-On Poly, this is 2 coats of that in the picture. I'll keep doing a few coats to see how this one comes along as well. Just another option to consider. I think this Tung-Oil finish will be good, it just will take a lot of patience. Still got a month I guess, that's the good news. So plenty of time to lay lots of coats.
That was about it for today. The very last piece of wood working will be to locate and drill out the pot holes in the top.
I'm ready for the finish sanding I think. It may not happen until this cold snap that's on the way passes.


Yes, for me too. Replicating the shape at that scale, my eye loses the connection. But the rounded end also seems a little off to me, since the headstock shape is so angular. Proposed alternative in yellow.Agreed on the trussrod covers. The ones mimicking the headstock shape look off somehow.

Without turning this into a design contest, I think the red dotted triangle could work. Edges parallel to the headstock, starting with the nut width, like this:Yes, for me too. Replicating the shape at that scale, my eye loses the connection. But the rounded end also seems a little off to me, since the headstock shape is so angular. Proposed alternative in yellow.
View attachment 4594836
Thanks, @1n3 this is good! Taking the kink out of the right side makes it more balanced, while keeping the angle of the end... hmm I'll definitely think about that option - it looks good
Thanks, @TFM94! I have no problems with a design contest.. I appreciate those who have taken the time to make suggestions.
@instrumentalist True! But I may have run out of ebony and redwood cutoffs! I pretty much need to get this done and settled pretty soon 
The dashed red lines are a straight offset of the headstock shape; first part of my exercise. It shows that 1) the "crook" on the treble side disappears before the offset shape reaches the truss rod cover area, and 2) the apex of the resulting triangle is off-center. In hindsight, I would've omitted it, but glad you got something out of it.
The three lines of the yellow shape are not parallel to their headstock counterparts; that doesn't seem to work either.
The three lines of the yellow shape are not parallel to their headstock counterparts; that doesn't seem to work either.

This is exactly what I was thinking when I was looking at the original mockup.Yes, for me too. Replicating the shape at that scale, my eye loses the connection.
View attachment 4594836
I think the red outline suggestion works great. Part of what makes it work, I think, besides the parallelism to the headstock sides, is that the radii on the corners are tight and better match those of the headstock itself; like a scale model of the headstock.
I also agree with the OP that the non-contradting ebony cover looks really sharp.
I spent a long time sanding. I brought this surface up to 320 all over. Finally, it was time for the first coat of oil!
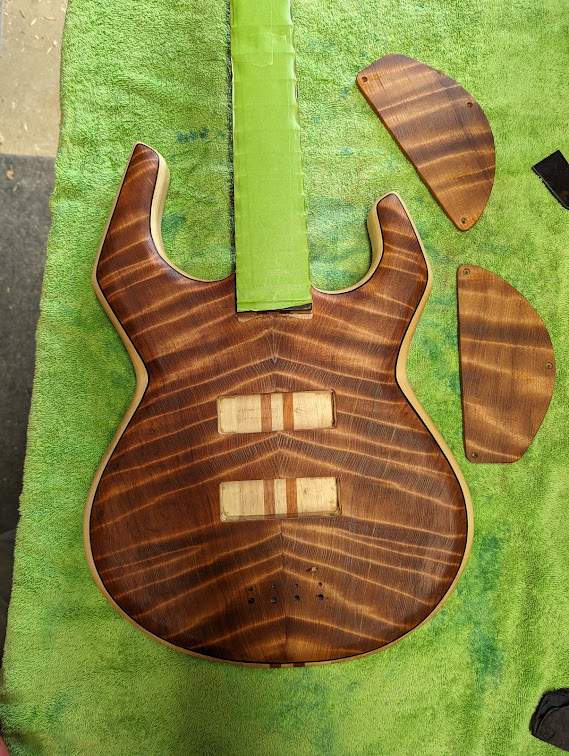
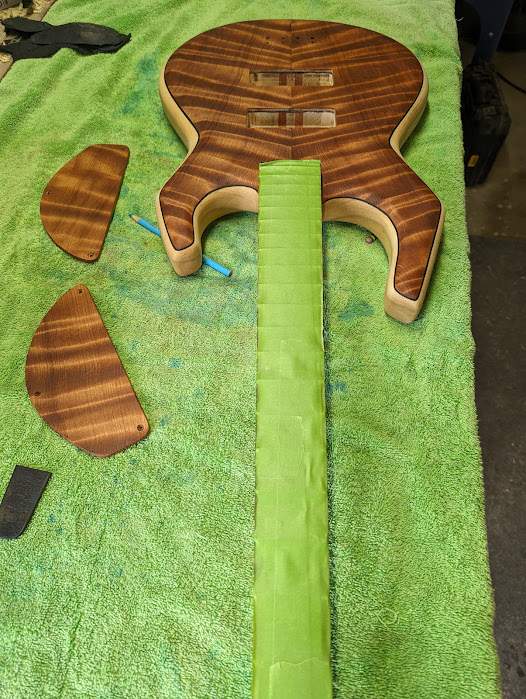
As expected, a couple spots that could use a little more sanding appeared, but overall pretty good.
I'll let this coat dry for a while, touch up the sanding, paint the logo and serial #, then lay into some coats.
This is the week - it's supposed to be high of about 60°F all week. I'm going to do as many coats as I can this week. I've discovered on previous finishes and again with the test redwood square that wet-sanding with the oil as a medium is a great way to get a smooth surface as you go, so I'll be doing some of that along the way.
It's great to see what this bass is going to look like after all this work!
As expected, a couple spots that could use a little more sanding appeared, but overall pretty good.
I'll let this coat dry for a while, touch up the sanding, paint the logo and serial #, then lay into some coats.
This is the week - it's supposed to be high of about 60°F all week. I'm going to do as many coats as I can this week. I've discovered on previous finishes and again with the test redwood square that wet-sanding with the oil as a medium is a great way to get a smooth surface as you go, so I'll be doing some of that along the way.
It's great to see what this bass is going to look like after all this work!
Jesus, that looks amazing. As a builder, you've certainly progressed! This is stunning. 

Thanks, guys! You're very kind to say so.
It's a really nice piece of topwood. Hopefully the rest of the finishing process will bring out the best in it!
After that first coat, I broke out some acrylic paint and slapped on a logo and serial # - 007
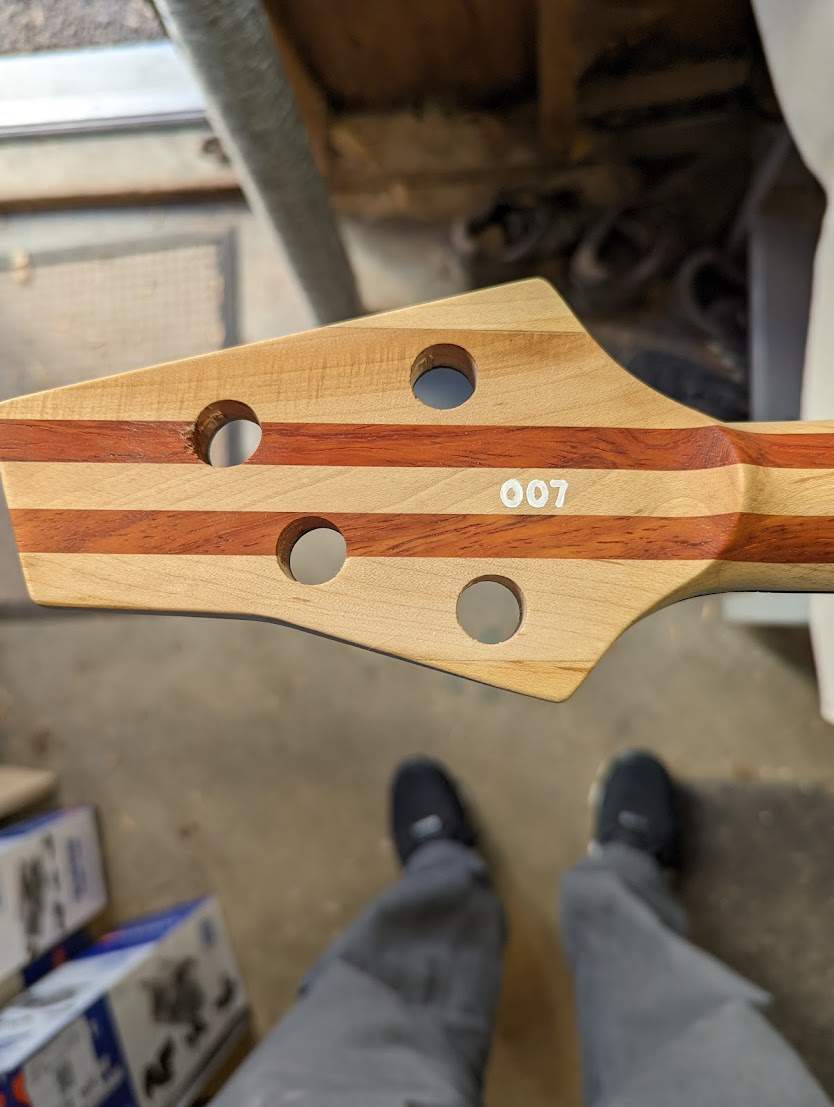
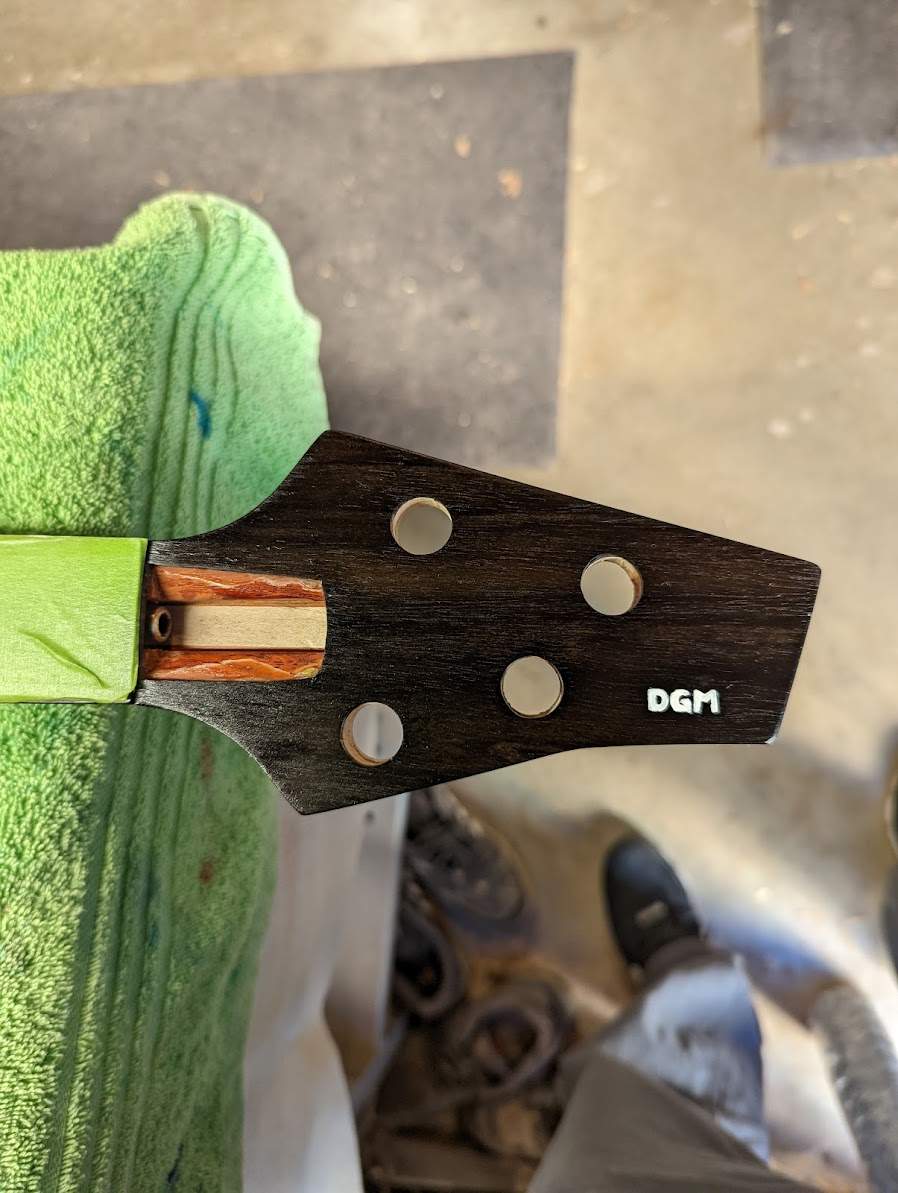
I'm working through some more coats, I may not post much til the end of the week when I set it aside to really dry out.
I do still have to drill the pot holes in the front and make the nut slot after that, but then it'll just be about electronics, assembly and setup. I can probably start the wiring sometime, too
It's a really nice piece of topwood. Hopefully the rest of the finishing process will bring out the best in it!
After that first coat, I broke out some acrylic paint and slapped on a logo and serial # - 007
I'm working through some more coats, I may not post much til the end of the week when I set it aside to really dry out.
I do still have to drill the pot holes in the front and make the nut slot after that, but then it'll just be about electronics, assembly and setup. I can probably start the wiring sometime, too

The top obviously looks great but even your serial looks good. I’ve tried to letter stuff by hand but it just looks like a shaky toddler tripped over the headstock with a semi-dry paint brush.

Wow. I've never used redwood, other than some dimensional lumber. I thought the figure was pretty spectacular before the oil was applied, and now that curly grain is kind of swamped by the flaming. Still spectacular, but in a new way.
I like that the width of the poplar reveal is fairly even around the edge, and the black veneer layer gives a nice pinstripe effect.
I like that the width of the poplar reveal is fairly even around the edge, and the black veneer layer gives a nice pinstripe effect.

I spent a long time sanding. I brought this surface up to 320 all over. Finally, it was time for the first coat of oil!
That redwood is something else, but the whole bass is turning out amazing!


