• TalkBass has been independent since 1998. Add your voice.
    Create a free account to reply to discussions, view embedded media, and browse with fewer display ads.
    Join freeLog in
    Want zero display ads or expanded classifieds tools? Compare plans.

Winter Build Off 2022 - The PeavEsh StinGer

Sep 23, 2018
4,393
10,097
So this is my first Winter Build Off and my first partial build. (Yes, I started out a post with 'so' on purpose...)

Winter Build Off 2022 - Renewal/Rebirth

My entry is a partial build I'm giving the terrible name of PeavEsh StinGer. The reason for the name and the random capitalization to come.

The theme is Renewal/Rebirth. I'm not the best with themes or deeper meanings, but here are a number of reasons I'm planning what I'm planning.
- The basic shape is modeled after thr Esh Stinger played by the late Peter Steele of Type O Negative. I used to hear my sister play their music in the mid 90's and I liked it, I just didnt know who it was. I've recently re-discovered their music. (Renewed)
- The neck, bridge, pickup, and body wood is NOS from closed factories, seconds, or found on the roadside. I think that fits into the Rebirth theme.
- I came up with the name, renewing the 2019 WBO 'Mashup' theme. Esh Stinger body with a Peavey GV neck. PeavEsh StinGer

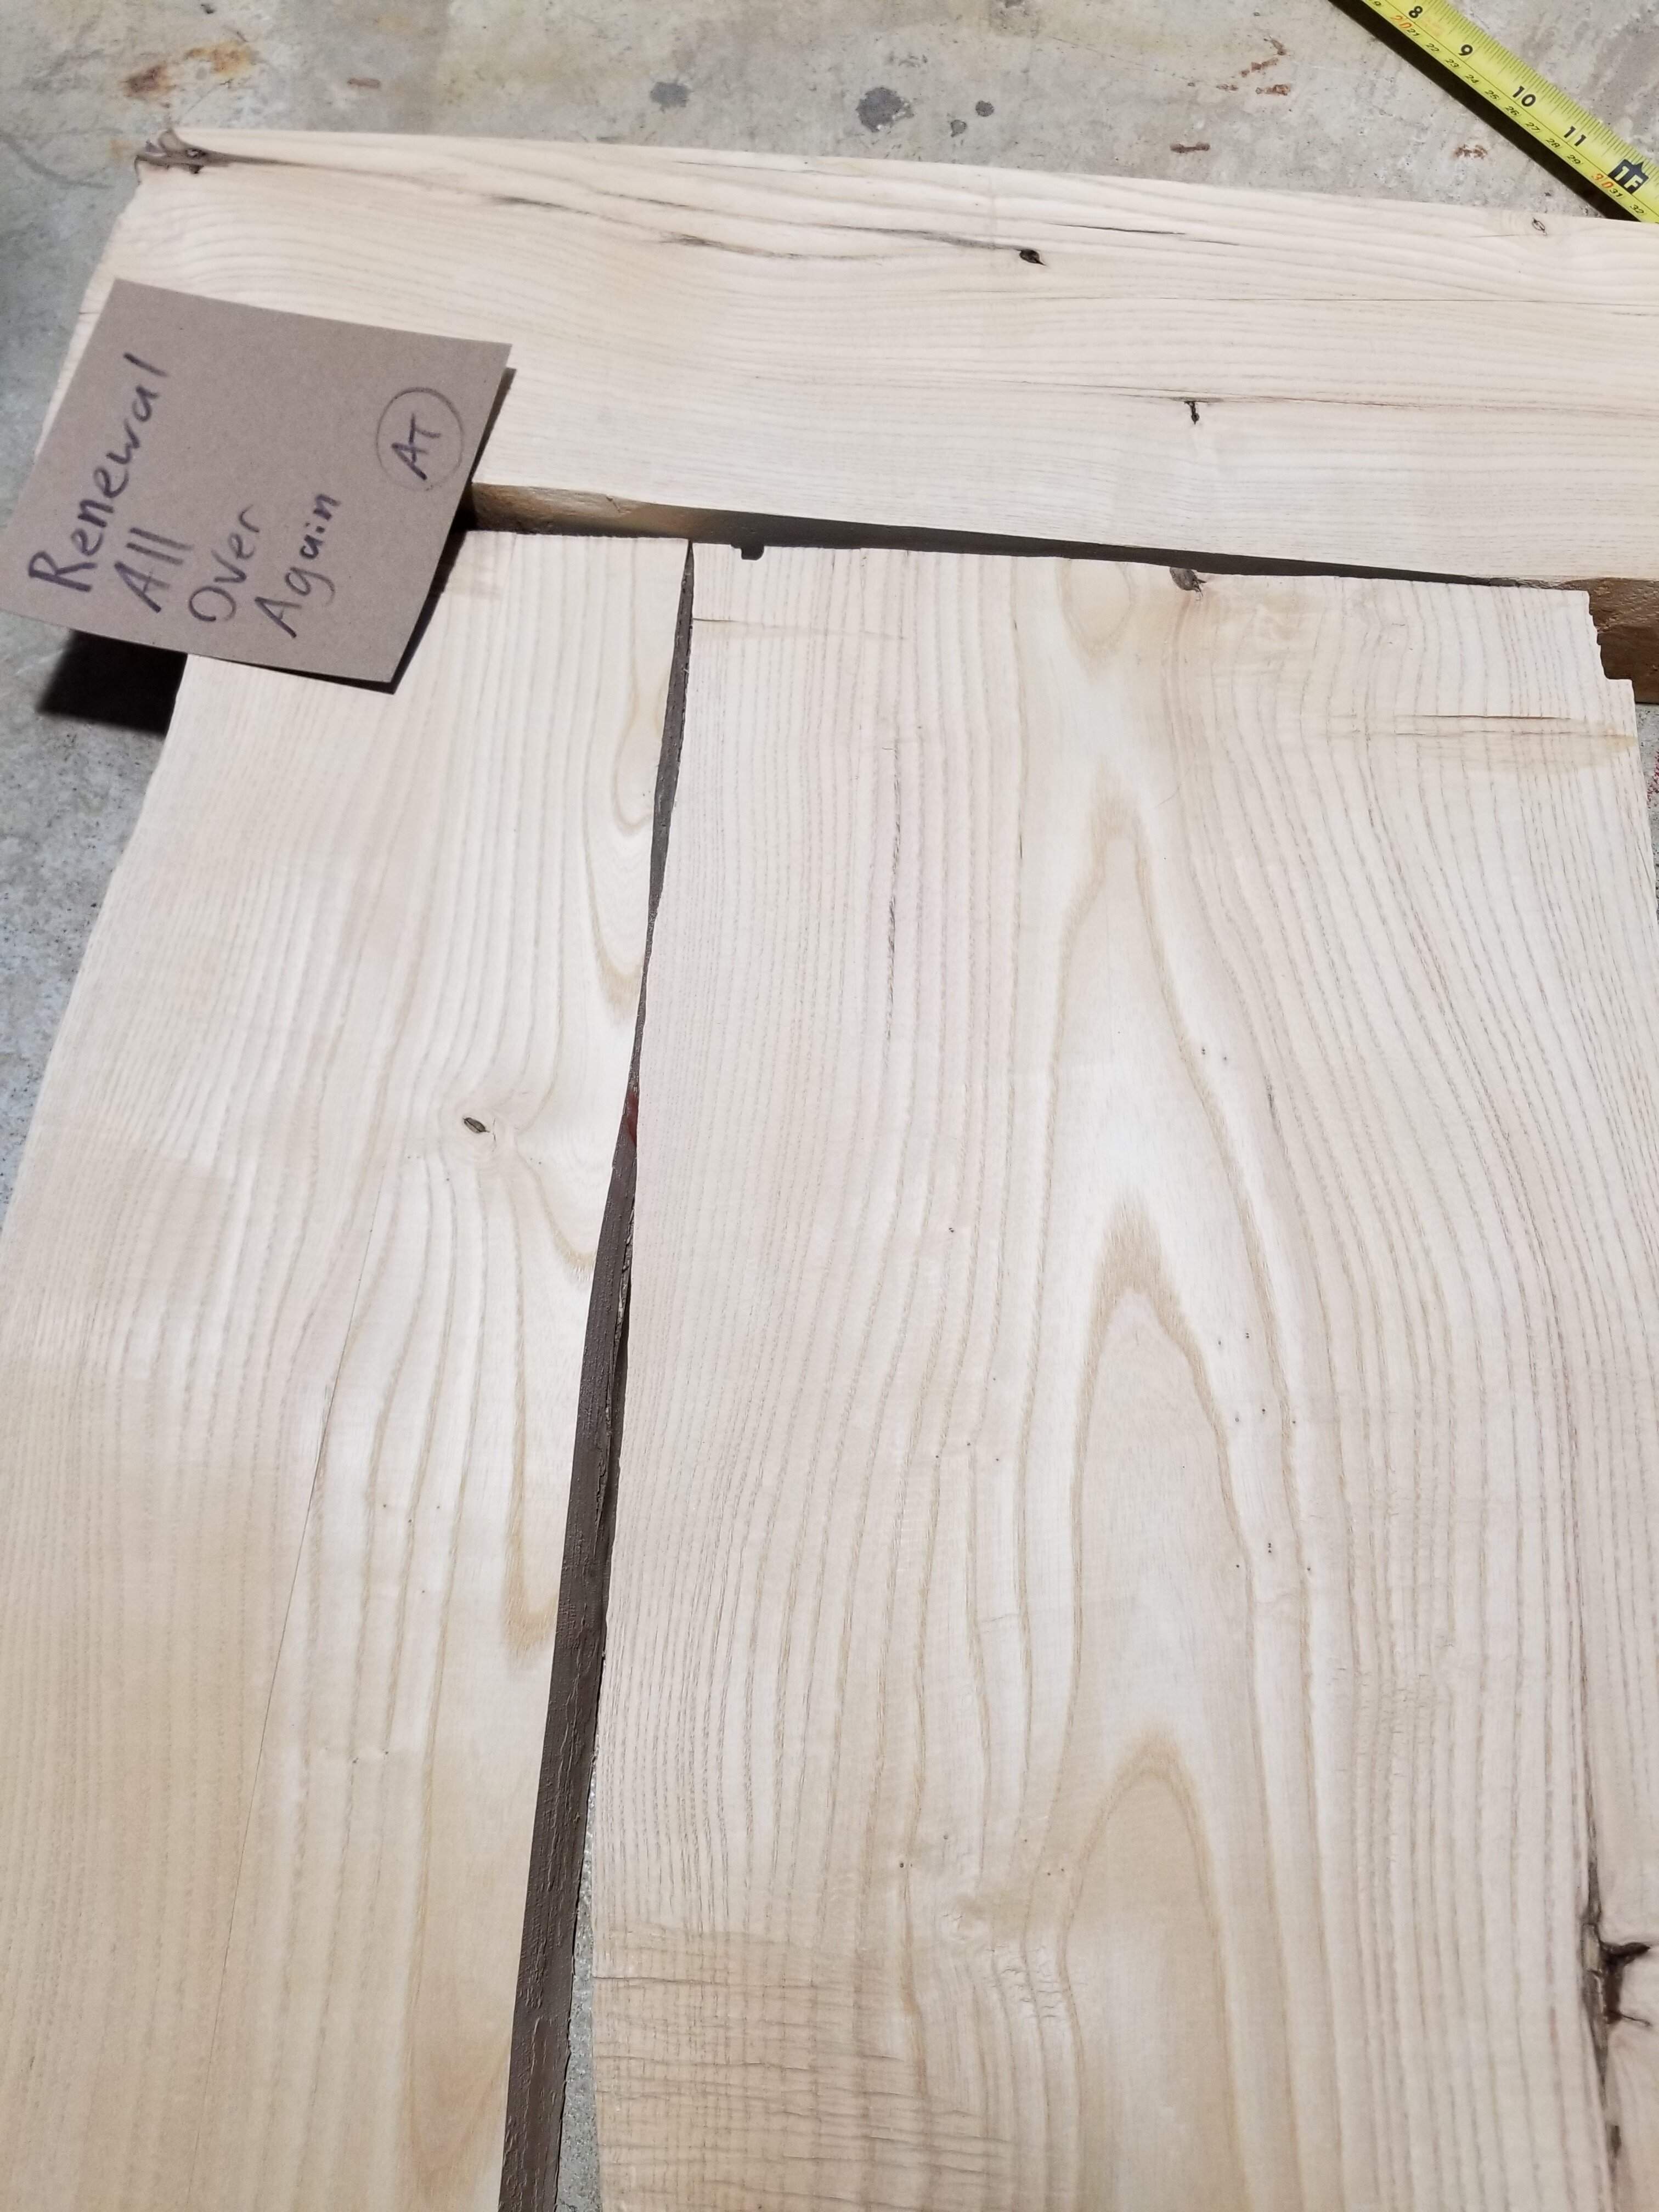
My intention was to use these Ash planks I've been drying. More on the origins of the wood later.
Obligatory lumber photo.
20211221_215804.jpg
20211221_215902.jpg


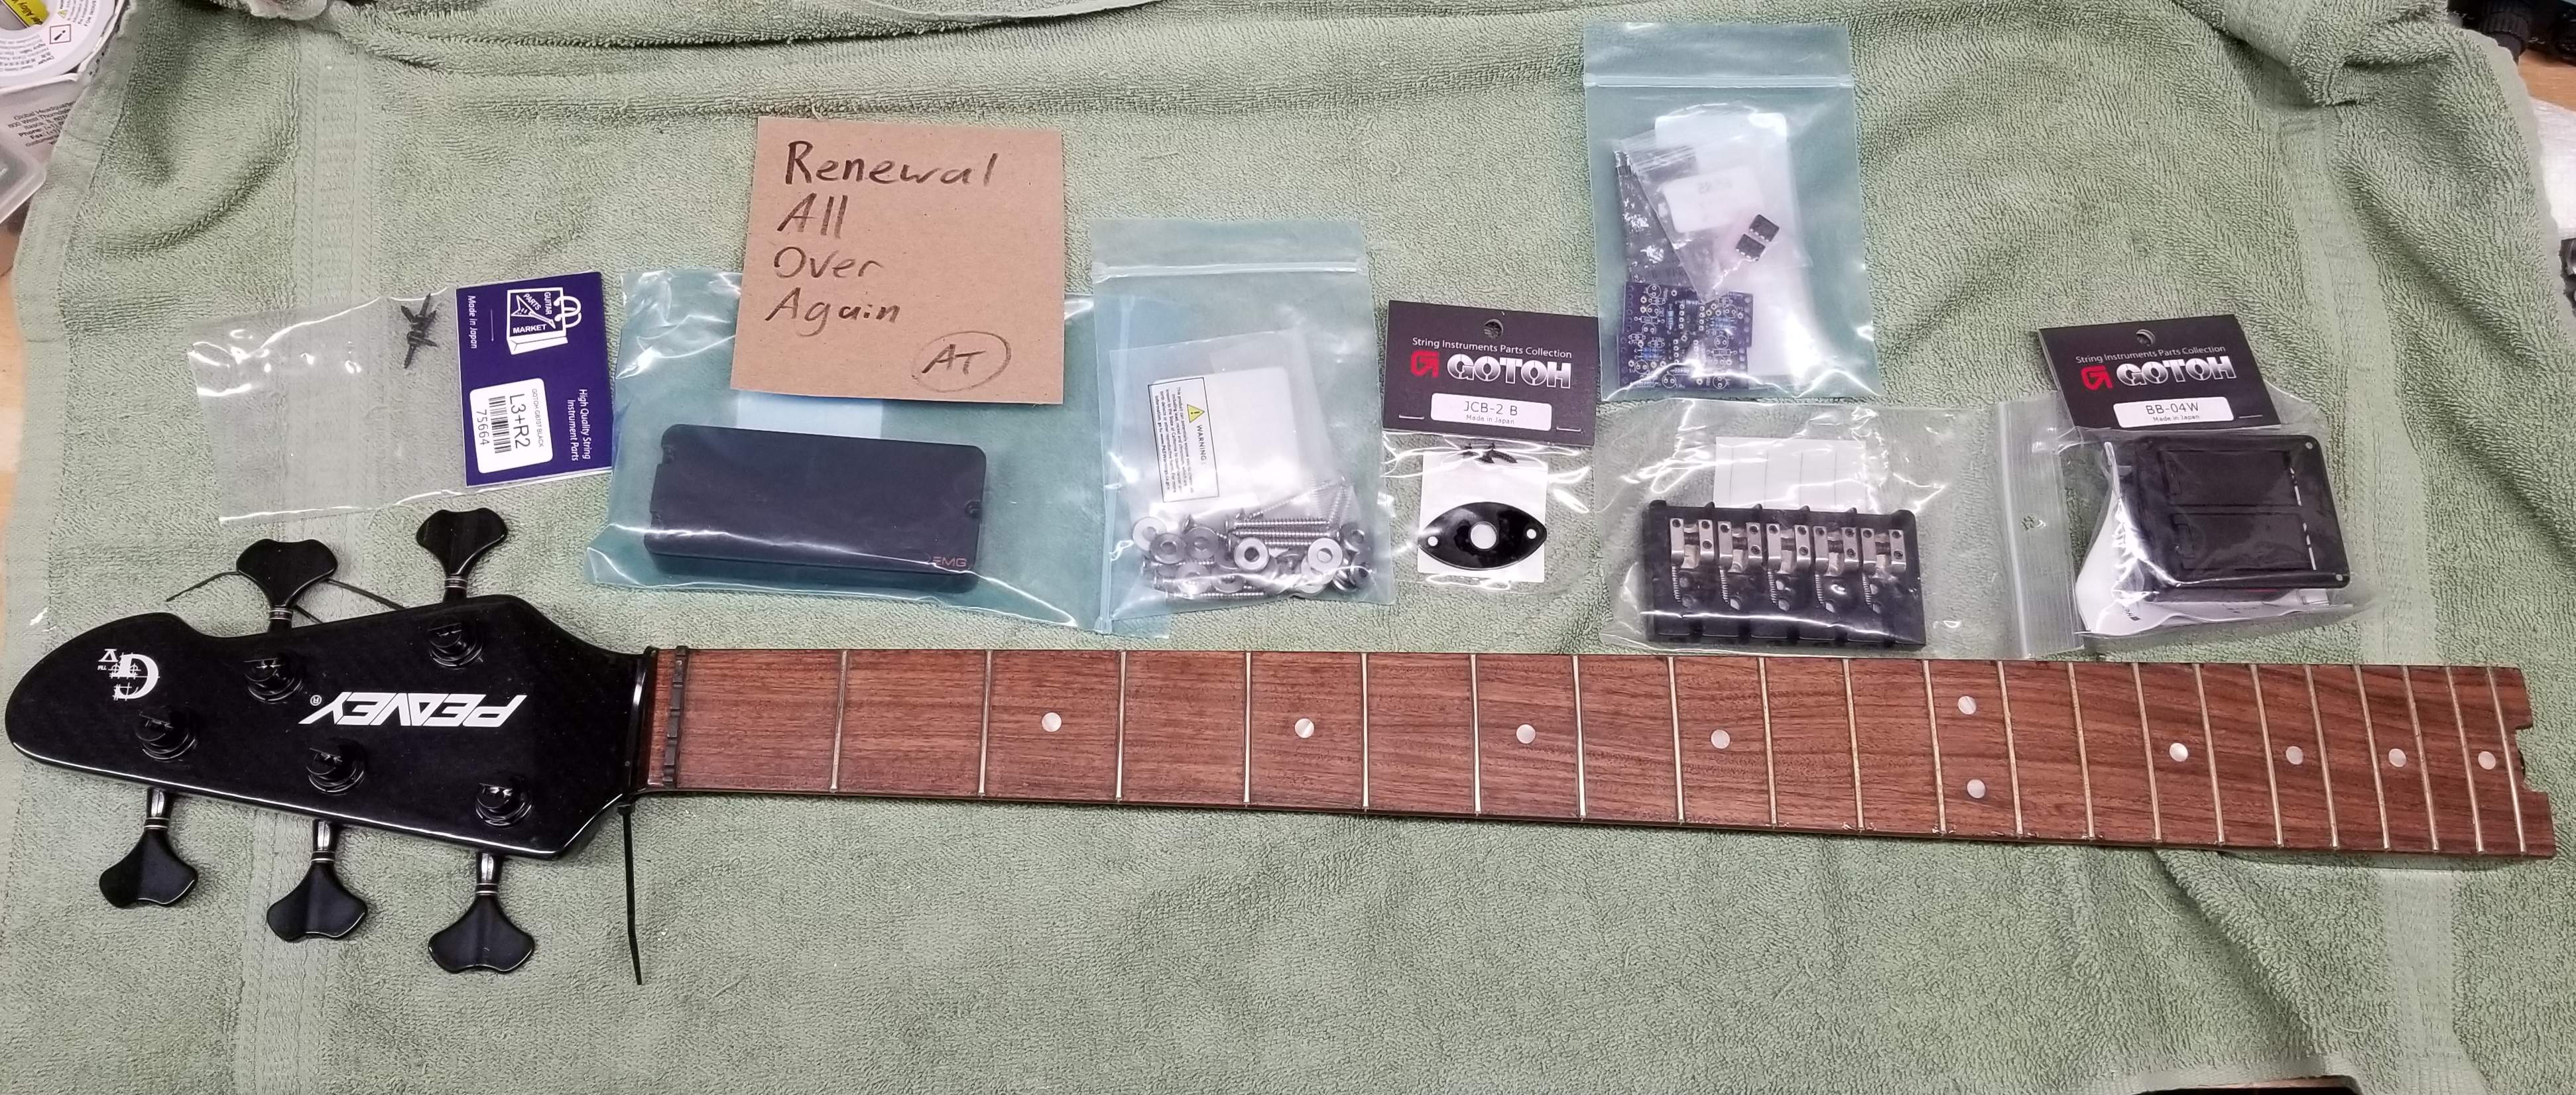
Obligatory parts photo
20211221_230226.jpg

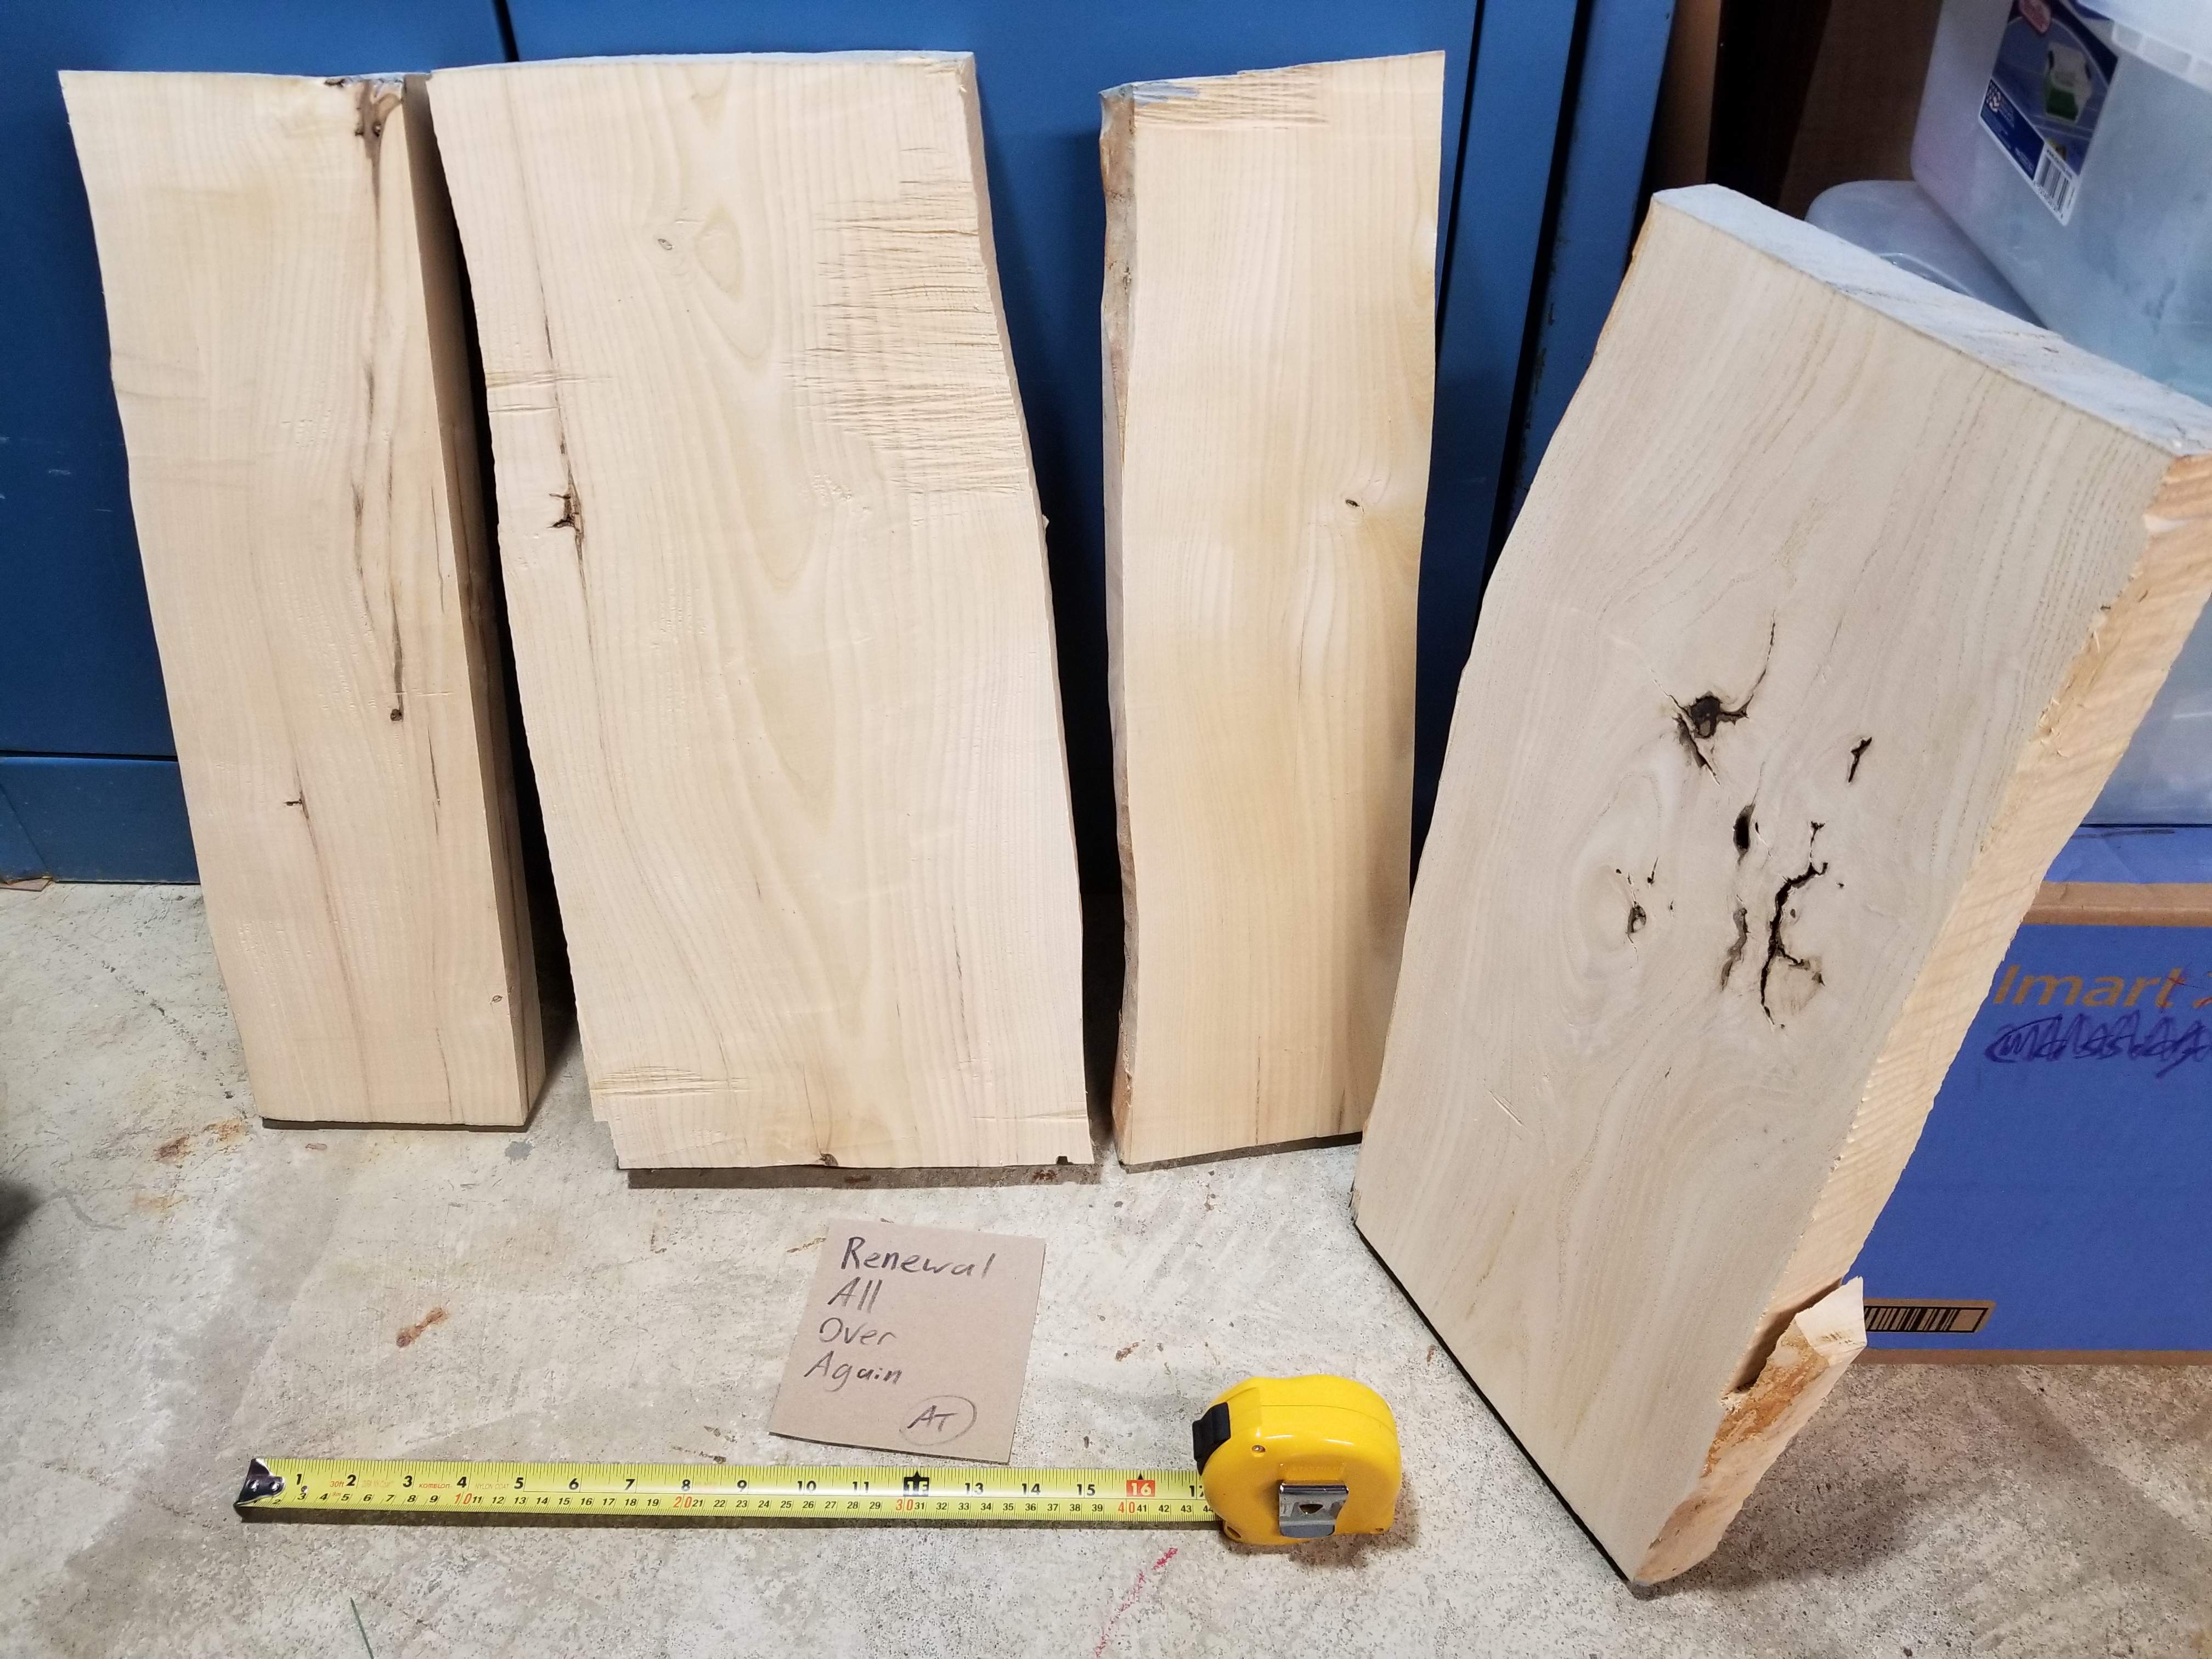
Obligatory backup lumber photo
20211221_230255.jpg


Inspiration
Photo of an actual Esh Stinger
20211221_230842.jpg


6'8" of gothic metal, Peter Steele making that Esh look like a short scale
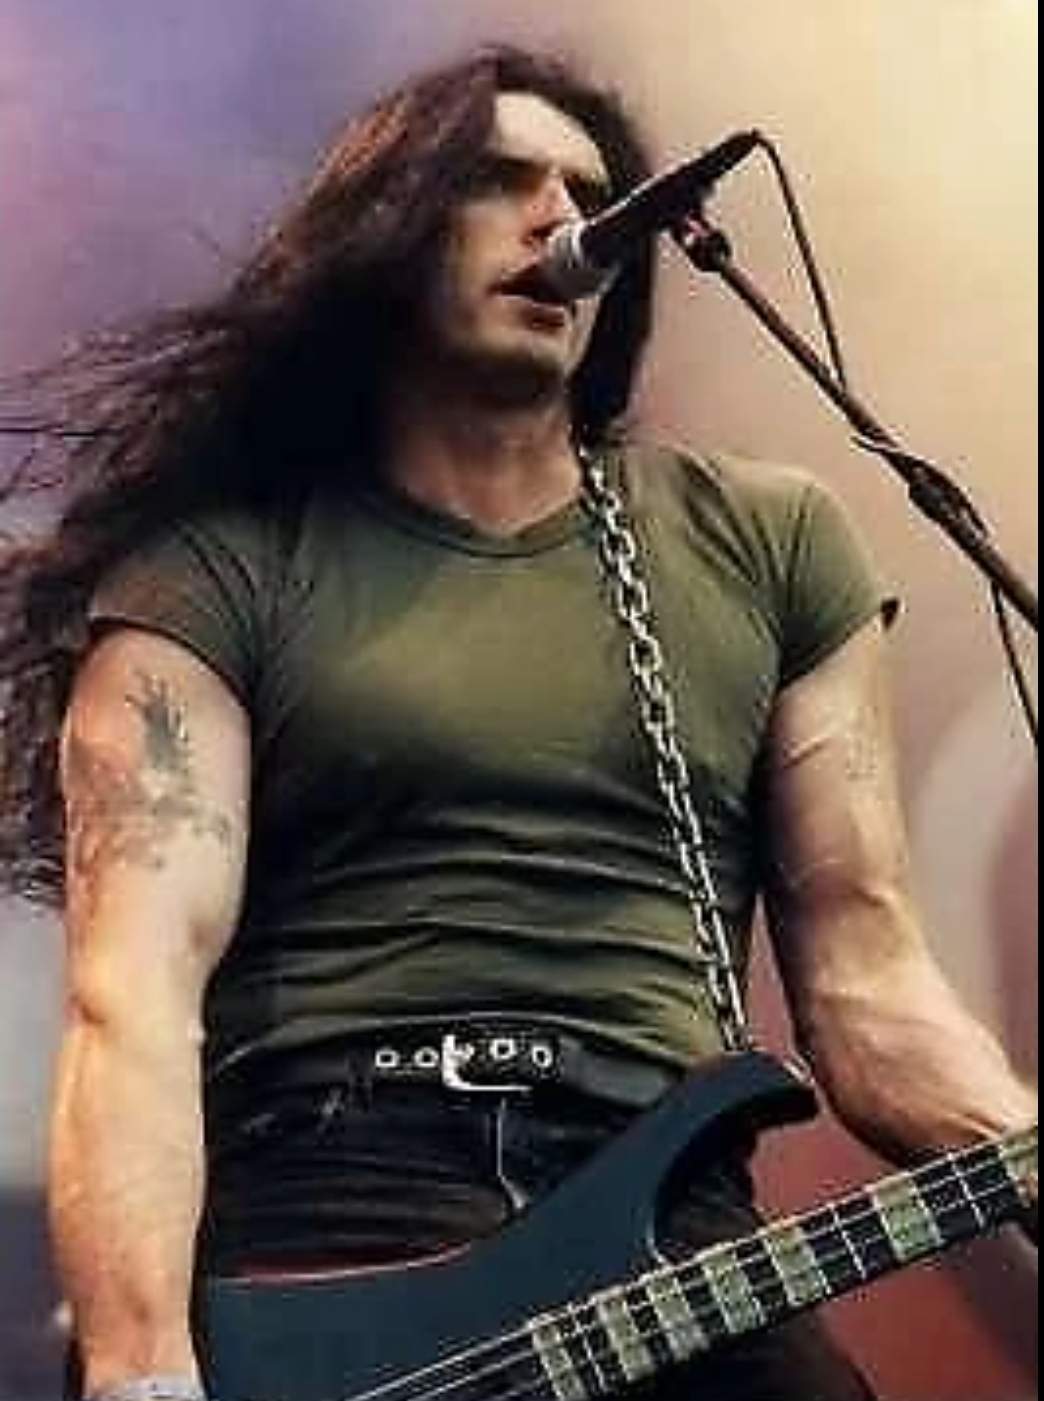
Screenshot_20211221-232017_Google.jpg
 
Last edited:
Some specifics
Pickup is an EMG MM5TW that was a factory second, sourced from the EMG Outlet on Reverb. It arrived with some sort or rosin on the case. A little alcohol took care of that. I'll build a wiring harness from scratch
20211221_220243.jpg


Luminlay side dots that I bought for my Warwick, but they were the wrong size.
20211221_220426.jpg


Preamp (at this point) is the Uncle Fluffy design MM 2-band from our friend at Passinwind Electronics. I started assembling the boards over the summer, I still have to get more parts in.
20211221_220226.jpg


The body wood started out as an ash tree about a half mile away. I saw the tree was being cut down, so I knocked on their door as asked if I could have a log for a bass guitar. The elderly lady was nice and said I could take what I wanted. (Rebirth!)
20201028_165129.jpg
20201028_205631.jpg


I had started a post on that here First bass body build, come watch me screw it up! but its obviously taking a different direction. Caution, that thread is pages and pages of jokes and ramblings. But it has process pictures
 
I forgot to list the specs and to mention this is a budget build. My intent is to use as much leftover or discounted parts as possible. Cost will be tracked.
- Body: Ash. Not Swamp Ash. Ohio, way-too-heavy Ash. Locally sourced, cut, and dried. Cost, $0.00
- Scale: 35"
- Bridge: Peavey Millennium saved from the closed warehouse. Cost, $35.00
- Neck: Peavey GV, carbon fiber wrapped. Also from the closed Peavey warehouse. 21 frets, Pau Ferro fingerboard, graphite nut. Cost, $125.00
- Tuners: Gohot GB707 in black. Cost, $72.00
- Pickup: Factory second EMG MM5TW. Cost, $60.00
- Preamp: Passinwind Electronics' Uncle Fluffy MM 2-band running at 18V, self assembled. Wiring harness will be homemade. Controls are Volume (push/pull humbucker/single) Bass and Treble. Cost, under $25.00
- Strings: Daddario EXL170SL-5. Cost, $0.00 from the Daddario Players Points program.
- Jackplate, Gotoh JCB-2 B. Cost, $7.00
- Battery box, Gotoh BB-04W. Cost $23.00
- Straplock buttons from Schaller. Cost $18.00
- Finish. TBD
- Knobs. TBD
 
Last edited:
Sorry, not much time to get things done in the past week...
The neck came from the wonderful to deal with Brown Eyed Girls Resale https://reverb.com/shop/ambers-bout...d-share&utm_campaign=shop&utm_content=1338154 (no affiliation) who is helping sort through and liquidate the old Peavey warehouses. I knew the neck had a few rough spots, but the price was where I needed it to be for this sort of build. The glossy finish is cleaning up well with #4 buffing compound.
20211031_015109.jpg


After buffing (ignore the tuners at this point)
20211203_220140.jpg


The frets were covered in rosin, but are cleaning up well enough with 0000 steel wool.
20211031_015050.jpg
20211031_020323.jpg


Too bad this particular neck didnt have Peaveys USA's standard level of care during installation. Peavey haters can hate all they want, but the upper end USA models (Cirrus, Millennium, G and GV) had fretwork on par or better than the upper end Fender USA models at the time. The frets seem level enough, but this really needs a refret. Thats not in my skillset and tooling at the moment, so maybe I'll come back to it next year.
20211125_223237.jpg
 
The machine head mounting holes were not round or the right size for the Gotoh GB707 machine heads due to the topcoat drips. Why not use Res-o-lites? They were twice the price. I usually use Hipshot Ultralites, but those were 2x the same price also and I wanted the shape of the 707's on this build.
20211126_183700.jpg


A 1/2" dowel heilically wrapped in 330 grit made quick work on the drips and gave me the 0.55" clearance I needed.
20211126_183743.jpg
20211126_183703.jpg
 
Last edited:
On to the body shape. I don't have a Stinger to trace, I dont have a printer large enough to make a 1:1 print, and I dont want to goof it up going freehand.

So I made a projector out of an empty box and a disassembled LED flashlight.

Print out an image, cover it in clear packing tape. I should have used an acrylic sheet for this for better clarity, but I didnt have one handy.
20211126_192946.jpg
20211126_193739.jpg


Removed the reflector assembly from a work light to make it a single-point light source
20211126_195614.jpg
20211126_200231.jpg


I lined up a yardstick at the nut to get the 35" scale correct. Real Stingers are 34" scale, so the body isnt going to be an exact copy of the shape (that's fine). Traced onto craft paper.
20211126_201807.jpg


Now I can cut that out and make a template.
 
I bought bar clamps. That counts as progress, right?
Right?

Testing out another finish on my test board. I wanted a flat black finish (Black No. 1) with the grain showing, similar to the Esh sandblasted finish. But this ash does look pretty good. I'll try a few more options before settling. Theres plenty of time, as I still have a stack of lumber sitting here mocking me.

This was a very rough test cut that I've been scuffing up on purpose to test the durability.
20211230_000649.jpg
 
I had the table saw out for part of a house project, so I thought I would run a piece of that ash through it to clean up one side. It's a 15A, 10" Dewalt with decent carbide-tipped blade.... and did not like that wood. I know it's not the best saw and the sharpest blade, but it took 'forever' to get through certain sections. Stupid dense wood. Why did I choose this wood again?
 
  • Like
Reactions: Bassinthemudd