• TalkBass has been independent since 1998. Add your voice.
    Create a free account to reply to discussions, view embedded media, and browse with fewer display ads.
    Join freeLog in
    Want zero display ads or expanded classifieds tools? Compare plans.

Winter Build Off 2026: "Off with his head!"

On my way to rehearsal, I wanted to get this thread going...

This is an "Unfinished Business" build. This perfect timing, as I need to get this completed (along with three other builds).

It's a pretty cool build, this one's going to the UK.

Here's the required pic. I'll be back later this even to add the other details.

20260106_133844.jpg

To be continued.

Oh yeah,
 

Attachments

  • 20260106_133813.jpg
    20260106_133813.jpg
    1.6 MB · Views: 22
This bass came about due to a discussion about building a headless bass the size of a Steinberger guitar copy. The client had played one and found that the size fit his needs for an ergonomic instrument.

I mentioned that I had built a few 25.5" scale bass and we came up with this design.

* small body, built from Honduran mahogany, Chambered for weight with a flame maple top.
* imported 25.5" scale maple neck with rosewood fretboard, 22 frets.
* Guyker seperate headless tuner/bridge assemblies (4x).
* brass headpiece (I will make this).
* six neck screws/ferrules.
* Two Imported pickups (EMG 35 size; the client will most likely swap these out for Nordstrands or other).
* controls: Volume/Blend/Tone (500k, passive)

The output jack will be angled like what Ibanez does on some of their basses.

The finish will be a black stain/sunburst on the top, with the rest of the bass being sprayed opaque black.

The goal is to have the bass weigh as little as possible, I'm shooting for 5 pounds (we'll see. Lol).
 
After our initial discussion, I had what I needed to start.

I had a beautiful flame maple billet which I had already resawn for a Longhorn build that I'm working on, it's a beautiful piece of lumber.
20251013_160216.jpg

I drew out the basic design on 1/8" plywood. I had planned to get a tracing of a friend's Steinberger GL, but he's about an hour away, I decided to draw the design myself. I feel that I'm close enough to the original instrument (a Hofner/Steinberger guitar copy). I transferred that to the maple top.
20251020_124041.jpg

Next, I started drawing out more details on the template, starting by laying out the tuner/bridges. The client had requested the Guyker units, I had not used them before, but they seem to be of good quality. I have used other Guyker products with good results.
20251020_130858 (1).jpg

I added the pickup locations, as well as areas to be chambered.
20251020_143914 (1).jpg
This shows the original chamber at the treble side lower bout, but after talking with the client, we decided to go from a top mounted output jack to the angled/ hidden design that Ibanez uses. I've never done this before, but I think I have come up with a way to do it.

This is how the template ended up. Notice that I had to make modifiations to the control cavity area, the downside of using a smaller body design is you can run out of room quickly.
20251120_103033.jpg

More to come.
 
To chamber the body, I made a tracing off of my template. I used that to transfer the drawing to 1/2" plywood. I used a drill press and a scroll saw to cutout the template, and cleaned it up with my spindle sander. Finally, I drilled 3 (3/16") holes down the centerline. I will use 3/16" dowels to attach the routed template, then the top to the body.
20260111_142036.jpg

Next, I used a drill press, along with forstner bits to remove material material, then routed out the remaining wood.
20251211_131343.jpg
20251211_131311.jpg

The dowel holes on the body are located in areas which upon attachment of the top, will either be routed out or covered by the bridge(s).
20251211_131356.jpg

After fitting the top to the body, I applied Titebond II to the top and body, the clamped the assembly.
20251211_131447.jpg
20251213_103422.jpg

Here's where I am at now. The body shape has been rough cut along the outline of the top.
20251213_153920.jpg
20251213_153913.jpg

Even without routing out the neck pocket, pickup and control cavities, plus final shaping sanding. The body's weighing in at just over two pounds.
20251213_153851.jpg
20251213_153902.jpg

I can live with that.

I have a couple other builds, as well as some repair work that needs to get completed. I hope to be back to this project in a week.
 
In addition to the tube heater I'd recommend running a dehumidifier, could save alot of your machines from surface rust

I run humidifiers/dehumidifiers on a regular basis. I've been doing this awhile. Try to keep humidity around 40-60%.

My large dehumidifier struggles keeping up with water pouring down from the roof the roof. Lol. It was like having two water pipes broken above the shop (there are no water pipes up there).

To his credit, yesterday my landlord had guys up on that 20'+ tall roof in below freezing weather repairing it.
 
Last edited:
It's been a minute...

Spring has sprung, thankfully! Lol.

The humidity has somewhat settled in the shop. I had a few bodies that developed mold. I've sprayed everything with white vinegar, it seems to be working. I've been soaking machinery and router bits in WD40, they are cleaning up nicely.

I have not been spending much time there. For years, I kept a shop in the basement of our cabin. Ironically, issues with water leaking in is what caused me to open up my new location. doh.

I've decided to spend this year correcting the drainage issues at my cabin, then we will be remodeling the basement. By the end of the year, I will move back in the home shop (the Bombshelter) for good. Yay.

Meanwhile, I have been catching up on builds and repairs. This project being one of them.

Only one pic for now. I marked the body for the location of the pickup routes. Next comes routing said pickup cavities, plus the neck pocket and the rear control cavity.

I'm ready to get this baby done. I'm sure my client agrees as well!
20260319_140352.jpg
 
Better late than never, my mantra. Lol.

I just got back from taking some time off, I got to visit some old friends in Florida. Definitely good for the soul.

It's good to be back in the shop. I routed out the neck and the pickup cavities. I also got the sides sanded.
20260505_143349.jpg
20260505_150837.jpg
20260505_152239.jpg
20260505_152230.jpg
20260505_152252.jpg

Next I will be working on the control cavity and the control cover. First I will draw them out, then make a set of templates. Next comes routing, then finish sanding.

Rawk.
 
Lot's going on, but I have been working on this project.

Originally I was going to use a standard back plate for the control cavity, but noooo. That would be too easy, said my ADHD (note: ADHD has been known to lie. Repeatedly). That being said, I started (over) thinking about the possibilities.

On this build there are three places where an allen wrench is needed for adjustment; 1-Truss rod, 2- the string locks on the headpiece, and 3- saddle height adjustment. I thought it would be cool to include the wrenches with this build. Even better if they were mounted onboard, in this case inside the control cavity.

I have built instruments that use rare earth magnets to attach various covers, but I discovered that they sometimes don't work as well as planned. Due to this, I no longer use them solely for attachment purposes. I decided to design the rear cover to rotate away from the rear control access. I could also make the cover large enough to allow for a second compartment to house the three allen wrenches.

After drawing out what I felt would work, I made a template of the cover. I then drew out the location of the control and wrench cavities. I also added a pivot point at the lower treble side bout.
20260518_162817 (1).jpg
20260519_132047 (1).jpg
I was also trying out different positions for some rare earth magnets to help hold the cover in position.

20260518_162745 (1).jpg
20260518_162831 (1).jpg

Next, I made a template to allow me to route out the area for the cover (I haven't cleaned it up with a spindle sander at this point).
20260519_135346 (1).jpg

I routed the wrench cavity first, taking it down past the thickness of the cover plate.
20260602_134303.jpg
20260602_134751.jpg

I routed the back for the coverplate on my table router. In hindsight I should have used a plunge router, I ended up routing too deep, I had some tear out as well.
20260603_121636.jpg

Next is building up the cavity to the proper height, the making the cavity cover.
 
Last edited:
I repaired the tear out at the rear of the body, I also removed the thin wall that seperated the control cavity from the wrench compartment. I then glued an 1/8" thick layer of mahogany to bring the surface of the cavity up to where it needed to be.
20260604_115403.jpg

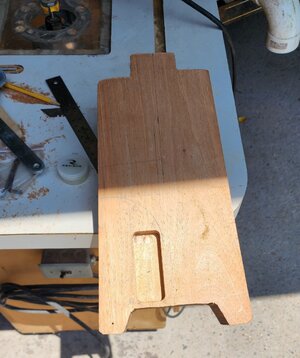
Then I made the cover out of a piece of mahogany that I took down to 1/4" .
20260609_154402.jpg
20260609_154420.jpg

I'm now working on the pivot for the cover. I believe that I've found a good way to do it.

 
What do think to Nordstrand Big Splits in there?
Good call. I have a set of Nordy Big Blades (warm/wooly), as well as a set of Zen Bades. They may be a five string set though. I love Carey's

This a build for a client. When we discussed pickups, he requested EMGs. I had a set of imported pickups that were EMG 35 size., so I went with them (the client is in the UK).

The client has ordered the EMG pickups and will swap them in when he recieves the bass.

I find myself pretty impartial when it comes to pickups. It kind of depends on the build, but to be honest, there are so many excellent pickup builders available. I'm a fan of many, big and small.

I bet Big Splits would kill. That being said, I think the EMGs will fit really well with this style build.
 

Latest posts