• TalkBass has been independent since 1998. Add your voice.
    Create a free account to reply to discussions, view embedded media, and browse with fewer display ads.
    Join freeLog in
    Want zero display ads or expanded classifieds tools? Compare plans.

Winter Build Off 2026 - One for Dad

Sanding may not be my favorite task ever... But then a quick wipe down with DNA and this shows up!

PXL_20260407_015725049.jpg
PXL_20260407_015705851.jpg
PXL_20260407_015657857.jpg

This walnut came out of the scrap bin at Keim (if you know, you know... Am I right @postalflunkie ? ) and is not the most uniformly colored... But it's got some character!
 
Initial setup and geometry check.

She lives!

PXL_20260415_014701404.MACRO_FOCUS.jpg
PXL_20260415_014654155.jpg

PXL_20260415_022351569.jpg
I may need to shave the bottoms of the saddles to get enough downward adjustment (still investigating where my math went wonky) but, I'm going to let it settle in for a couple of days first. Even with the nut higher than Willie Nelson, I spent about an hour playing last night. This one is going to be hard to give up!

Need to do some final fettling (drill for ground wire, strap locks, and through-body stringing, connect pickup cavities, route a slot for truss rod access) then we may actually get some finish on it!

PXL_20260415_022336447.jpg
 
Last edited:
Wrapping up the final details on this one.

I used 2 pieces of heavy paper in the neck pocket to bring the action up (in the neighborhood of .010 got me close) so made the decision to toss a .020 veneer in there. Bust out the "identify your lumber" kit,

PXL_20260423_153847277.jpg
find something in a reasonably close color,

PXL_20260423_154359457.jpg

and Bob's your uncle.

17769879054152062589457752856750.jpg

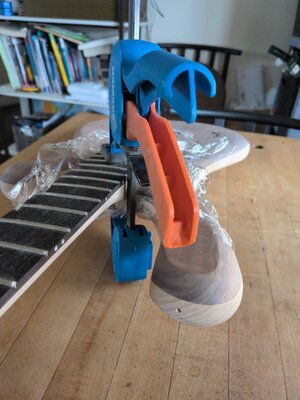
I'm using the neck as a clamping caul with some plastic wrap that I "borrowed."

Next up was making (attempting to make... explanation follows) some knobs.

I glued up some neck and drop top leftovers,

PXL_20260421_004641707.jpg

squared everything up and did some layout, shooting for 3/4 high by 3/4 diameter.

PXL_20260423_172300520.jpg

Gotta head to practice, but I'll update more later.
 
Whew! Great rehearsal!

Ok, back to the story.

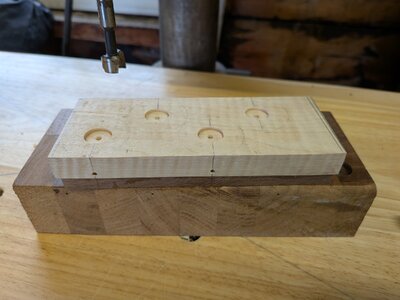
A 1/2 forstner cut a pocket in the base for the nut, then a 3/32 through the side for the set screw (4-40).

PXL_20260423_204816286.jpg

I had a brand, spankin' new 7/8 hole saw that measured exactly 3/4 for the "plug"... So let's give this a whirl.

Back the center drill out so it will just barely find the center and mark the cut.

PXL_20260423_205445086.MP.jpg

Then, drill to depth with a 15/64 to fit the pot shaft, then back to the hole saw, pull the center drill and flip it over (the pointy end goes in the chuck) and drill down not quite all the way. Except for that one little guy... Don't worry about that little guy.

PXL_20260423_211059766.MP.jpg

Over to the bandsaw to free them, and there we go; 6 rough cut knobs.

PXL_20260423_211208486.jpg

PXL_20260423_211531228.MP.jpg

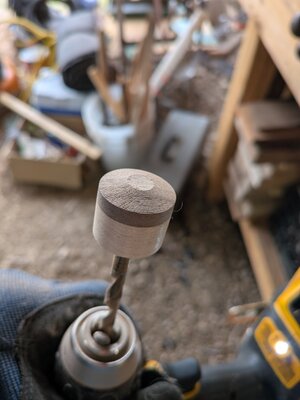
Next, put that handy 15/64 drill bit into a cordless drill backwards (pointy end in the chuck again) and spin the rough knobs against an 80 grit disc sander and a 220 grit belt to ensmoothen.

PXL_20260423_212749599.jpg
PXL_20260423_212827808.MP.jpg

And here we have.... Not a success.

PXL_20260423_213215119.jpg

After ensmoothening, the diameters are a very consistent .65

Which means they look like miniature skyscrapers when sitting on the pots.

So... I've got another piece of walnut/maple gluing up and will go with a larger diameter hole saw. I've got a 1 1/8 that measures out to around a .95 plug so that's where I'll start tomorrow.

Onward and upward!
 
Whew! Great rehearsal!

Ok, back to the story.

A 1/2 forstner cut a pocket in the base for the nut, then a 3/32 through the side for the set screw (4-40).

View attachment 7481083

I had a brand, spankin' new 7/8 hole saw that measured exactly 3/4 for the "plug"... So let's give this a whirl.

Back the center drill out so it will just barely find the center and mark the cut.

View attachment 7481084

Then, drill to depth with a 15/64 to fit the pot shaft, then back to the hole saw, pull the center drill and flip it over (the pointy end goes in the chuck) and drill down not quite all the way. Except for that one little guy... Don't worry about that little guy.

View attachment 7481085

Over to the bandsaw to free them, and there we go; 6 rough cut knobs.

View attachment 7481086

View attachment 7481087

Next, put that handy 15/64 drill bit into a cordless drill backwards (pointy end in the chuck again) and spin the rough knobs against an 80 grit disc sander and a 220 grit belt to ensmoothen.

View attachment 7481088
View attachment 7481089

And here we have.... Not a success.

View attachment 7481090

After ensmoothening, the diameters are a very consistent .65

Which means they look like miniature skyscrapers when sitting on the pots.

So... I've got another piece of walnut/maple gluing up and will go with a larger diameter hole saw. I've got a 1 1/8 that measures out to around a .95 plug so that's where I'll start tomorrow.

Onward and upward!


If I’m turning that style of knob I seem to keep going shorter and shorter to have them look right to me. Taller can work with some interesting shapes but the last straight cylinder type knobs with a rounded top I made were just long enough to go over the pot shafts.
 
Knobs (looks around nervously), part 2:

I started off the same way as yesterday by undercutting for the nut and drilling the setscrew hole

PXL_20260424_171321032.jpg
Then the hole saw routine followed by bandsaw liberation (exactly the same as last time... Just a bigger hole saw)

Clean them up on the disc and belt sander and this is starting to look promising.

PXL_20260424_173737900.jpg

I used a scrap of mdf clamped to the table of my disc sander to get a consistent angle, and sanded a chamfer.

PXL_20260424_184653894.jpg
PXL_20260424_184723935.MACRO_FOCUS.jpg

Then held them to the slack portion of the belt with a light behind so I could see when I had full contact

PXL_20260424_184746746.MP.jpg

Giving me a nicely domed set of knobs... Plus a spare.

PXL_20260424_185130239.jpg
 
Last edited:
Since the string tree I ordered from the Borg appeared incapable of holding anything stronger than a sewing thread (I easily bent it with my fingers) but the holes were already spotted in the headstock face, I needed to make one.

Snag a chunk of 1/4 brass out of the scrap box, two holes, and bust out the files.

PXL_20260424_152336545.jpg
PXL_20260424_153130063.jpg

A bit more finessing and a bunch of sanding, and we've got some bass jewelry!

PXL_20260424_200658904.MACRO_FOCUS.jpg

I need to come up with something to space it up a bit, but the hard part is done.

I hope!
 
Since the string tree I ordered from the Borg appeared incapable of holding anything stronger than a sewing thread (I easily bent it with my fingers) but the holes were already spotted in the headstock face, I needed to make one.

Snag a chunk of 1/4 brass out of the scrap box, two holes, and bust out the files.

View attachment 7481468
View attachment 7481469

A bit more finessing and a bunch of sanding, and we've got some bass jewelry!

View attachment 7481470

I need to come up with something to space it up a bit, but the hard part is done.

I hope!


The string retainer looks very nice. Good work! How’s that little green belt sander work for you? I had one that came from Harbor Freight. It was ok for a little while then I couldn’t adjust the belt to track right so I rebuilt the tracking adjuster on the top roller then it got off again and I tossed it in the trash.
 
  • Like
Reactions: Reedt2000

Latest posts