• TalkBass has been independent since 1998. Add your voice.
    Create a free account to reply to discussions, view embedded media, and browse with fewer display ads.
    Join freeLog in
    Want zero display ads or expanded classifieds tools? Compare plans.

Z Bass II - Preliminary Designs Underway

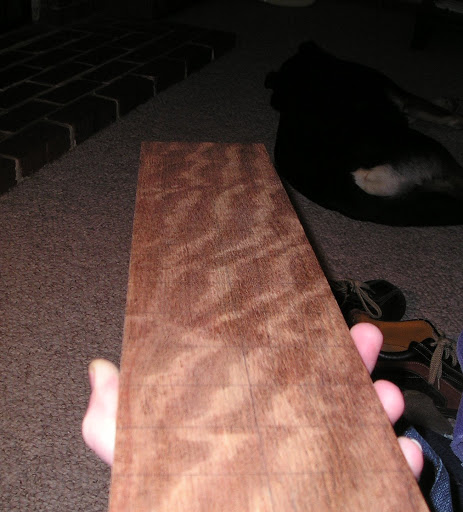
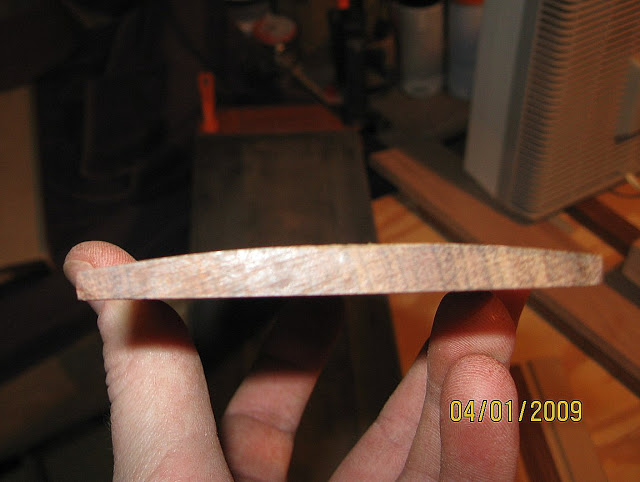
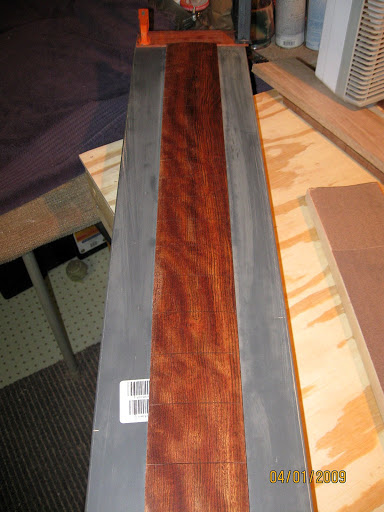
This is a nice piece of chechen that I'll be using for the fret board. It's got really cool waterfall figuring
P1010005-1.jpg


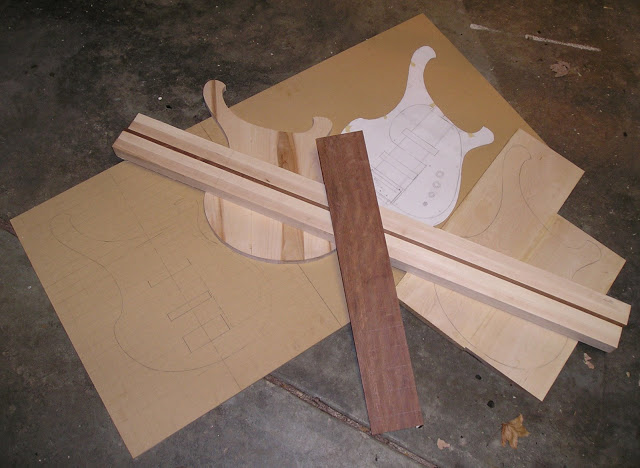
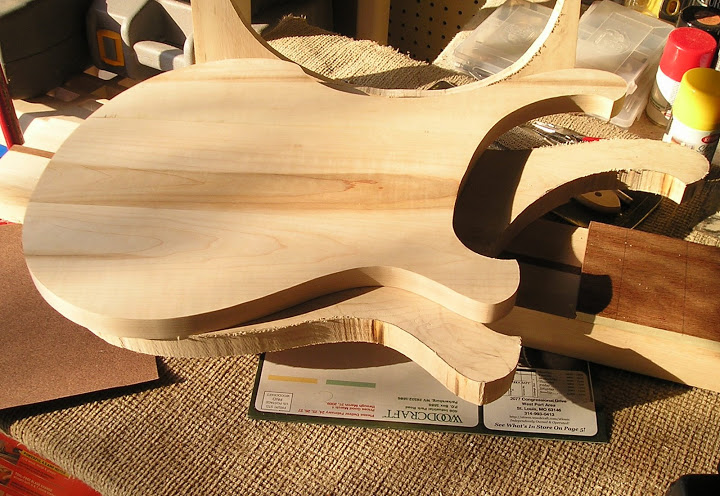
Most of the primary components...
P1010024-1.jpg


P1010032-1.jpg


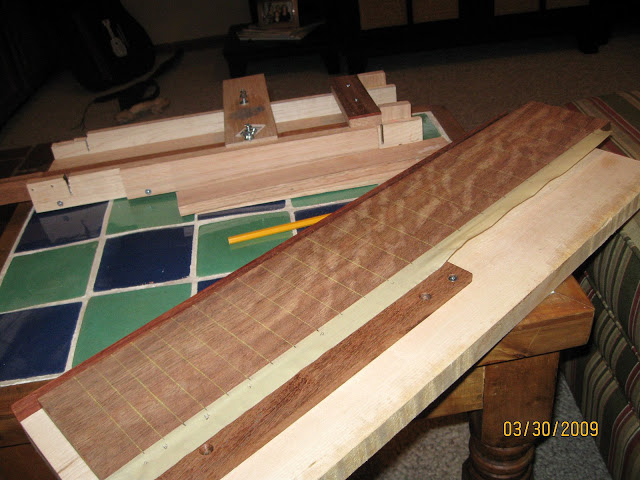
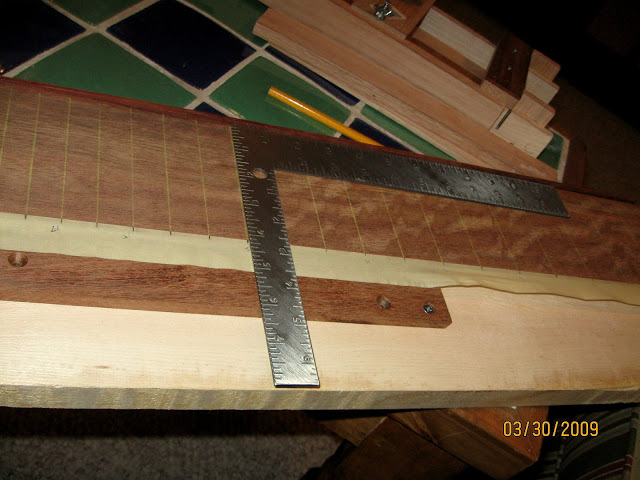
Marking up the fretboard:

IMG_0252.jpg


IMG_0254.jpg


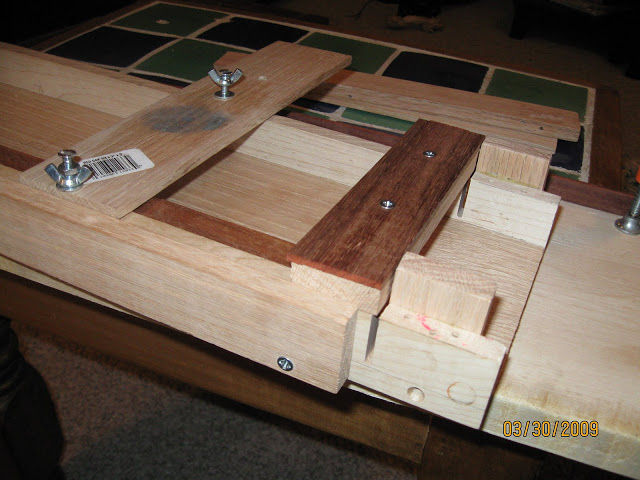
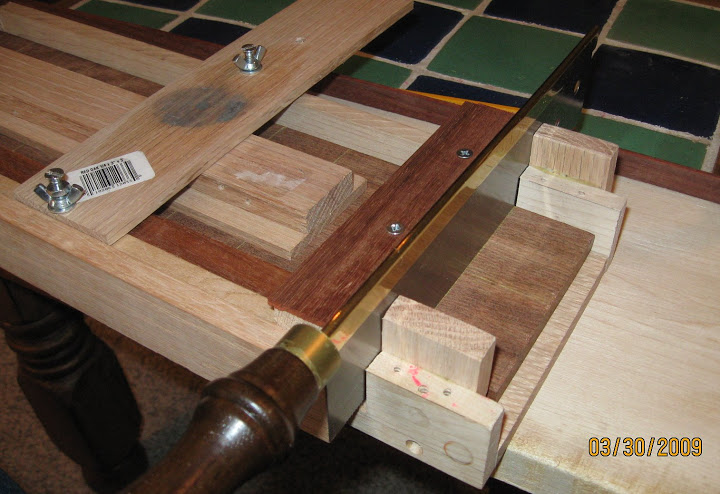
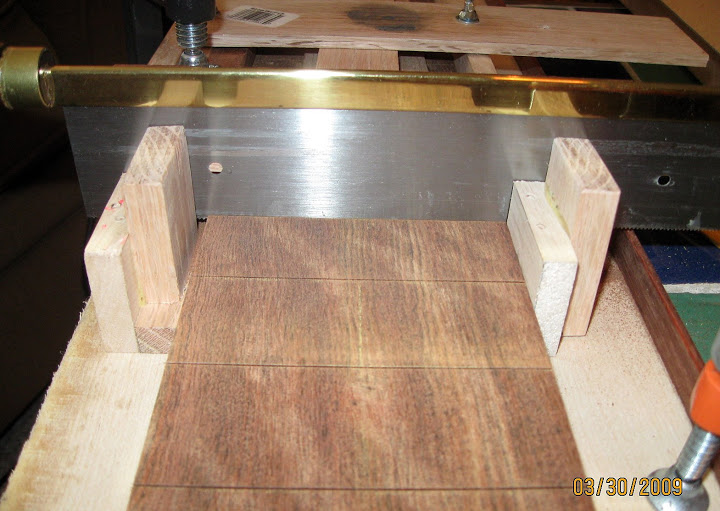
Fret Sawing Jig:

IMG_0255.jpg


IMG_0259.jpg


IMG_0263.jpg


My DIY 9.5" Radius Sanding Block

P1010021-1.jpg


IMG_0268.jpg


IMG_0269.jpg


IMG_0270.jpg


IMG_0265.jpg


IMG_0272.jpg


I've received my fret wire and tuning machines (Stew Mac)
Leo Quann BadAss bridge (Sigler Music via eBay)
a set of Bartolini's are on the way from a fellow TB'er.

I've gotten a lot done and still have a lot to do!

I'm especially proud of the sanding block!
I found a really easy way to make 'em, if anyone's interested... ;)

My wife needs the laptop now... MORE TO COME!
 
its usually better if you can knock it down with a hand plane, or a belt sander and finish the radiusing with the block, it takes a long time and alot of sandpaper to do it all by hand

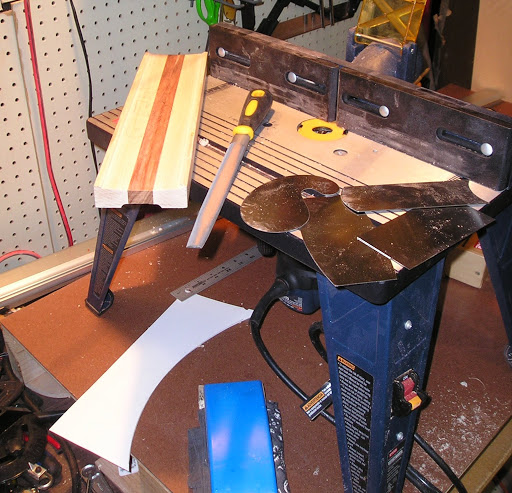
This is my "Make a Radiused Sanding Block" suite of tools:

1) Router and router table with adjustable fence
2) Scrapers
3) File (to keep scrapers sharp)

NOTE: - I used the large, somewhat rounded but mostly rectangular scarper that's underneath all the others in the picture almost exclusively in the clean-up phase.

P1010021-1.jpg


1) Mark the end of the block with the desired radius and center point

2) Set the fence on the router table so that your block's center is aligned and set the height of the router bit (1/16", straight) level with the peak of the curve.

3) Run the block through, turn it around and run it through.

4) Adjust the fence in a little (just under a 1/16"), lower the bit to meet the curve - run the block through - turn it around - run it through again.

Repeat steps 3 and 4 until you've carved out the radius.

Then I used rounded scrapers to clean up the router tracks (which was very easy).

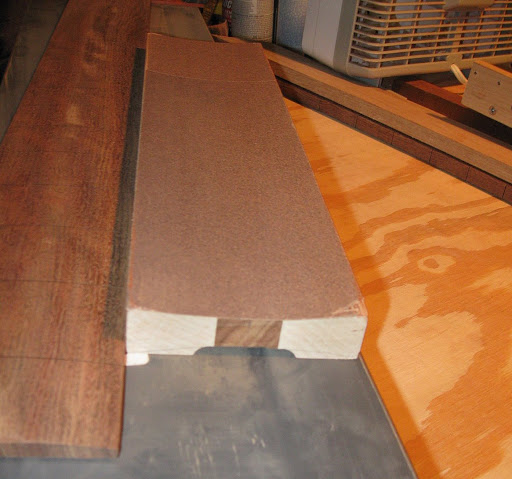
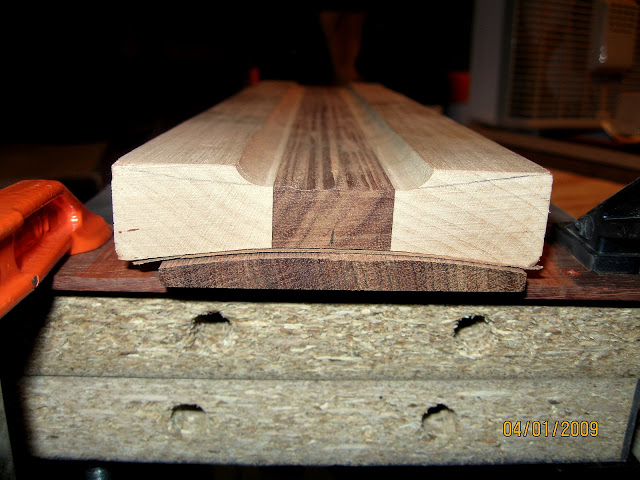
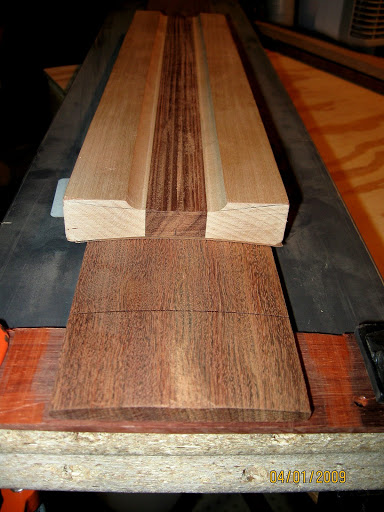
The results:

IMG_0268.jpg


The backside of this block was my first attempt using a rounded tip router bit. I thought that the rounded tip would be more attuned to my goal of a smooth radius, but it turned out to be worse that a straight bit.

IMG_0270.jpg


I used 3M spray mount to adhere the sandpaper (100 grit) to the block.

There ya go! Depending on how easily your router table fence adjusts and the bit height is set, this takes relatively very little time and energy. About 20 minutes for the routing phase for mine and that's because I was being VERY cautious. The scraping took about another 20 minutes or so and was quite relaxing.

When it was all said and done and compared to other methods I've seen with swinging-arm router jigs or using an existing radius and sandpaper - this method was a breeze!

Does that make sense?

Now, sanding the radius onto the fretboard took a much longer time. I have some ideas about how I could make that process go faster - and I may even go pick up another piece of chechen (or rosewood) and try them out for the hell of it.

Can't wait to get back to work on this tonight and this weekend!
 
love the body design, can't stand the pickguard.

Thanks (body design).
Can't please everybody (pickguard). ;)

I actually like the pickguard a lot, but I know it's a very strong statement in this design and strong statements tend to draw out strong feelings.

roberthabraken said:
I really like your fret saw jig and your sanding block! Was it easy to sand it by hand or did it take long?

Thanks - and thanks to you for your thread! I've been enjoying it very much!

As for the sawing jig - that was a real exercise in frustration at first as I would drill, cut, screw together THEN discover the error of my ways - disassemble, reassemble and discover NEW gremlins in the mix...

The most important aspects (to me) for a fret sawing jig are:
1) wide enough to accommodate the fret board (obviously)
2) RIGHT ANGLES!!! Making sure not only the sides that guide the (presumable square) fretboard blank are square too, but also the blade guides are nice and perpendicular AND parallel with regard to the slotting area - if that makes sense...

That was hard to do with wood - drilling - the 'little nudge here and there' that always happens when you go to screw in a critical guide piece... UGH!!!

3) the clamping mechanisms. There are actually two in mine - the one that uses the wing nut to tighten down on the shims that hold the FB from above - and the shims that I jammed in to hold the FB firmly against the side of the jig.

The sanding block - after brainstorming and tons of research here and abroad on how to create one, it occurred to me that the router and scrapers method seemed most accessible to me.

Now that I've done it - I honestly cannot think of an easier way to go about it. Using the fence and gradually worrying away the radius was almost too easy. After the routing, I could technically have gone straight to sanding and not bothered with cleaning up the router trails (they were barely there and at best were less than 1/32" ea. if that... so I'd imagine they'd have little impact on the fretboard's radius.

But cleaning up the rout tracks with the scraper was super easy and seeing a perfectly smooth radius was nice.

Sanding the fretboard - that took time and elbow grease. I estimate it took about an hour (at least) of actual sanding - spread out over 4 hours. So I'd sand for a good 4 or 5 minutes... pause... look at where I was... go back to sanding.. pause... look... sand... etc...

It's my first time, so I was probably extra cautious. I've also concluded that if I created a tray with vertical sides to guide the block and hold the fretboard, I could probably knock it down much more quickly.

By the way - I only used 1 sheet of 100 grit sandpaper to sand the entire radius. I kept knocking the dust out of the paper and cleaning it off of the FB - which I am sure helped.

By the way - the sandpaper you see in the picture above is the very same sheet I started with - and that picture is POST radiusing...
 
Thanks for all the nice info and details, very interesting :).

I think your bass design is really sweet and it's gonna be a killer :hyper:.

I myself have the problem that my fb isn't square (parallel sides), but already tapered, so I can't do it like that, although I was thinking of sticking it to a perfect square board of MDF with some tape. That'll do..
 
Thanks for all the nice info and details, very interesting :).

I think your bass design is really sweet and it's gonna be a killer :hyper:.

I myself have the problem that my fb isn't square (parallel sides), but already tapered, so I can't do it like that, although I was thinking of sticking it to a perfect square board of MDF with some tape. That'll do..

That was my big lesson learned from last build - STAY SQUARE AS LONG AS YOU CAN! So on this build, I've made it a rule - if it doesn't have to be shaped yet, don't shape it.

I shaped my body wings on the last build way too much too early and it made it very challenging to get them glued.
 
That was my big lesson learned from last build - STAY SQUARE AS LONG AS YOU CAN! So on this build, I've made it a rule - if it doesn't have to be shaped yet, don't shape it.

I shaped my body wings on the last build way too much too early and it made it very challenging to get them glued.

That's a wise rule :D. I must say I do that myself too, but I bought the fb tapered (done in the store, probably to get more boards out of the same piece of wood :scowl:).. else I never would before it was finished..
 
Holy cow Tony! You aren't just messing around here. VERY nice!

I kind of dig the 'updated Ric' sort of thing, that someone else mentioned, and I think the sort of 'Marcus Miller' style guard works well.

Maybe I'll get to play this sometime when I'm town when you complete it.

Very impressive. I'm impressed with myself if I get the control plate off to change the battery without causing damage to the bass or myself!
 
Holy cow Tony! You aren't just messing around here. VERY nice!

I kind of dig the 'updated Ric' sort of thing, that someone else mentioned, and I think the sort of 'Marcus Miller' style guard works well.

Maybe I'll get to play this sometime when I'm town when you complete it.

Very impressive. I'm impressed with myself if I get the control plate off to change the battery without causing damage to the bass or myself!

Thanks, Ken! And you've nailed it on the head - updated Ric + Marcus Miller/Ric pickguard = Z Bass II.

Hopefully I'll have this one finished next time you blow through and I'd be honored if you'd give it a test run! I have a hard time letting anyone touch my first build since I am so familiar with all it's shortcomings. On this one I am working triple-time on making it more 'wart free'. I want real players to be able to pick it up, play it and say, "Yeah... That works!"
 
S L O W L Y . . .

With the oppressive heat we've had here, working in the garage has been out of the question.

That, and a thousand other excu... 'er, reasons!

I have installed the truss rod - I have my pickups, bridge, tuning machines, the fretboard is slotted and glued to the neck blank - which is roughly profiled (side view) but not yet tapered (top view).

I need to make an appointment with my dad and his neighbor to get the neck cut to shape. I just don't have the right tools for that operation.

We had a few weeks of extreme heat and humidity and that kept me out of the garage. Then we took a little family vacation - there have been a few gigs and rehearsals - all of those things piled on top of each other and basically forced me to put the hole build on hold.

But the weather's broken and after a friend visited and I proudly showed him my roughed out neck - and after hearing my band asking "Where's the Z-Bass?" - I think I've run out of excuses and need to start making sawdust again!

Thanks for the inquiry! I'll get rolling again soon and post like crazy.
 
S L O W L Y . . .

With the oppressive heat we've had here, working in the garage has been out of the question.

That, and a thousand other excu... 'er, reasons!

I have installed the truss rod - I have my pickups, bridge, tuning machines, the fretboard is slotted and glued to the neck blank - which is roughly profiled (side view) but not yet tapered (top view).

I need to make an appointment with my dad and his neighbor to get the neck cut to shape. I just don't have the right tools for that operation.

We had a few weeks of extreme heat and humidity and that kept me out of the garage. Then we took a little family vacation - there have been a few gigs and rehearsals - all of those things piled on top of each other and basically forced me to put the hole build on hold.

But the weather's broken and after a friend visited and I proudly showed him my roughed out neck - and after hearing my band asking "Where's the Z-Bass?" - I think I've run out of excuses and need to start making sawdust again!

Thanks for the inquiry! I'll get rolling again soon and post like crazy.

I see / understand... well, I hope you'll have some time and good conditions and the weather on your hand and such!! I'll wait patiently :ninja:
 
After a very long break, I'm back to the build.

Routed the truss channel...
P1010067.jpg


Installed the truss rod - dual action, spoke wheel nut from Stew Mac...
P1010070.jpg


Glued on the fretboard...
P1010076.jpg


Another shot of the fretboard...
P1010077.jpg


Then took another long break. After the 2nd break, I got antsy and decided I had to do something. Warning... don't get antsy and decide you have to do something...


I took the neck to my dad's and we both put too little thought into what we were doing - and cut too deeply into the neck when trying to trim the taper...
IMG_0586.jpg


Ugh... that hurts! But this is part of how things can go. So I decided to trim both side of the neck equally deep and build it back out by laminating maple to each side.

So we created a sled to use with the table saw and began "Operation Salvage the Neck".
IMG_0594.jpg


Here's the newly trimmed neck...
IMG_0602.jpg


Gluing the maple lams...
IMG_0606.jpg


Another view...
IMG_0608.jpg


I used my router to slim the neck to the correct width...
IMG_0613.jpg


View from headstock end...
IMG_0614.jpg


View from body end...
IMG_0618.jpg


The whole thing...
IMG_0619.jpg


Later this afternoon I'll be heading back to dad's to do some cleanup trimming on the body end and I'll be in really good shape to start adding the body.

More to come!