

Enjoy the benefits of a premium membership!
Upgrade Account
-
TalkBass has been independent since 1998. Add your voice.
Create a free account to reply to discussions, view embedded media, and browse with fewer display ads.
Join free Log in
Want zero display ads or expanded classifieds tools? Compare plans.
You are using an out of date browser. It may not display this or other websites correctly.
You should upgrade or use an alternative browser.
You should upgrade or use an alternative browser.
$5 bass rescue from death
- Thread starter Never2Late
- Start date
More options
Who Replied?
I'm not familiar with the Memphis brand or history, so I wasn't sure if it was worth making the logo more visible (vs. the "ghost" logo that's there now). The comments in a couple of videos suggest this bass is from the 80's and made in Japan, but I have no idea if that's accurate. Does anyone here know?
Memphis is one of those cheapo off-brands that have changed hands multiple times since the 70s and have been made in Japan, Korea, and probably elsewhere. The quality is all over place - some are nice, some are firewood; some are solid wood, some are plywood. Judging by the logo, yours is an 80s MIK build.
I lucked in a nice Memphis several years ago and restored / modded it. Not to the extent of yours, though - that's quite a job!
Nice work! You should be commended for such nobility. It's a beautiful thing, to restore an instrument.
Great job!!!! I love project posts with plenty of good pic's and a good write up. Well done!!!
Dude...that is just awesome! What a fun project! Outstanding pix and description.
Thank you!
Bravo on doing that. It was a good read, and felt good to know you saved it
These types of threads are why TalkBass can be so cool.
Awesome story. Congrats. Loved the photo journey. Thanks for posting.
That's amazing. Not only well done on the work, but great job documenting it. What a great thread.
Thank you for the feedback on the write-up.
Reading through the all pages of replies has been heart warming.
I wasn't sure if sharing my experience in detail in a post like this would be useful.

Enjoyable? I have absolutely zero skills to pull off something like that and greatly admire those that can at such a high level.Thank you for the feedback on the write-up.
Reading through the all pages of replies has been heart warming.
I wasn't sure if sharing my experience in detail in a post like this would be useful.

@Never2Late this is a much more elegant way of doing this than my method I got this little bass book that I jot down all stuff bass on, this is noe bookmarked and part of my collection.@BAG - It's pretty easy. Just wrap copper tape around the pickup wires, sticky side out, and pull it through the hole. I pull the wires and the tube together to get the tube into the hole. Since it's sticky side out, the wires still move back and forth after it's done.
If the hole is big, I wrap the copper more loosely and use more layers. If the hole is small, it's a tighter wrap around the wires with less layers.
Once the tube is pulled into place, cut a few slits in each end and fold out the "tabs" onto the edges of the cavity. (the copper tape tube needs to be longer than the hole,)
Then when you shield the cavities, that copper tape overlaps the "tabs" and connects everything. Once it's all in place, I push a toothpick in the hole ends all around the wires to smoosh the overlapping bits together really well against the hole walls for good contact, and to allow the wires to move easily.
Here are a few pictures from when I shielded one of my other basses with a P/J config:
View attachment 7326553
View attachment 7326554
View attachment 7326556
View attachment 7326557
View attachment 7326558
View attachment 7326565
View attachment 7326566


OP, I salute you!
Just because a musical instrument is inexpensive and shabby doesn't mean it's worthless.
Just because a musical instrument is inexpensive and shabby doesn't mean it's worthless.

Exciting updates! 
I ended up cleaning the strings more thoroughly and replacing most of the screws with new ones. (OCD) That made "Ghost Memphis" look and feel new and even nicer.
Then I played Ghost on and off for a few weeks. It sounds fantastic. I really like the sound of that P pickup.
And it balances beautifully. I had it on a slippery nylon strap, pointed up somewhere around 40 degrees, and the neck stayed up while playing. At only 8 pounds, that surprised me.
BUT what that process confirmed is that, while I am able to play a full size bass, I play better and am much more comfortable with short-scales.
I briefly considered mounting Ghost up on a wall just to look at.
But it seemed a shame to have a bass that feels and sounds that nice sitting around unused. I decided to see if I could find it another owner that would play and appreciate it. I had NO idea about its value.
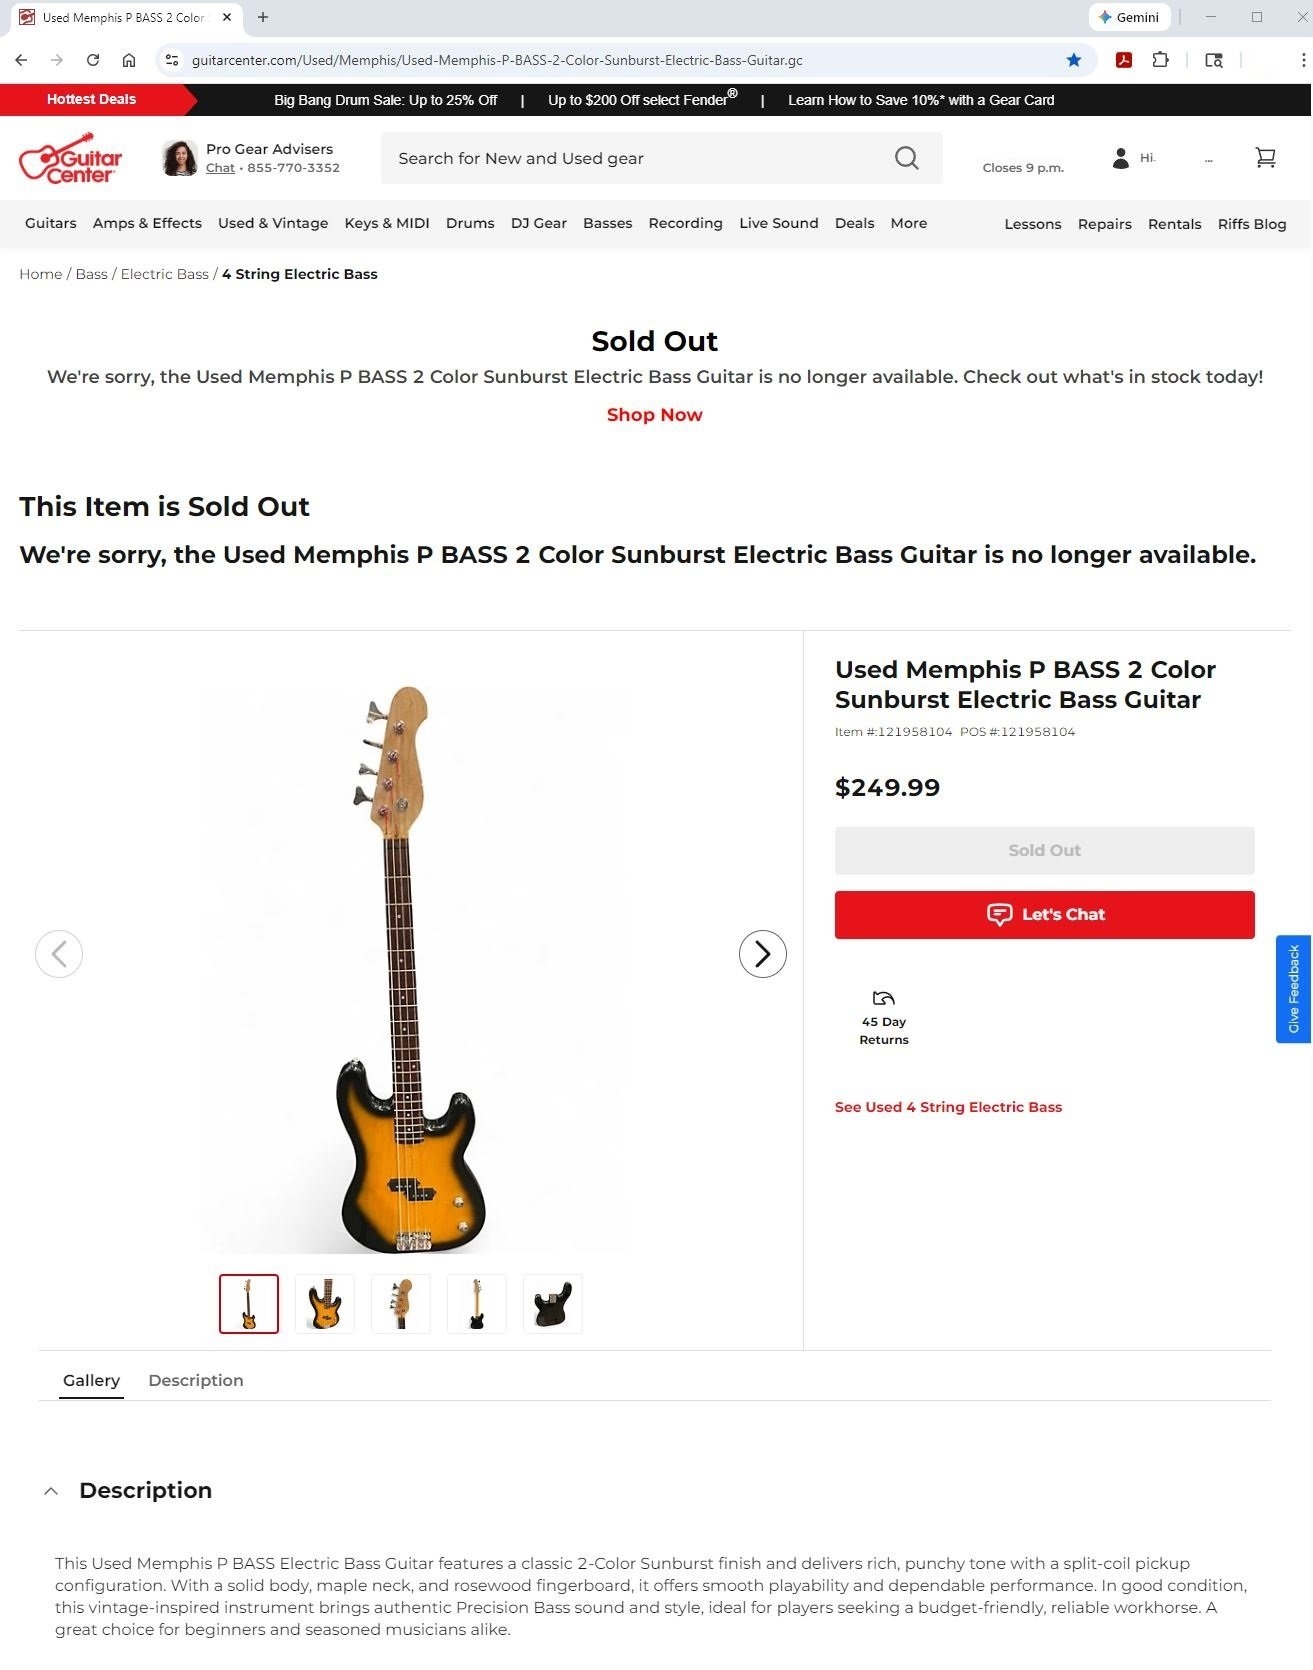
So I brought it to Guitar Center. They looked it over, played it, commented about how nice it looked and played, and bought it. I eagerly watched the listing on their website to see what would happen. And a short while later it sold!
It's now been more than 45 days (the return period), so Ghost Memphis seems to have found its new home! After all the work and love that went into it, that thought of it being appreciated and regularly played makes me super happy.
I ended up cleaning the strings more thoroughly and replacing most of the screws with new ones. (OCD) That made "Ghost Memphis" look and feel new and even nicer.
Then I played Ghost on and off for a few weeks. It sounds fantastic. I really like the sound of that P pickup.
And it balances beautifully. I had it on a slippery nylon strap, pointed up somewhere around 40 degrees, and the neck stayed up while playing. At only 8 pounds, that surprised me.
BUT what that process confirmed is that, while I am able to play a full size bass, I play better and am much more comfortable with short-scales.
I briefly considered mounting Ghost up on a wall just to look at.
But it seemed a shame to have a bass that feels and sounds that nice sitting around unused. I decided to see if I could find it another owner that would play and appreciate it. I had NO idea about its value.
So I brought it to Guitar Center. They looked it over, played it, commented about how nice it looked and played, and bought it. I eagerly watched the listing on their website to see what would happen. And a short while later it sold!
It's now been more than 45 days (the return period), so Ghost Memphis seems to have found its new home! After all the work and love that went into it, that thought of it being appreciated and regularly played makes me super happy.


That is so cool!! A great story! And thanks for posting here and putting a ribbon on a wonderful tale!
.
.
That's a brilliant tale all the way through - and you are still bookmarked for my next shielding job, in fact I've just yesterday taken stock of a Cort GB short scale. It's active so doesn't necessarily need a shielding job but that's never stopped me shielding actives before. Just got to work out how to fit a active/passive switch as the Cort is active only, then I'll whip the copper tape out.
Such a lovely end to your remarkable work, huge thanks for sharing beginning to a lovely end. Absolute respect to you and giving this beautiful instrument a new lease of life.
Thank you so much for the story.
Such a lovely end to your remarkable work, huge thanks for sharing beginning to a lovely end. Absolute respect to you and giving this beautiful instrument a new lease of life.
Thank you so much for the story.


