
Enjoy the benefits of a premium membership!
Upgrade Account
-
TalkBass has been independent since 1998. Add your voice.
Create a free account to reply to discussions, view embedded media, and browse with fewer display ads.
Join free Log in
Want zero display ads or expanded classifieds tools? Compare plans.
You are using an out of date browser. It may not display this or other websites correctly.
You should upgrade or use an alternative browser.
You should upgrade or use an alternative browser.
5 string buckeye burl/mahogany neck through
- Thread starter lbridenstine
- Start date
More options
Who Replied?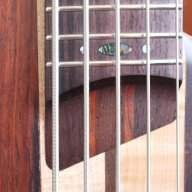


Following this one too. Good luck with this one. I love Buckeye Burl!
Thank you and me too.
How do you hold the body in place when using the router sled?
Double sided tape. It worked good for the mahogany, but when I started the burl, I could see the tape start unsticking and the burl popped up, so I stopped routing at that point and haven't gotten back to it yet to figure out a different way to do it. I think I'll have to clamp it somehow and maneuver clamps around as I go. Unless carpet tape will do... that's thicker and stickier.
Carpet tape did the trick for holding the burl down. It's flat now.


I made the cavity cover and started on the route, but I'll have to finish that up later.

After the cavity is done, the body will be set aside until after I get the neck made.
I made the cavity cover and started on the route, but I'll have to finish that up later.
After the cavity is done, the body will be set aside until after I get the neck made.

Fabulous, Lisa!
The two pieces look like they're dancing!
Haha, they kind of do.

Here's (part of) the new piece of maple.

And I was surprised to find this in the package too.

I started drawing out potential neck laminate layouts. The pencil lines parallel with the outer taper would be the makore veneer and the rest would be the maple. The vertical line is the 24th fret.

The only difference in this one is the veneer down the middle.

Ignore the scarf joint area that I accidentally drew facing the wrong way...
The maple is 13/16" thick, so I drew the outer pieces of maple to that width and the middle ones are 3/8", which I figure would be about half, minus the blade kerf. My current thought is that I will glue up the two halves separately, then joint the middle edge of each and glue them together.
I think I like the first one better than the second. I drew a couple of others, but the widths would require too much surfacing of everything and they didn't look any better. Evan has a big festival to play/manage this weekend, so I'll send these to him next week and see what he thinks.
Any thoughts from you guys? I wouldn't mind trying some other layouts.
And I was surprised to find this in the package too.
I started drawing out potential neck laminate layouts. The pencil lines parallel with the outer taper would be the makore veneer and the rest would be the maple. The vertical line is the 24th fret.
The only difference in this one is the veneer down the middle.
Ignore the scarf joint area that I accidentally drew facing the wrong way...
The maple is 13/16" thick, so I drew the outer pieces of maple to that width and the middle ones are 3/8", which I figure would be about half, minus the blade kerf. My current thought is that I will glue up the two halves separately, then joint the middle edge of each and glue them together.
I think I like the first one better than the second. I drew a couple of others, but the widths would require too much surfacing of everything and they didn't look any better. Evan has a big festival to play/manage this weekend, so I'll send these to him next week and see what he thinks.
Any thoughts from you guys? I wouldn't mind trying some other layouts.

- Apr 12, 2014
- 87
- 107
- 35
- Disclosures
- Owner/Luthier, Jillard Guitars
without the veneer would look great, really cool idea.
Without the middle veneer or any veneer?
That corner design is very unusual to me... I'm so used to the parallel lamination necks, maybe I don't see enough stuff.
But won't it be rather difficult to obtain the proper angles? And also, how will you apply compression on this? Will you use counter angled pieces on bottom and top, so as to recover parallel surfaces to apply the pries (sorry, no better words for the clamping big stuff, my english vocabulary is still limited in the field of lutherie)?
What veneer had you in mind?
I lean a little bit towards the first design without the center line.
But won't it be rather difficult to obtain the proper angles? And also, how will you apply compression on this? Will you use counter angled pieces on bottom and top, so as to recover parallel surfaces to apply the pries (sorry, no better words for the clamping big stuff, my english vocabulary is still limited in the field of lutherie)?
What veneer had you in mind?
I lean a little bit towards the first design without the center line.

- Jul 1, 2005
- 4,291
- 21,932
- 79
- Disclosures
- CataldoBasses: Designer/Builder ThunderBuckerPickups:Consultant
Without the middle veneer or any veneer?
No veneer gets my vote. IMO there will be enough going on just letting the flame be flame.
I missed the resolution on the first piece of maple. Did the original vendor make good on it or is this a new supplier?
That corner design is very unusual to me... I'm so used to the parallel lamination necks, maybe I don't see enough stuff.
But won't it be rather difficult to obtain the proper angles? And also, how will you apply compression on this? Will you use counter angled pieces on bottom and top, so as to recover parallel surfaces to apply the pries (sorry, no better words for the clamping big stuff, my english vocabulary is still limited in the field of lutherie)?
What veneer had you in mind?
I lean a little bit towards the first design without the center line.
Check out Miziomix's threads, he does tapered neck laminates, which is where I got the idea. He does solid pieces rather than veneers and it looks great. And yeah, I probably will use angled wedges to help with clamping.
All of the pieces of wood are parallel except the middle.
The veneer is in post #1. It's makore, almost the exact same color as the mahogany.
No veneer gets my vote. IMO there will be enough going on just letting the flame be flame.
I missed the resolution on the first piece of maple. Did the original vendor make good on it or is this a new supplier?
That wasn't an option, haha. The veneer is going to basically tie together the body to the headstock (color-wise), since the headstock is most likely going to be mahogany too.
It's from a different supplier. I went with someone closer to here for less environmental shift.
I didn't try to return the other, I'll just cut it into shorter pieces to use it for something else at some point. I don't feel the need to ship it back.
wedges and clamps, of course... Thanks
I'll check Miziomix's threads to see what it looks like. So, basically, you can first glue all the parallel pieces, and finish assembling the central parts with both lateral ones. Will you check wood pieces for quarter sawn balance wood grain and orientation?
I'll check Miziomix's threads to see what it looks like. So, basically, you can first glue all the parallel pieces, and finish assembling the central parts with both lateral ones. Will you check wood pieces for quarter sawn balance wood grain and orientation?
wedges and clamps, of course... Thanks
I'll check Miziomix's threads to see what it looks like. So, basically, you can first glue all the parallel pieces, and finish assembling the central parts with both lateral ones. Will you check wood pieces for quarter sawn balance wood grain and orientation?
I think you got the idea. I'm going to glue 3 pieces together for each side (assuming we go with that layout), then after I get the bridge and nut and double check on the exact taper widths, I'm going to draw a line down one side where I need to cut/route it straight, which would end up being the centerline, cut the angle down the whole thing with the bandsaw close to the line, then route it against a straightedge. Then I'll put that one over the other half and trace the line and do the same thing, then glue the two halves together.
The pieces of maple are going to be flipped 90° after I cut them so the surface that you see in the picture is actually going to be the glue sides with the veneers and also the outer edges of the neck. I'm not sure if that makes it quartersawn or not, I haven't checked.
I think the design without the center veneer looks best. Omitting the center veneer will probably make the glueup a bit more difficult, though.
I would suggest that you stop the taper of the inner laminates before the scarf joint. Cutting that point will sort of ruin the effect a bit. The outer pieces must be a bit wider, so that may not be possible.
I would suggest that you stop the taper of the inner laminates before the scarf joint. Cutting that point will sort of ruin the effect a bit. The outer pieces must be a bit wider, so that may not be possible.
I think the design without the center veneer looks best. Omitting the center veneer will probably make the glueup a bit more difficult, though.
I would suggest that you stop the taper of the inner laminates before the scarf joint. Cutting that point will sort of ruin the effect a bit. The outer pieces must be a bit wider, so that may not be possible.
I'll see if I can figure out a way to get that point on there.
I worked on the control cavity today. I made a template that fit the cover and routed that first, then drilled out most of the inner route with forstners bits.
Then I maneuvered the template around to help me finish up the route. The area on the left is for the 9v for the pre-amp.
I routed all the way to the edge on the small side so it'll do this instead of having to pull the cover off with your finger.
I definitely stole that idea from other people.
There's a few burn marks from the router inside, so I'll sand those out. Other than that, I just have to glue in the magnets.
Brilliant! They should all do this!I routed all the way to the edge on the small side so it'll do this instead of having to pull the cover off with your finger.

I definitely stole that idea from other people.


