

Enjoy the benefits of a premium membership!
Upgrade Account
-
TalkBass has been independent since 1998. Add your voice.
Create a free account to reply to discussions, view embedded media, and browse with fewer display ads.
Join free Log in
Want zero display ads or expanded classifieds tools? Compare plans.
You are using an out of date browser. It may not display this or other websites correctly.
You should upgrade or use an alternative browser.
You should upgrade or use an alternative browser.
5-String Fanned Hybrid Headless
- Thread starter Dave Higham
- Start date
More options
Who Replied?

Compressed air through the jack hole should pop the lid right off.
Hey, I never thought about that one!

Here's how.
One.
Two.
Three.
Yeah, I know, it means I have to have the suction cup in the guitar case but if it was screwed in place I'd need a screwdriver...


Three things.
1: Subb'd
2: Your work is beautiful. Right up there with Pilot Jone's "Practice Build" and Robert Habraken's Paradox J5 on levels of craftsmanship and attention to detail. Plus I find this bass attractive as all get out, which is mountains more than I can say for many headlesses. Definitely one of my top 3 favourite build threads.
3: I cried when I got to the last post. I want to see this beauty finished!
1: Subb'd
2: Your work is beautiful. Right up there with Pilot Jone's "Practice Build" and Robert Habraken's Paradox J5 on levels of craftsmanship and attention to detail. Plus I find this bass attractive as all get out, which is mountains more than I can say for many headlesses. Definitely one of my top 3 favourite build threads.
3: I cried when I got to the last post. I want to see this beauty finished!

Hey, I never thought about that one!
Here's how.
(...)
Yeah, I know, it means I have to have the suction cup in the guitar case but if it was screwed in place I'd need a screwdriver...
Very clever Dave! And sooo clean! I love it!

Three things.
1: Subb'd
2: Your work is beautiful. Right up there with Pilot Jone's "Practice Build" and Robert Habraken's Paradox J5 on levels of craftsmanship and attention to detail. Plus I find this bass attractive as all get out, which is mountains more than I can say for many headlesses. Definitely one of my top 3 favourite build threads.
3: I cried when I got to the last post. I want to see this beauty finished!
Thanks James, but Dave does have a lot more experience and craftsmanship than me. I like and love his clean work.
Thanks James, but Dave does have a lot more experience and craftsmanship than me. I like and love his clean work.
That may be, but I have 0 experience with woodworking or machining, so what do I know
I just hang around the LC cause I love seeing things be built and you three are the most in depth, and thus my favorite. "Skill" level doesn't really matter to me lol 
Thank you all for the nice things you say. I dont consider myself to be anything special in the way of craftsmanship. Many years ago I worked with silversmiths who were real craftsmen. When the apprentice was grumbling about something he couldnt get right, theyd say Ee lad, theres no substitute fer skill but I think that patience often goes a long way towards it.
If what they say about the measure of a craftsman being his ability to hide his mistakes, perhaps Ive got a foot on the ladder.
Anyway, to continue:
Instead of an arm-rest bevel on the front of the body, Im going to put a cylindrical surface on the whole of the bass half (this is why I had to vary the depth of the cavities I routed before gluing the two halves of the body together). I made this jig for the second bass I made which had a cylindrical surface on the whole of the front, but I think if I did that on this one, the treble side of the body wouldnt be deep enough for the controls.
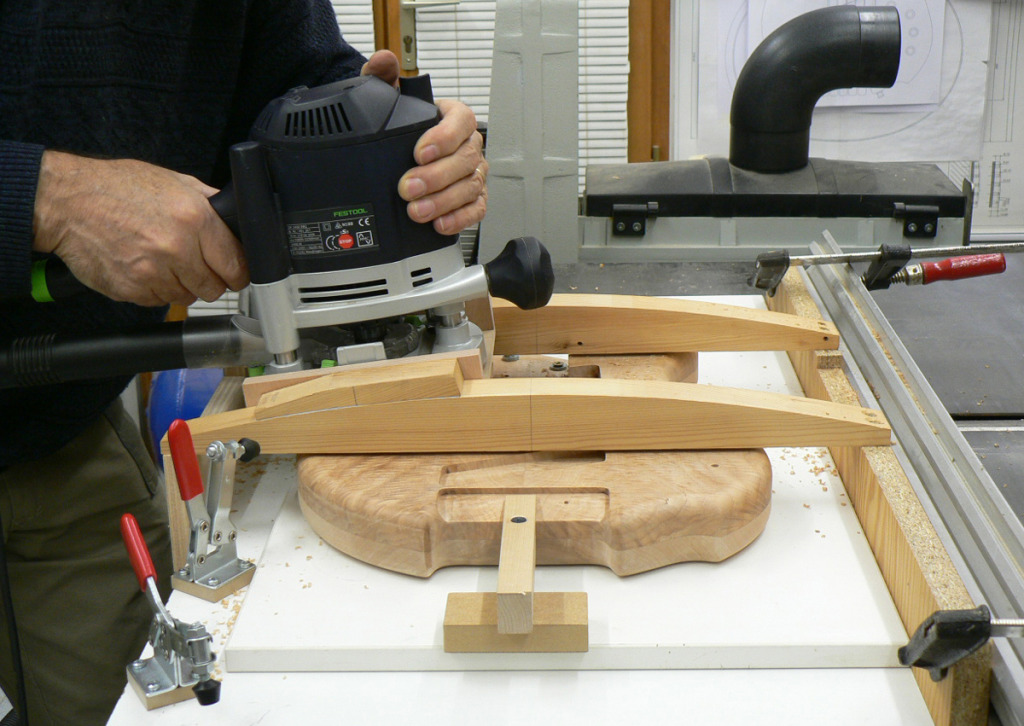
Heres an end view showing the curve on the front of the body.
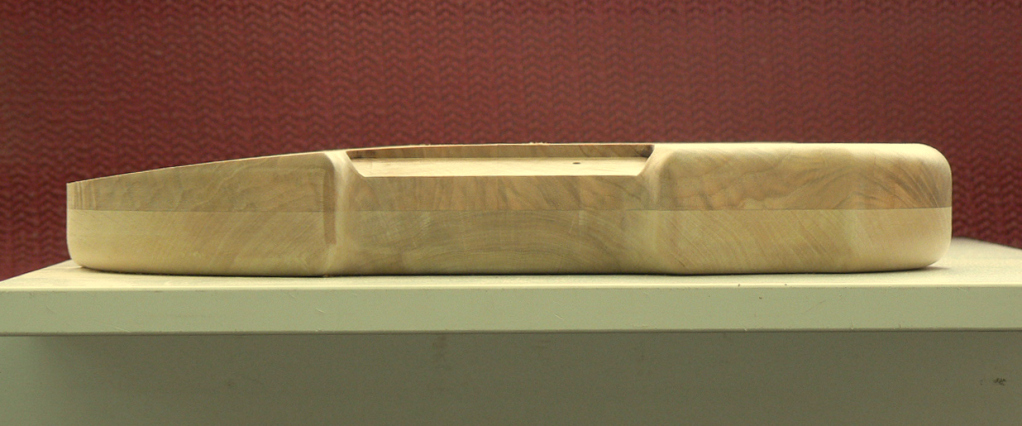
I then turned it over and did the same thing on the back.
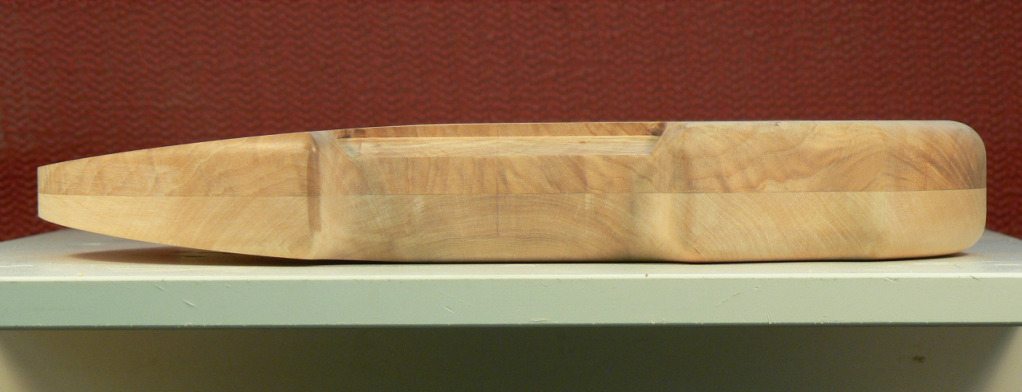
Heres a side view showing the shape the curved surfaces make.
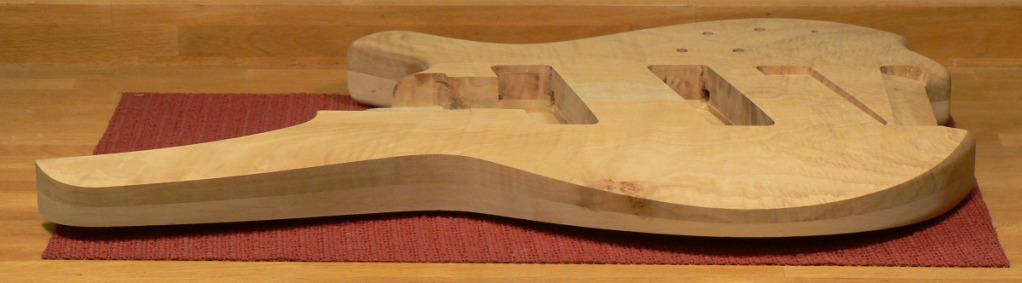
And one of the other side. I actually put the body back in the jig and swivelled it slightly to bring the outermost part of the upper horn in line with the widest point of the lower bout. I then routed just the upper horn so that at its narrowest point it was the same thickness as the lower bout. Of course I forgot to take any photos of that.
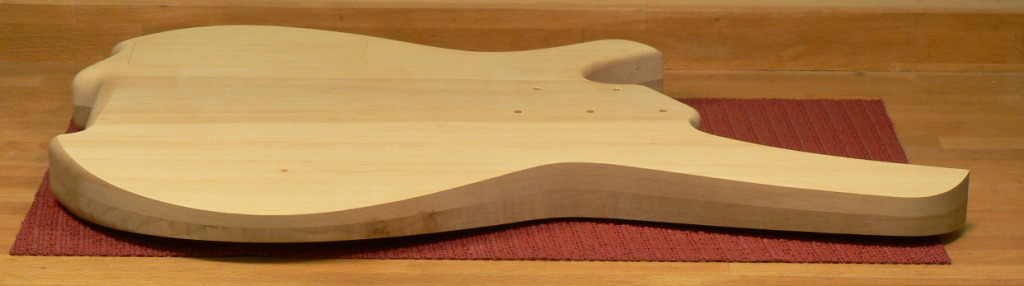
I bevelled the back in the waist, tapering the bevel right up to the end of the upper horn. The bevel doesnt show up very well in the photo. The bevel was cut using spoke-shaves and sanding sticks and was made so the edge of the body is the same thickness from the widest part of the lower bout to the end of the upper horn.
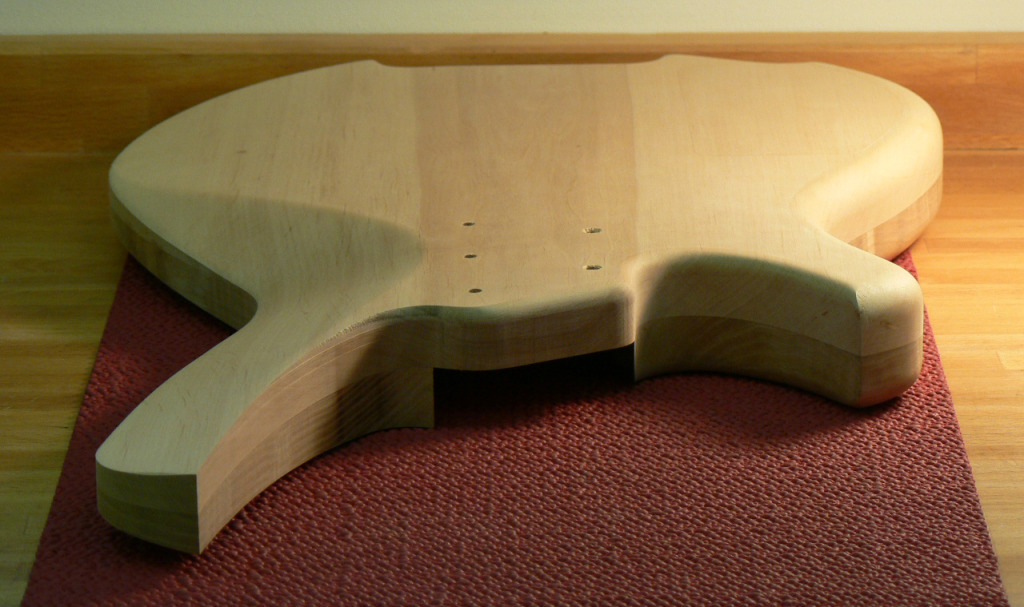
The edge was the rounded using spoke-shaves, sanding sticks and cloth backed abrasive in the shoe-shine style to give this. The white thing in the neck pocket is a sacrificial block of wood which makes it easier to shape the area around the neck pocket without accidentally sanding or rasping the corners off.
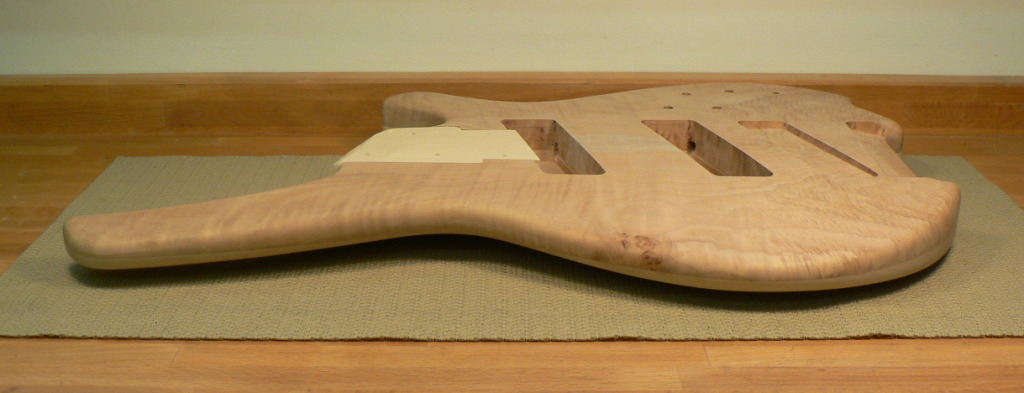
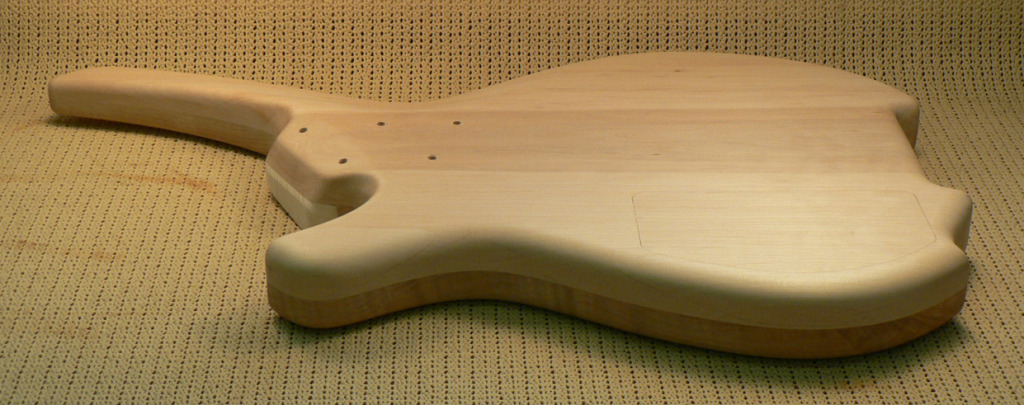
After a lot more sanding the back now looks like this.
If what they say about the measure of a craftsman being his ability to hide his mistakes, perhaps Ive got a foot on the ladder.
Anyway, to continue:
Instead of an arm-rest bevel on the front of the body, Im going to put a cylindrical surface on the whole of the bass half (this is why I had to vary the depth of the cavities I routed before gluing the two halves of the body together). I made this jig for the second bass I made which had a cylindrical surface on the whole of the front, but I think if I did that on this one, the treble side of the body wouldnt be deep enough for the controls.
Heres an end view showing the curve on the front of the body.
I then turned it over and did the same thing on the back.
Heres a side view showing the shape the curved surfaces make.
And one of the other side. I actually put the body back in the jig and swivelled it slightly to bring the outermost part of the upper horn in line with the widest point of the lower bout. I then routed just the upper horn so that at its narrowest point it was the same thickness as the lower bout. Of course I forgot to take any photos of that.
I bevelled the back in the waist, tapering the bevel right up to the end of the upper horn. The bevel doesnt show up very well in the photo. The bevel was cut using spoke-shaves and sanding sticks and was made so the edge of the body is the same thickness from the widest part of the lower bout to the end of the upper horn.
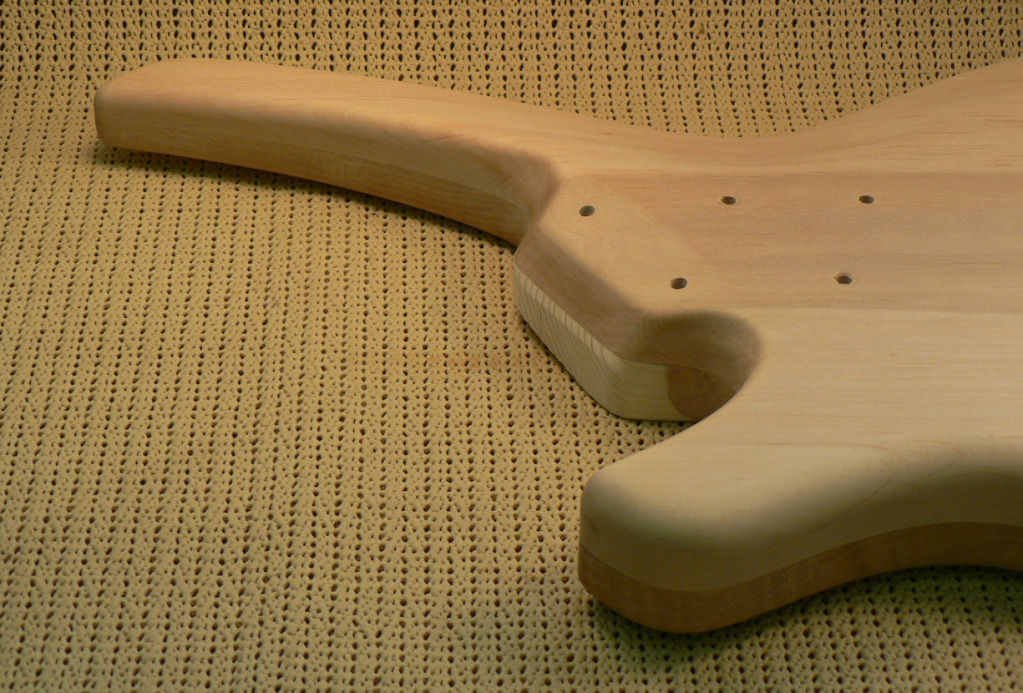
The edge was the rounded using spoke-shaves, sanding sticks and cloth backed abrasive in the shoe-shine style to give this. The white thing in the neck pocket is a sacrificial block of wood which makes it easier to shape the area around the neck pocket without accidentally sanding or rasping the corners off.
After a lot more sanding the back now looks like this.

I seem to have let this thread stagnate a little. Sorry about that (and thanks for the kind words), Ill try to get me finger out and show some progress.
The bodys just about ready for finishing, so back to the neck. I like to use threaded inserts and machine screws to attach the neck. I know that woodscrews will hold a neck perfectly well, but I seem to be screwing and unscrewing quite a lot before finally getting the instrument finished, which isnt really a good idea with woodscrews.
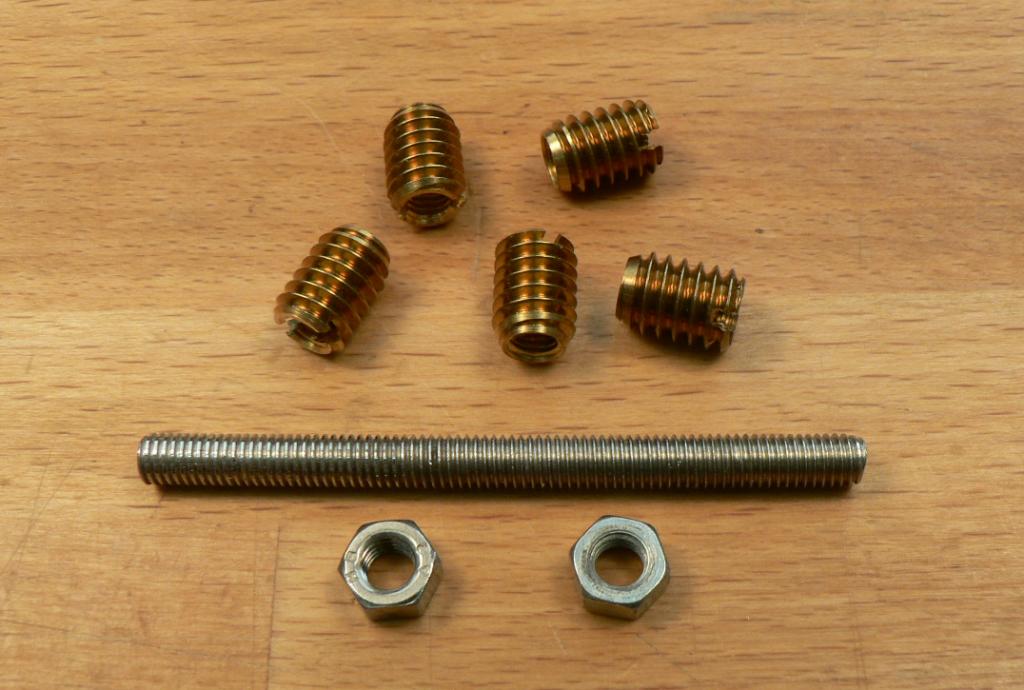
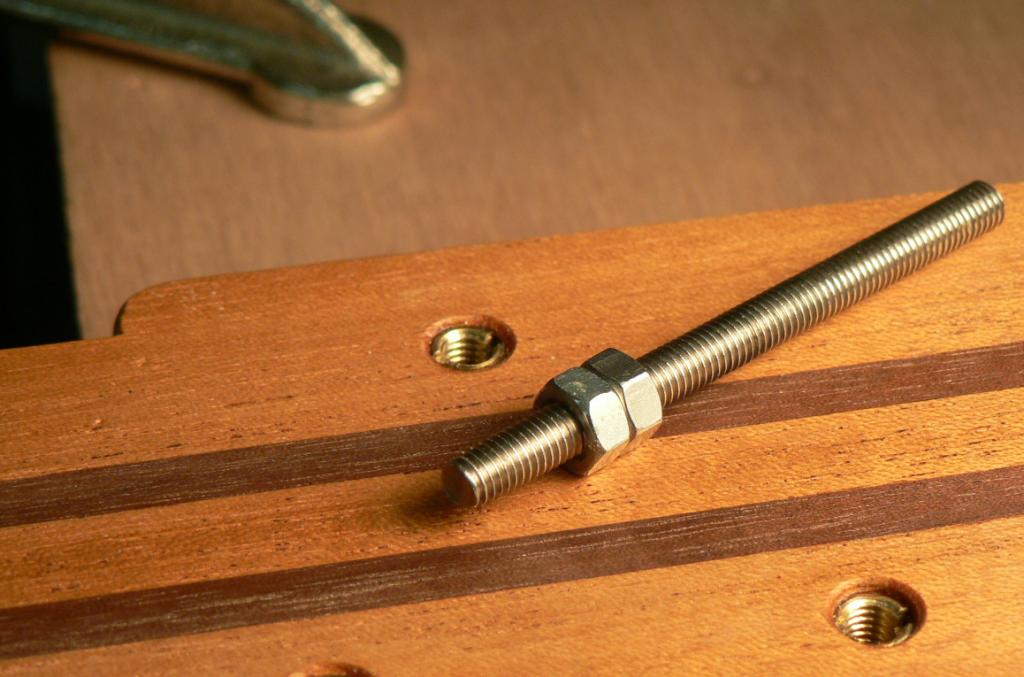
Some people seem to have problems installing threaded inserts so I thought Id show how I do it. These are the inserts I use, and to install them I use a piece of threaded rod (or a machine screw with the head cut off) and two nuts.
By the way, before installing the inserts in the neck, do a trial run on an off-cut of the same wood as the neck to determine what diameter of hole you need for the insert. For a relatively soft wood like mahogany it could be the root diameter of the thread on the outside of the insert, but for harder woods you may need to make it a bit bigger.
The first thing to do is to countersink the holes for the inserts. Make the outside diameter of the countersink at least as big as the outside diameter of the insert. This is to avoid chewing up the surface as the insert starts to screw into the wood.
Put the threaded rod into the chuck in the drill press and screw the two nuts onto it.
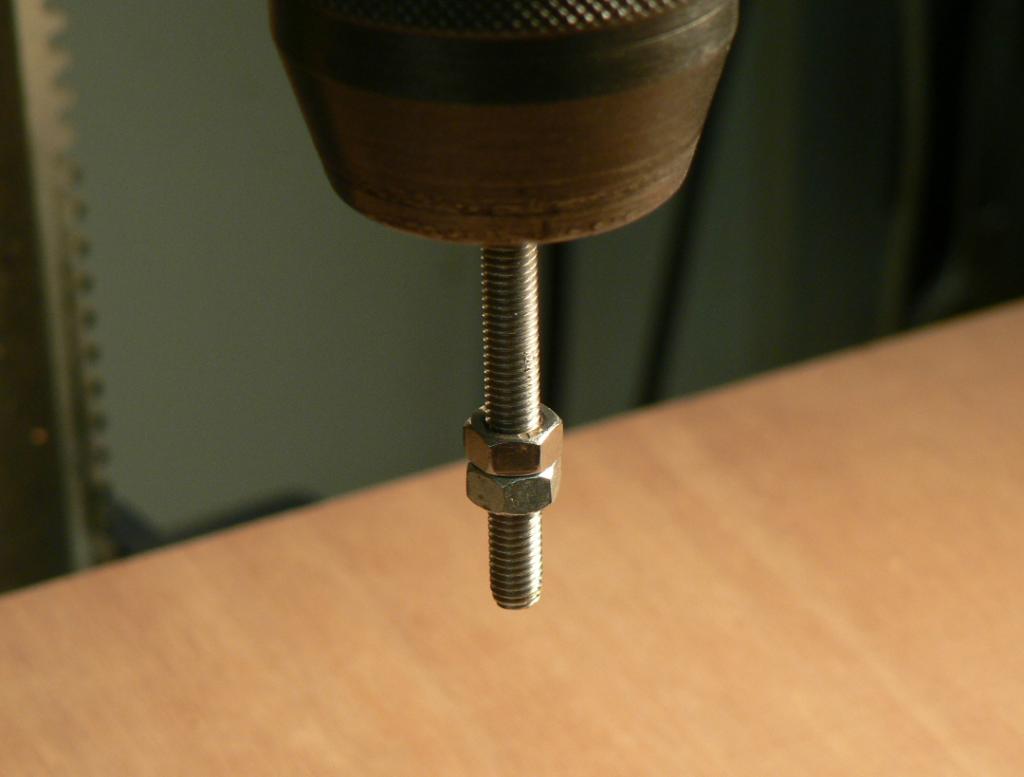
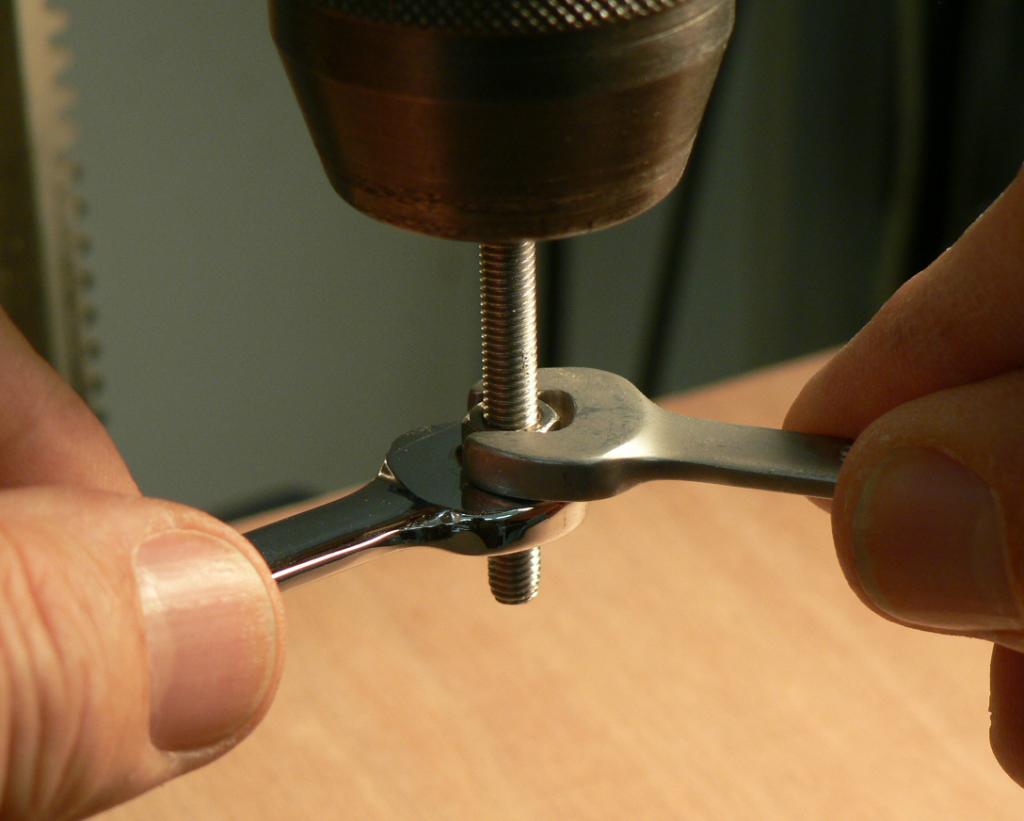
Tighten the two nuts against each other to block them on the threaded rod.
Now thread the insert onto the rod.
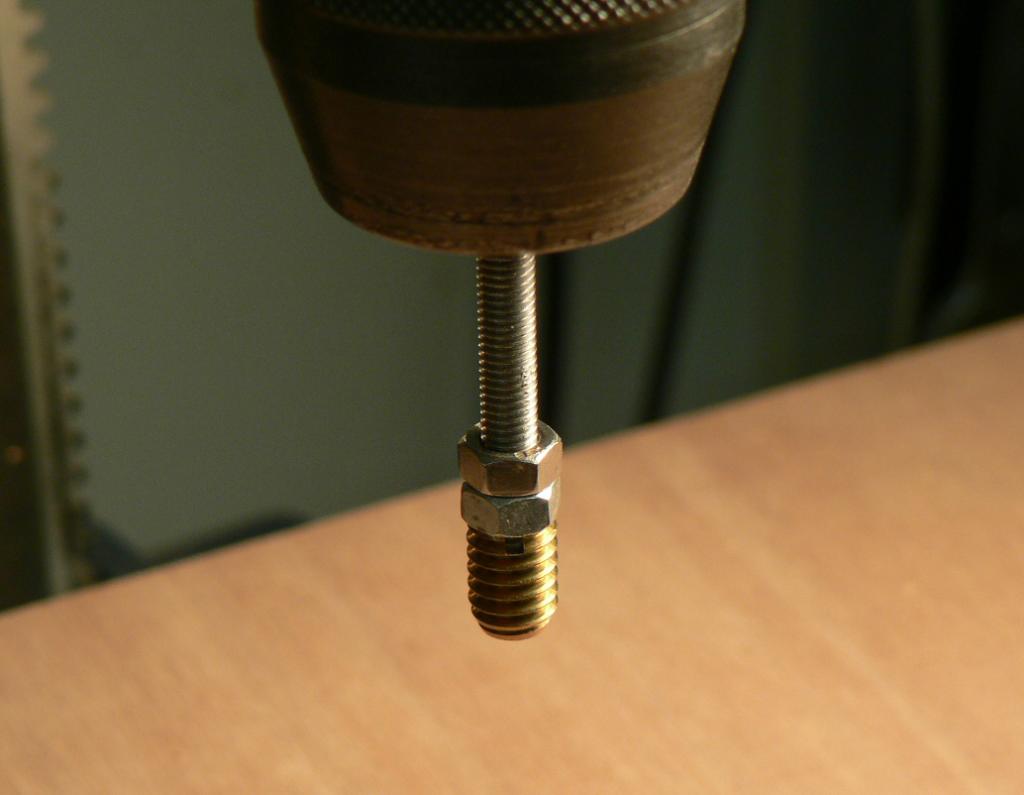
Bring the chuck down to the hole and apply downward pressure. How much pressure will depend on the wood and the hole size. This is why youre doing a trial run before attacking the neck. At the same time turn the chuck by hand and screw in the insert
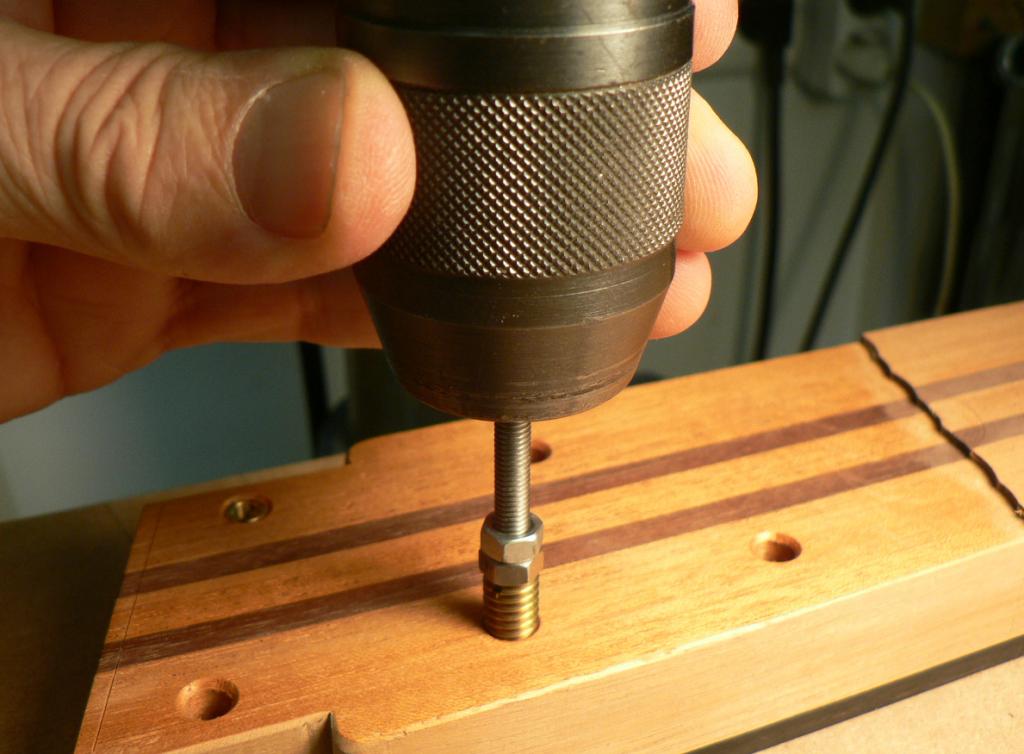
until its all the way in.
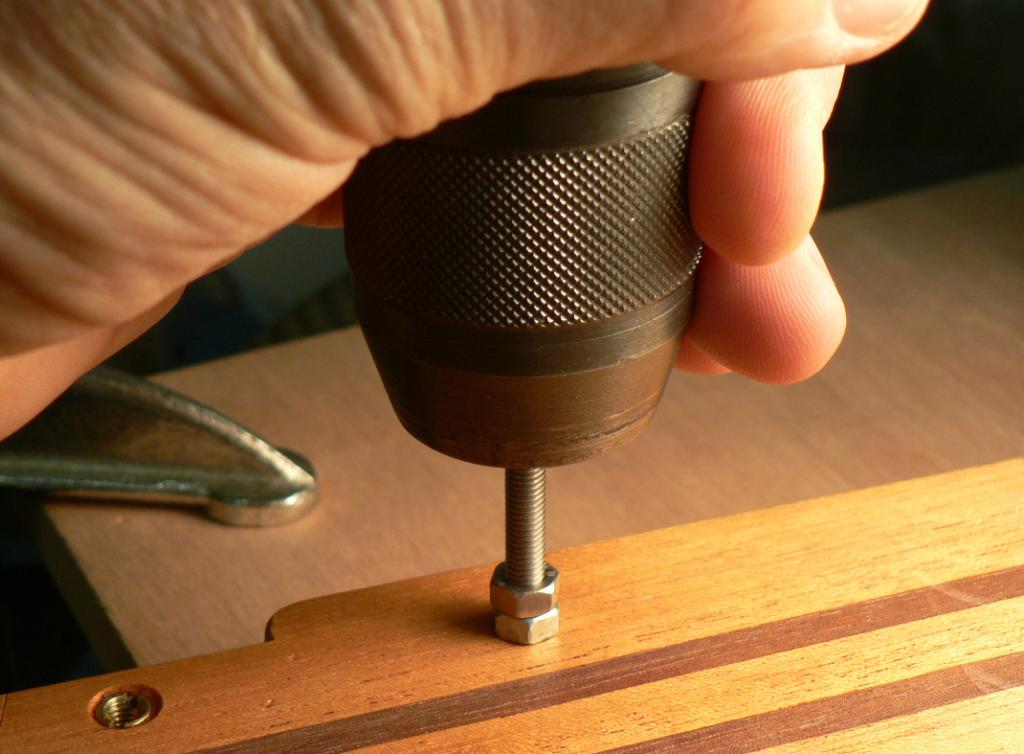
Now release the threaded rod from the chuck.
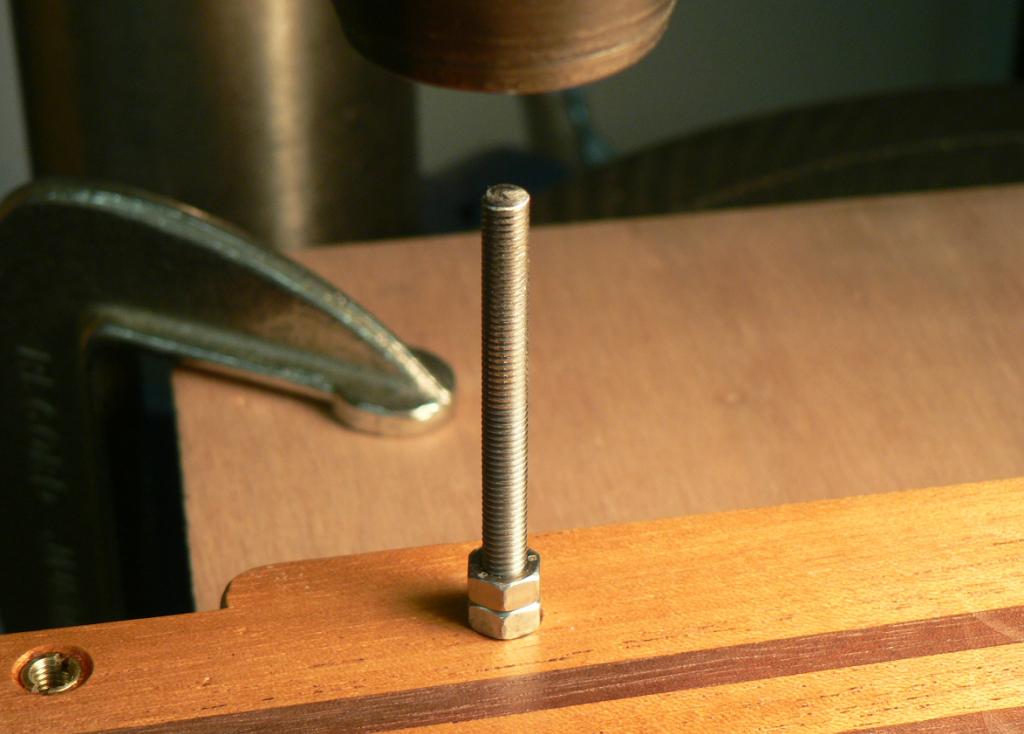
Unlock the nuts. Screwing in the insert will have tightened the rod and locknuts against the insert and locked everything up solid, but unlocking the nuts will release the rod.
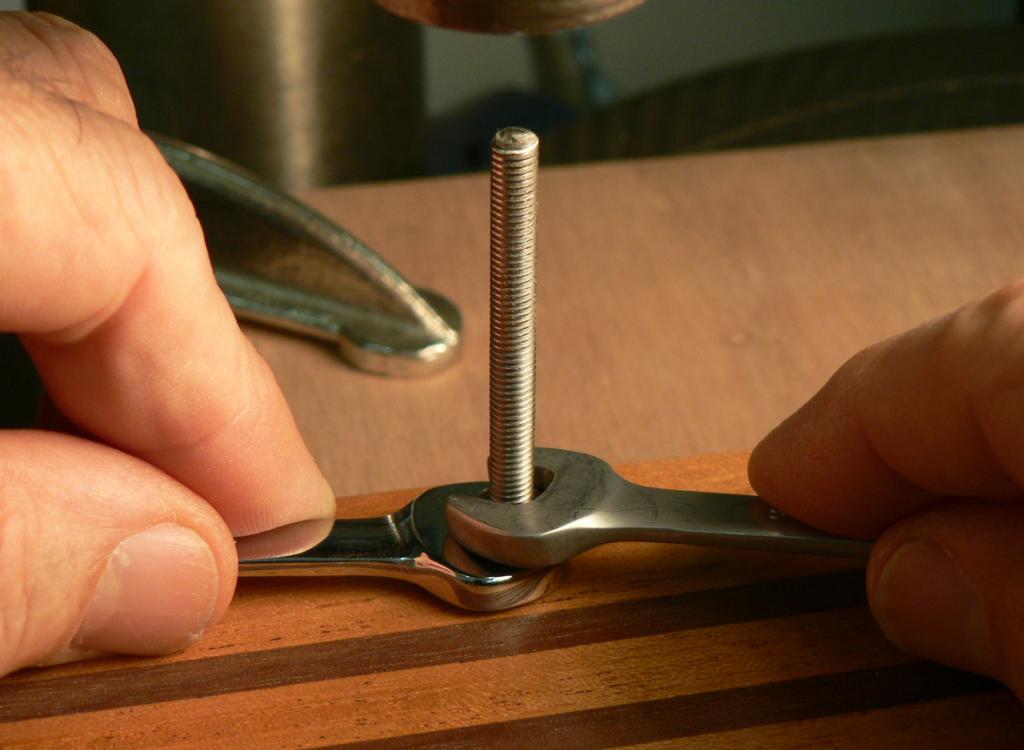
And unscrew the threaded rod. I then wick a few drops of thin CA between the insert and the wood and theyre never going to budge.
The bodys just about ready for finishing, so back to the neck. I like to use threaded inserts and machine screws to attach the neck. I know that woodscrews will hold a neck perfectly well, but I seem to be screwing and unscrewing quite a lot before finally getting the instrument finished, which isnt really a good idea with woodscrews.
Some people seem to have problems installing threaded inserts so I thought Id show how I do it. These are the inserts I use, and to install them I use a piece of threaded rod (or a machine screw with the head cut off) and two nuts.
By the way, before installing the inserts in the neck, do a trial run on an off-cut of the same wood as the neck to determine what diameter of hole you need for the insert. For a relatively soft wood like mahogany it could be the root diameter of the thread on the outside of the insert, but for harder woods you may need to make it a bit bigger.
The first thing to do is to countersink the holes for the inserts. Make the outside diameter of the countersink at least as big as the outside diameter of the insert. This is to avoid chewing up the surface as the insert starts to screw into the wood.
Put the threaded rod into the chuck in the drill press and screw the two nuts onto it.
Tighten the two nuts against each other to block them on the threaded rod.
Now thread the insert onto the rod.
Bring the chuck down to the hole and apply downward pressure. How much pressure will depend on the wood and the hole size. This is why youre doing a trial run before attacking the neck. At the same time turn the chuck by hand and screw in the insert
until its all the way in.
Now release the threaded rod from the chuck.
Unlock the nuts. Screwing in the insert will have tightened the rod and locknuts against the insert and locked everything up solid, but unlocking the nuts will release the rod.
And unscrew the threaded rod. I then wick a few drops of thin CA between the insert and the wood and theyre never going to budge.

Jazzdogg
Less barking, more wagging!
That's the same way I do it, except I add a fender washer between the nuts, which makes turning the nuts a little faster and easier.

SaintMez
Commercial User
- Jan 3, 2010
- 428
- 59
- Disclosures
- Blood Brothers Guitars - Luthier, Porter Guitars - Contractor
Dave you should author a book. Your posts have greater content and much better photos than any of the books I've read. You offer more informative "How To" instruction than anything that's currently published on the subject. Just a thought.

That looks like a great method. It seems the threaded inserts have divots for a flat head screw driver to drive the inserts in. Would it work it one used a screw driver like thing to insert these. I have a drill press and can do it by this method, but i'm just curious whether those divots in the inserts are for hand screwing them in..

Hopkins
Commercial User
That looks like a great method. It seems the threaded inserts have divots for a flat head screw driver to drive the inserts in. Would it work it one used a screw driver like thing to insert these. I have a drill press and can do it by this method, but i'm just curious whether those divots in the inserts are for hand screwing them in..
Maybe into something made of soft material. But I tried it the first time I used them, and the soft brass broke right off when threading them into maple.
Maybe into something made of soft material. But I tried it the first time I used them, and the soft brass broke right off when threading them into maple.
I've experienced exactly the same thing trying to unscrew one. I now think that the inserts are meant to go in 'slot first' and the slot turns the first couple of threads into a sort of tap to help the insert cut its way into the wood.

- Aug 15, 2011
- 571
- 171
- Disclosures
- Owner/Luthier:RoseBud Basses & Guitars LLC
There is actually a fancy tool intended to insert the threaded inserts...

I haven't been able to justify the $25.00 bucks it takes to buy one when you can do what Dave has. Nice Job Dave!
I haven't been able to justify the $25.00 bucks it takes to buy one when you can do what Dave has. Nice Job Dave!

You should use the drill press.That looks like a great method. It seems the threaded inserts have divots for a flat head screw driver to drive the inserts in. Would it work it one used a screw driver like thing to insert these. I have a drill press and can do it by this method, but i'm just curious whether those divots in the inserts are for hand screwing them in..
The slots are there to apply torque to screw it in, but not with a screwdriver. The official insertion tool for these has a smooth smaller-diameter cylinder that slips into the insert to guide it and keep it aligned; then it steps wider to a larger diameter to apply downward force. Just below the step (in the small-dia part) it is cross-drilled, and a thin roll pin is inserted. The roll pin sticks out a bit on each end, and engages the slots in the insert to provide driving torque.
In this way it does the same job as the allthread-and two-nuts tool, it just can be used much faster.


