

Enjoy the benefits of a premium membership!
Upgrade Account
-
TalkBass has been independent since 1998. Add your voice.
Create a free account to reply to discussions, view embedded media, and browse with fewer display ads.
Join free Log in
Want zero display ads or expanded classifieds tools? Compare plans.
You are using an out of date browser. It may not display this or other websites correctly.
You should upgrade or use an alternative browser.
You should upgrade or use an alternative browser.
5-String Fanned Hybrid Headless
- Thread starter Dave Higham
- Start date
More options
Who Replied? Thanks for the info guys, it all makes sense now.
I know I’ve slowed down a lot with this thread. One reason is that I’m up to my ears in drywall (plasterboard) and insulation at the moment; the other is that the new improved Photobucket is such a load of crap that I’ve abandoned attempts to add photos several times. Anyhow, I’ll give it another try.
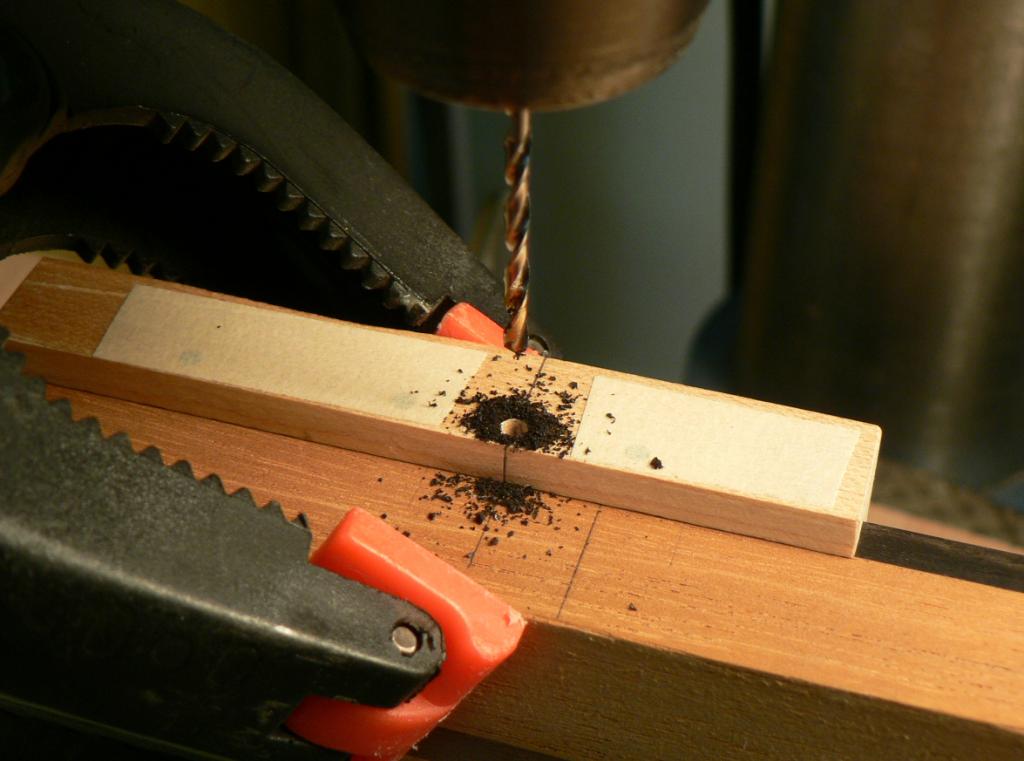
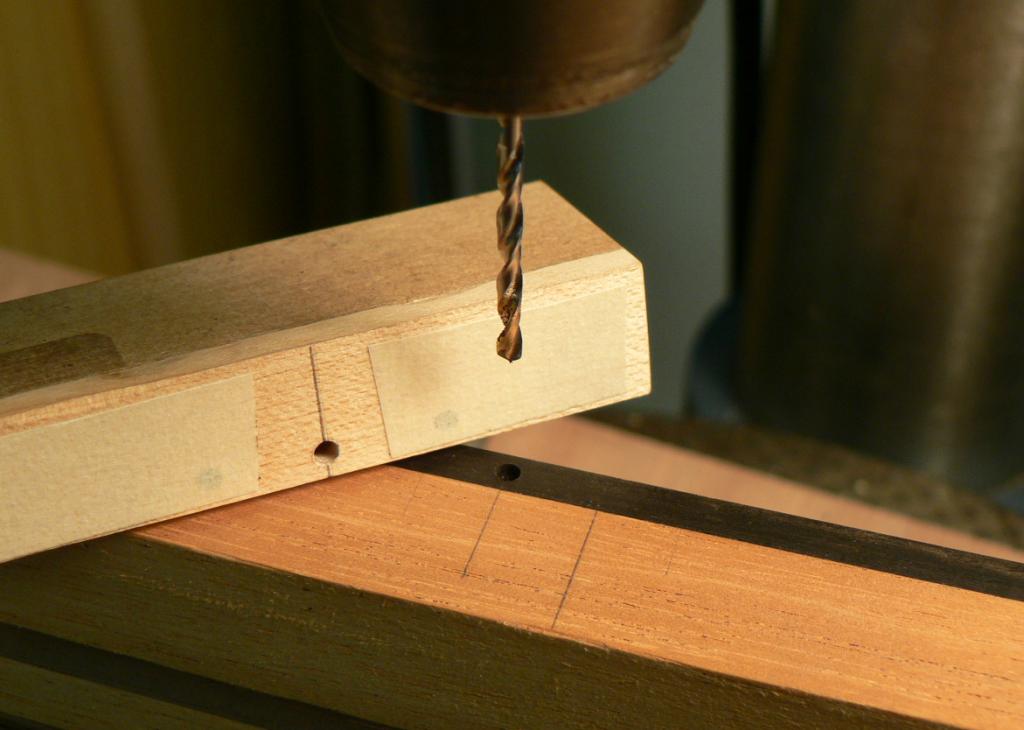
I installed some pearl dots in the edge of the fingerboard. A simple drill guide helps to get them all the same distance from the edge.
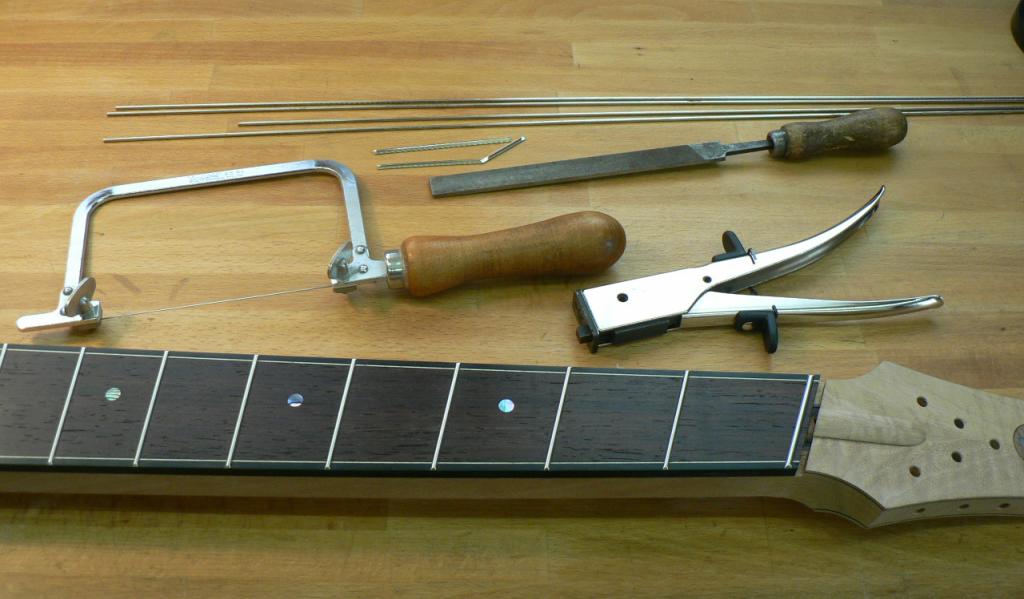
Fitted the frets. No ‘in progress’ photos but here they are installed with the tools I used to do it. Thanks to Rob Habraken for the tip about the tang nipper. By the way, they’re banjo frets. I thought that if Leland Sklar and Sheldon Dingwall like them combined with fanned frets, I might too. We shall see.
The zero fret is a jumbo one. That should automatically give me the right amount of string clearance at the first fret.
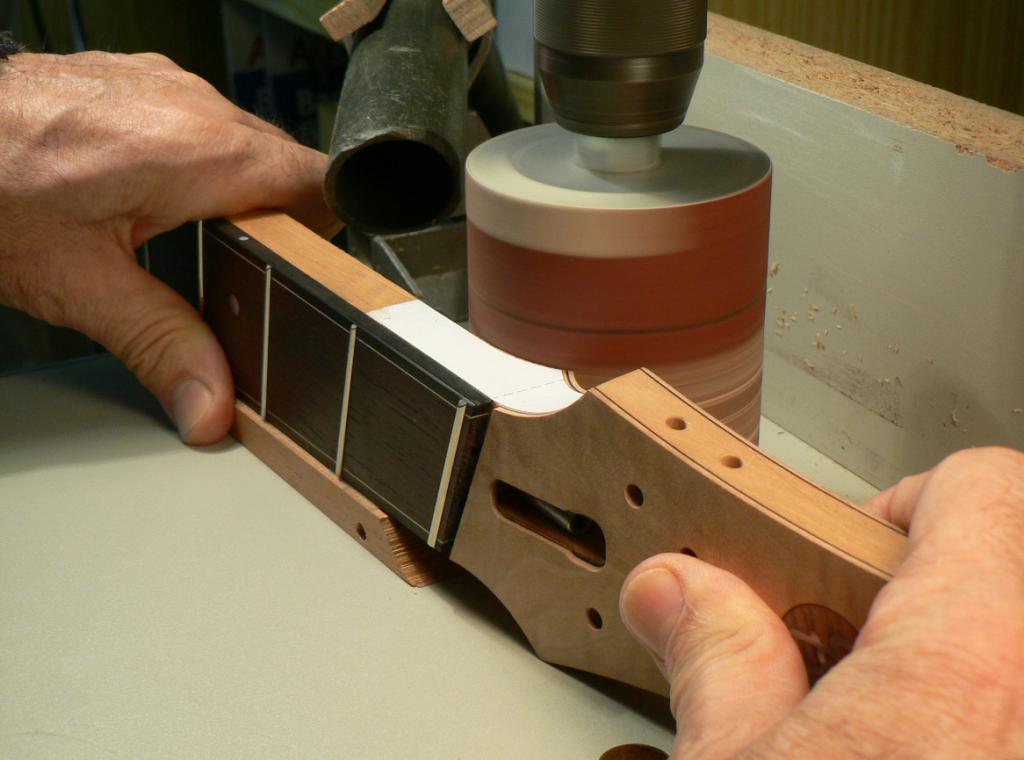
Now to shape the neck, starting with the curve of the volute on the makeshift spindle sander.
Here’s the result.
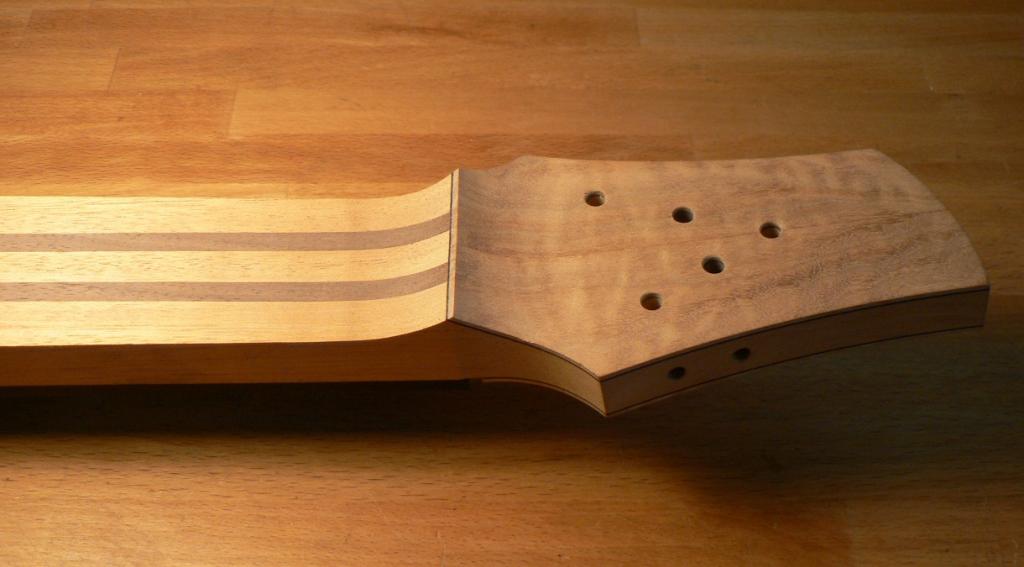
On to shaping the neck proper. I do this by drawing a couple of cross sections with facets at 45° and transferring the facet dimensions to the neck. You can just make out the pencil lines drawn on the neck in this photo. I bought a couple of micro-plane rasps and I really like them. You just have to stroke the wood with them and they cut beautifully. Here I’ve cut a facet between the two pencil lines.
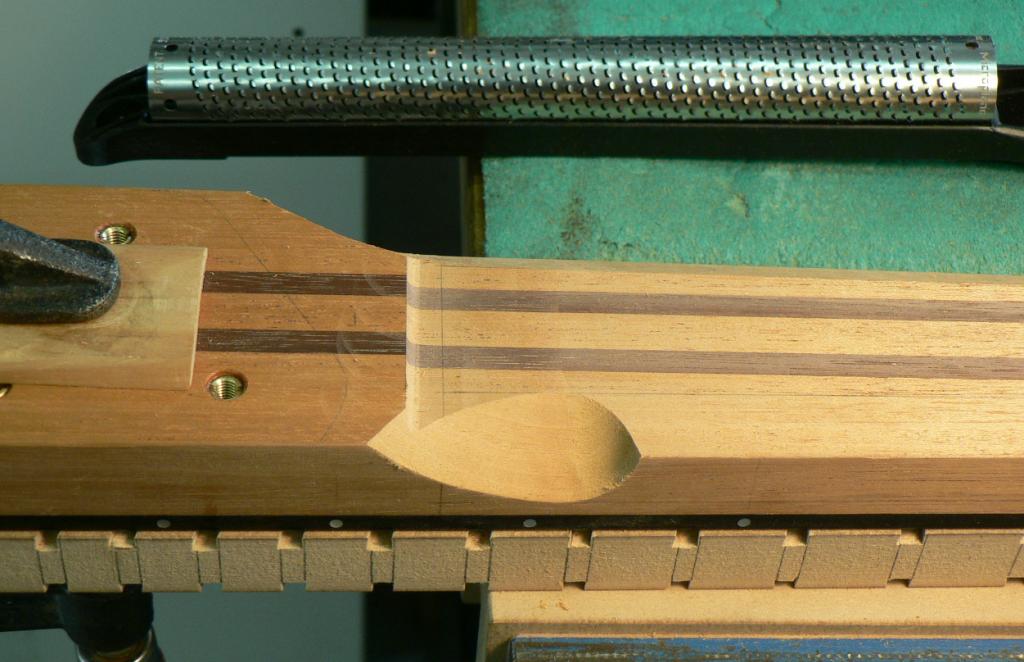
Then I cut one at the other end.
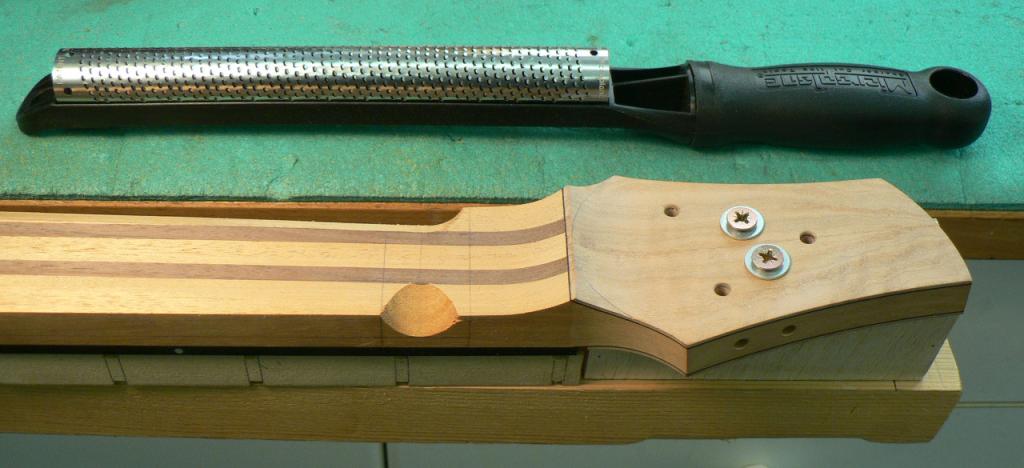
Then join them up.
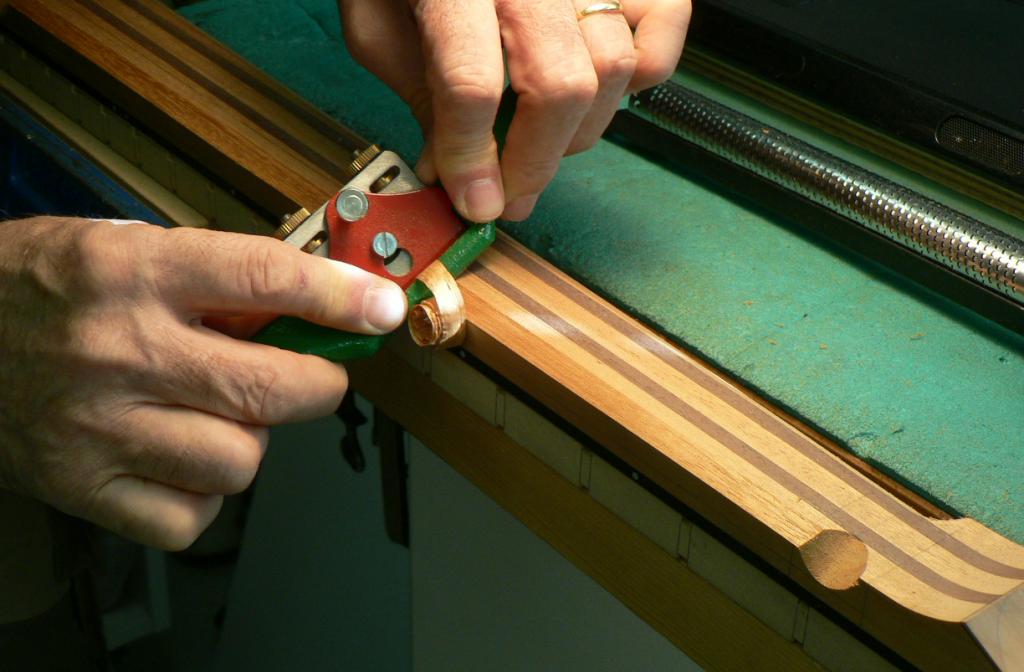
I carry on like this, cutting smaller facets and finish up blending them together with sanding boards and abrasive strip in the ‘shoe-shine’ fashion. Then I blend the neck profile into the volute and here’s the result.
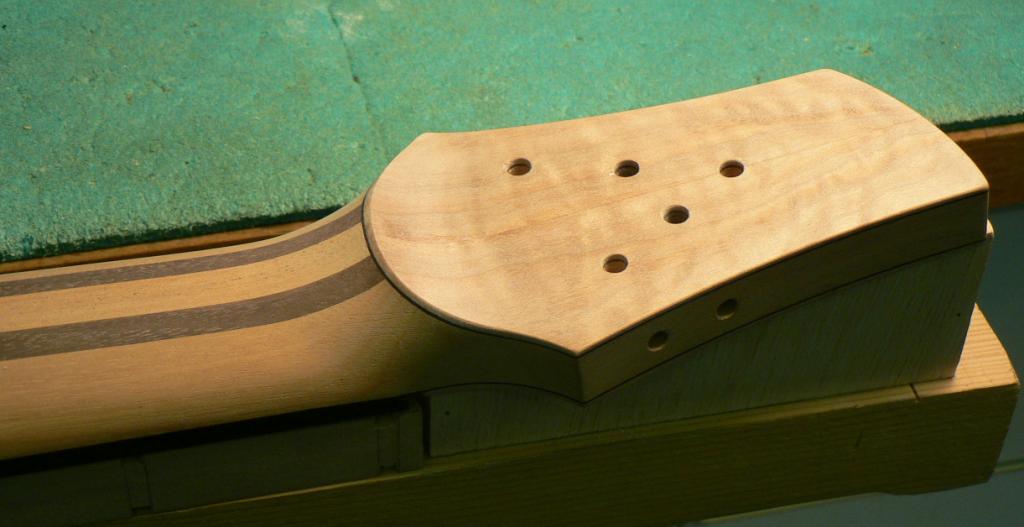
Here’s the heel finished.
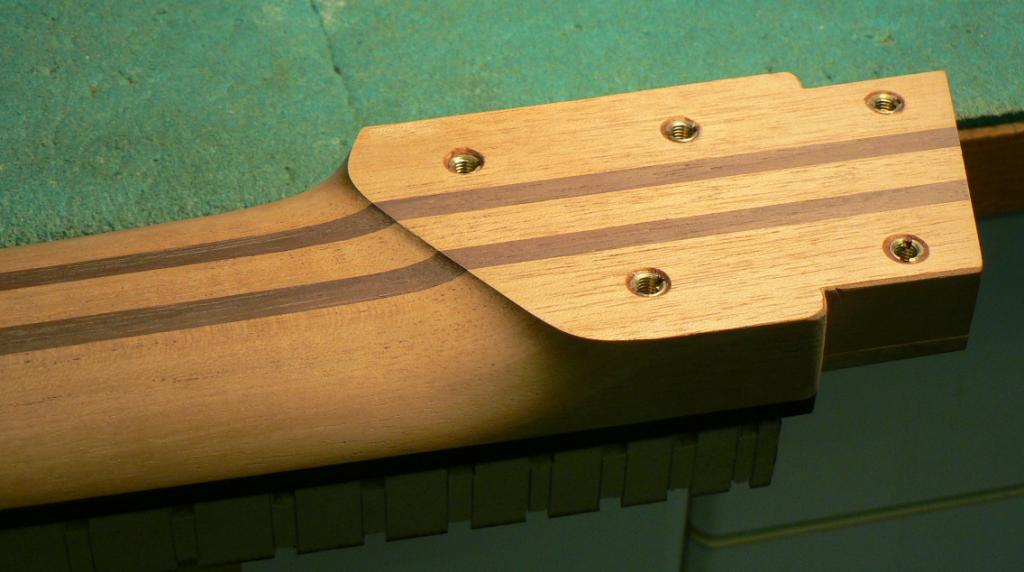
That nice crisp edge was formed by fitting the neck to the body and blending the two together.
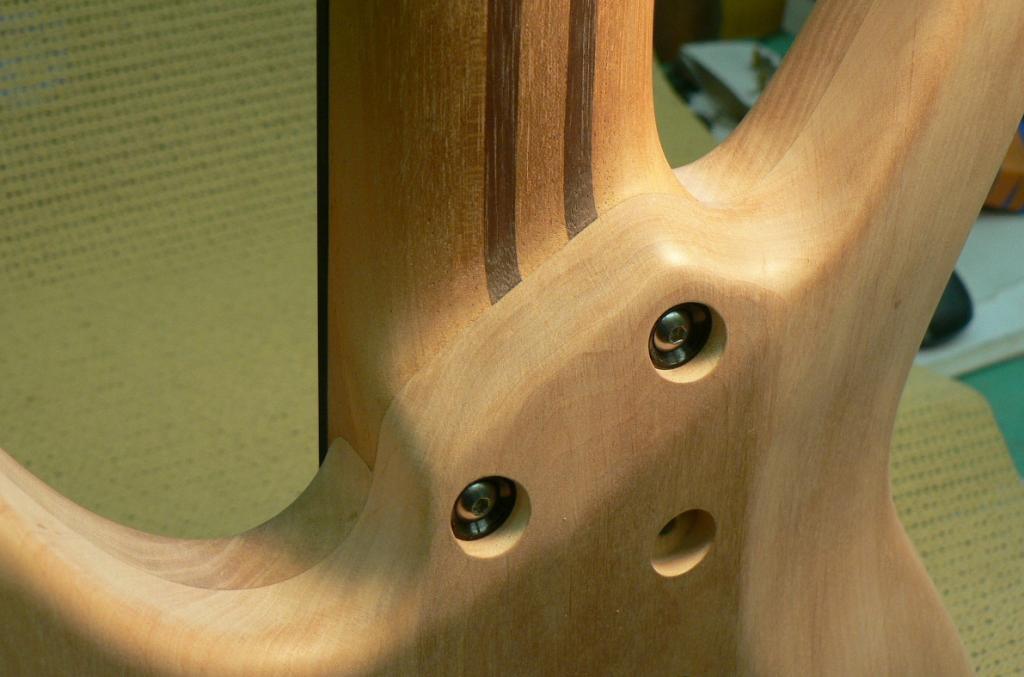
Fingers crossed; it seems to have worked this time. Photobucket will now arrange your photos in an album in the order of 'oldest first' or 'newest first' but not 'File name' so the last batch of photos I uploaded are all mixed up. As the French say, "Why make things easy when you can make them complicated?".
I installed some pearl dots in the edge of the fingerboard. A simple drill guide helps to get them all the same distance from the edge.
Fitted the frets. No ‘in progress’ photos but here they are installed with the tools I used to do it. Thanks to Rob Habraken for the tip about the tang nipper. By the way, they’re banjo frets. I thought that if Leland Sklar and Sheldon Dingwall like them combined with fanned frets, I might too. We shall see.
The zero fret is a jumbo one. That should automatically give me the right amount of string clearance at the first fret.
Now to shape the neck, starting with the curve of the volute on the makeshift spindle sander.
Here’s the result.
On to shaping the neck proper. I do this by drawing a couple of cross sections with facets at 45° and transferring the facet dimensions to the neck. You can just make out the pencil lines drawn on the neck in this photo. I bought a couple of micro-plane rasps and I really like them. You just have to stroke the wood with them and they cut beautifully. Here I’ve cut a facet between the two pencil lines.
Then I cut one at the other end.
Then join them up.
I carry on like this, cutting smaller facets and finish up blending them together with sanding boards and abrasive strip in the ‘shoe-shine’ fashion. Then I blend the neck profile into the volute and here’s the result.
Here’s the heel finished.
That nice crisp edge was formed by fitting the neck to the body and blending the two together.
Fingers crossed; it seems to have worked this time. Photobucket will now arrange your photos in an album in the order of 'oldest first' or 'newest first' but not 'File name' so the last batch of photos I uploaded are all mixed up. As the French say, "Why make things easy when you can make them complicated?".



Wow.. I am so amazingly impressed by your work! Great you used the fret tang nipper trick  . I also like the idea of the spindle sander for the volute... going to copy that I think. And your way of shaping the neck, starting with those facets also appeals to me. Time to plan a new build.. lol.
. I also like the idea of the spindle sander for the volute... going to copy that I think. And your way of shaping the neck, starting with those facets also appeals to me. Time to plan a new build.. lol.
That neck joint DOES look great! If it weren't for the screws in the back I would think it was a neck-thru...


Sorry guys, I've been busy with other things. Boring things like drywall insulation, etc.
It ain't finished yet. There are a few more photos to show but I spent quite a long time putting coats of Tru-oil on it and then left it to harden before rubbing down and buffing up, which I haven't done yet. Then I have to assemble all the bits.
Thanks for the comments. I hope to get back to it soon.
It ain't finished yet. There are a few more photos to show but I spent quite a long time putting coats of Tru-oil on it and then left it to harden before rubbing down and buffing up, which I haven't done yet. Then I have to assemble all the bits.
Thanks for the comments. I hope to get back to it soon.

Hopkins
Commercial User
OK heres a little more. This was done a while ago but I didnt get around to writing it up.
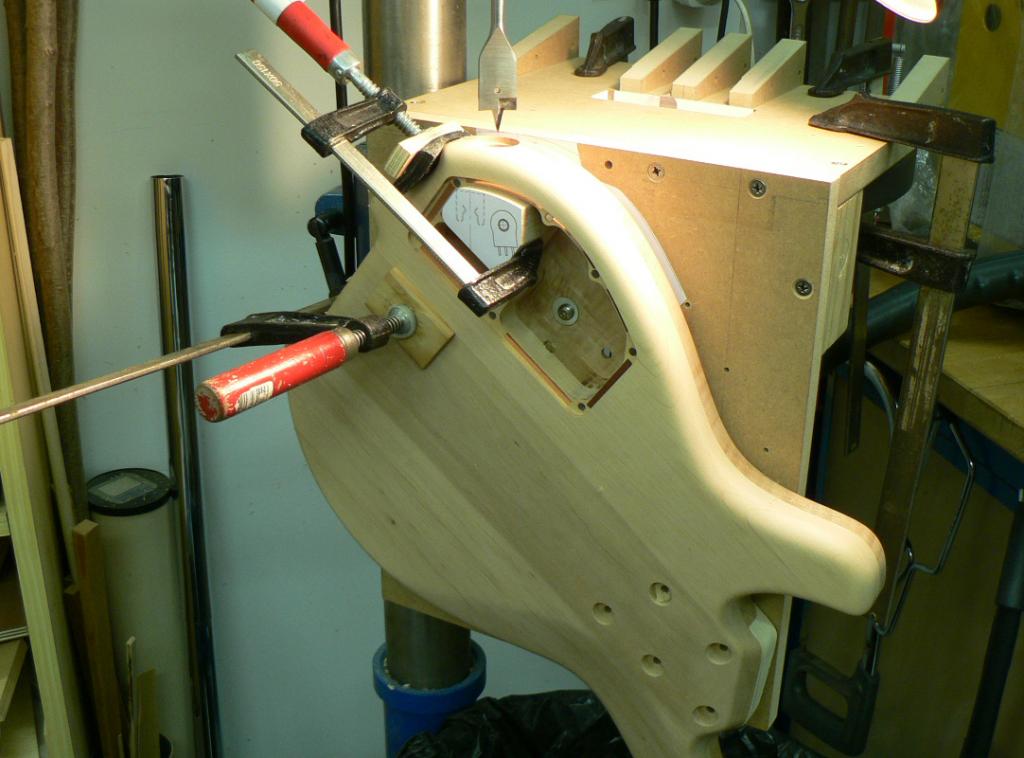
One of the last things to do on the body was to drill the hole for the jack socket and its a big scary hole drilled in an awkward place. Whats more, I couldnt find a Forstner bit of the right diameter so I had to use spade bits. The way I did it was to build a fixture using the routing templates that I wont need again (waste not, want not) that I could clamp to the drill press table like so.
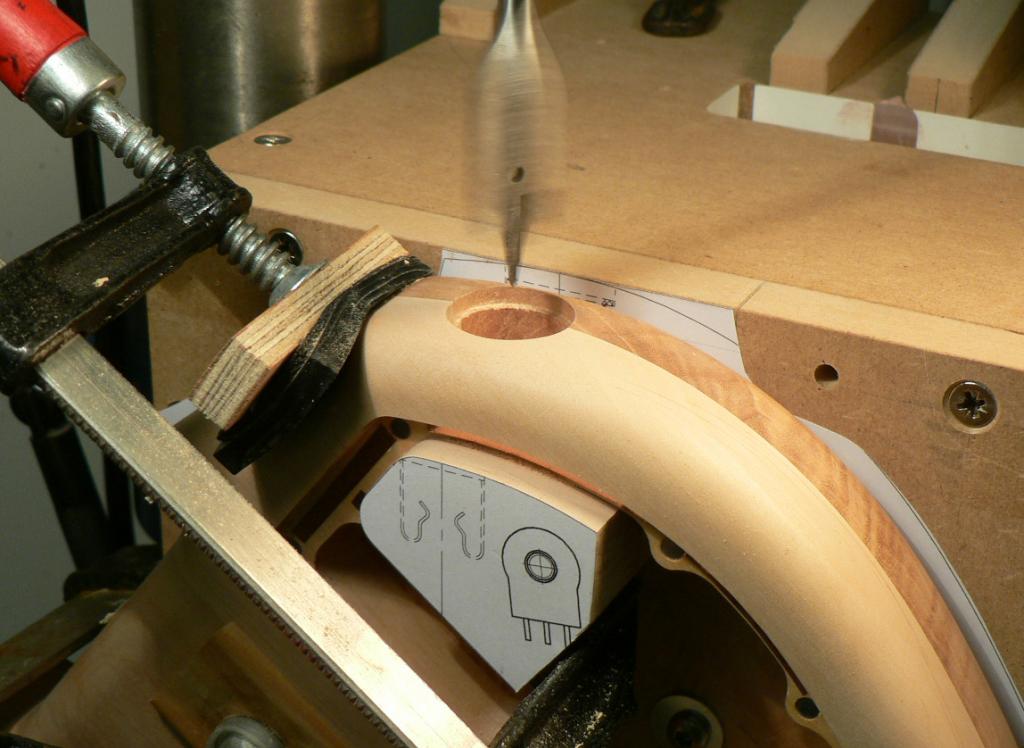
I also shaped a caul to clamp inside the cavity to avoid break out as much as possible. Lowering that whopping spade bit was a somewhat sphincter-clenching moment but it turned out OK.
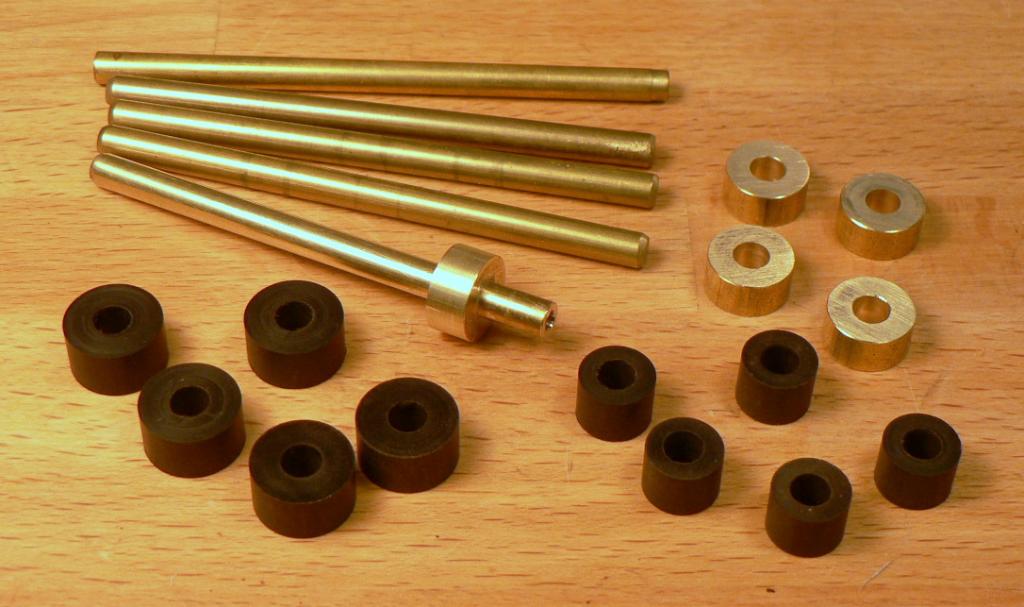
I now had to make a few odds and ends to finish off. First the ferrules for anchoring the strings up at the sharp end. I started out with some pieces of 5mm brass rod and cut off some short pieces of 12mm rod, 6mm long with a 5mm hole through them. I also made some similar ebony pieces. Here they all are.
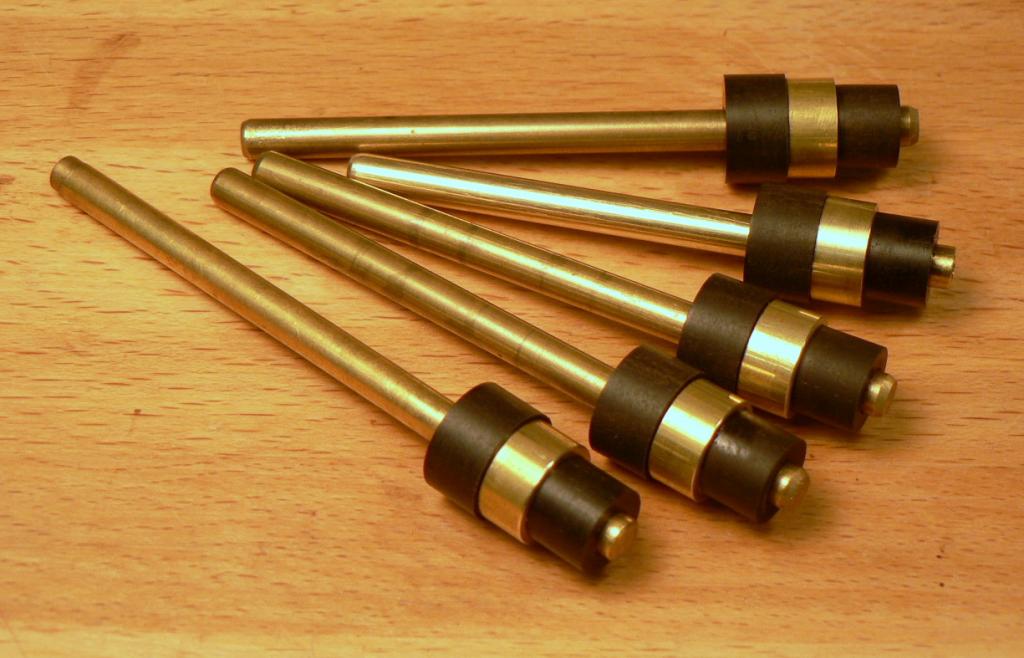
I then slid the pieces with the holes in onto the 5mm rods and super-glued them all together! Not really what an engineer would have done but this way was much easier than turning a solid brass core and the ebony pieces would still have been glued on.
I put them in the lathe and bored a 2.5mm hole through and then parted them off and chamfered each end of the hole.
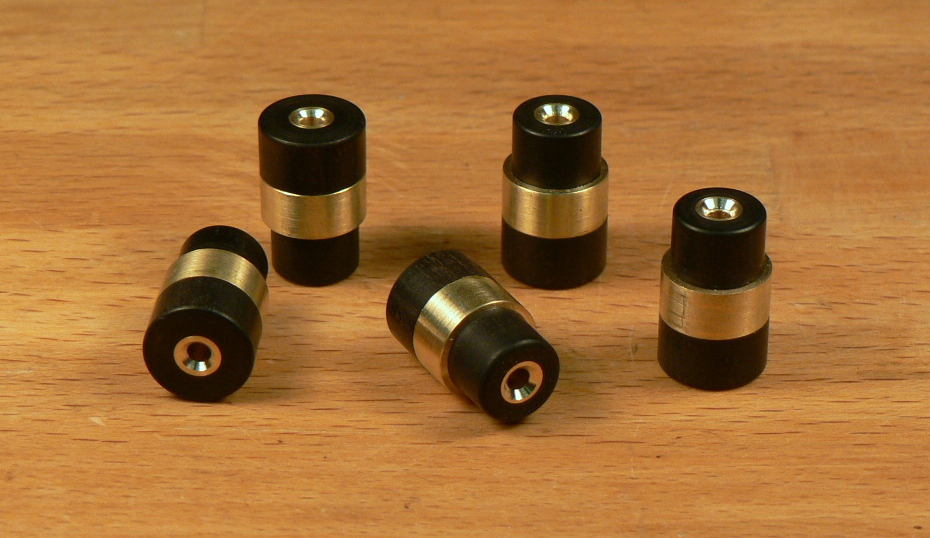
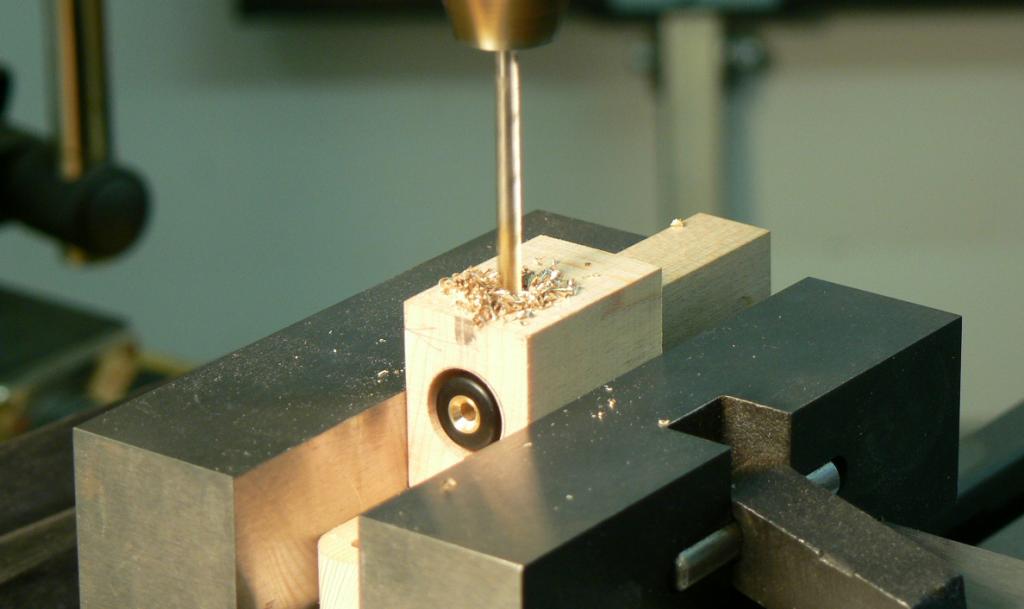
I drilled and tapped a hole for a grub-screw in each one using a little wooden fixture as before.
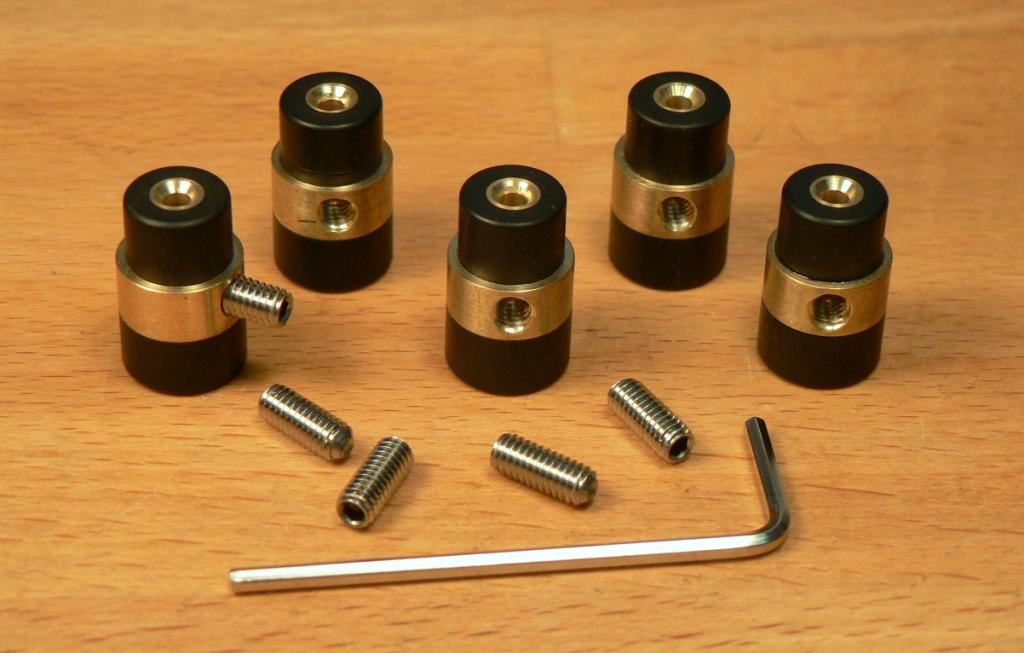
Here they are all finished.
By the way, does anyone else find the new 'improved' Photobucket a total load of crap? Not only does it mix all the photos up and refuse to put them in the order of their file names, copying the link to put them on the forum is now a real PITA. On the old version I could click on the link and it was copied; now I can't even double click on it. I have to swipe the link (which is slow) and then press Control-c to copy it. Is it just me?
One of the last things to do on the body was to drill the hole for the jack socket and its a big scary hole drilled in an awkward place. Whats more, I couldnt find a Forstner bit of the right diameter so I had to use spade bits. The way I did it was to build a fixture using the routing templates that I wont need again (waste not, want not) that I could clamp to the drill press table like so.
I also shaped a caul to clamp inside the cavity to avoid break out as much as possible. Lowering that whopping spade bit was a somewhat sphincter-clenching moment but it turned out OK.
I now had to make a few odds and ends to finish off. First the ferrules for anchoring the strings up at the sharp end. I started out with some pieces of 5mm brass rod and cut off some short pieces of 12mm rod, 6mm long with a 5mm hole through them. I also made some similar ebony pieces. Here they all are.
I then slid the pieces with the holes in onto the 5mm rods and super-glued them all together! Not really what an engineer would have done but this way was much easier than turning a solid brass core and the ebony pieces would still have been glued on.
I put them in the lathe and bored a 2.5mm hole through and then parted them off and chamfered each end of the hole.
I drilled and tapped a hole for a grub-screw in each one using a little wooden fixture as before.
Here they are all finished.
By the way, does anyone else find the new 'improved' Photobucket a total load of crap? Not only does it mix all the photos up and refuse to put them in the order of their file names, copying the link to put them on the forum is now a real PITA. On the old version I could click on the link and it was copied; now I can't even double click on it. I have to swipe the link (which is slow) and then press Control-c to copy it. Is it just me?

There is actually a fancy tool intended to insert the threaded inserts...
View attachment 317023
I haven't been able to justify the $25.00 bucks it takes to buy one when you can do what Dave has. Nice Job Dave!
Where do I find one of those. I use the locking nut method as well.
Truly excellent work Dave.

Does McMaster-Carr ship to Europe?Where do I find one of those. I use the locking nut method as well.
Truly excellent work Dave.
This is the url for inserts and their drivers, assuming that it's not influenced by my immediately prior browser history.
http://www.mcmaster.com/#catalog/119/3263
By the way, does anyone else find the new 'improved' Photobucket a total load of crap? Not only does it mix all the photos up and refuse to put them in the order of their file names, copying the link to put them on the forum is now a real PITA. On the old version I could click on the link and it was copied; now I can't even double click on it. I have to swipe the link (which is slow) and then press Control-c to copy it. Is it just me?
I don't like the new pages either, but the click once to copy link does work for me. I think I had to allow javascript on the site to get it working.
Where do I find one of those. I use the locking nut method as well.
Truly excellent work Dave.
Thanks Alan. Is this any help?
Invalid Link Removed
Edit. I note that when you click on the link you get the French version. I think Google has done that because I'm in France. Tappex is, of course, British.

Very, very nice, Dave. Great craftsmanship. A pleasure to watch
What screw size are you using? Mine are M5. I'm thinking of increasing the size to M6. But it might be an overkill.
I absolutely hate the new Photobucket. What was easy then is either not available any longer or I have yet to figure out how it works. But the one click copy works with me too. Probably it's like PJ says.
What screw size are you using? Mine are M5. I'm thinking of increasing the size to M6. But it might be an overkill.
I absolutely hate the new Photobucket. What was easy then is either not available any longer or I have yet to figure out how it works. But the one click copy works with me too. Probably it's like PJ says.
Thanks Maurizio. I use M5 too and I also think M6 would be overkill.
On the Photobucket thing. On the old version, the image code was shown under the thumbnail photos in all my libraries and one click on the code copied it.
On the new version you have to choose the 'Easy linking mode' (yeah, right!) for the codes and the file name to be shown and, until yesterday, I could copy the code by double clicking on it to highlight it and pressing Control-c.
Now, double clicking doesn't work any more and I have to swipe it and press Control-c. However, if I click on the thumbnail and open that photo in a new window, the one-click copy of the image code works. But that's still another operation and I then have to back-pedal to find the next photo.
In the 'Support' section it lists 'Sort by file name' as one of the options, but it isn't.
On the Photobucket thing. On the old version, the image code was shown under the thumbnail photos in all my libraries and one click on the code copied it.
On the new version you have to choose the 'Easy linking mode' (yeah, right!) for the codes and the file name to be shown and, until yesterday, I could copy the code by double clicking on it to highlight it and pressing Control-c.
Now, double clicking doesn't work any more and I have to swipe it and press Control-c. However, if I click on the thumbnail and open that photo in a new window, the one-click copy of the image code works. But that's still another operation and I then have to back-pedal to find the next photo.
In the 'Support' section it lists 'Sort by file name' as one of the options, but it isn't.
On the new version, be careful of removing photos. Previously you couldn't re-organize them folder/directory-wise - but we've all figured that out by now. But now, if you upload a photo, upload some more, and then delete one of the first group, I think PB is re-using filenames, and it may result in weirdness or failure. They're using some stupid naming system like photo-1 photo2 photo-3 (instead of photo234879 photo234880 photo234881 e.g.)within each folder, and they re-use numbers if you delete.

It should probably be noted that photobucket isn't the only game in town. I'm squarely in the anti-photobucket camp, partly because it is such a nightmare on mobile platforms. But I can't advocate for Flickr either. My favorite is probably Imgur, especially for anonymous hosting (just drag+ drop, hit upload, copy code, no account needed), and there are a number of mobile apps. But I don't know how it compares on things like ownership rights.


