• TalkBass has been independent since 1998. Add your voice.
    Create a free account to reply to discussions, view embedded media, and browse with fewer display ads.
    Join freeLog in
    Want zero display ads or expanded classifieds tools? Compare plans.

Another DIY cab thread. Loud, Small, and Cheap. 22 pounds that pounds.

(The bracing on the cut list may need to be adjusted length wise because it will sit on top of the port shelf instead on running all the way to the bottom panel)

Yeah, I think I just marked the braces on the cut list longer than needed. They're easy to chop down to reach only to the top of the port shelf.

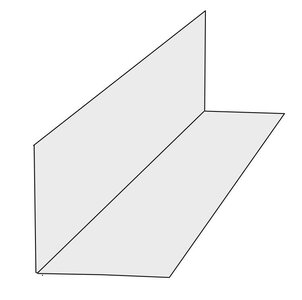
I forget how much assembly detail I gave earlier. I built a right-angle jig from fa couple pieces of scrap 1x6. This makes it easy to glue a pair of panels. Lay down some waxed paper to keep the PLPremium from gluing everything to the jig. Then clamp one panel to the jig. Add glue and clamp the second panel in place.

See the picture for a sketch of the jig.
 

Attachments

  • jig.jpg
    jig.jpg
    13.8 KB · Views: 136
With the cut list, one really shouldn't need "plans". With a cab like this, you can assemble it any order as long as you put the right panels the right way. You can start at the top or bottom or make a shell of the sides first.

If you have any specific questions about the assembly, feel free to ask.


(The bracing on the cut list may need to be adjusted length wise because it will sit on top of the port shelf instead on running all the way to the bottom panel)
The main question is how the heck do you keep the baffle square when gluing w/o any bracing?
 
I typically Use a 23 gauge pin nailer when assembling cabs that get textured paint or any type of covering.
Sometimes I will cut wood strips the same dimensions as the amount the baffle gets recessed to us as temporary spacers. These get used as straight edges to draw where the thickness of the wood stops on the opposite side so you know exactly where the nails go and use the same technique to draw lines that your pieces start and or end at so your not guessing where the glue goes. Line it up and shoot it.

A couple of pre drilled screws would also work, just remember that the holes may need to be filled prior to finishing.

If you don't have a pin nailer or any way to drill for screws, clamps are your best bet. There are a ton of styles and methods for using clamps.

PL, Gorilla glue or some other type of urethane glue is what's usually recommenced for cab construction because it holds great and expands which will fill small gaps. The adhesive I use is very thick and sticky so the pieces don't slide around nearly as much as they would if it was regular yellow wood glue.
 
The main question is how the heck do you keep the baffle square when gluing w/o any bracing?

I have a couple blocks cut from leftover 4x4 posts. I verified the 90-degree faces and marked them. Clamp the blocks to the bottom panel, then apply glue to the baffle and clamp it to the blocks, in contact with the bottom panel. Remember the wax paper so the blocks can be removed!

And I also have a pin nailer, which helps keep the parts together till the PL Premium cures. No need for fasteners at all, but the pins are a great help.

I don't have any of those long cabinet-making clamps. The picture shows how I think I did this. Clamp blocks to bottom panel. Apply glue to baffle and clamp to blocks.
 

Attachments

  • baffle.jpg
    baffle.jpg
    31 KB · Views: 138
Last edited:
It slipped my mind at the time of the build, but I remember @Rick Auricchio saying that his table saw wasn't capable of doing some of the wider cuts. I know the range is all over the map and there are a lot of table saws on the market that won't rip a whole sheet of plywood in half (24") and many that don't have a rip capacity over 10".
This is a cheap and easy solution to that. Here is an entry level table saw ($40 Craigslist find) that maxed out at 10" for cut width that I helped a buddy modify.
image1.JPG


Its simple. A 3/4" plywood surface with plywood edges and a ripped down 2x4 for the braces.
image2.JPG


A few screws go through the side of the table in to the new wood platform. Through bolting would work too.

image3.JPG


Instead of routing out a Chanel for the original (not square) rip fence, we decided a 24" clamp guide would work better and be useable through the whole width of the table

A similar style extension is also a great platform for a router as the same "Fence" can be used with it and it really doesn't claim much more shop space.
 
The screws on the under side of the table are staggered, and probably about 8 of them total. The rails for the out feed and side extension had to be removed during the installation. Its pretty sturdy, the table has very little flex before the opposite end lifts up when leaning on the wood extension, and it doesn't really move if I drag it around by the new extension. For real production work, something like the Incra or Delta T2 fence systems would be the way to go, but its just not that kind of project and its not getting used enough to warrant the expense, nor is there enough room for it. The plywood only has minor scuffs on it where the clamp attaches, and won't show any substantial wear with occasional-light use.
The Dewalt Rack and Pinion fence will spoil a person quickly, but a little extension like this really opens up the possibilities and makes an entry level saw much more useable. And some aluminum look spray paint would make it pro
 
Resurrecting this thread...

So if you tuned the OP's cabinet lower than 60Hz or whatever it was, to say closer to 40-45Hz, you would gain some bass extension and lose a bit of mids, correct? Would this make a sacrifice in power handling or make it hit Xmax at lower power or things like that?
 
I have another bigger 112 build from S2012 Duke Lejeune design.
I went into it after I changed my bass to a 5er and wanted a beefy companion to the B string.
Result is awesome soundwise, such heavy bass, totally different from my other cab that has anyway an incredible presence in the mids. The side side of my two cabs is the same for stacking.
It is loaded with a S2012 Duke Lejeune design and a 3.5k crossover bought on amazon
IMG_2403.JPG

IMG_2407.JPG