OK. . .finishing up Willie's bass. I know a few people have asked on forum and on this thread how to do a setup or "Help me with my setup!". . . it's really hard to help someone verbally without some solid measurements. I've been waiting for some cheap automotive feeler gauges to come in the mail and they have not. I was hoping I'd have a simple method to show for measuring neck relief, but I've been setting by feel up til now, so I'll just show and explain what I can.
These are tools you should have. . . all of them can be obtained locally and cheaply, or you probably have something workable lying around the house already: a sharp pencil, a business card, a ruler, allen keys appropriate for your bass, and a tuner.
Notice I have metric and standard allen key sets. This is critical. Use the correct type of allen keys for the bass you're working on. The SX basses are metric. . . the MIM Fenders are standard. I keep both types at the ready. The last thing you want to do is strip a screw. . . especially that truss rod one!
First, take your ruler and business card and make some 1mm hash marks at the corner of the card. This is perhaps not the most precise way to make measurements, but it's miles better than no measurements at all. You should be able to reasonably guess the fractions in-between the 1mm hash marks.
Use this card to measure your action at the 12th fret. . . the distance between the top of the fret and the bottom of the string. . . ok, I'm measuring on the 11th fret in the picture, but it's incredibly hard to take a photo at this angle and hold all the stuff in place. I posted this picture big so you can zoom in and see the hash marks. I'm a hair under 2mm. . . this bass just by sheer luck lined up almost perfectly from my wild truss rod guess before I put new strings on and tuned up to pitch. . . and the action was almost right on.
But, I've been doing a few basses lately, so I have a bit of a feel for zeroing in on a functional setup. That being said, I loosened the truss rod.
NOTE: I loosen all of the strings before making any adjustments on the truss rod just to be sure I don't damage the threads on the rod.
I usually want to explore the full range of usable relief (typically between .3 and 1mm) on each bass before settling in on a setting. It's wise to tighten your way into your final truss rod setting. . . so go looser than you need to (more relief than you want) and slowly tighten your way towards your final relief setting. This minimizes shift in the rod after you have your bass set. There's nothing more frustrating than sending a bass out of the shop perfectly set to get a call a couple of days later that the action went all high and weird on the instrument. Same concept as tuning an instrument. . . tune up to pitch. If you overshoot, go back lower than the target pitch and slowly tune up.
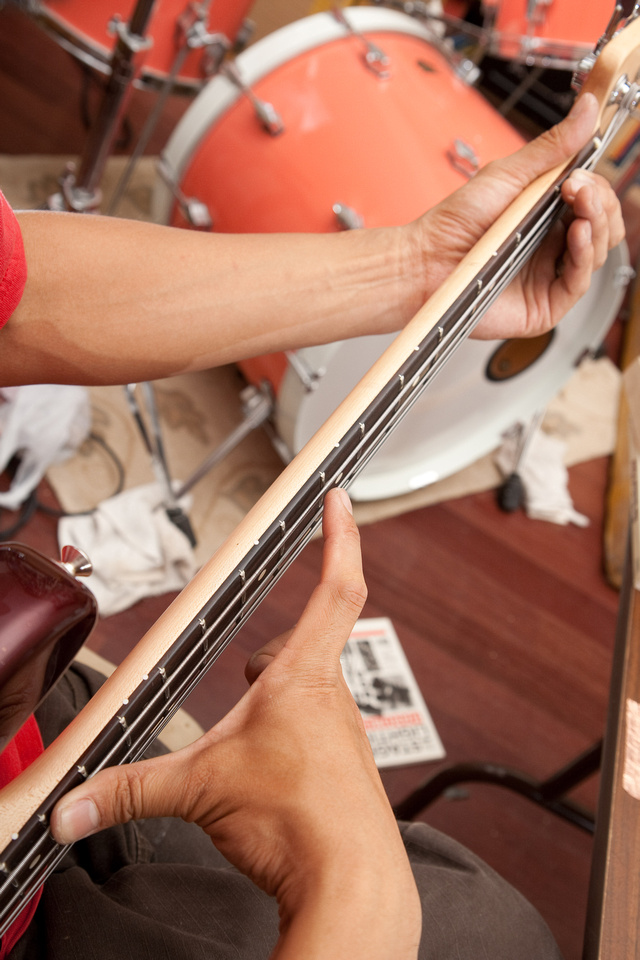
I "measure" my relief like this. . . I fret the 1st fret with my left hand, and with my right hand, I use my thumb to depress somewhere around the 13th fret and use my pointer finger to press and observe the relief at the 7th fret using the string as a straight edge. Your hand size will be different, but as long as you're consistent, you will be able to get an idea of the bow in the neck without expensive tools. Remember. . . the rule of thumb which is .3mm-1mm. This is the range inside of which we typically find the optimal setting. If you pick up a random bass and find 2mm of relief, you know there's a strong possibility it will not play right, and if it doesn't, you'll have a good idea why.
The way I experiment with the range of relief is to start with the truss rod loose (lots of relief). . . I then set my action to something right at the edge of reasonable or a bit lower than that point. I want to be able to hear buzz, severe buzz, and clear notes as I play along the fretboard. Let's say for our example we find this point at ~1.7mm action at the 12th fret. I set my truss rod to ~1mm relief and set my action to 1.7mm (at the bridge saddles). . . play and observe. I then tighten the truss rod a bit. . . maybe 1/4 turn and re-check my relief. Observing that the relief has decreased slightly, I adjust my bridge saddles again to set 1.7mm action at the 12th fret. . . play and observe. I then tighten the truss rod by another 1/4 turn, set my action to 1.7mm and repeat the process all the way until the neck is almost straight. You will find somewhere in that range, a setting that gives you the best compromise of playability in the upper, lower, and middle registers of the fretboard. Having explored the full usable range of neck relief, you can now select the optimal relief setting for the bass remembering to loosen more than necessary and then tighten up to your final truss rod setting. After the truss rod is set, you can raise your strings at the saddles to set the action where you like to normally play. Some folks dogmatically advocate a certain relief setting as the "only" way to set an instrument. The word optimal is loaded because that definition is different for each player, but you certainly can't know for certain whether the bass is set the best it can without exploring the full range of usable relief and deciding where to set it based on that information. At this point in time, I'm finding this optimal setting to be different from instrument to instrument. If after Plek, I find the settings to be identical, I'll know the differences were a result of human error or factors I did not account for in my methodology.
Since I am working with well leveled fretboard, I experience buzz in regions of the neck or along the entire length of the neck evenly. If you do not have a level fretboard, you will find buzz up to a certain fret and then the buzz goes away . . . and other anomalies caused by high and low frets. This will make diagnosis a bit more complex. This will not change the procedure for methodically finding the optimal setup on a bass but throws a few more variables into the mix. I recommend getting the Fret Rocker tool from Stewmac even if you don't plan to do your own fretwork. It will allow you to at least locate trouble on a neck. It's also a handy tool to have in your pocket when you go shopping for a bass.
Invalid Link Removed
Please keep in mind that all of the procedures I illustrate in this thread are just one way of doing things, and as you probably observe reading through the thread in sequence, I'm always learning new tricks as I go along and my methods and even target setups are constantly shifting as I learn. If you do it differently and get great results, you're probably taking another valid approach.
On Willie's bass, I'm set just a hair under 2mm with my fretwork and with my strings. I'll keep the bass handy for a couple of days and play it often to make sure the neck has stabilized before sending it back.
Speaking of Willie's bass. . . this thing sounds incredible. It's easily within the top 85% of production instruments I've come across. Now that it's actually playable and the bridge is actually connected to the body

, it's a real keeper. Willie bought it used at Haight Ashbury music. . . whoever sold it made a very foolish decision. This thing weighs in at 8.41lbs. and sounds GREAT! Jasaman, tell Willie to never give up this bass. If he does, have him give me a call, and I will buy it immediately.


 I'm happy about the latest breakthrough. We're really dialing in a great standard configuration for the p-basses. The stock NP4. . . still brilliant. You guys have the latest audio samples from #7 and I feel that bass sounds tremendous but personally, I prefer the new pickup. It's the amplified sound I had in my head when I started the P's. . . and then some.