

Enjoy the benefits of a premium membership!
Upgrade Account
-
TalkBass has been independent since 1998. Add your voice.
Create a free account to reply to discussions, view embedded media, and browse with fewer display ads.
Join free Log in
Want zero display ads or expanded classifieds tools? Compare plans.
You are using an out of date browser. It may not display this or other websites correctly.
You should upgrade or use an alternative browser.
You should upgrade or use an alternative browser.
Blondes have more fun - a weekend build.
- Thread starter ChickWithaRic
- Start date
More options
Who Replied?
There are all kinds of specialist decal fixing solutions and even tools available. I have some of them left over from when I used to do custom motorcycle helmet artwork.
You don't need any of them, and I'm not going to use any of the specialist stuff that I have for this side project. You can do a perfectly good job of applying a water slide decal with things that you probably already have, or can very easily and cheaply buy. I'm going to show you how.
I've cut decals out from the sheet leaving a fairly minimal amount of the carrier film. I have a soft artists' brush (taken from a soft artist but you can buy one if necessary) and two containers, one of which has water with a tiny drop of dish soap added to break the surface tension. The other contains the only chemical assistance you're going to need - Johnson's Future floor wax. It's not a wax at all, it's a self levelling acrylic clear coat with a million uses.
I've started by applying a thin coat of Future to the areas where the decals will be applied. This gives me a nice smooth semi gloss surface, which is essential for a good result. I'm going to leave that for 15 minutes and have a bowl of soup.
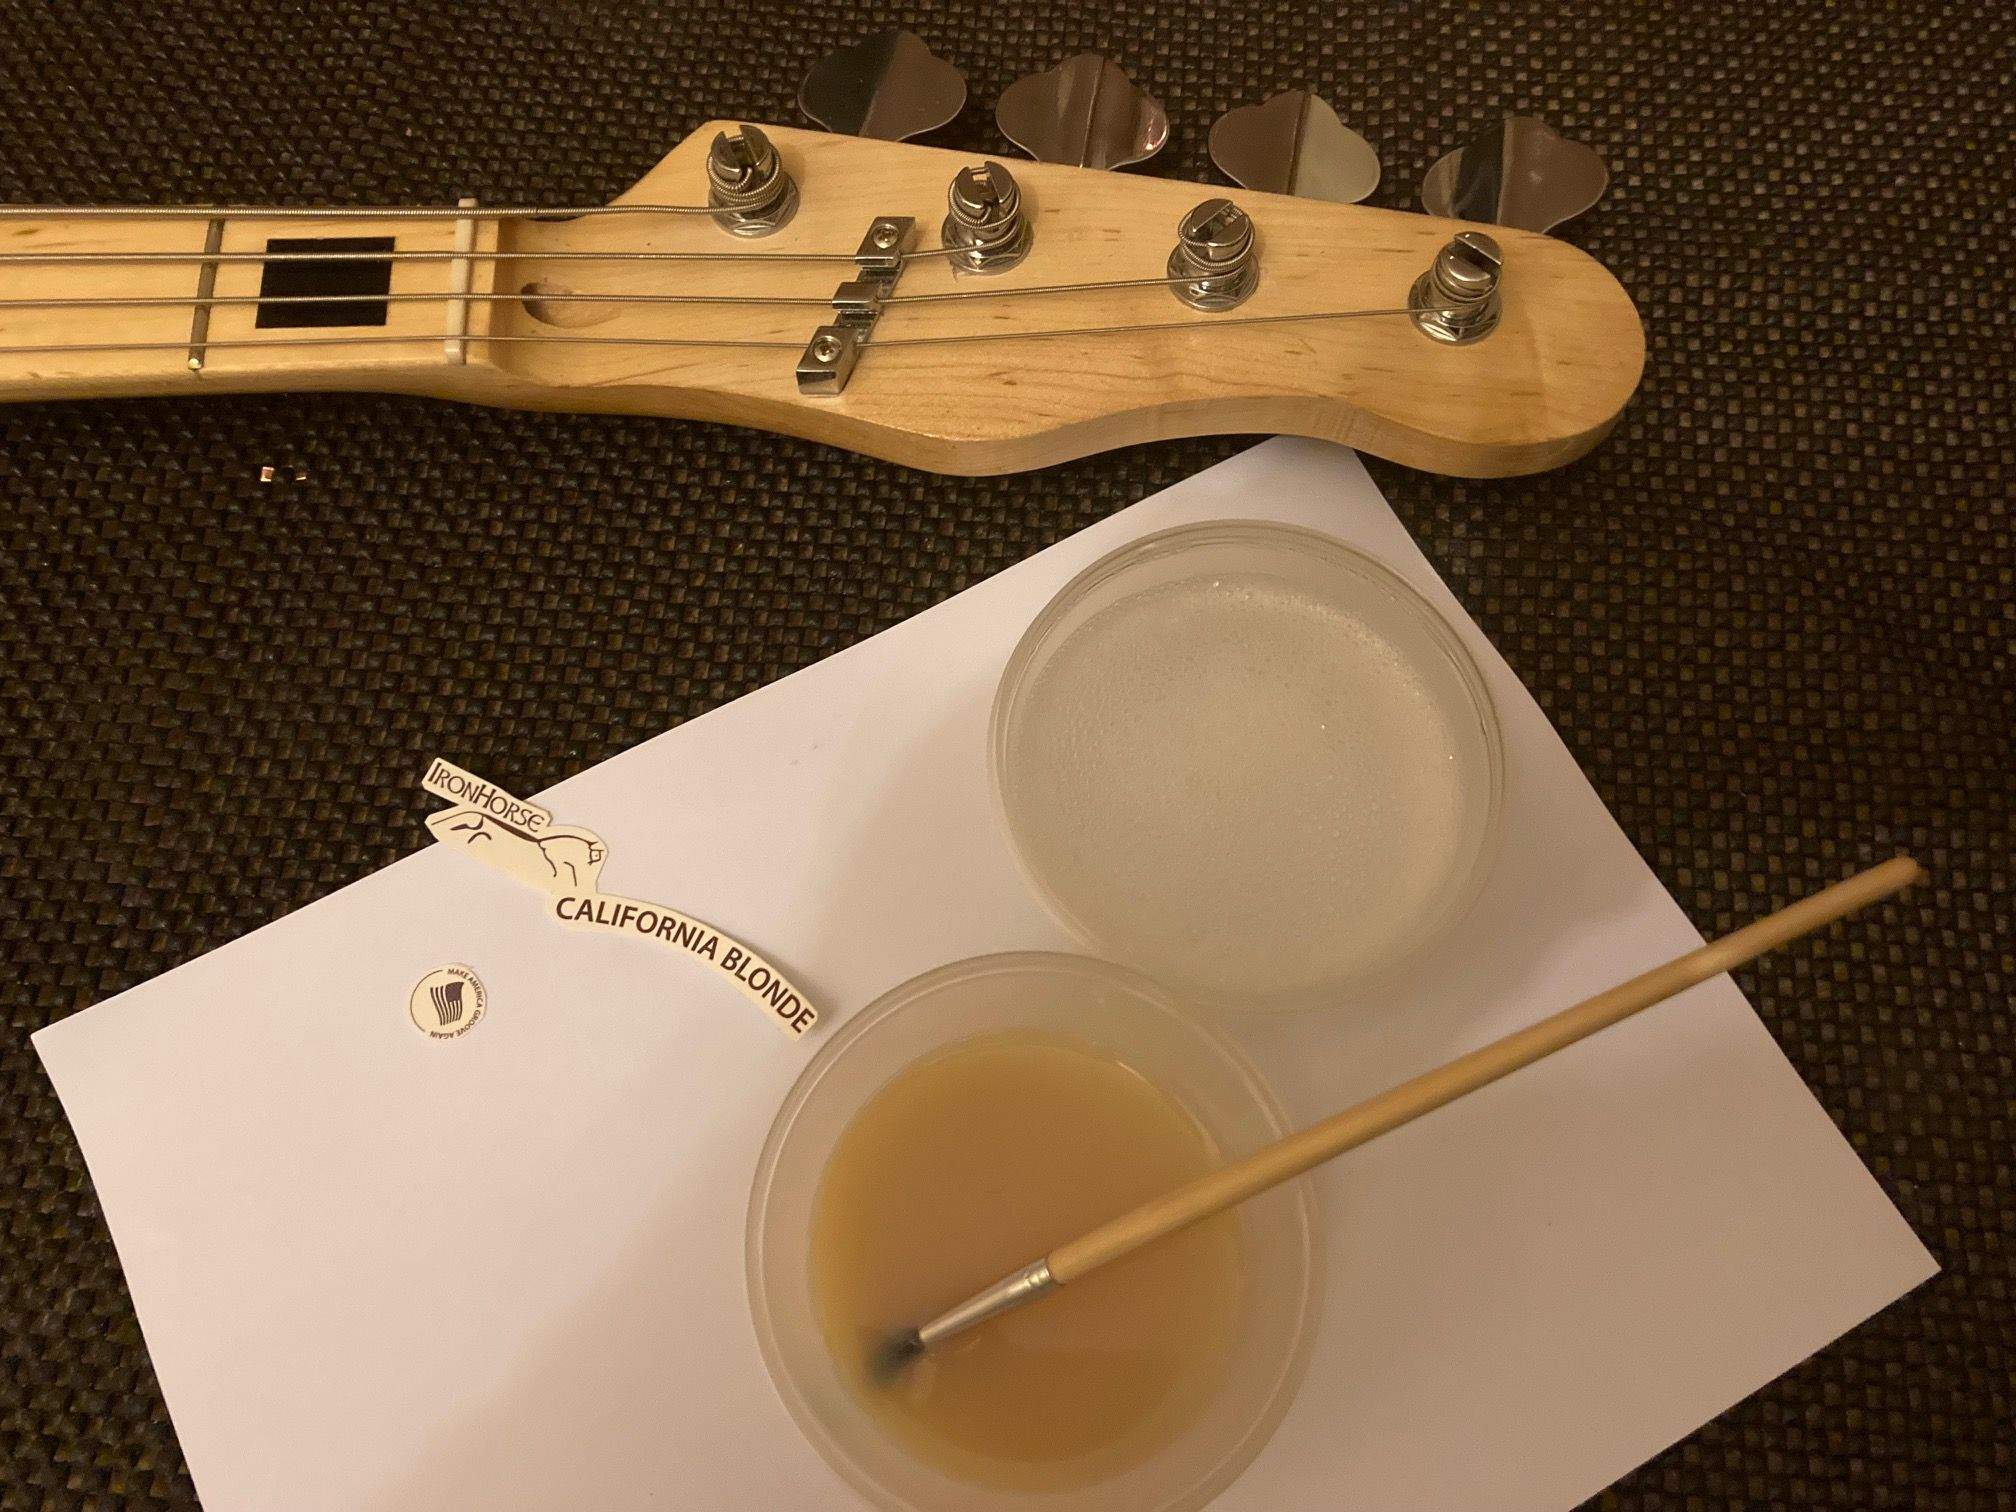
Soup of the day is tomato, vodka, and celery with frozen H2O croutons finished with a chilli mint and lime salt rim garnish. Highly wreckermended.

The obvious first step is to soak the decal in the water for around two minutes for a home printed decal. Most commercial decals require a much shorter soak time so be aware of this if you're using a commercial product from somebody like Cartograf. You'll see the backing paper turn darker as the water soaks in, and when it's uniformly dark with no bright spots your decal is probably ready to be applied. If this takes three, even four, minutes, don't worry - everything I'm writing here is a guide and there are no immutable laws going on. Relax, this is fun, and if it all goes wrong you can do it again from step one.
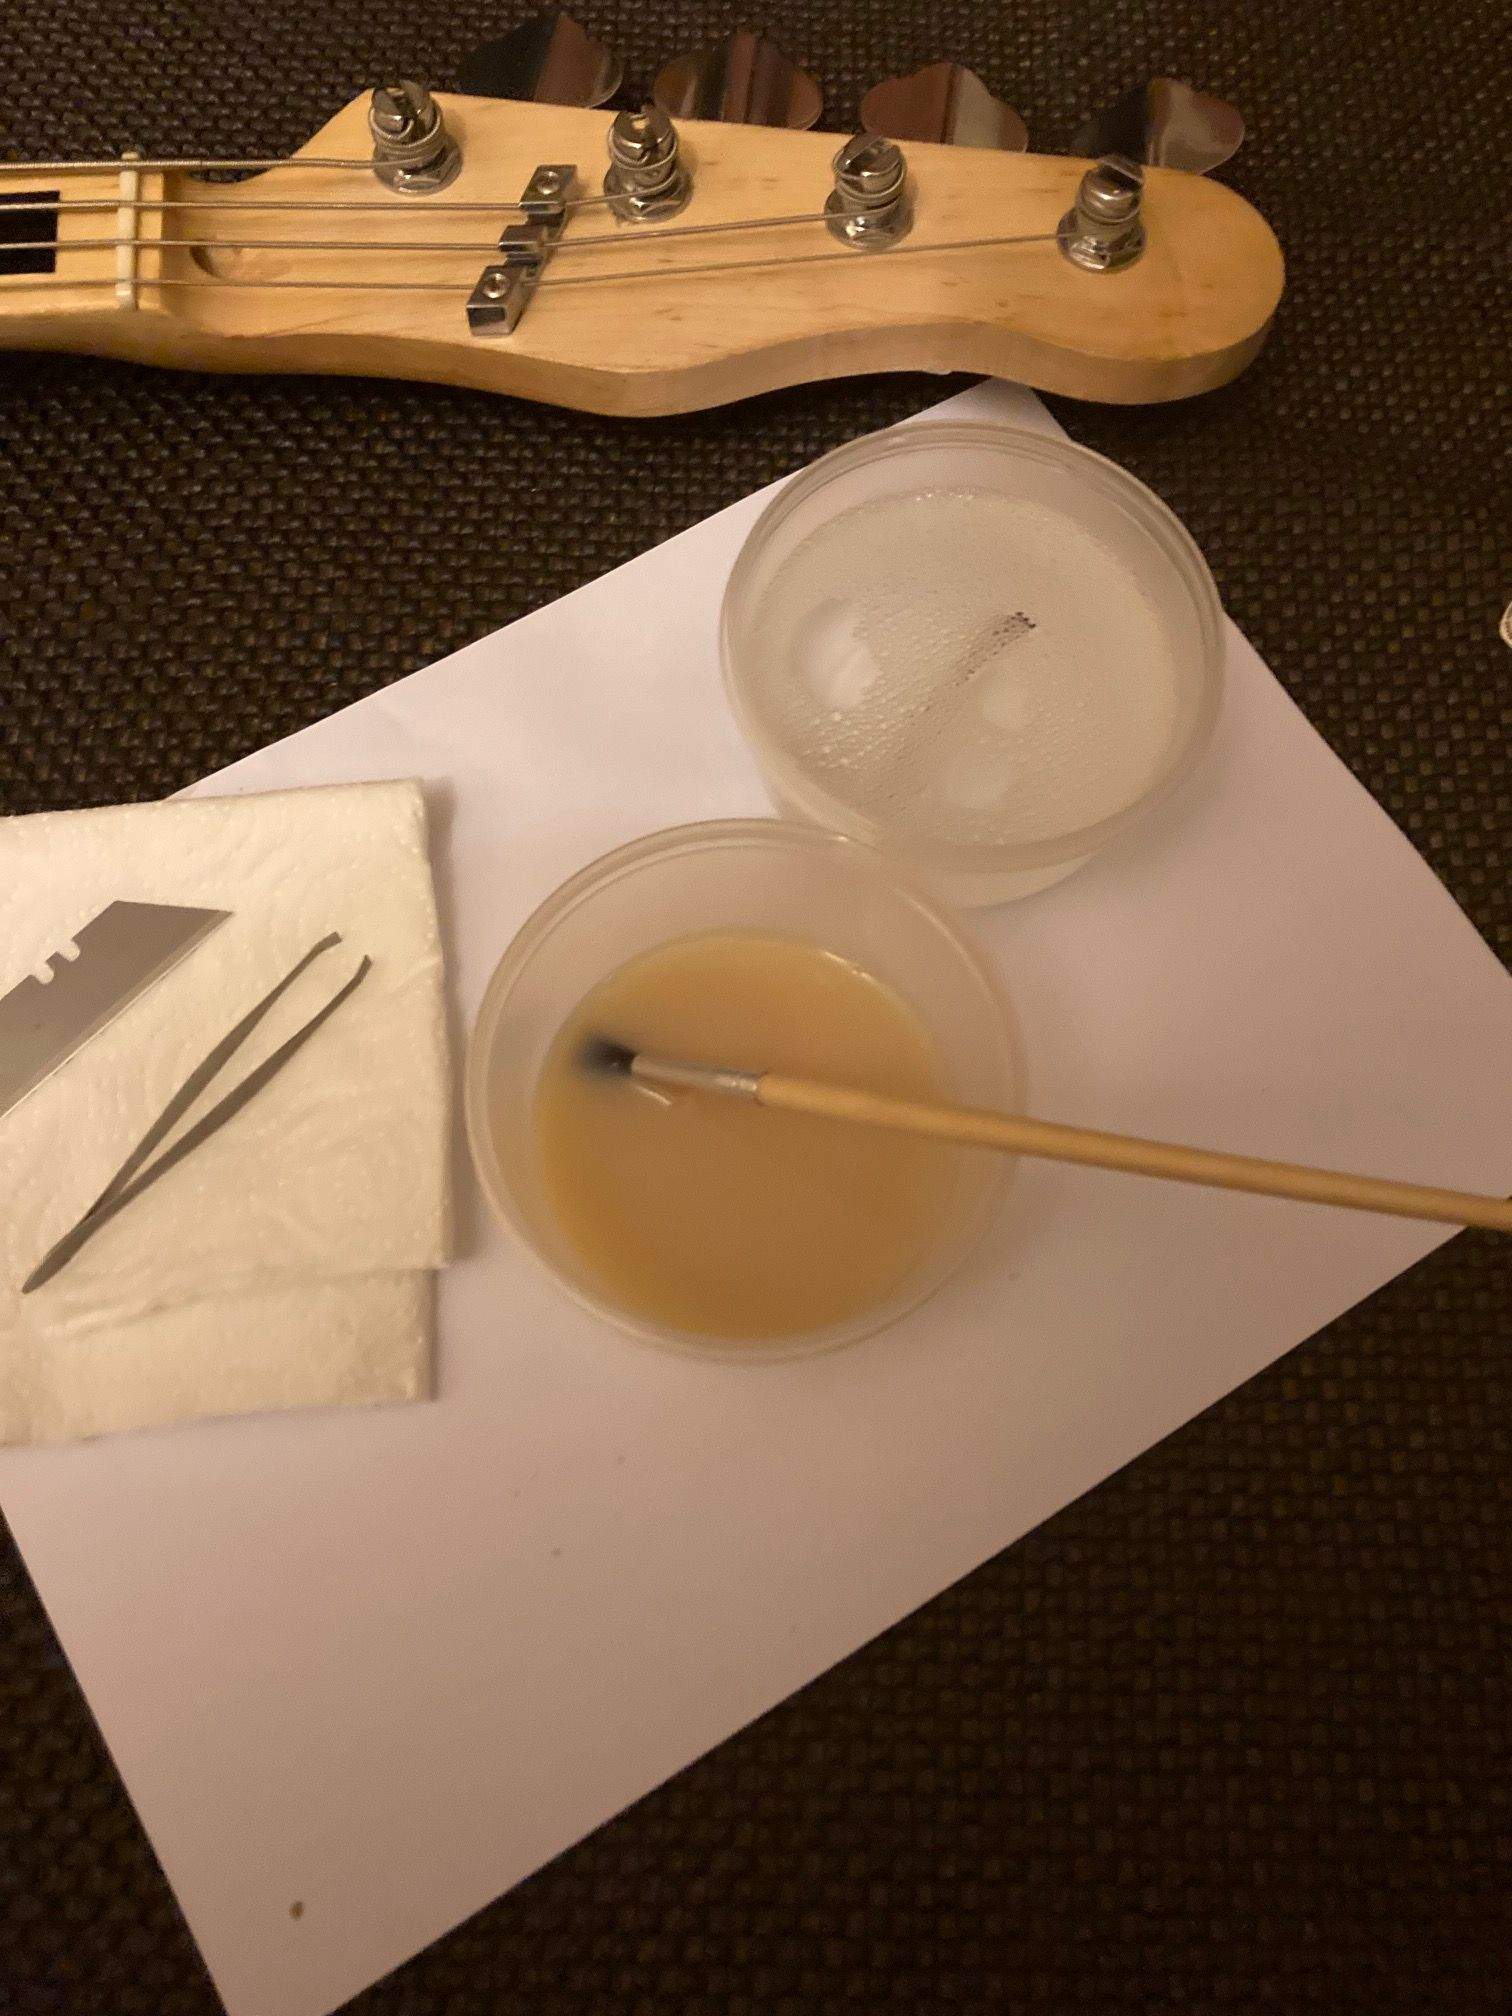
Look carefully in the water container. The deck is in there, it didn't float as I had expected. Such is live posting. It's like live TV except you can do it naked. Lift the decal gently from the water - I use tweezers for this - and set it down on a folded paper towel to wick away the excess water. ten seconds is plenty of time for this, and whilst the water is wicking away, take your Future brush, dip it in the water container, and ****lightly**** wet the area where you will apply the decal with the resulting dilute Future solution. Don't skip this step. It's absolutely critical.
Place the decal, on its backing paper, in its final position, or pretty close. Begin to slide the decal from its backing paper. I do this with the very tip of a fresh from the pack craft knife blade. Some people use a fingertip, others a paintbrush, there is no definitive method here and if whatever you choose to do works well for you, it is the best method. Holding the decal in place, gently, very gently, slide the backing paper from underneath it, allowing the decal film to settle onto the surface.
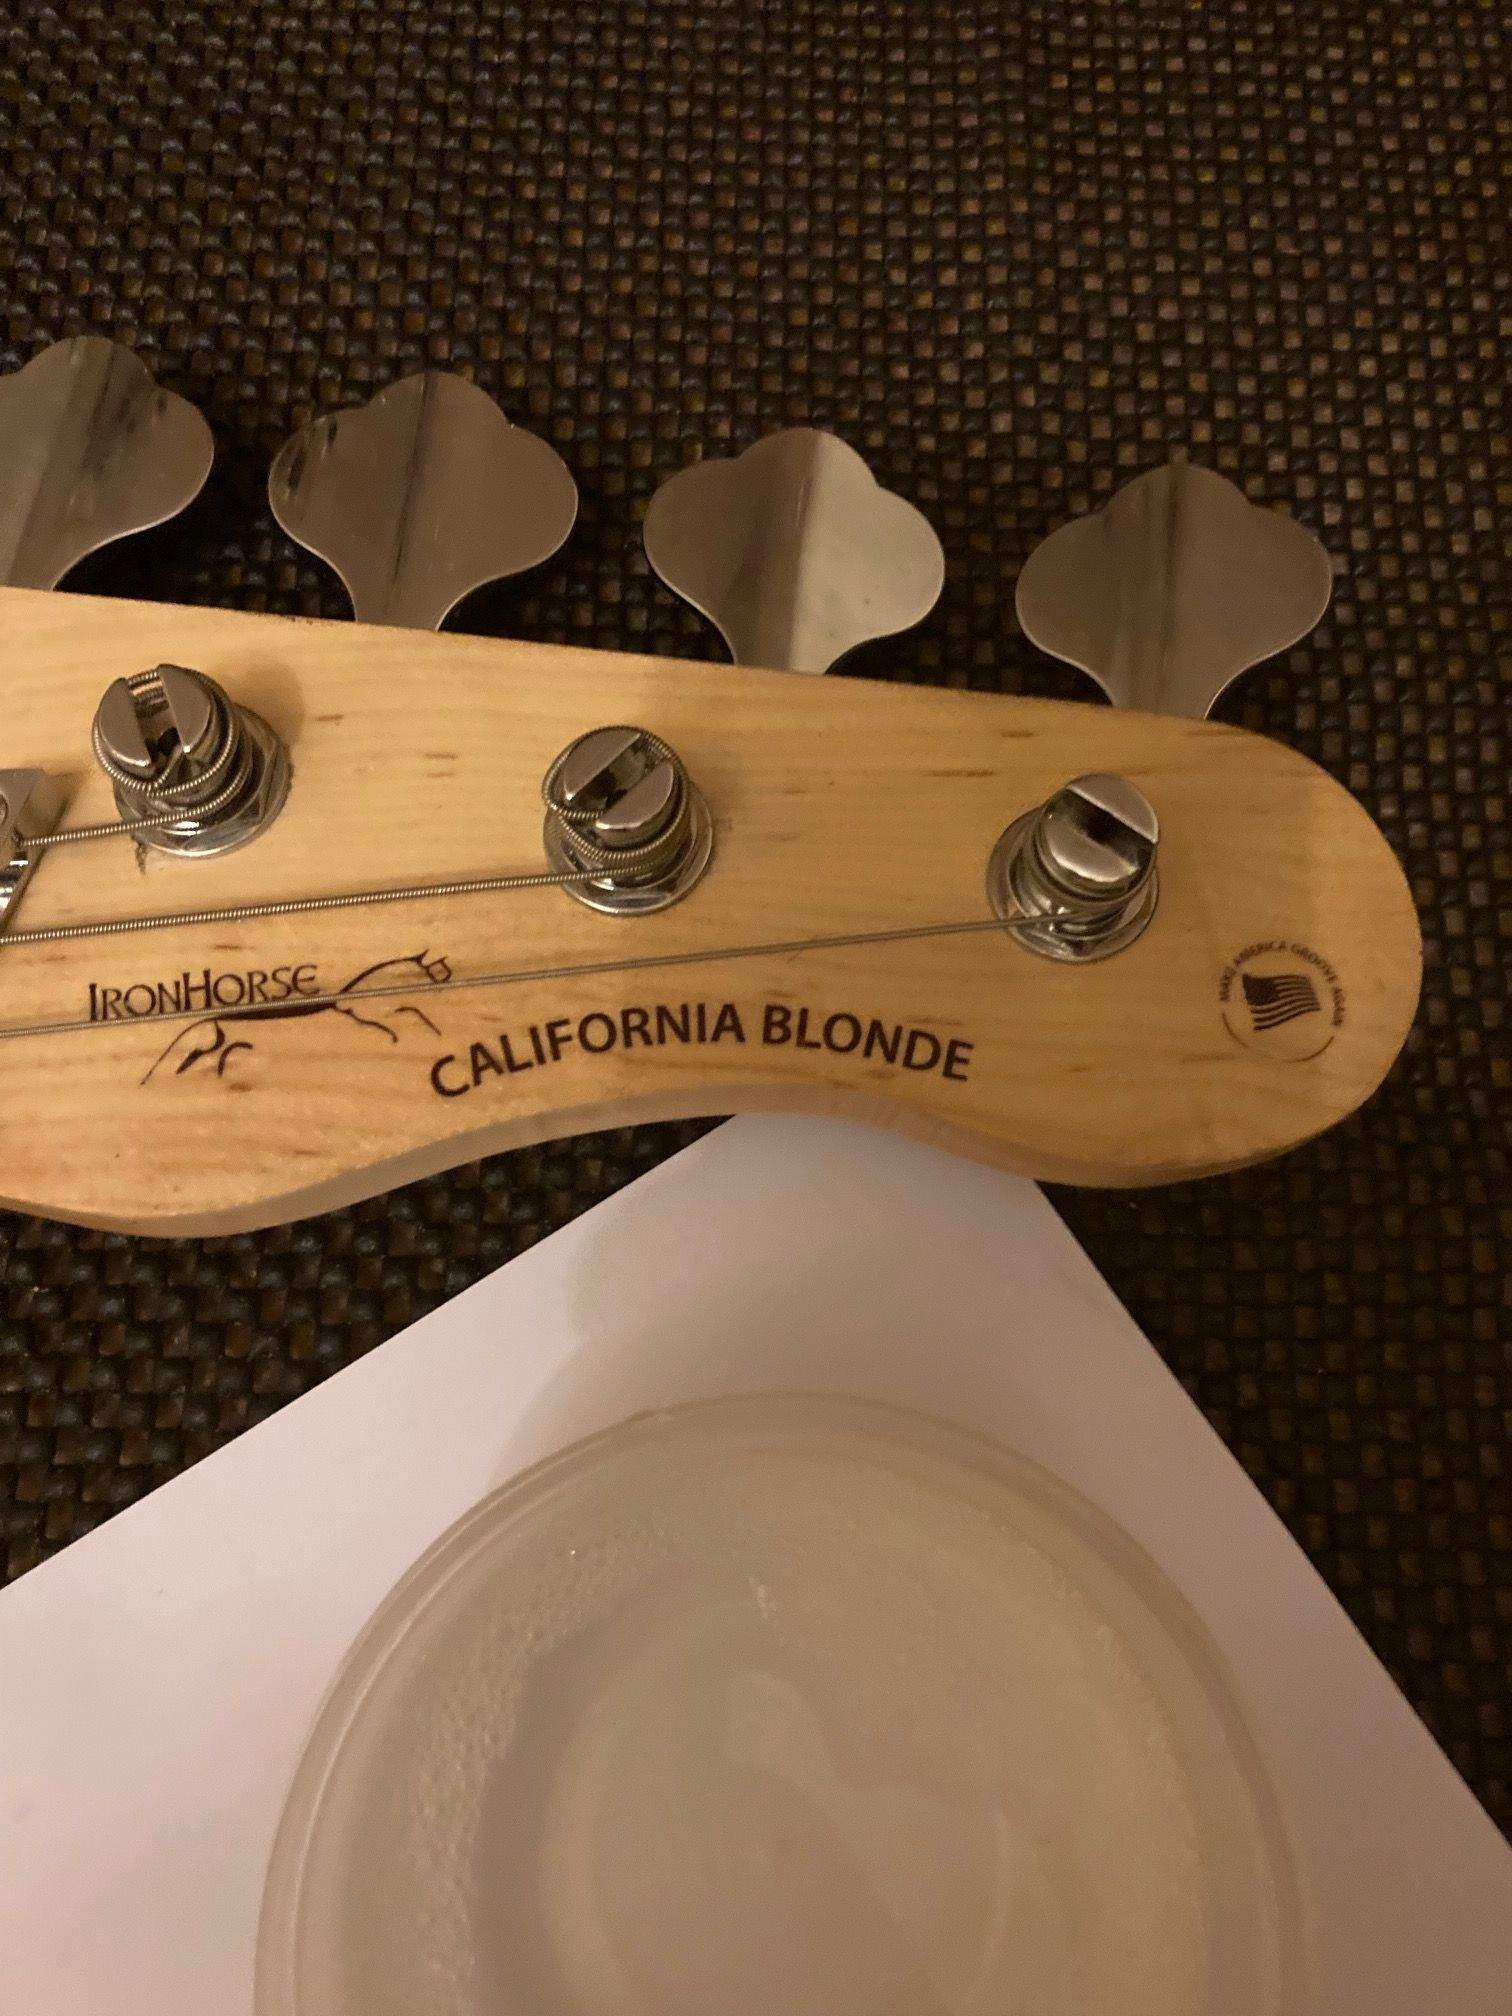
Once the decal is entirely free of its paper and sitting on the surface, you need to tease it into its final position. I use the artists' brush for this. This is why we re-wet the area, to allow us to do this fine adjustment. If you need to really shift the decal now, don't panic, use the water/ Future mix as a lubricant to almost "refloat" the decal, reposition, wick away excess liquid with the corner of a paper towel WITHOUT ACTUALLY TOUCHING THE DECAL JUST THE LIQUID, and relax. Now you can sit back. Keep an eye on the decal for a few minutes and if the edges begin to curl up, gently tease them back down with your brush. Once it has settled, walk away. Nothing you can do now will make any difference.
Don't be surprised or alarmed if the deal begins to wrinkle or bubble up. This is entirely normal. Mine did to a degree, I tried to take a picture, I hope it comes out ok.There is slight bubbling and wrinkling.
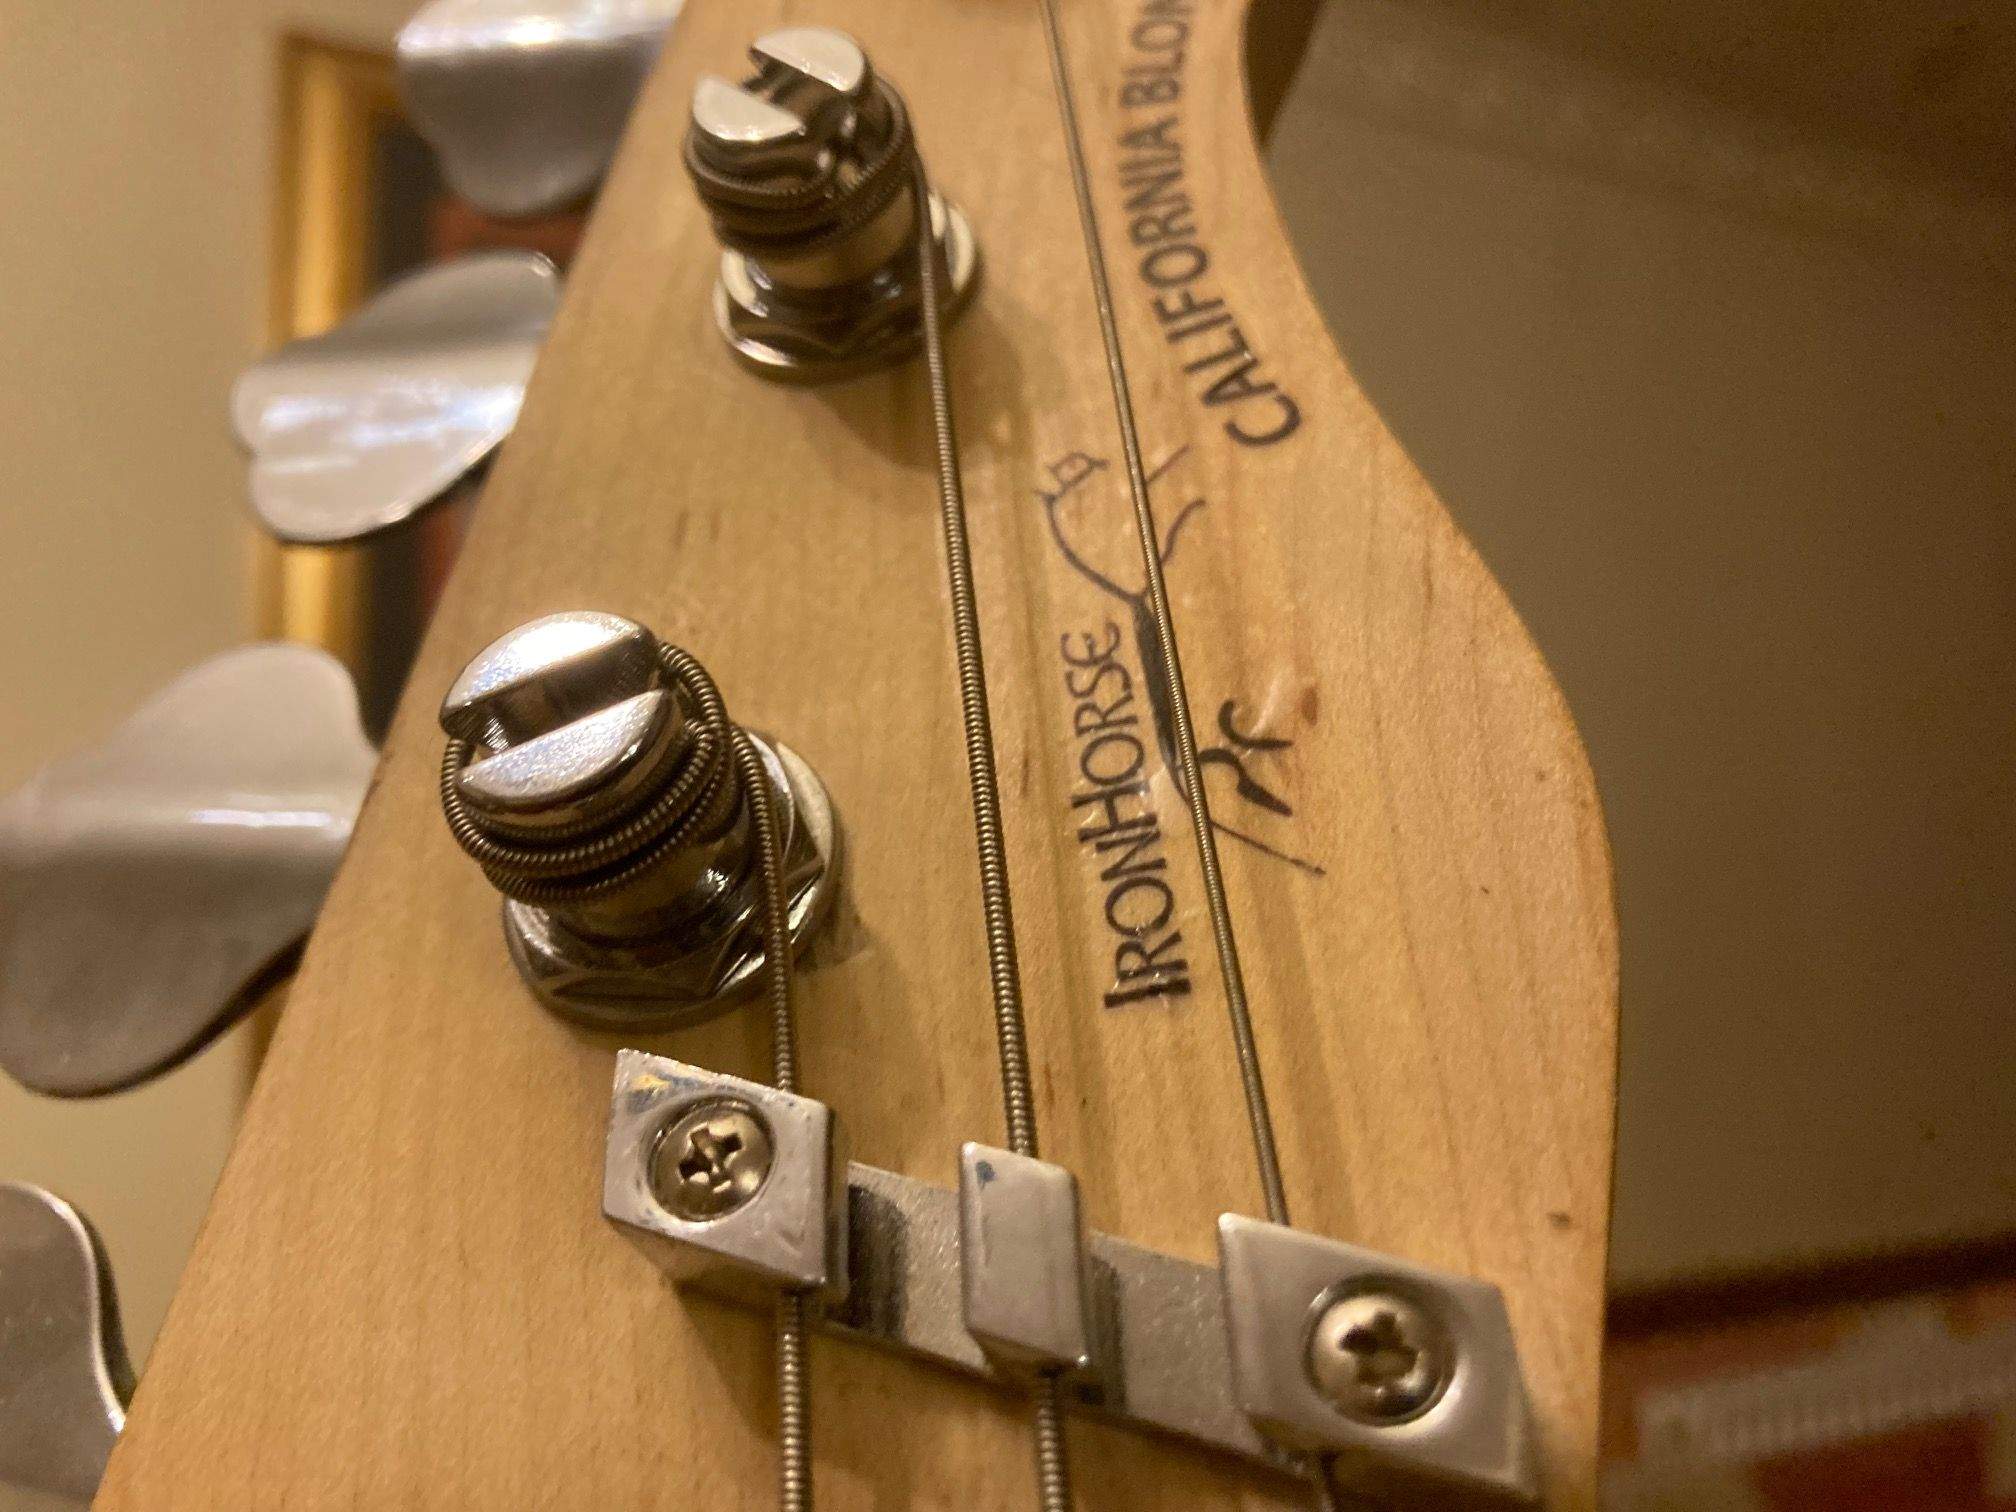
DO NOT PANIC.
Don't even THINK about touching that decal, it's doing its lifecycle thing. Do you remember that floating coat of Future/ water we applied, right before applying the decal? Right now, it's doing its magic, and as it cures it's going to draw the decal down tight to the surface so that in an hour or two, it will look for all the world as if it had been silk screen printed onto the headstock. Trust me. I've done this before.
Here's one I did earlier.
I'm going to give that 12 hours, and then I will strip off the hardware from the headstock and apply a couple of coats of the same lacquer I used to spray the decal sheet with right at the beginning. And that's job done.
This is a really inexpensive way of adding a final pro touch to your project. It's tricky at first, and I would recommend giving it a few tries on scrap, but you CAN do it, and you don't need special stuff for 99% of what you will ever want to do.
I hope this made sense, it makes sense to me because I know the process inside out but I am also aware that I am not a naturally gifted tutor, so if you have questions ask here or use my PM if you're shy.
Hang in dude, we are nearly done. Hey, who's hungry? I have soup.
You don't need any of them, and I'm not going to use any of the specialist stuff that I have for this side project. You can do a perfectly good job of applying a water slide decal with things that you probably already have, or can very easily and cheaply buy. I'm going to show you how.
I've cut decals out from the sheet leaving a fairly minimal amount of the carrier film. I have a soft artists' brush (taken from a soft artist but you can buy one if necessary) and two containers, one of which has water with a tiny drop of dish soap added to break the surface tension. The other contains the only chemical assistance you're going to need - Johnson's Future floor wax. It's not a wax at all, it's a self levelling acrylic clear coat with a million uses.
I've started by applying a thin coat of Future to the areas where the decals will be applied. This gives me a nice smooth semi gloss surface, which is essential for a good result. I'm going to leave that for 15 minutes and have a bowl of soup.
Soup of the day is tomato, vodka, and celery with frozen H2O croutons finished with a chilli mint and lime salt rim garnish. Highly wreckermended.
The obvious first step is to soak the decal in the water for around two minutes for a home printed decal. Most commercial decals require a much shorter soak time so be aware of this if you're using a commercial product from somebody like Cartograf. You'll see the backing paper turn darker as the water soaks in, and when it's uniformly dark with no bright spots your decal is probably ready to be applied. If this takes three, even four, minutes, don't worry - everything I'm writing here is a guide and there are no immutable laws going on. Relax, this is fun, and if it all goes wrong you can do it again from step one.
Look carefully in the water container. The deck is in there, it didn't float as I had expected. Such is live posting. It's like live TV except you can do it naked. Lift the decal gently from the water - I use tweezers for this - and set it down on a folded paper towel to wick away the excess water. ten seconds is plenty of time for this, and whilst the water is wicking away, take your Future brush, dip it in the water container, and ****lightly**** wet the area where you will apply the decal with the resulting dilute Future solution. Don't skip this step. It's absolutely critical.
Place the decal, on its backing paper, in its final position, or pretty close. Begin to slide the decal from its backing paper. I do this with the very tip of a fresh from the pack craft knife blade. Some people use a fingertip, others a paintbrush, there is no definitive method here and if whatever you choose to do works well for you, it is the best method. Holding the decal in place, gently, very gently, slide the backing paper from underneath it, allowing the decal film to settle onto the surface.
Once the decal is entirely free of its paper and sitting on the surface, you need to tease it into its final position. I use the artists' brush for this. This is why we re-wet the area, to allow us to do this fine adjustment. If you need to really shift the decal now, don't panic, use the water/ Future mix as a lubricant to almost "refloat" the decal, reposition, wick away excess liquid with the corner of a paper towel WITHOUT ACTUALLY TOUCHING THE DECAL JUST THE LIQUID, and relax. Now you can sit back. Keep an eye on the decal for a few minutes and if the edges begin to curl up, gently tease them back down with your brush. Once it has settled, walk away. Nothing you can do now will make any difference.
Don't be surprised or alarmed if the deal begins to wrinkle or bubble up. This is entirely normal. Mine did to a degree, I tried to take a picture, I hope it comes out ok.There is slight bubbling and wrinkling.
DO NOT PANIC.
Don't even THINK about touching that decal, it's doing its lifecycle thing. Do you remember that floating coat of Future/ water we applied, right before applying the decal? Right now, it's doing its magic, and as it cures it's going to draw the decal down tight to the surface so that in an hour or two, it will look for all the world as if it had been silk screen printed onto the headstock. Trust me. I've done this before.
Here's one I did earlier.
I'm going to give that 12 hours, and then I will strip off the hardware from the headstock and apply a couple of coats of the same lacquer I used to spray the decal sheet with right at the beginning. And that's job done.
This is a really inexpensive way of adding a final pro touch to your project. It's tricky at first, and I would recommend giving it a few tries on scrap, but you CAN do it, and you don't need special stuff for 99% of what you will ever want to do.
I hope this made sense, it makes sense to me because I know the process inside out but I am also aware that I am not a naturally gifted tutor, so if you have questions ask here or use my PM if you're shy.
Hang in dude, we are nearly done. Hey, who's hungry? I have soup.

I'm up way too early so I can finish this. Hostilities shall commence shortly.
I'll be finishing the shielding, making the electrical connections, lacquering the headstock, and doing one small operation I should have done earlier but forgot. Then it's a case of giving it a setup and, if I have time, recording a few noise samples.
I'll be finishing the shielding, making the electrical connections, lacquering the headstock, and doing one small operation I should have done earlier but forgot. Then it's a case of giving it a setup and, if I have time, recording a few noise samples.
Attachments

Last edited:

Hey thanks for the decal tutorial, i gotta bookmark this. I have struggled with decals and resigned my self to 2-3 tries with mediocre results. I never heard of the Future floor wax trick.
I learned of the usefulness of Future for decals from the scale modeling community. I was struggling with some home printed decals I had made for a motorcycle helmet project and given that those guys use decals all the time, and often to astonishing effect, I put out a call for help in the days of Usenet. What lovely, truly talented craftspeople they are, and super helpful. Thanks to their help and advice I discovered all kinds of products, such as the specialist setting and softening solutions from GSI Creos and MicroScale, but also discovered two common household chemicals that do 99% of the same job - Future, and white vinegar.Hey thanks for the decal tutorial, i gotta bookmark this. I have struggled with decals and resigned my self to 2-3 tries with mediocre results. I never heard of the Future floor wax trick.
Future is a setting solution, i.e, it will draw the decal down tight to the surface to achieve that silk screened look. White vinegar is a softener, useful for getting a decal to comply flawlessly to compound curves. The most important advice I received was do not panic, it's SUPPOSED to look like that, trust the science, it will fix itself.

It's a genuinely useful skill.Thanks for the decal play-by-play. Super mega useful.

It is super helpful. However, I will likely just do a crappy hand painted job, if I need to do a decal or logo.
I grew up in a very harsh, judgemental environment. I was always picked on for every little thing, so I turned out to be very hard on myself and others.
Then I joined here and everyone is so supportive and nice. It takes a lot of pressure off to know I can do a terrible job and everyone will still say it looks great. I'm basically a 5 yr old, making macaroni art and everyone just pats me on the head, smiles and says, "good boy, good job".
I mean, if making something look perfect is your thing, go for it.
Me? I'm enjoying the whole low pressure vibe.
My instruments would still make it onto my mom's fridge, so, some of you are overachieving. Just sayin.
I grew up in a very harsh, judgemental environment. I was always picked on for every little thing, so I turned out to be very hard on myself and others.
Then I joined here and everyone is so supportive and nice. It takes a lot of pressure off to know I can do a terrible job and everyone will still say it looks great. I'm basically a 5 yr old, making macaroni art and everyone just pats me on the head, smiles and says, "good boy, good job".
I mean, if making something look perfect is your thing, go for it.
Me? I'm enjoying the whole low pressure vibe.
My instruments would still make it onto my mom's fridge, so, some of you are overachieving. Just sayin.
Last edited:
I’ve only ever used room temperature water for headstock decals (and countless airplane models when I was about 11) and this looks like a much better approach. Very uptown.It's a genuinely useful skill.
First thing I did today was remove the neck again. You might remember way back exactly 1 week ago, I had a nasty step between the neck heel and the neck. This wasn't a huge deal because I was going to hit it with my bullnose pane, but I forgot, and I decided instead to make up a little tool for this and use the palm router.
The obvious problem with using a router is that there is no flat reference surface, so I had to create one. I used an offcut of iroko and copied over the neck screw pattern, and gave each hole a generous countersink.
With this, I can attach the neck and use a long reach end guided router cutter to transfer the neck's dimension to the body's heel. Simple but effective. I used my cordless router for no better reason than it already had the exact cutter I needed installed. I'm going to keep this simple little fixture in my box of tools. I think I will use it again.
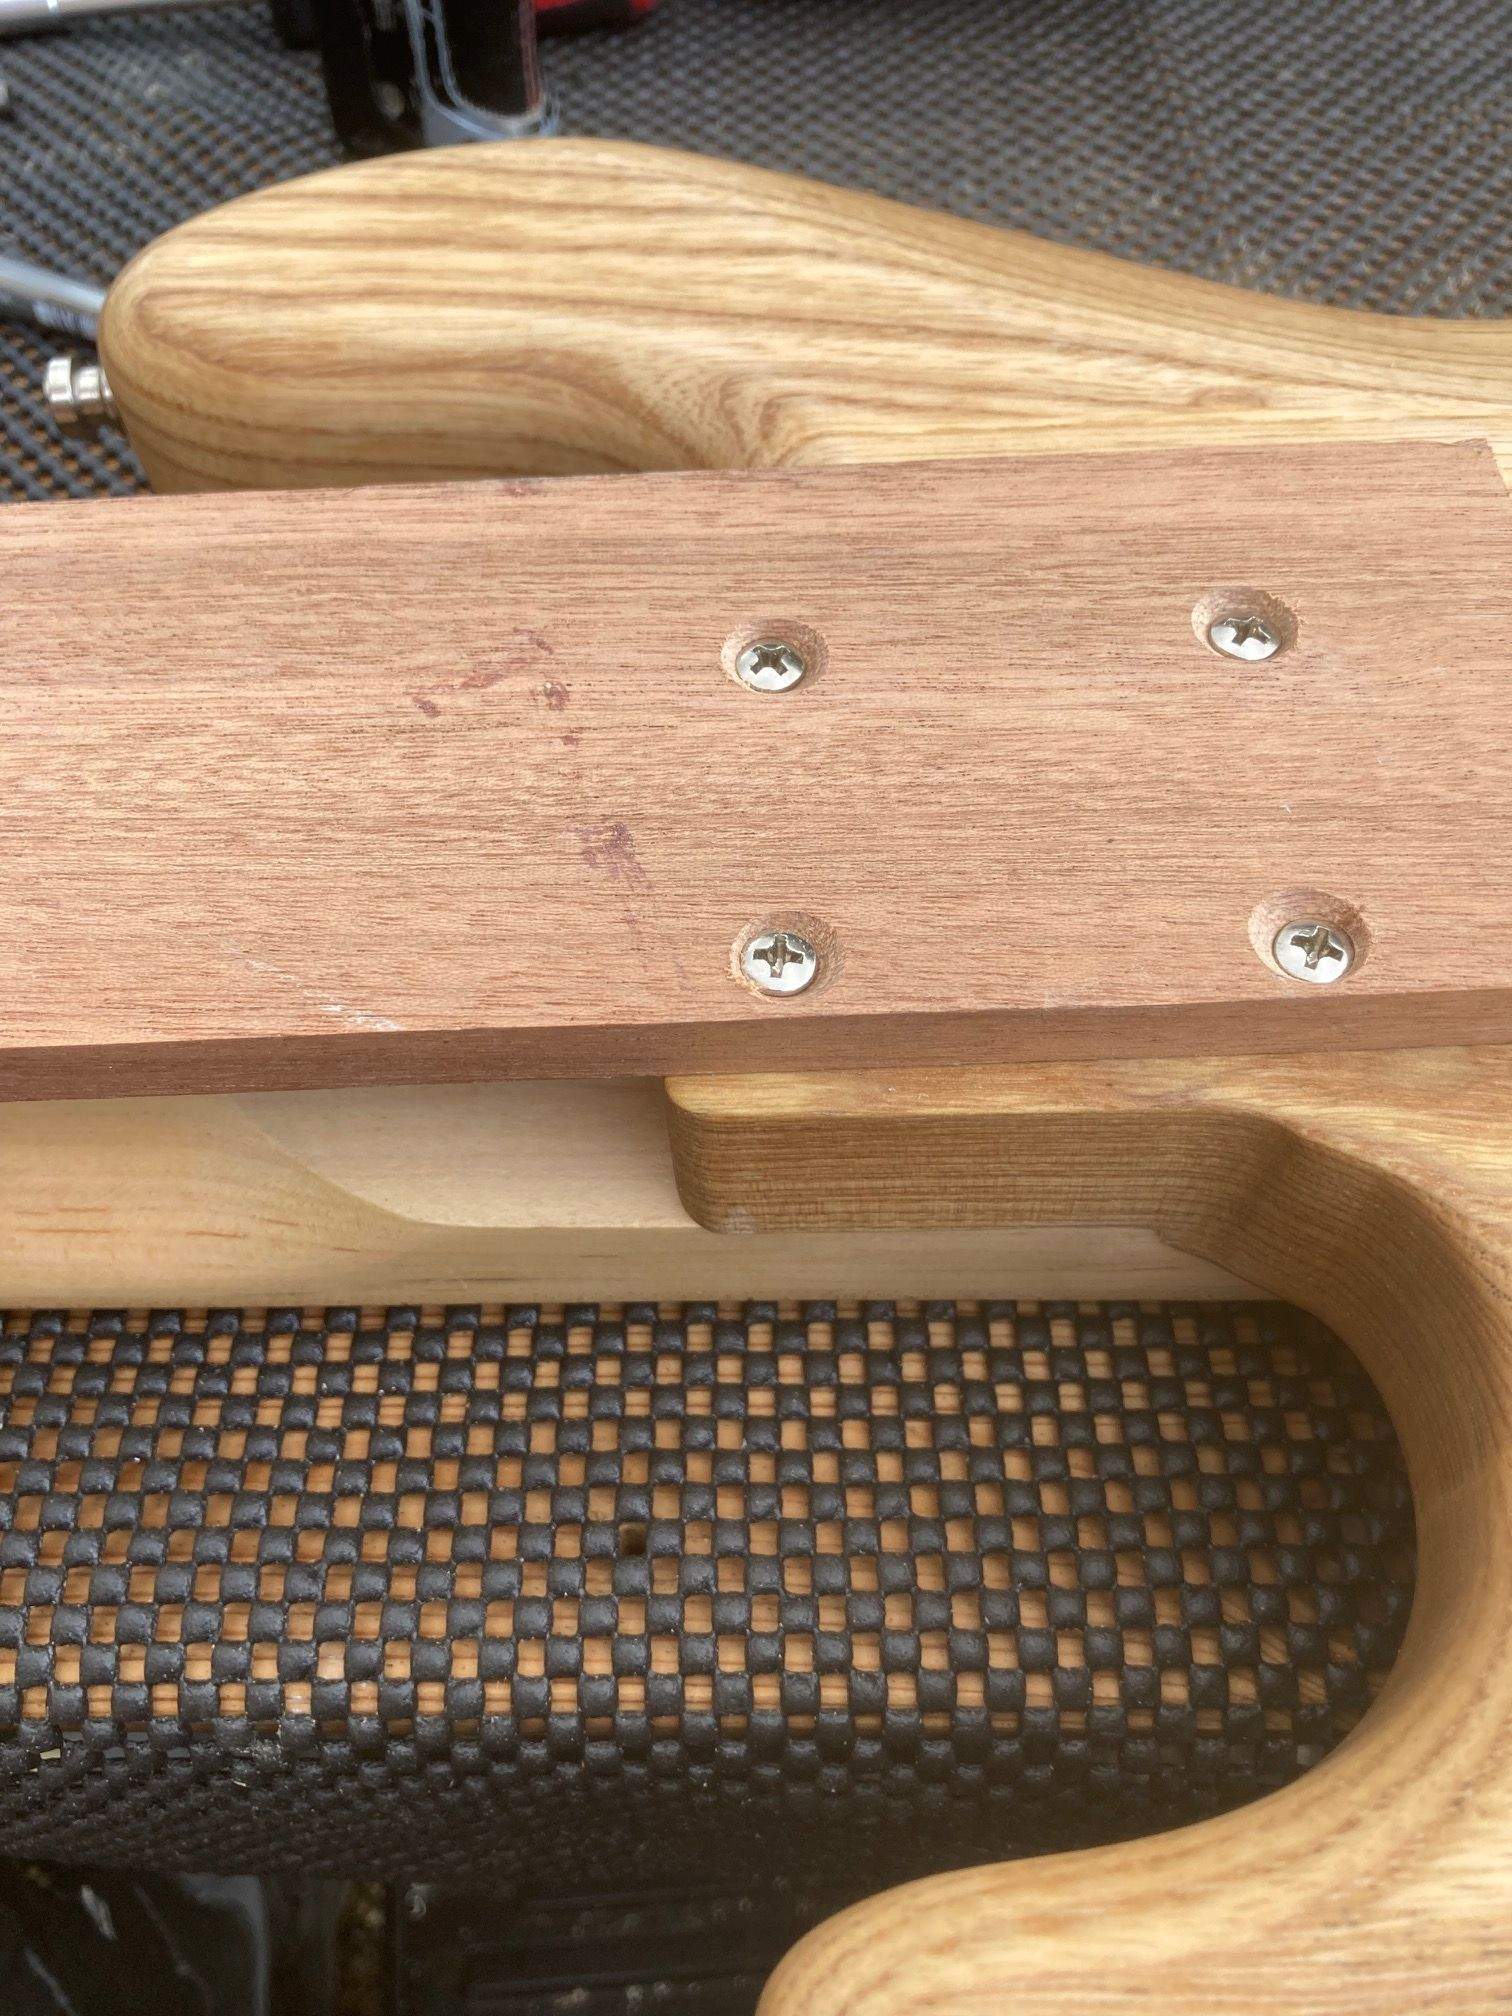
I ran the cutter just into the existing router hump which is a feature of early JB bodies, gave it a light sanding and a coat of the tung oil finish. That will do.
For y'all who said I was brave for attempting to do the neck/ pocket joint by hand with a Shinto rasp and a block plane, all I'm going to say is that I told you I knew exactly what I was doing. I don't want to be **that person** but this is one heck of a closely wrought neck to pocket joint. I'll let the pictures write the words.
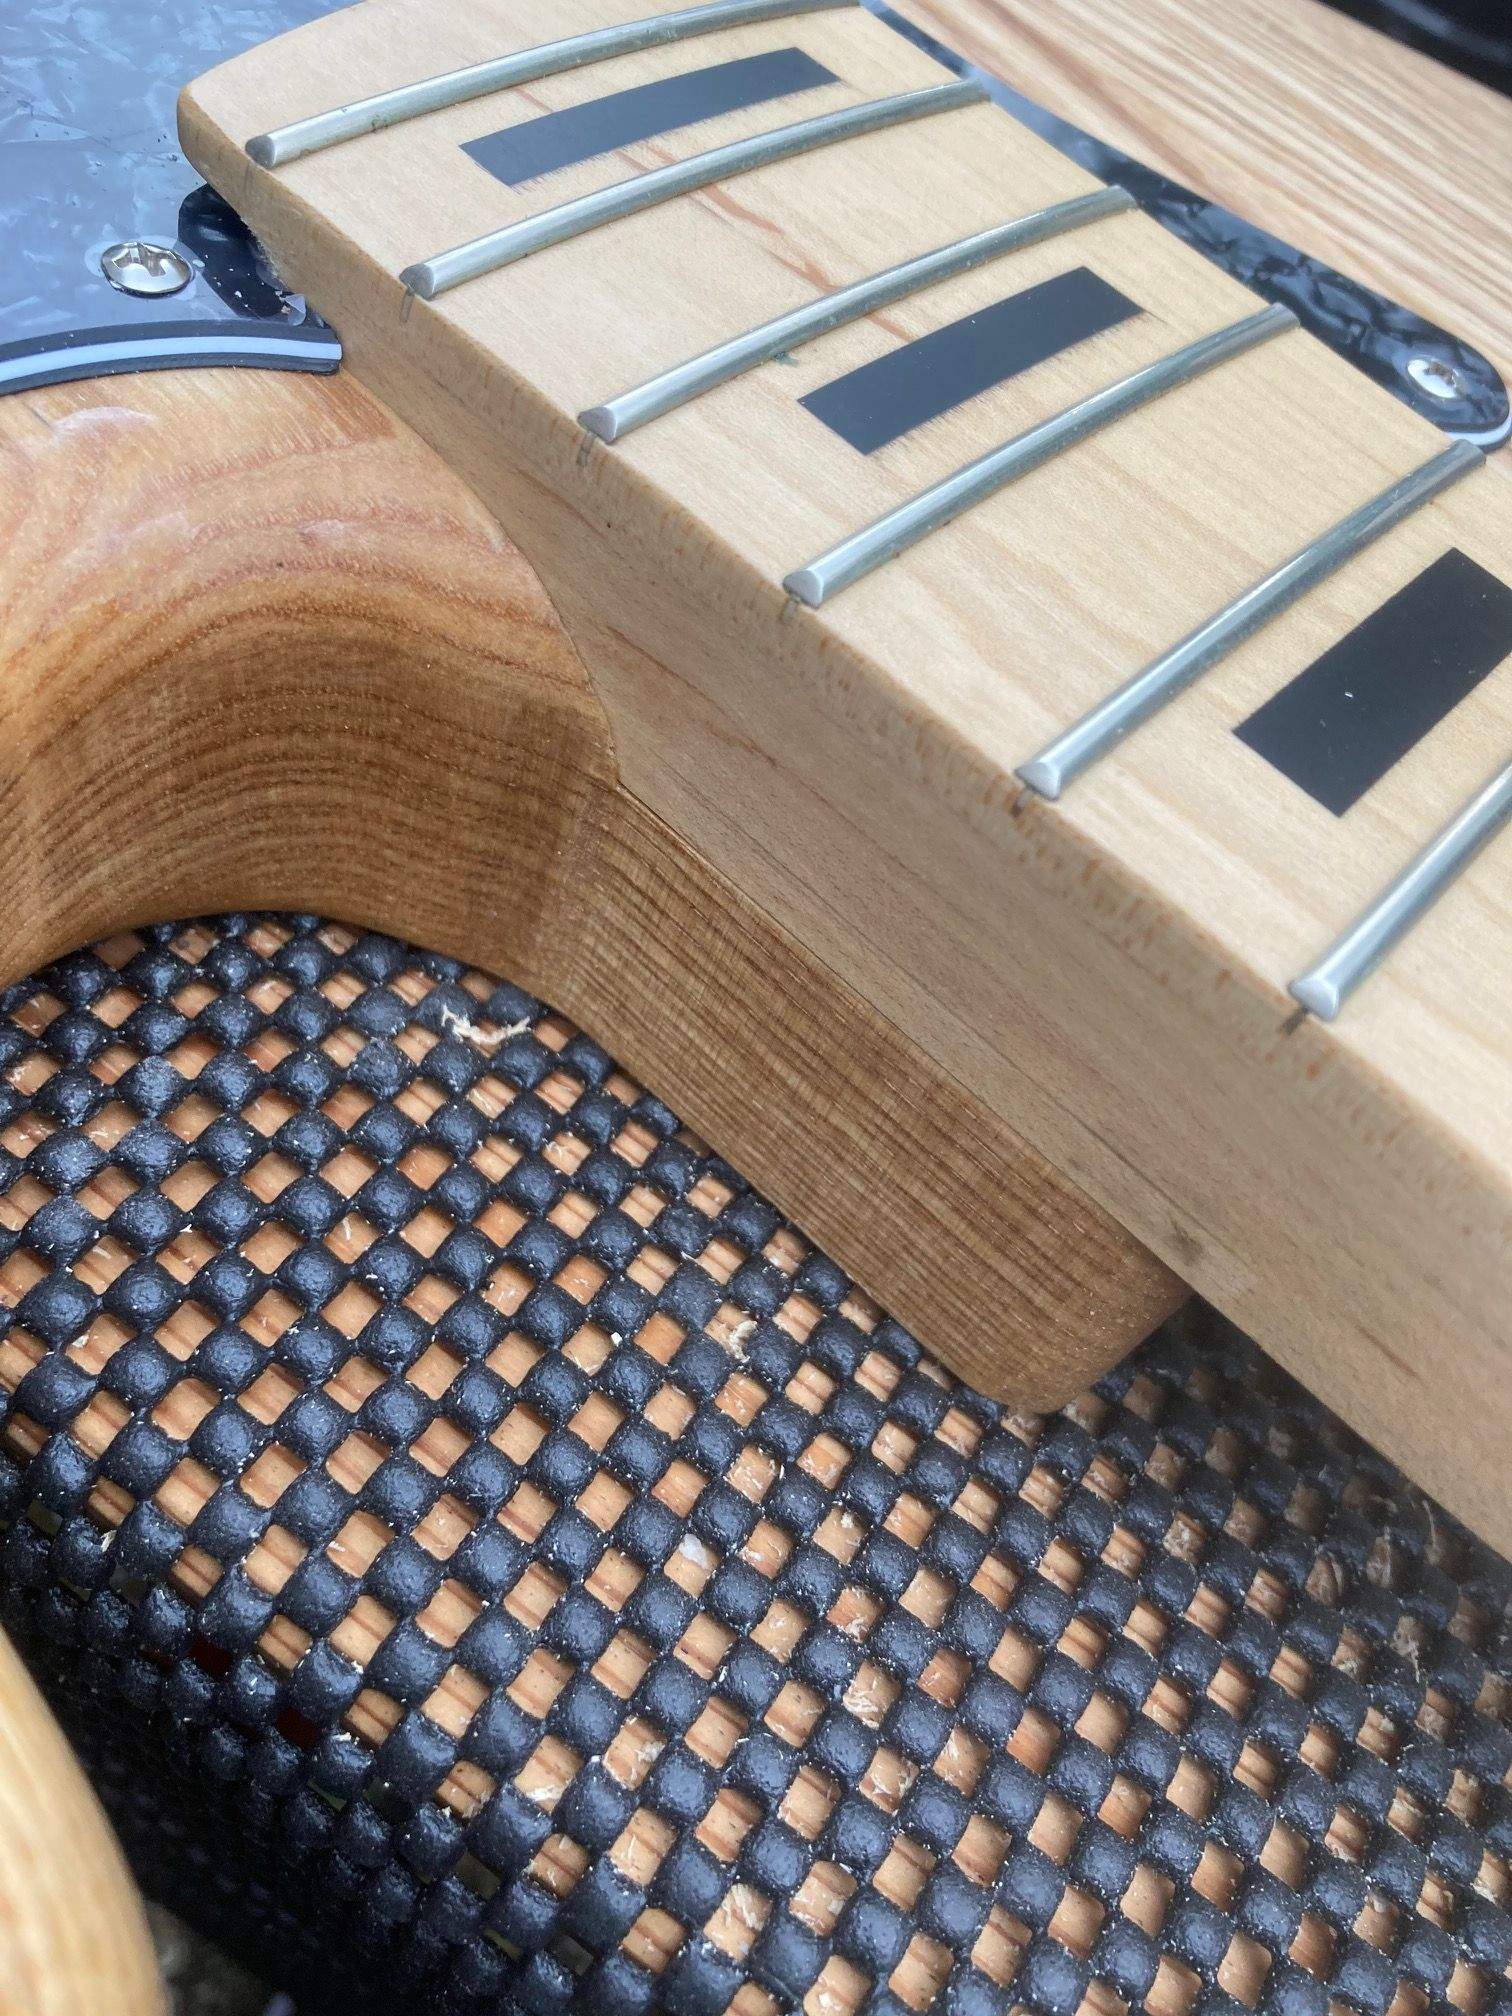
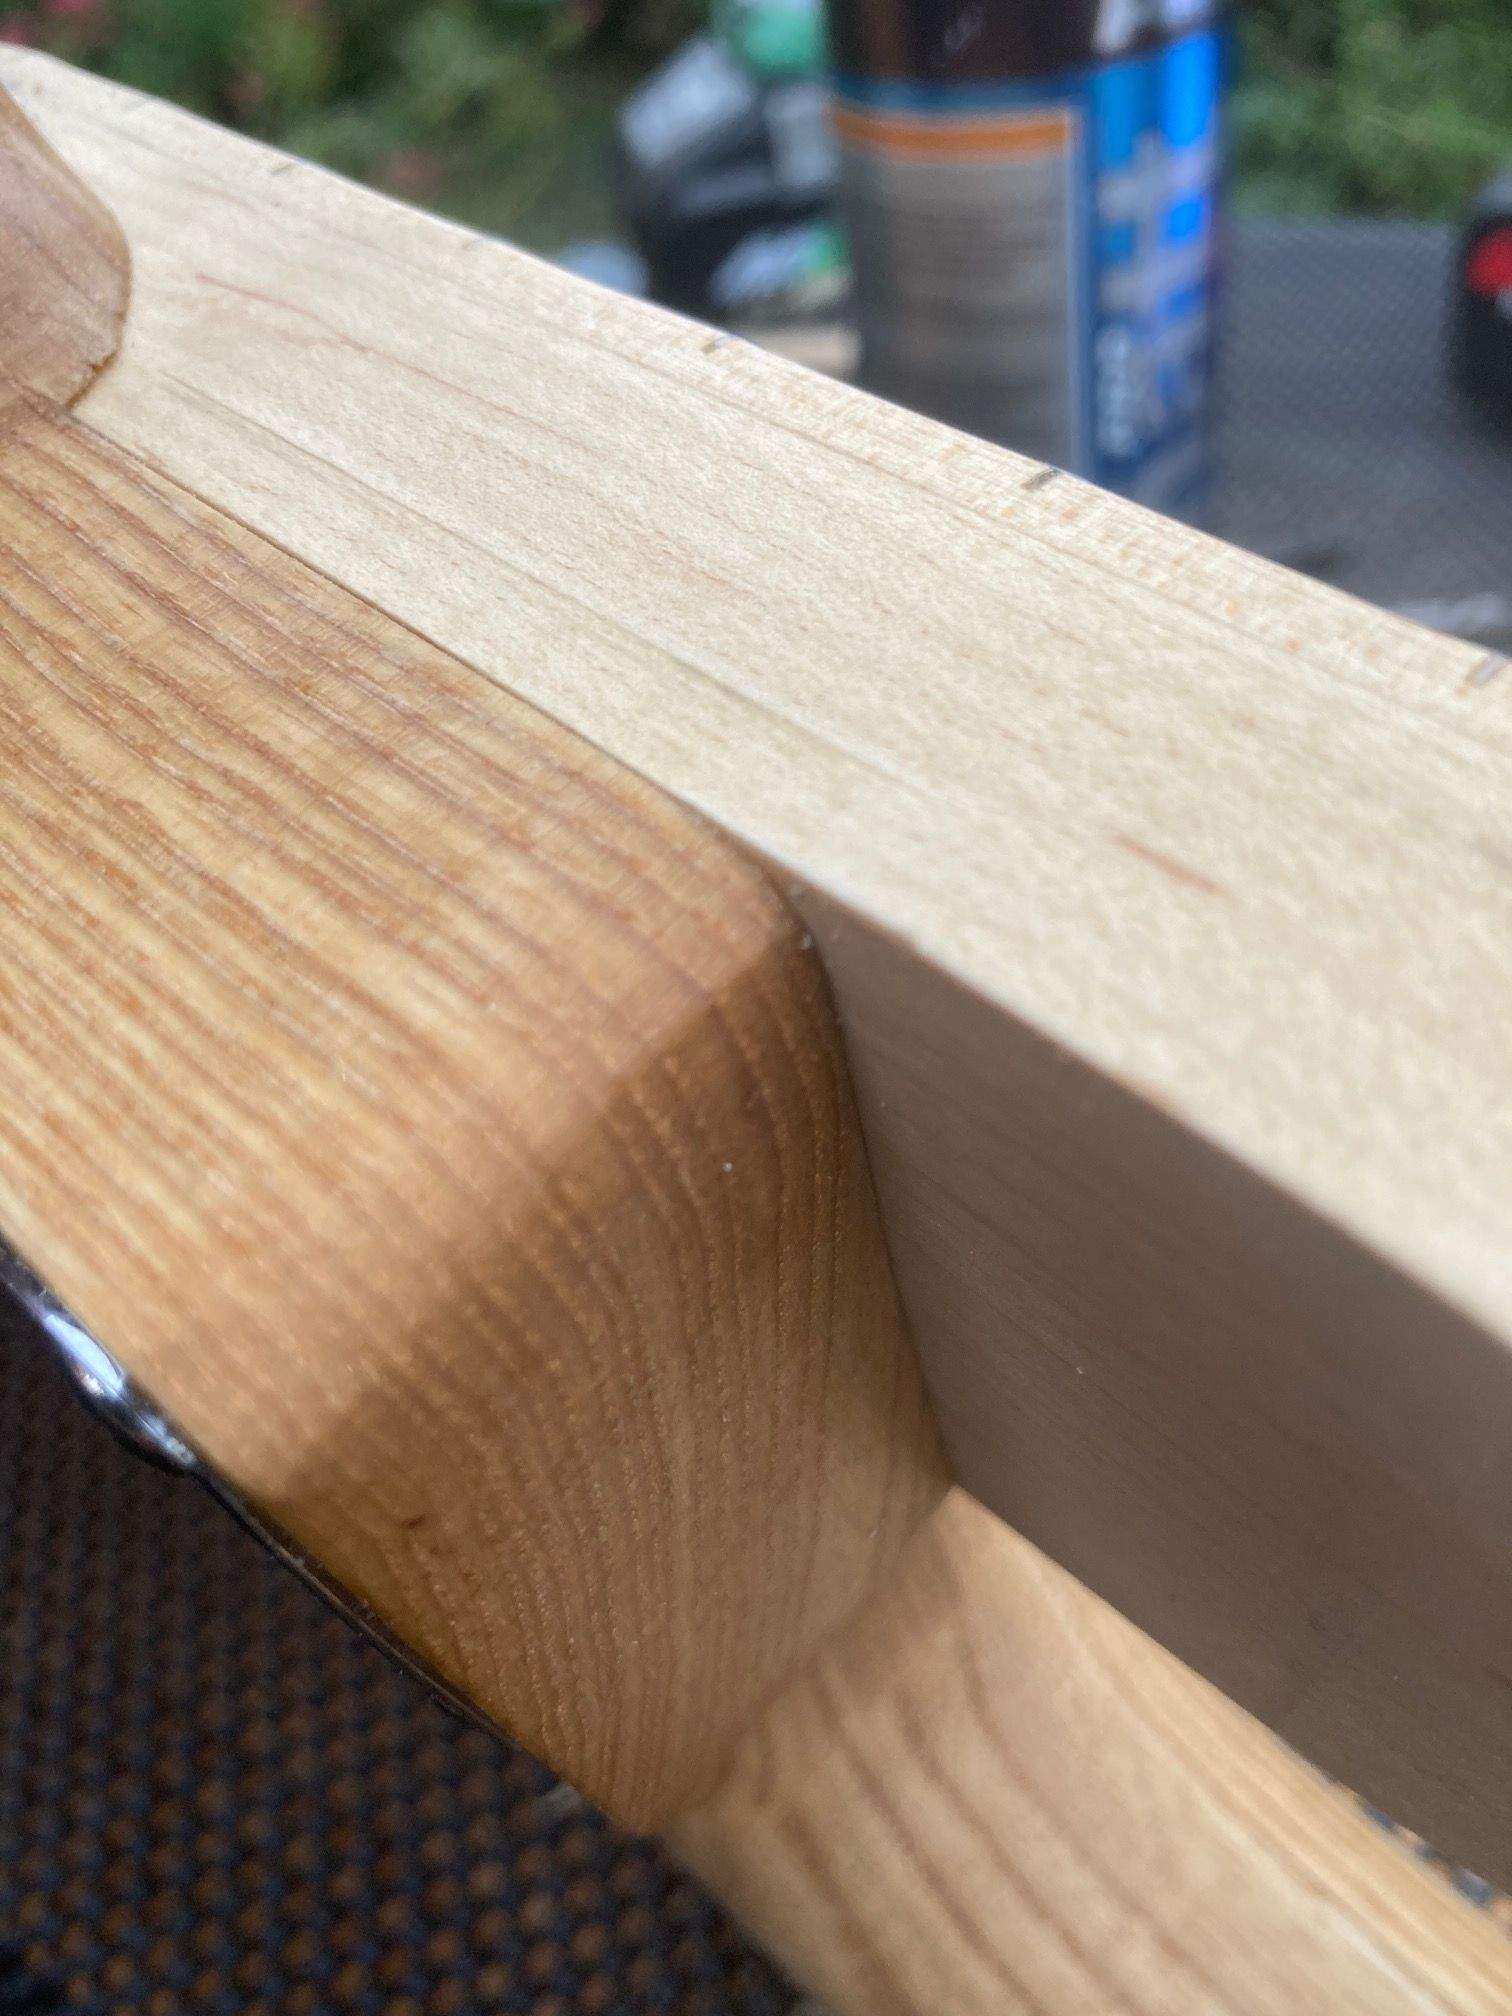
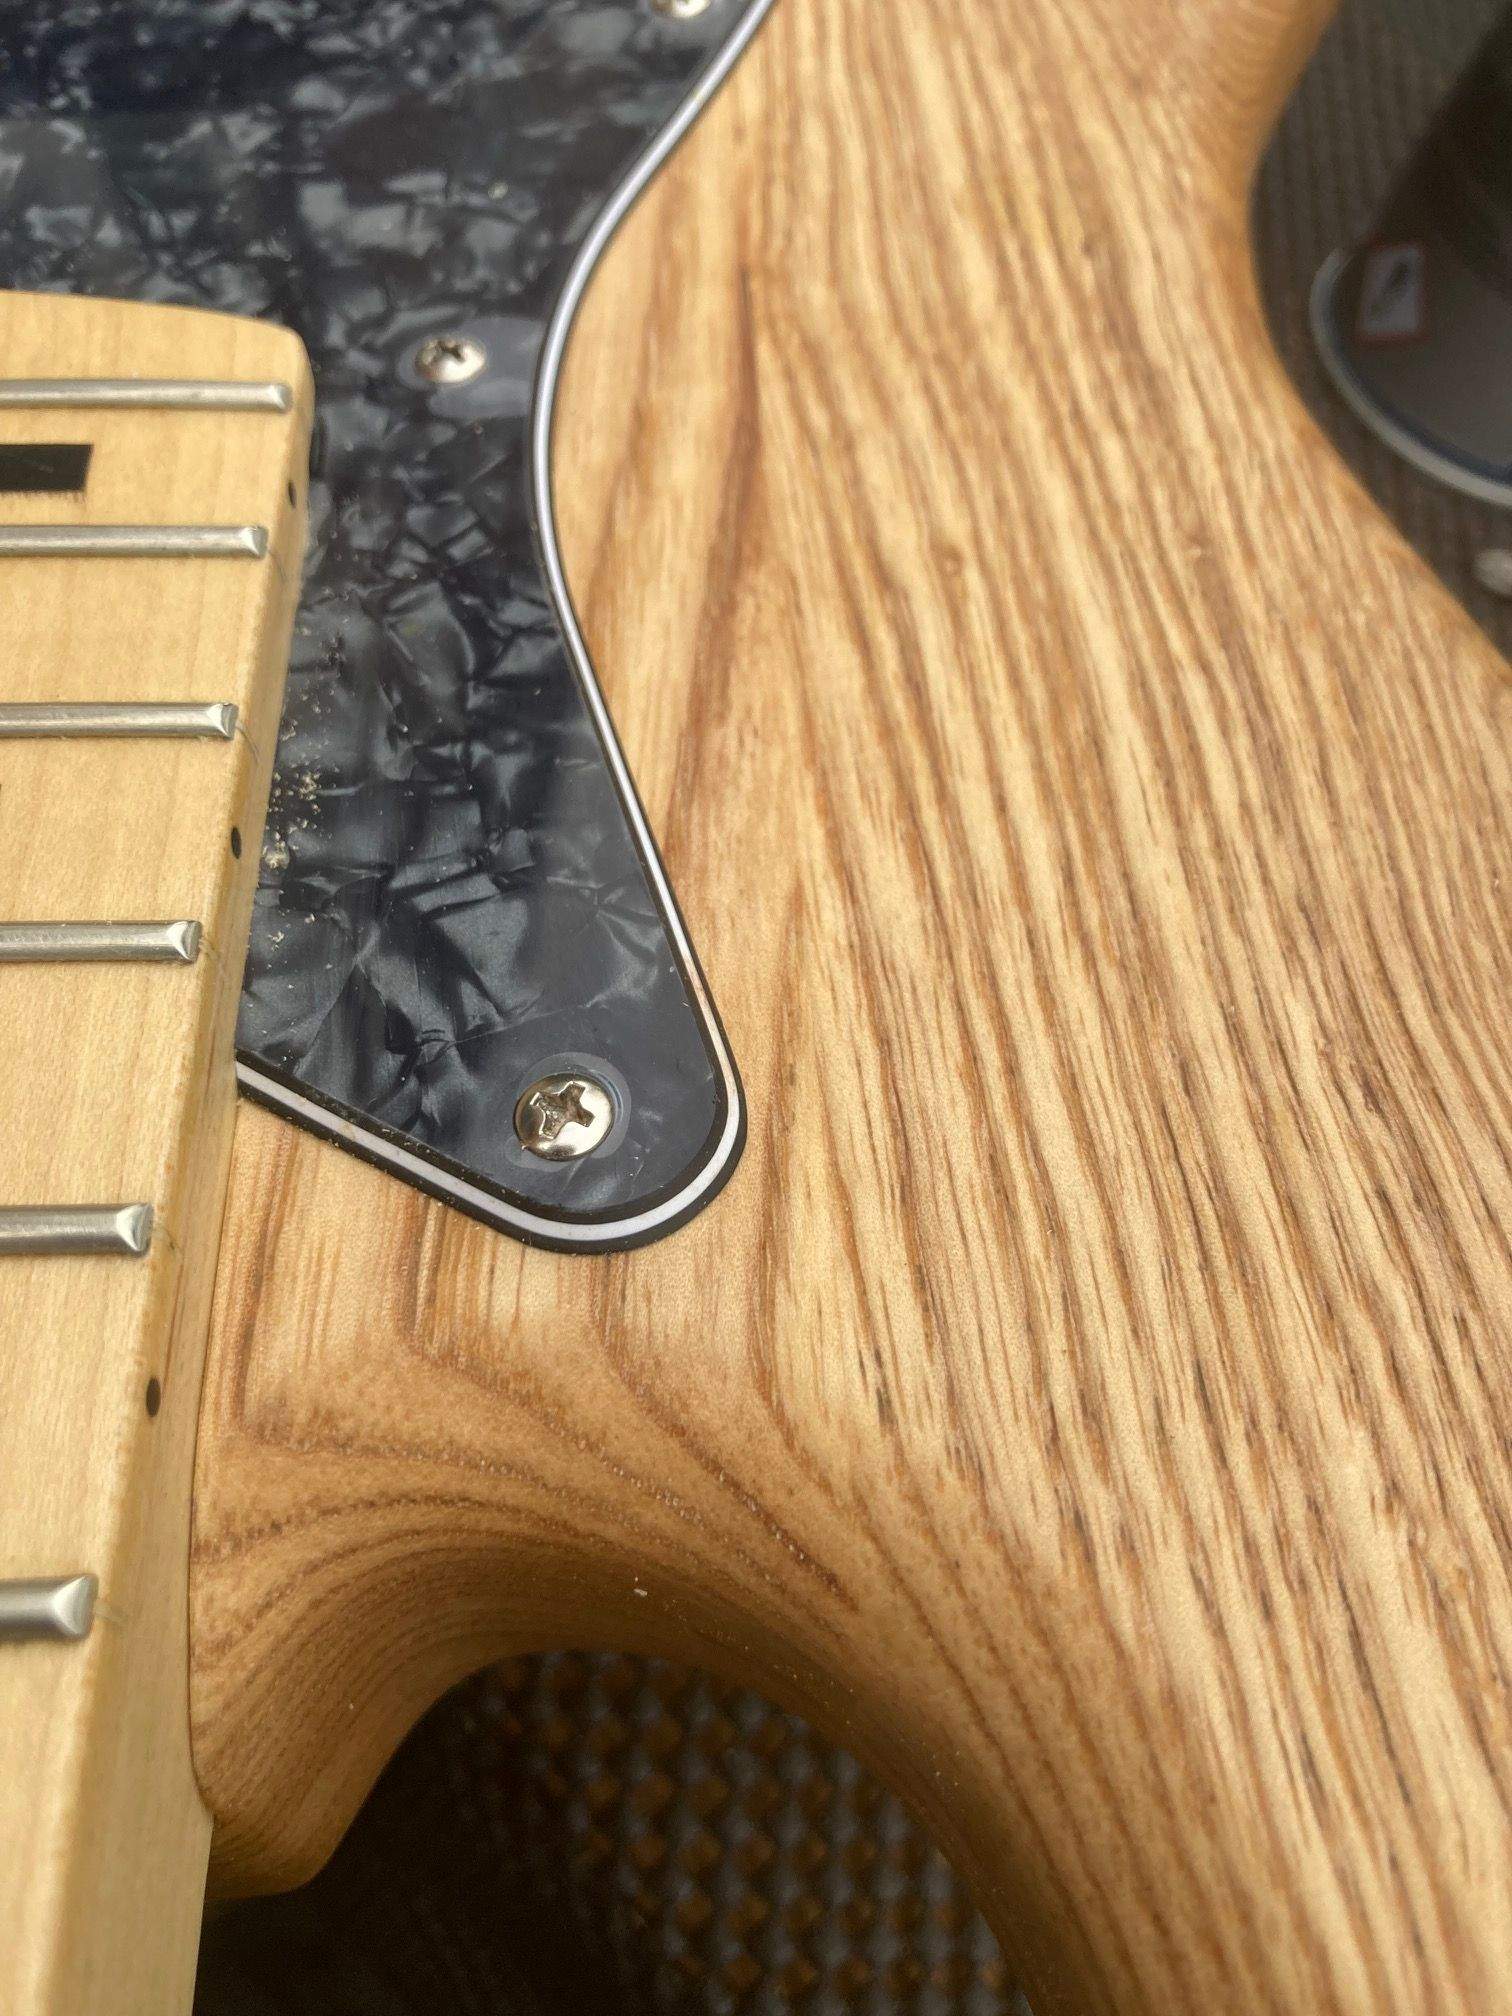
That's more than good enough, and in that last picture you can see my hand rolled neck edges and fret end polishing. I'm proud of the job I did with that and it makes such a difference to playability and feel. The 7ender pickguard also fits like a glove. Am I a happy bunny? Oh yeah.
Removing the neck from its temporary routing fixture, I did some finish sanding, masking, and gave the headstock two light coats of acrylic matte lacquer. Before doing this, I went over the decals with wet micromesh pads, just to knock back the sharp edges of the carrier film to ensure the graphics took on that silkscreened look. This is entirely optional and another coat of lacquer would probably do the same job, but it's how I learned to do decalling. Anyway, a set of genuine Micromesh pads is a worthwhile investment.
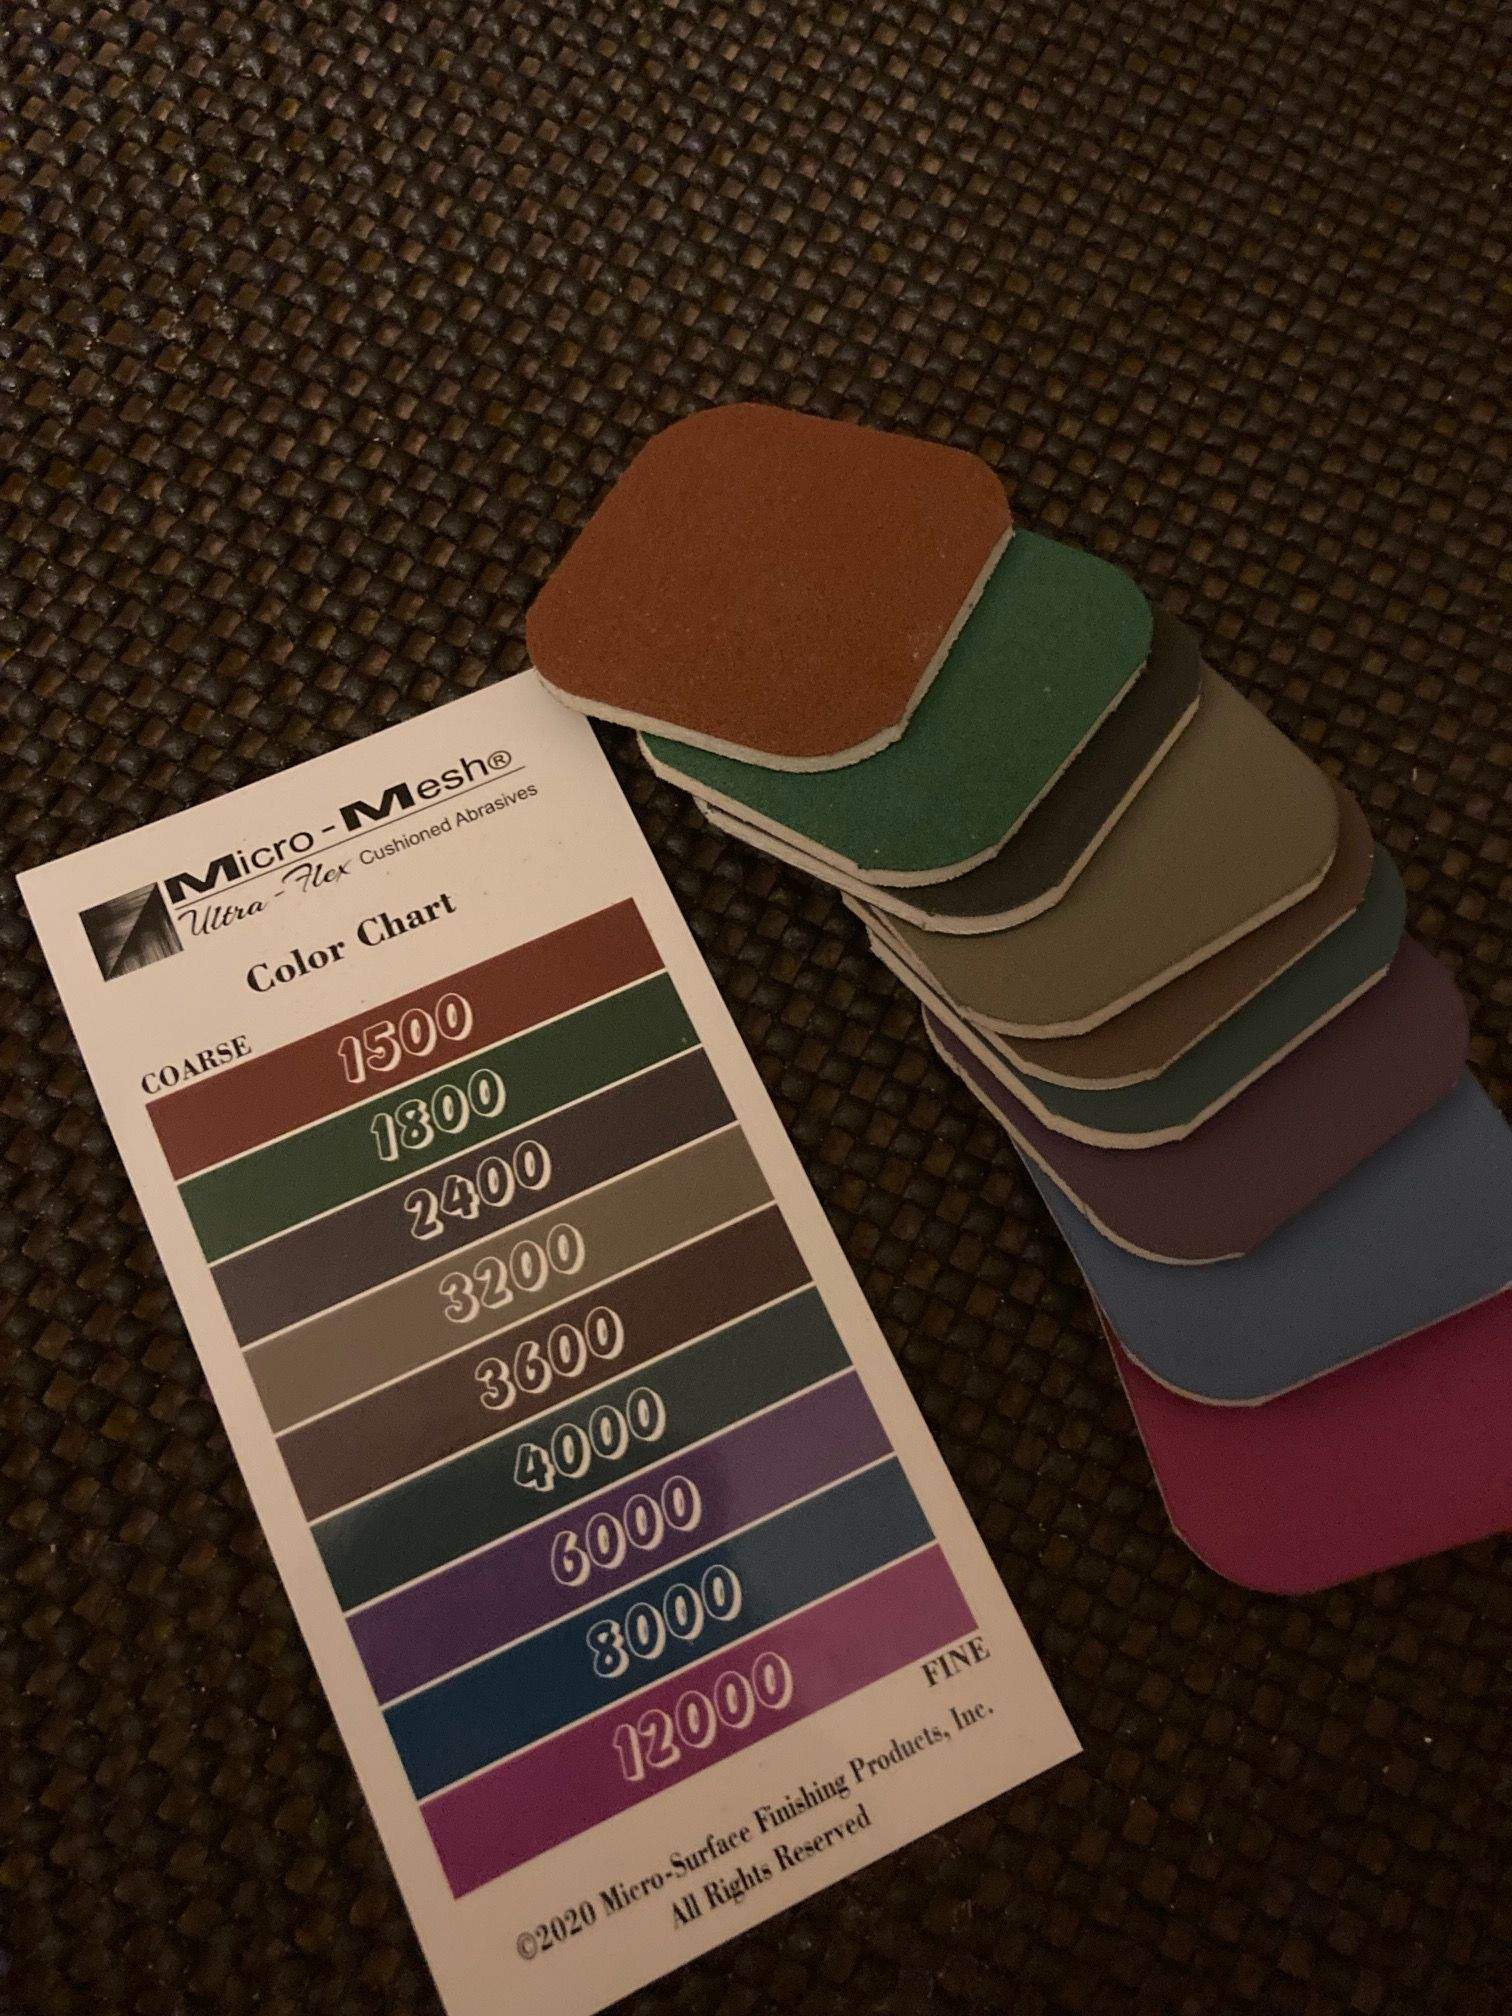
Look after them, treat them as tooling, and never use them dry because they're not supposed to work that way.
Moving swiftly on, I completed the shielding and even did my very own value engineered connection between the neck pickup cavity and the control cavity. I think I saved at least 3 cents doing this instead of using 3 inches of costly wire. Leo would be proud.
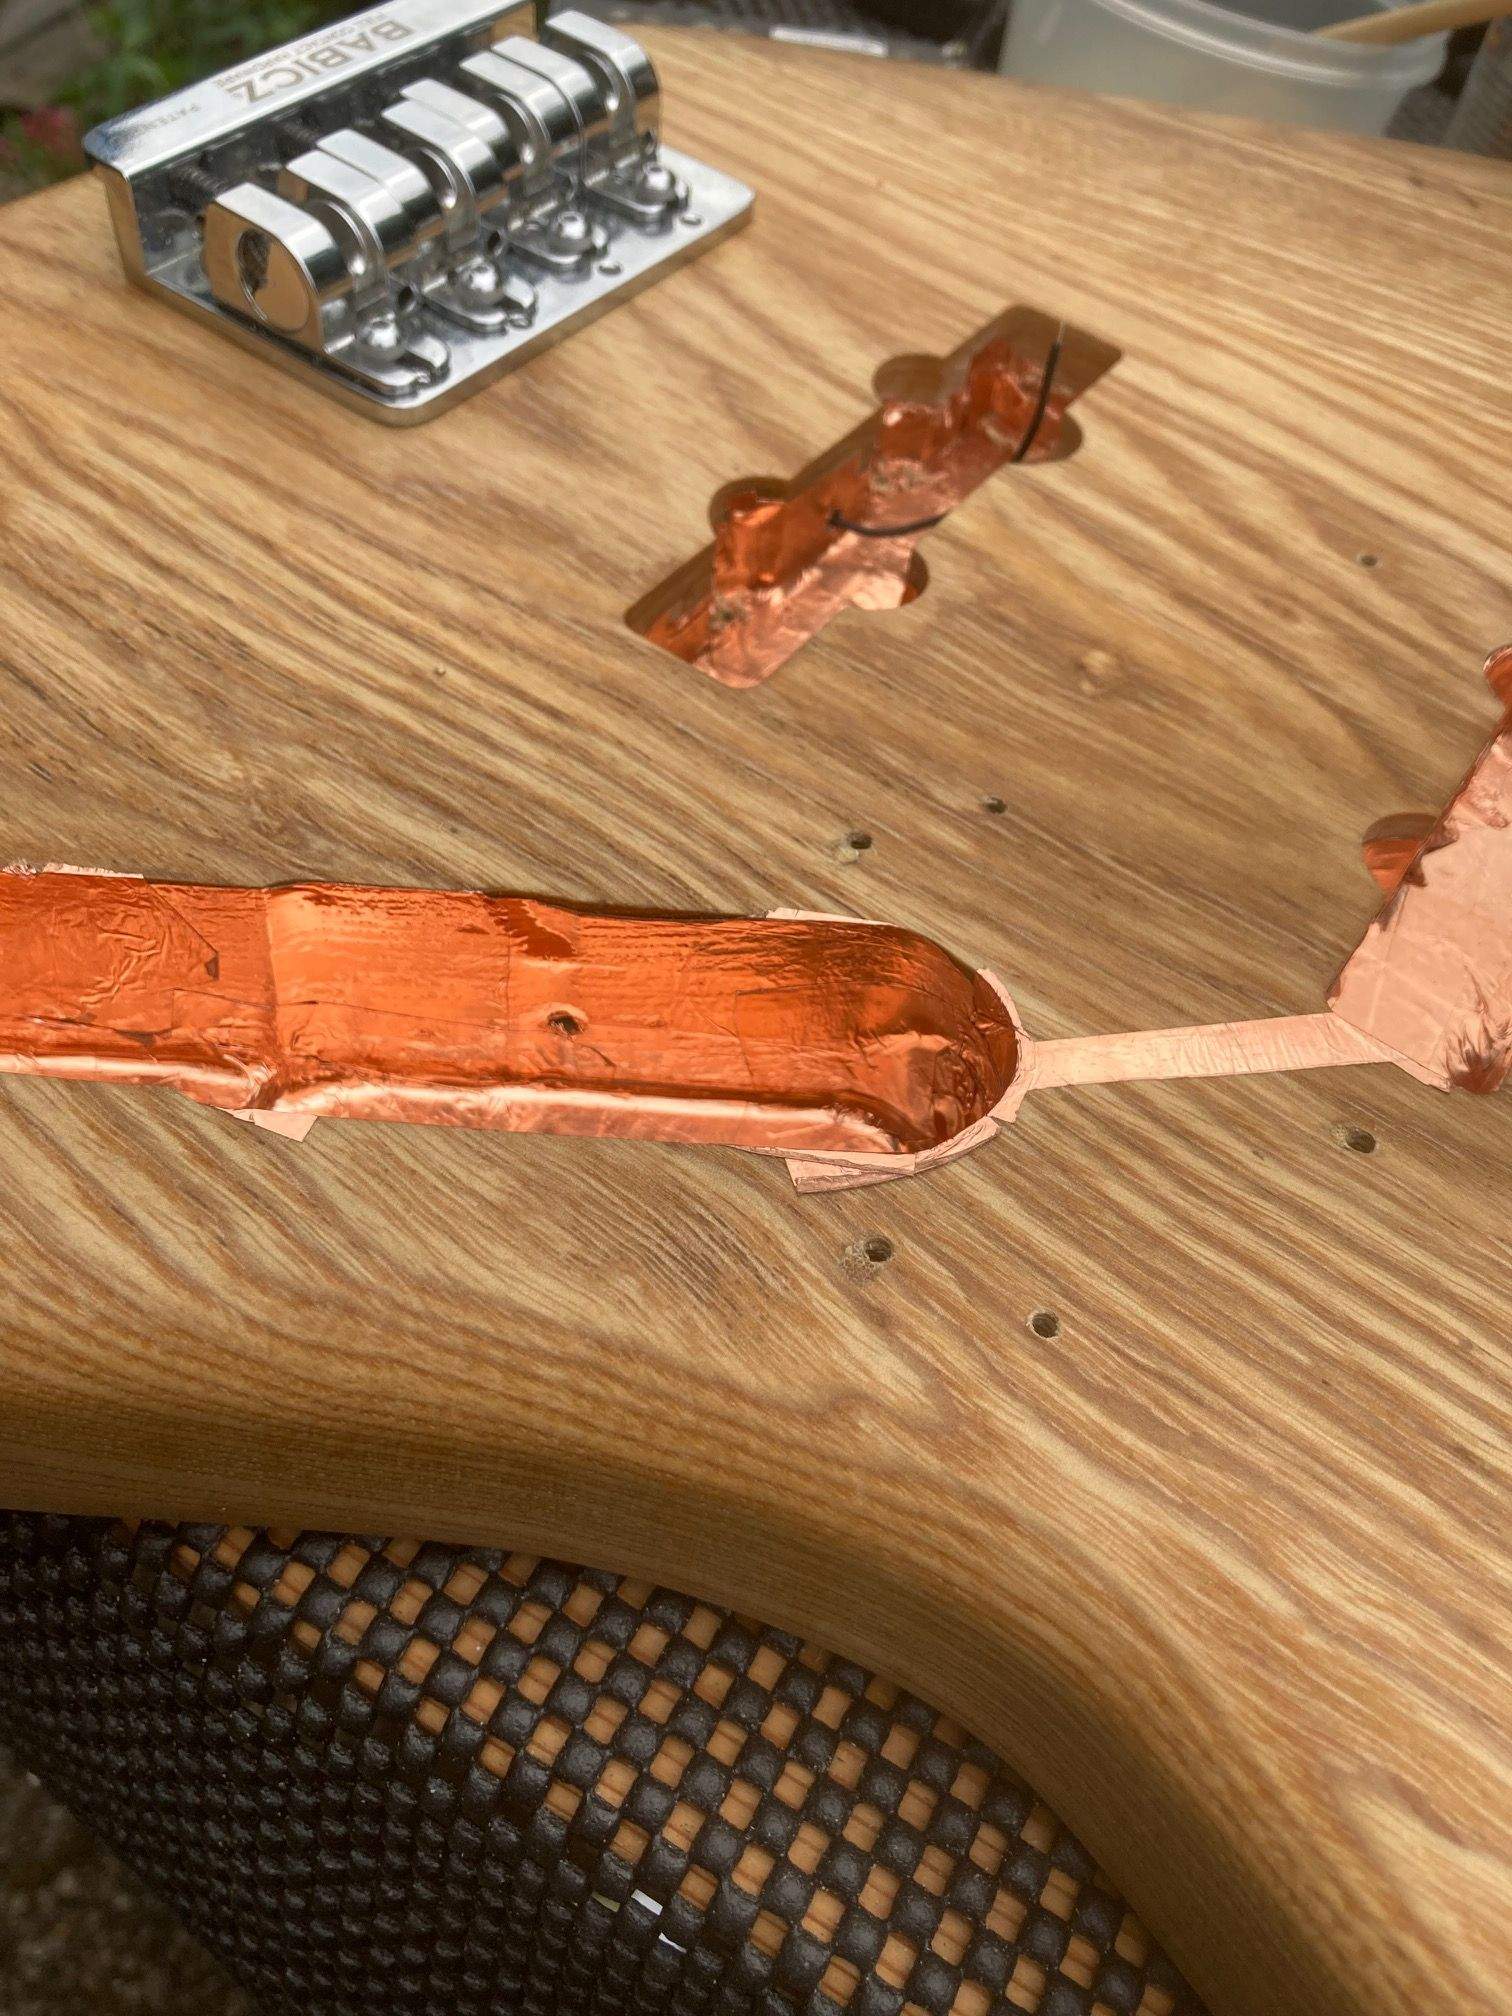
Now all I have to do is my most hated task, soldering, and final reassembly before giving it a setup to the 7ender numbers. Simple Dimple.
The obvious problem with using a router is that there is no flat reference surface, so I had to create one. I used an offcut of iroko and copied over the neck screw pattern, and gave each hole a generous countersink.
With this, I can attach the neck and use a long reach end guided router cutter to transfer the neck's dimension to the body's heel. Simple but effective. I used my cordless router for no better reason than it already had the exact cutter I needed installed. I'm going to keep this simple little fixture in my box of tools. I think I will use it again.
I ran the cutter just into the existing router hump which is a feature of early JB bodies, gave it a light sanding and a coat of the tung oil finish. That will do.
For y'all who said I was brave for attempting to do the neck/ pocket joint by hand with a Shinto rasp and a block plane, all I'm going to say is that I told you I knew exactly what I was doing. I don't want to be **that person** but this is one heck of a closely wrought neck to pocket joint. I'll let the pictures write the words.
That's more than good enough, and in that last picture you can see my hand rolled neck edges and fret end polishing. I'm proud of the job I did with that and it makes such a difference to playability and feel. The 7ender pickguard also fits like a glove. Am I a happy bunny? Oh yeah.
Removing the neck from its temporary routing fixture, I did some finish sanding, masking, and gave the headstock two light coats of acrylic matte lacquer. Before doing this, I went over the decals with wet micromesh pads, just to knock back the sharp edges of the carrier film to ensure the graphics took on that silkscreened look. This is entirely optional and another coat of lacquer would probably do the same job, but it's how I learned to do decalling. Anyway, a set of genuine Micromesh pads is a worthwhile investment.
Look after them, treat them as tooling, and never use them dry because they're not supposed to work that way.
Moving swiftly on, I completed the shielding and even did my very own value engineered connection between the neck pickup cavity and the control cavity. I think I saved at least 3 cents doing this instead of using 3 inches of costly wire. Leo would be proud.
Now all I have to do is my most hated task, soldering, and final reassembly before giving it a setup to the 7ender numbers. Simple Dimple.

If it's good enough for mom's fridge, it's good enough for anybody. All of this is supposed to be enjoyable, and the moment you stop enjoying it is the exact moment to quit.It is super helpful. However, I will likely just do a crappy hand painted job, if I need to do a decal or logo.
I grew up in a very harsh, judgemental environment. I was always picked on for every little thing, so I turned out to be very hard on myself and others.
Then I joined here and everyone is so supportive and nice. It takes a lot of pressure off to know I can do a terrible job and everyone will still say it looks great. I'm basically a 5 yr old, making macaroni art and everyone just pats me on the head, smiles and says, "good boy, good job".
I mean, if making something look perfect is your thing, go for it.moment to quit
Me? I'm enjoying the whole low pressure vibe.
My instruments would still make it onto my mom's fridge, so, some of you are overachieving. Just sayin.
I won't say I'm unhappy with it.Wow. That neck/body joint is flawless.
And not only for saving three cents!Leo would be proud.
Three cents is a LOT of money.And not only for saving three cents!
I have a bone to pick with the ENTIRE musical instrument industry, and I'm going to pick it right now.
Guys, it's 2021 and the only people who don't require me to solder connections together are EMG, and I don't like EMG. It's just not my thing I'm sorry. Every other industry in the world has a standardized quick connect interface but if you wanna make a guitar you are Donald Ducked. Surely it can't be THAT difficult?
Anyway, I hate soldering. I'm not great at it, my eyesight even when corrected is about as useful as a c*ck flavored lollipop which doesn't help at all, and did I mention I hate it? I know exactly what I should do, how to do it, I just suck at it. And it smells bad.
I got there in the end. First job was to solder the bridge ground to the bridge pickup cavity shielding, and then connect that to the control cavity shield. The metal control cover will complete the ground circuit as it is in contact with the shield.
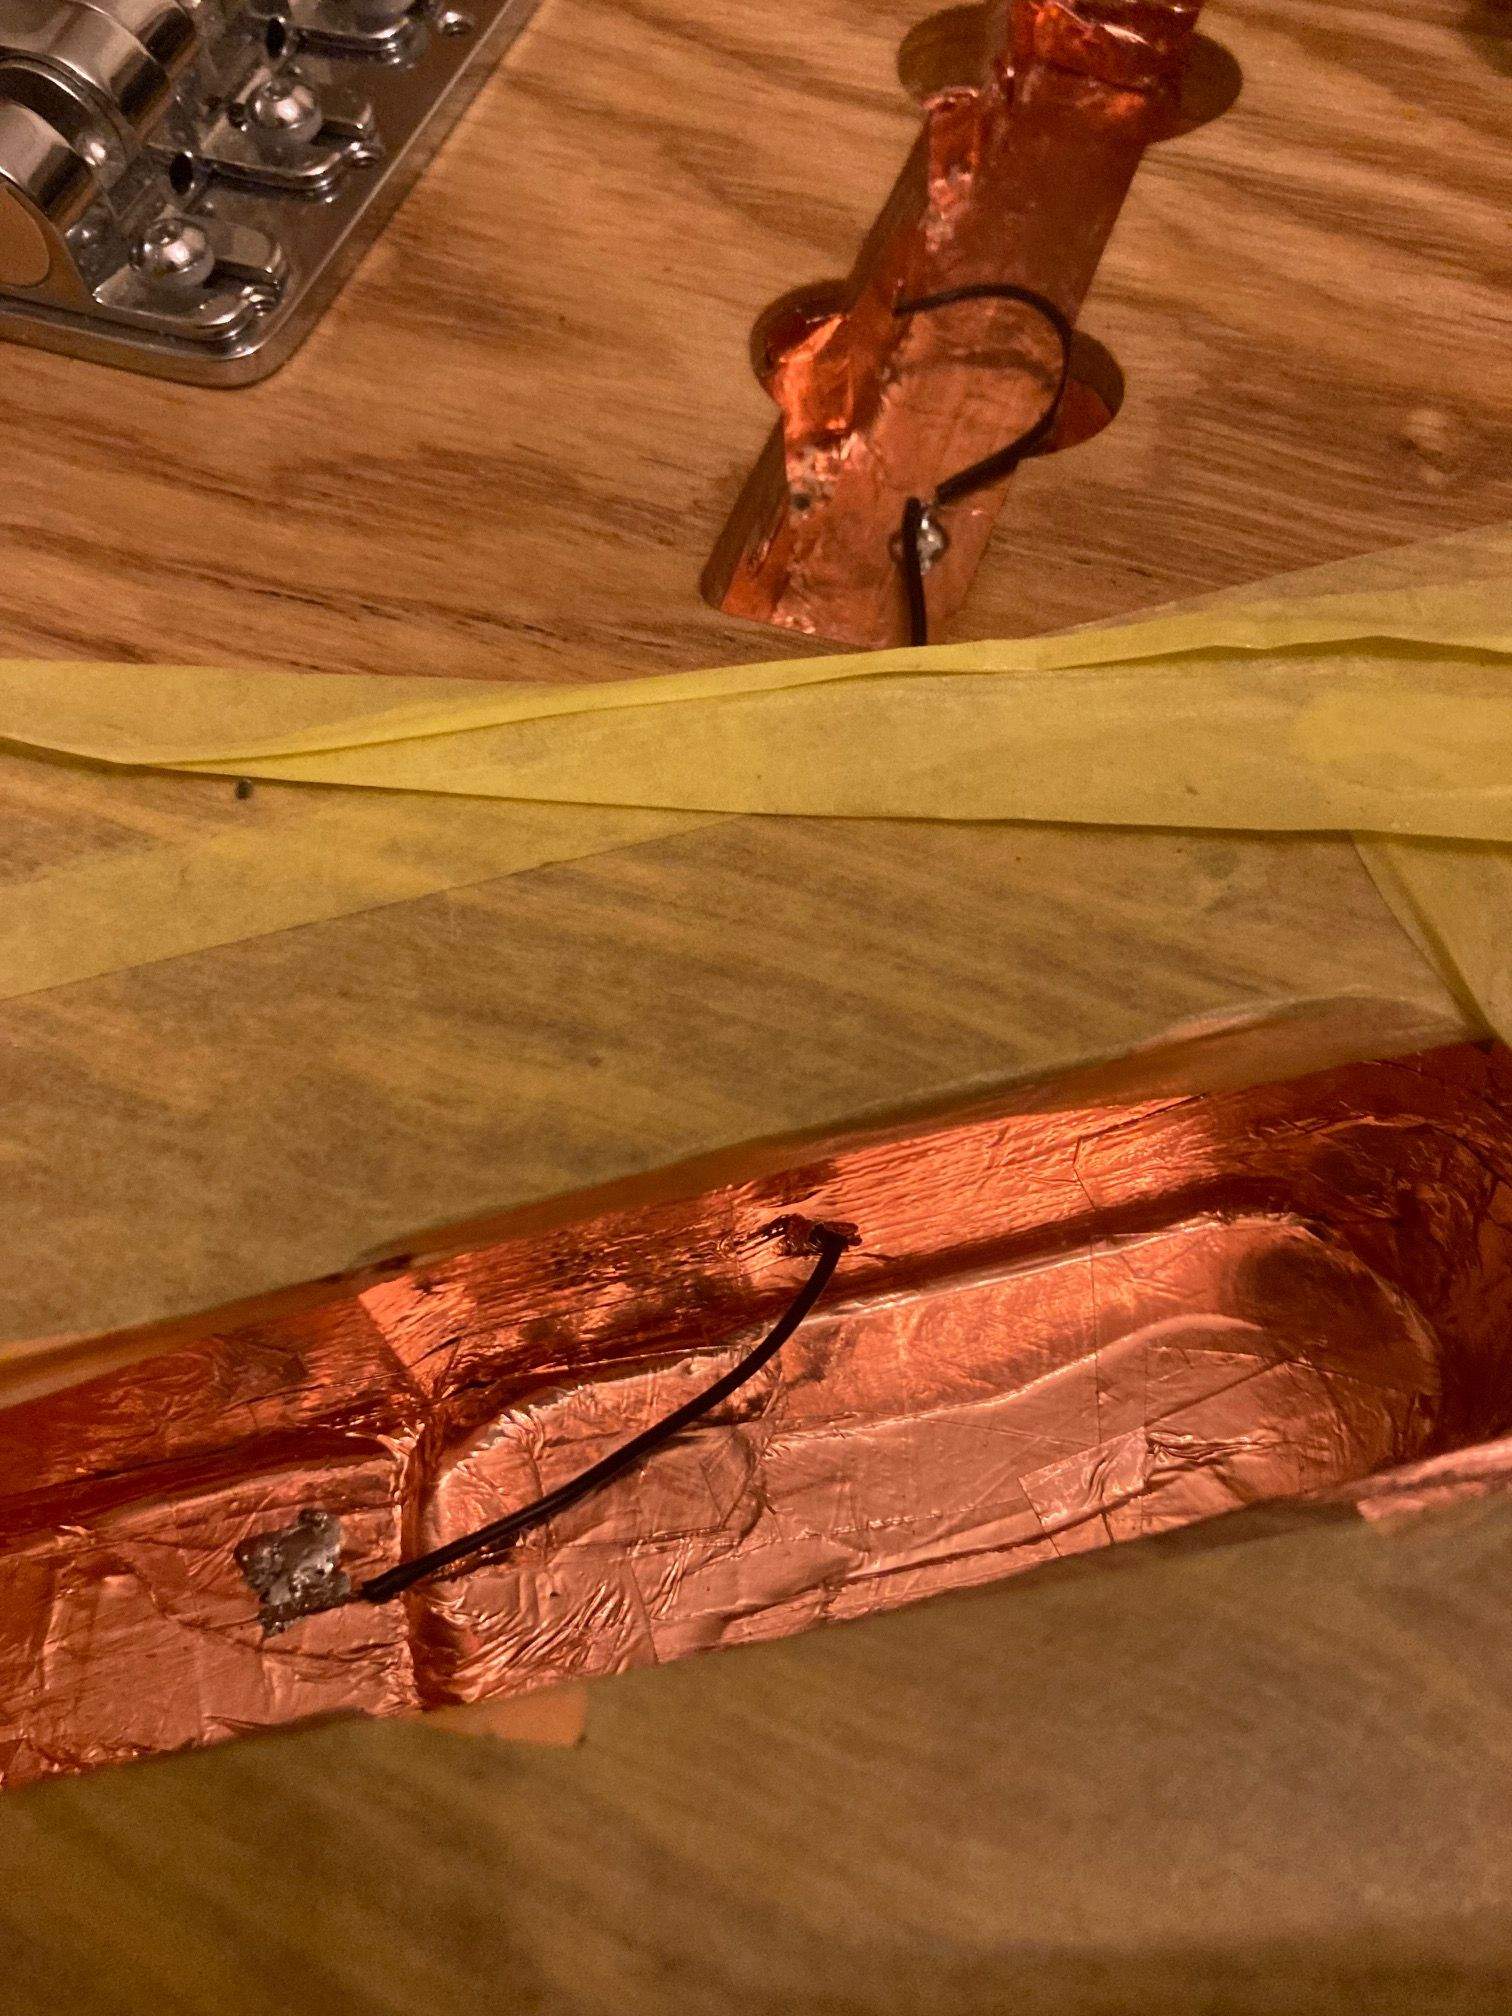
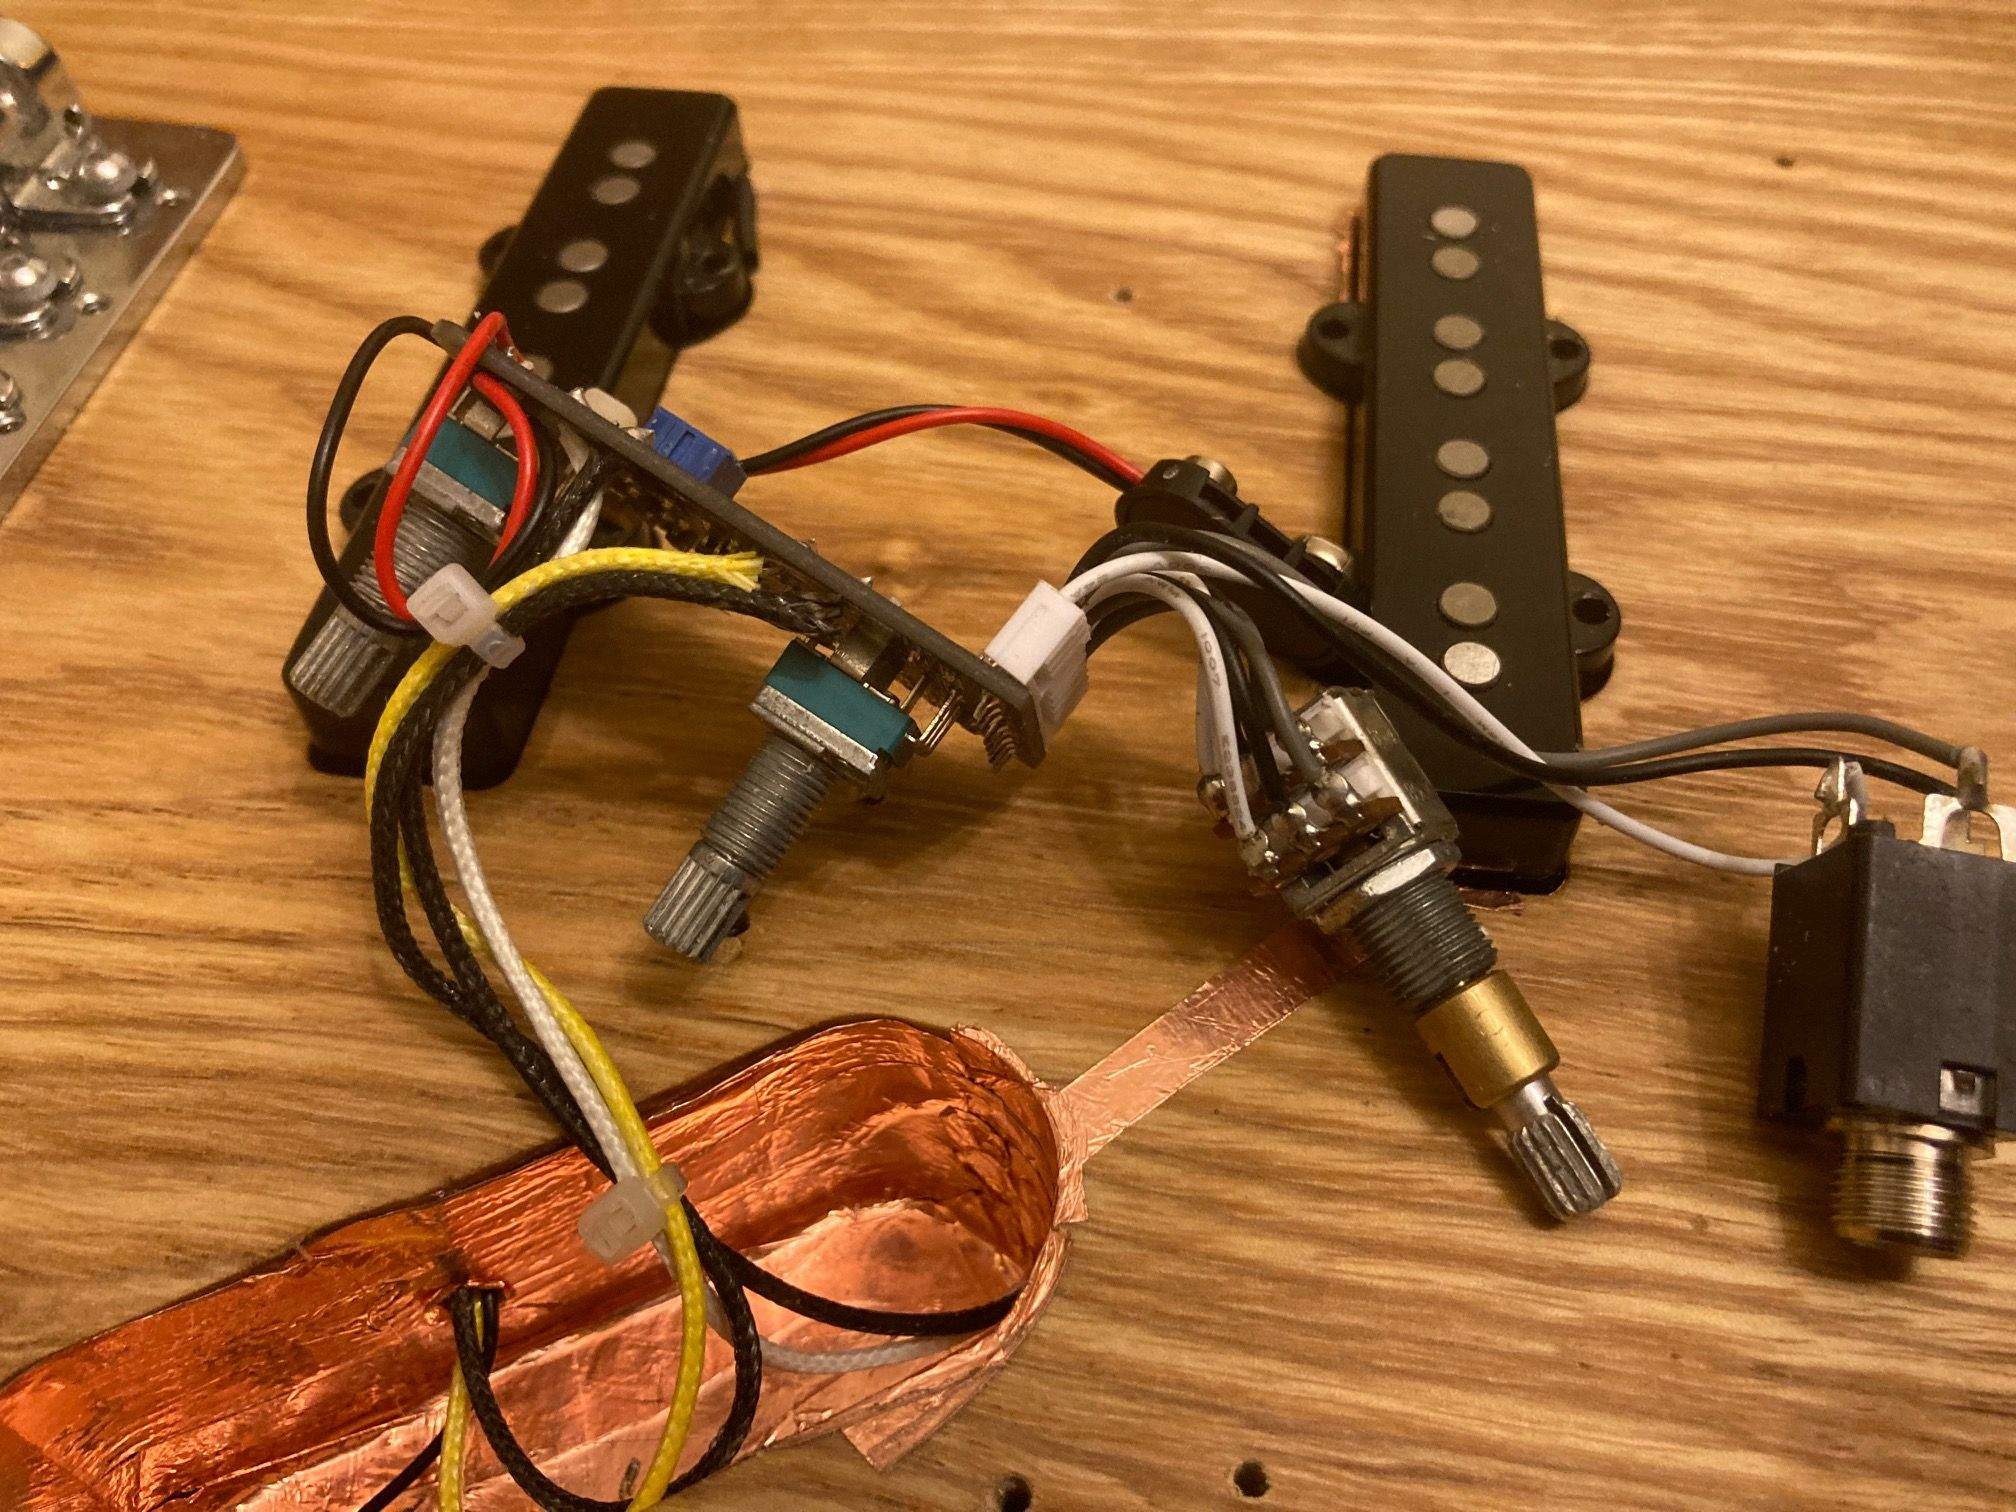
I connected the battery leads and pickup leads, and had a harness of sorts. I wish I could do the super neat wiring some folks can manage to pull off. I removed the circuit from the control plate to make life easier.
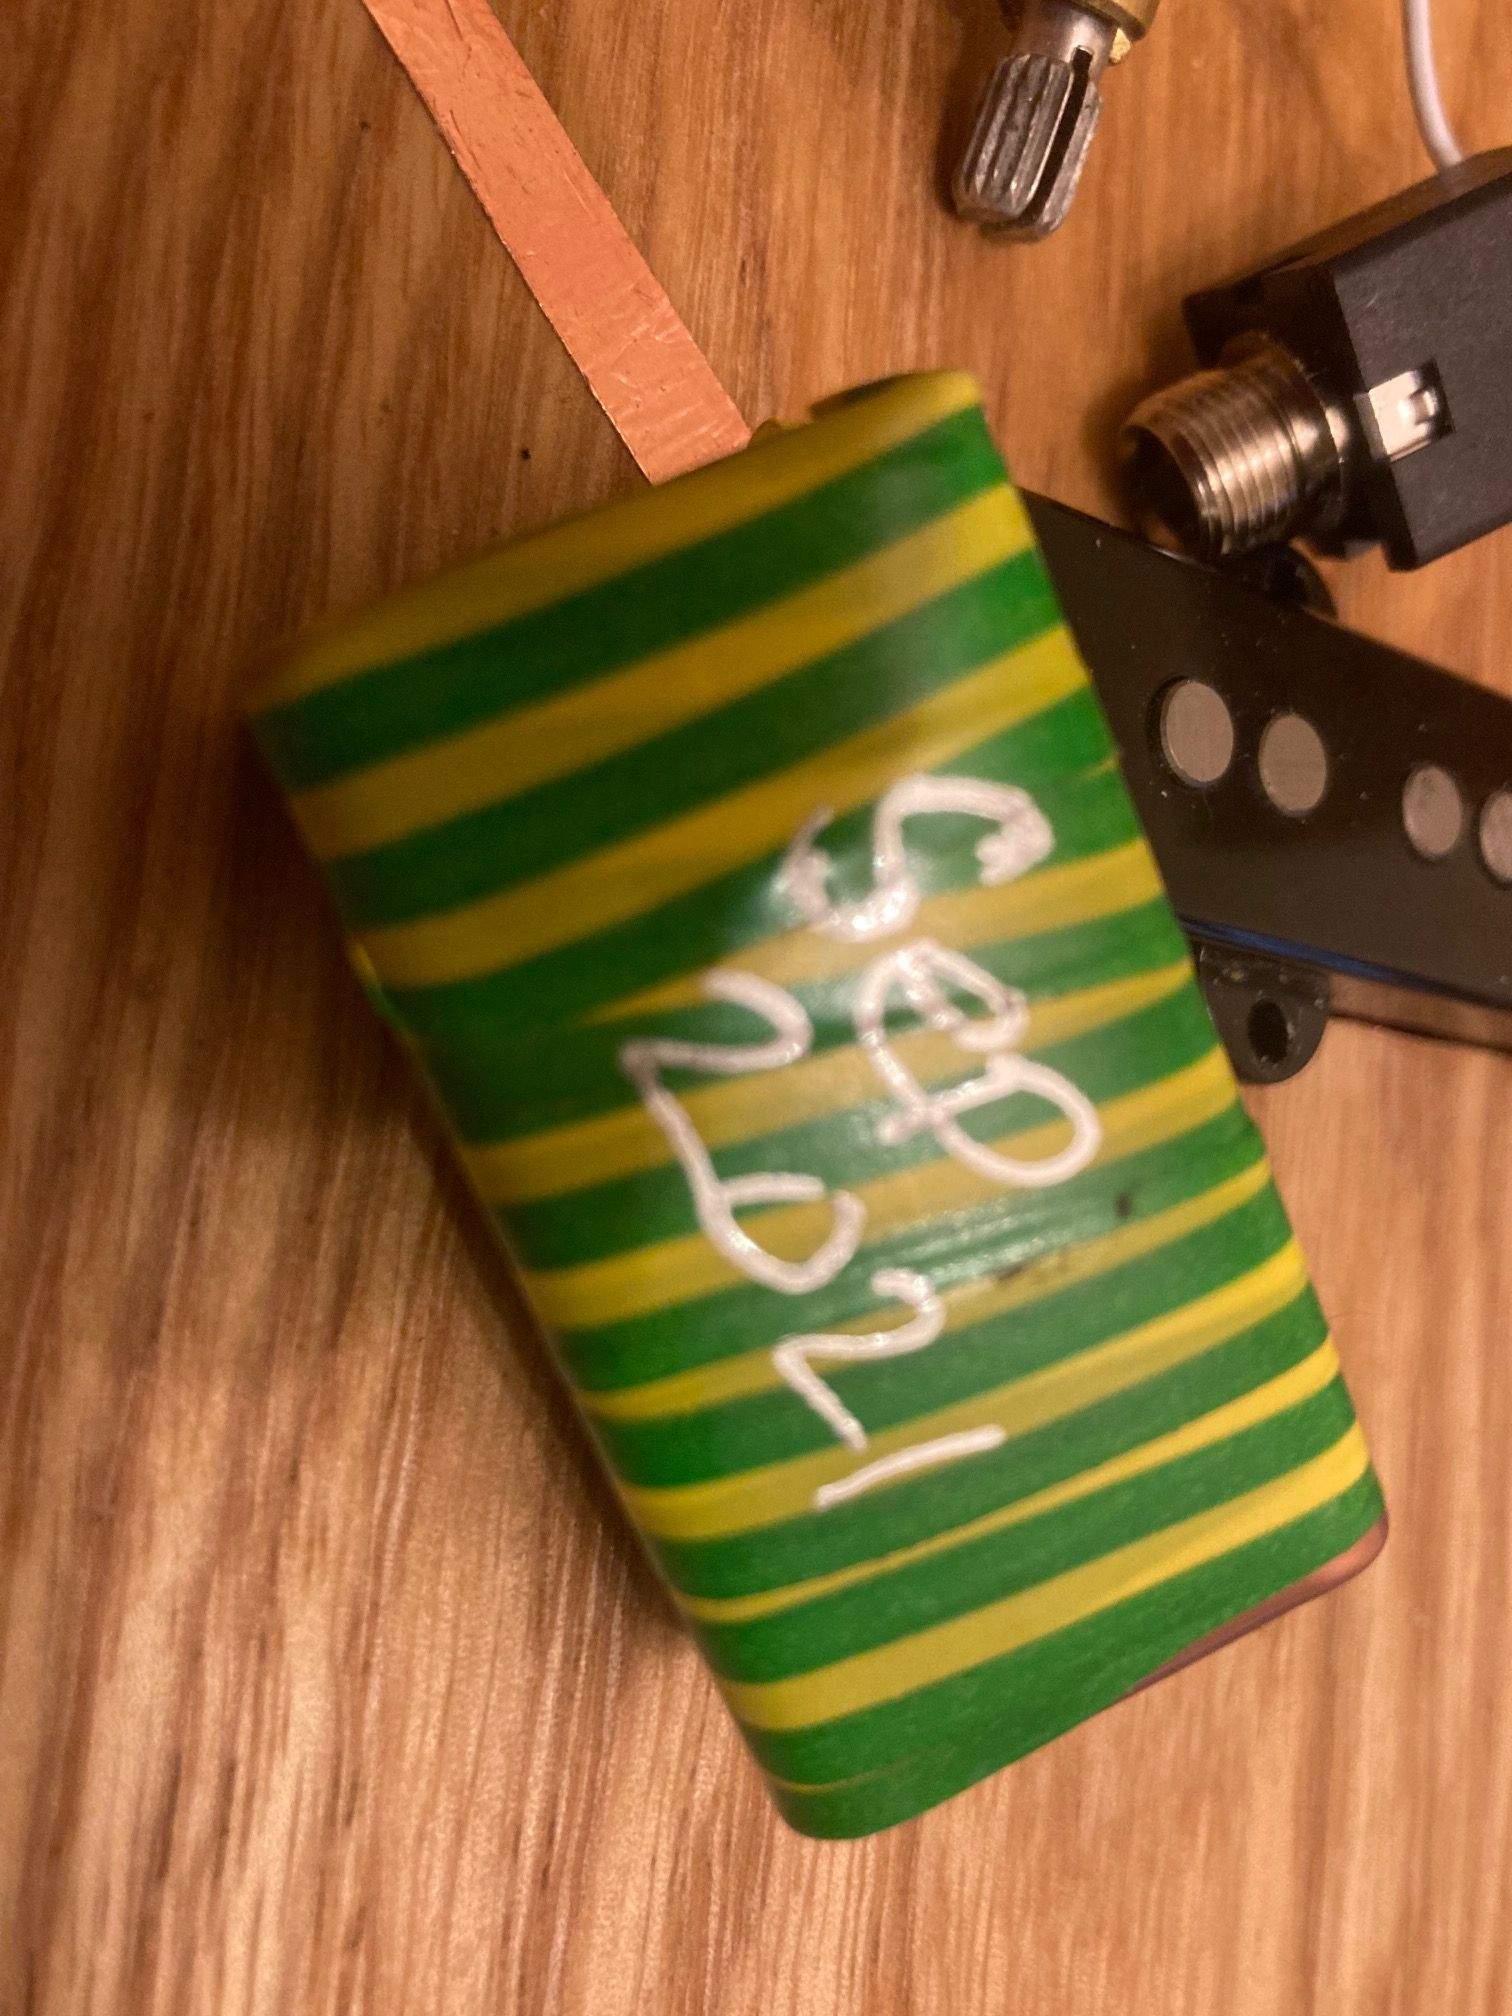
All connections made, so all that remains is to dress the battery. I wrapped it in two layers of electricsl tape, and wrote the date on the tape as a professional courtesy to the next person along. Me. Seriously, this is good practice.
 By now suffering from electronics stress, I sat back with a nice cold drink and listened to captain cool for a while before doing anything else.
Guys, it's 2021 and the only people who don't require me to solder connections together are EMG, and I don't like EMG. It's just not my thing I'm sorry. Every other industry in the world has a standardized quick connect interface but if you wanna make a guitar you are Donald Ducked. Surely it can't be THAT difficult?
Anyway, I hate soldering. I'm not great at it, my eyesight even when corrected is about as useful as a c*ck flavored lollipop which doesn't help at all, and did I mention I hate it? I know exactly what I should do, how to do it, I just suck at it. And it smells bad.
I got there in the end. First job was to solder the bridge ground to the bridge pickup cavity shielding, and then connect that to the control cavity shield. The metal control cover will complete the ground circuit as it is in contact with the shield.
I connected the battery leads and pickup leads, and had a harness of sorts. I wish I could do the super neat wiring some folks can manage to pull off. I removed the circuit from the control plate to make life easier.
All connections made, so all that remains is to dress the battery. I wrapped it in two layers of electricsl tape, and wrote the date on the tape as a professional courtesy to the next person along. Me. Seriously, this is good practice.
Attachments

Just gonna stop you right there.Guys, it's 2021 and the only people who don't require me to solder connections together are EMG,.....
LC made electronics the way they are, back when the world was created and pirates rode dinosaurs and they aren't meant to be changed.
All you need is a split pup, vol & tone and they should be soldered.
I don't know what all this EMT whatever crap is, but I'm sure it's of the devil and will probably make you do drugs or go blind.


