• TalkBass has been independent since 1998. Add your voice.
    Create a free account to reply to discussions, view embedded media, and browse with fewer display ads.
    Join freeLog in
    Want zero display ads or expanded classifieds tools? Compare plans.

Brooks FV-12. A short scale twelve-string bass

Basvarken

Commercial User
Dec 3, 2010
1,743
10,606
Velp Rockcity
www.thegibsonbassbook.com
Disclosures
Hobby Luthier / Gibson Bass Book
Hooray, another Brooks bass is born!

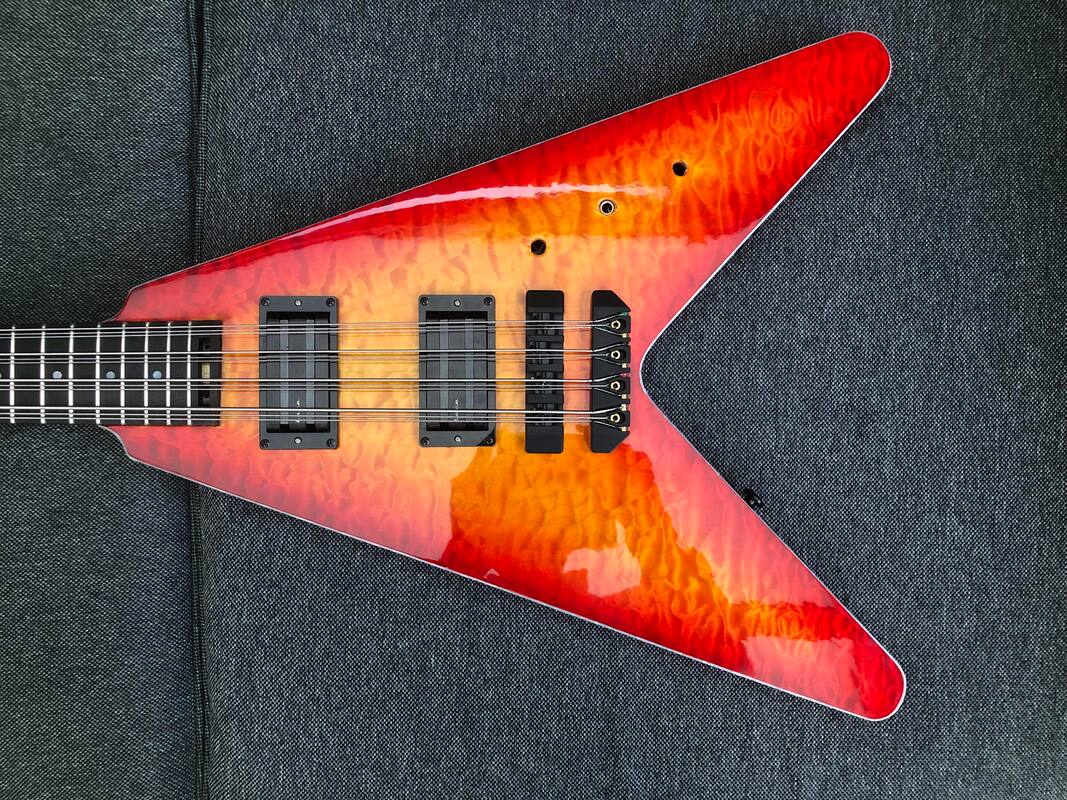
The Brooks FV-12

- Korina body wings
- Bookmatched Quilted Maple top
- Nine ply Korina/Mahogany Neck through
- Cherry Burst high gloss finish
- Pearloid binding
- Ebony fretboard
- Mother of Pearl position dots. Aluminium Circle dot for 12th
- Jumbo frets
- 30 1/2" scale
- Buffalo horn nut
- ETS Custom made twelve string brass bridge and tailpiece. Black
- Two spokewheel double action trussrods
- Carbon reinforcement strip in the neck
- Pickups: Lace Alumitone DB7, Black
- Controls : volume, volume, tone
- 0.047mfd capacitor
- Gotoh GB 350 lightweight bass tuners, Black
- Gotoh ST-31 octave string tuners, Black
- Output: Pure Tone Multi Contact jack
- d'Addario custom strings
- Weight: 4.3 kg


brooks-fv-12-full-front2-1500_orig.jpg

brooks-fv-12-body-side-view-1500_orig.jpg

brooks-fv-12-headstock-1500_orig.jpg

brooks-fv-12-headstock-back-1500_orig.jpg

brooks-fv-12-bridge-tailpiece-1500_orig.jpg

brooks-fv-12-full-back-1500_orig.jpg

brooks-fv-12-output-cup-1500_orig.jpg

brooks-fv-12-bottom-to-top-1500_orig.jpg


In posts below I'll show pics of the build process.
 
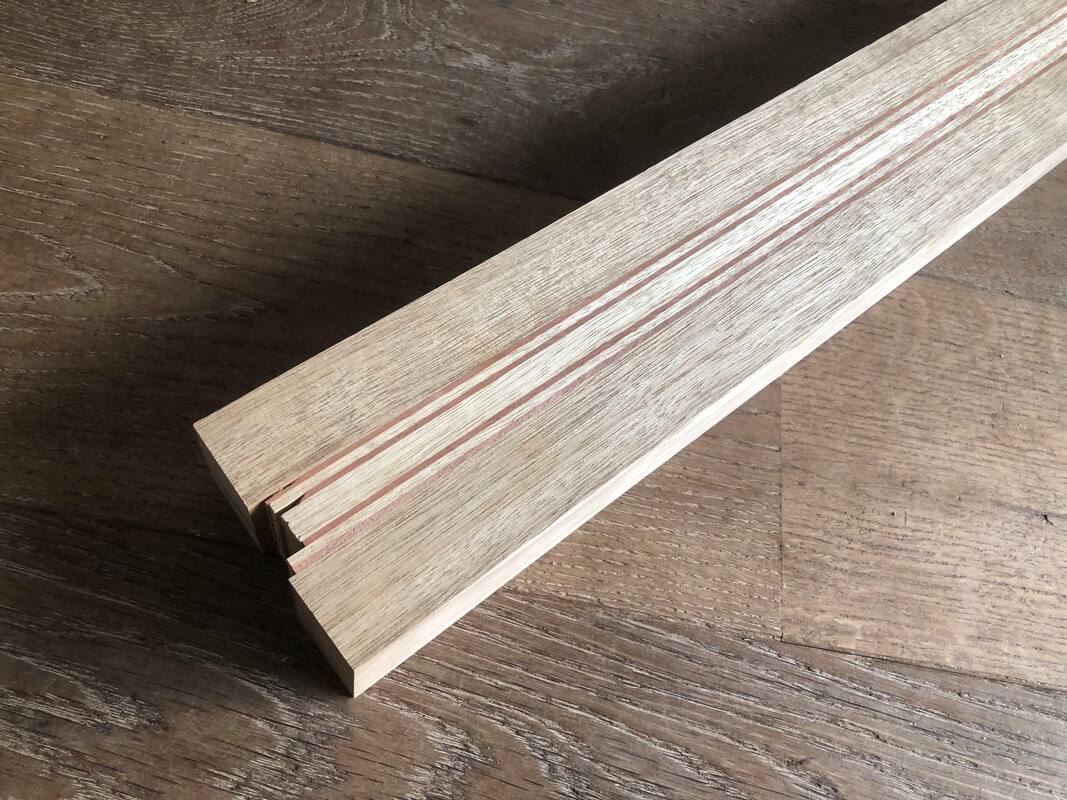
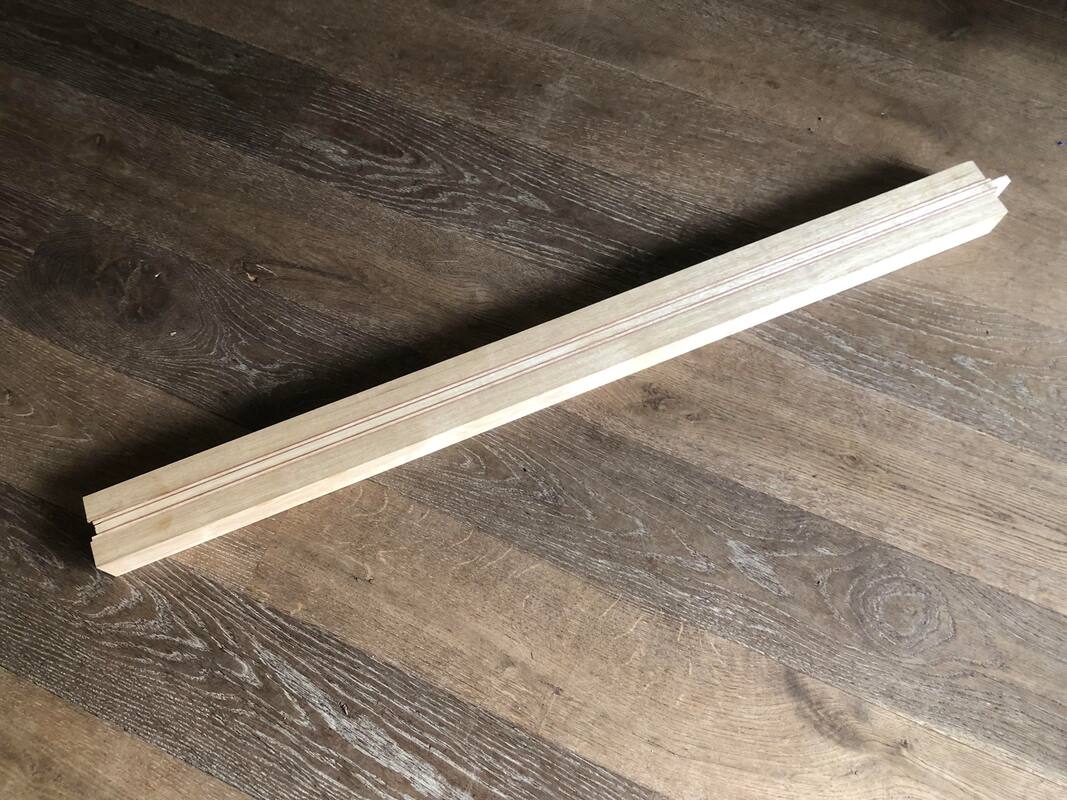
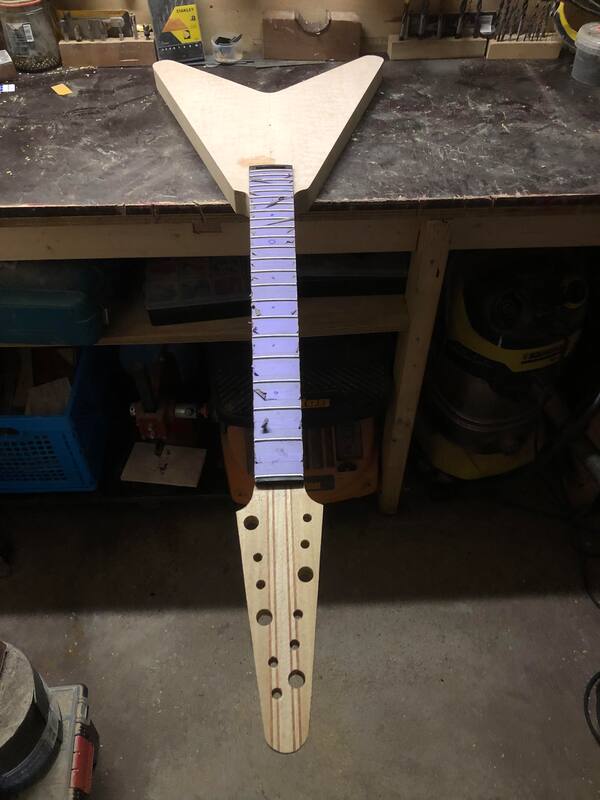
My wood supplier made the neck blank for me.
It's a nine ply korina with mahogany strips in between

brooks-fv-12-qm-neckblank_orig.jpeg

brooks-fv-12-qm-neckblank2_orig.jpeg


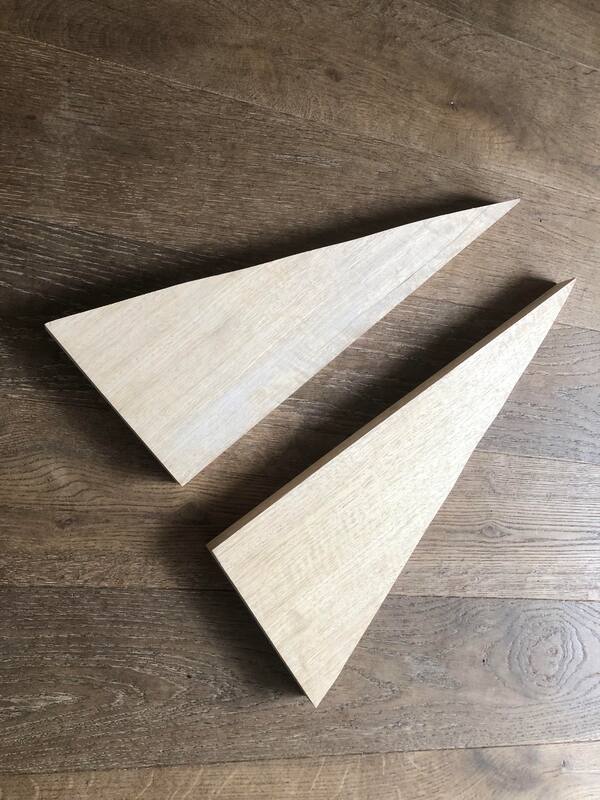
I had some triangular pieces of korina in my shop that could be used for the body wings

brooks-fv-12-qm-bodywings_orig.jpeg

brooks-fv-12-qm-neckblank-bodywings_orig.jpeg


On most builds I start with the fretboard.
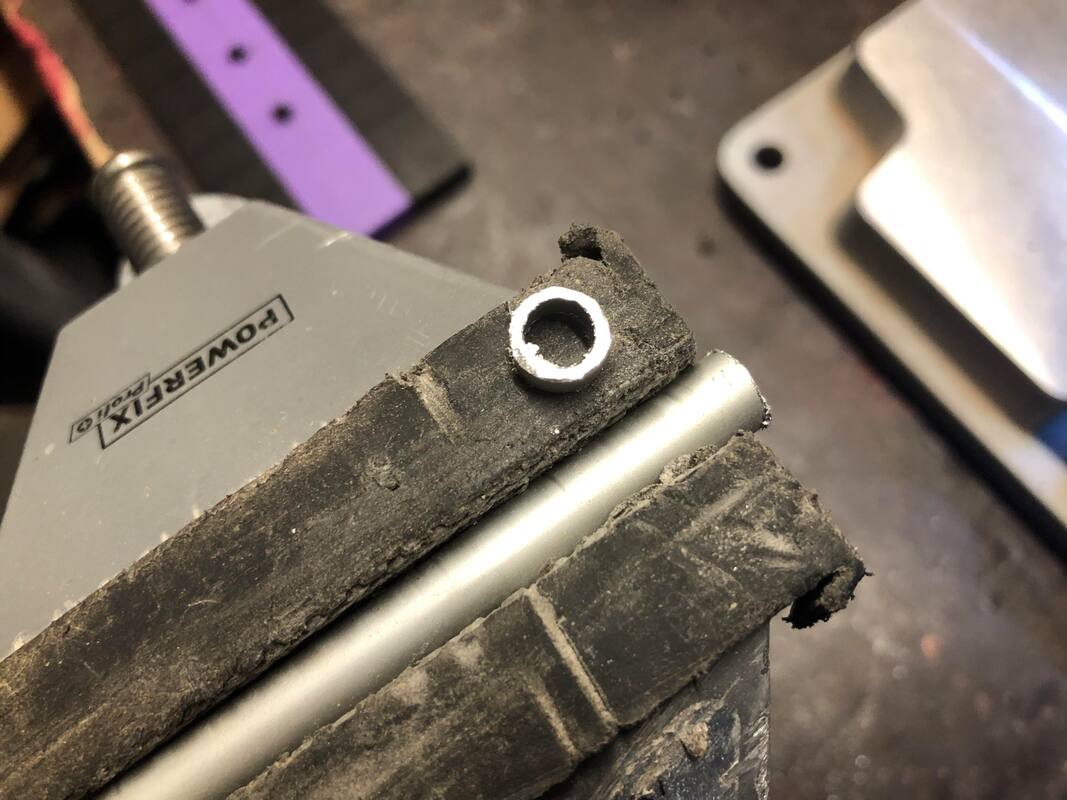
And in this particular case the 12th inlay.
I sawed off a ring off an aluminum tube.

brooks-fv-12-qm-12-pos-ring_orig.jpeg


Drilled the holes for all the inlays. In this pic you see the 12th position hole

brooks-fv-12-qm-drilling-for-inlays_orig.jpeg


Glued the mother of pearl dots in. And also the ring for the 12th position. On the inside of the ring I used a black position dot marker (not very well visible in this pic, sorry)

brooks-fv-12-qm-inlays-glued-in_orig.jpeg


Sanded the inlays flush with the fretbaord using a 16" radius beam

brooks-fv-12-qm-inlays-radiused_orig.jpeg

brooks-fv-12-qm-inlays-radiused2_orig.jpeg


Taped off the fretboard to prevent superglue splattering all over the board while I hammered the frets in.

brooks-fv-12-qm-halfway-fretting_orig.jpeg


After hammering each fret in I used the fretpress to make sure they were seated well.

brooks-fv-12-qm-fretpress_orig.jpeg
 
Next I shifted my attention to the neck blank. Starting with the slot for the carbon reinforcement strip.

brooks-fv-12-qm-routing-strip-slot_orig.jpeg

brooks-fv-12-qm-routed-strip-slot_orig.jpeg

brooks-fv-12-qm-carbon-strip-installed_orig.jpeg


And then the two slots for the trussrods on either side of the carbon strip.
They follow the taper of the neck.

brooks-fv-12-qm-routing-trussrod-slot_orig.jpeg

brooks-fv-12-qm-trussrods-installed_orig.jpeg

brooks-fv-12-qm-trussrods-spokewheels_orig.jpeg


Made the truss rod access slot and cover.

brooks-fv-12-qm-trussrods-access-slot_orig.jpeg

brooks-fv-12-qm-trussrods-cover-ebony_orig.jpeg

brooks-fv-12-qm-trussrods-cover_orig.jpeg


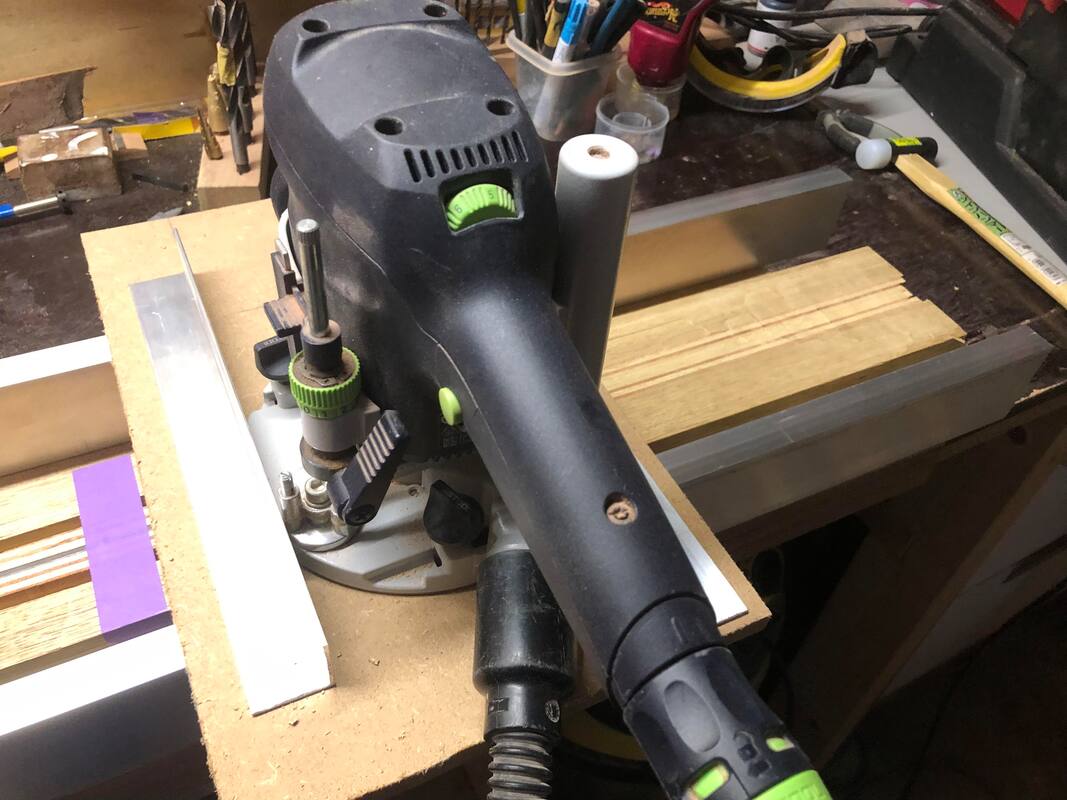
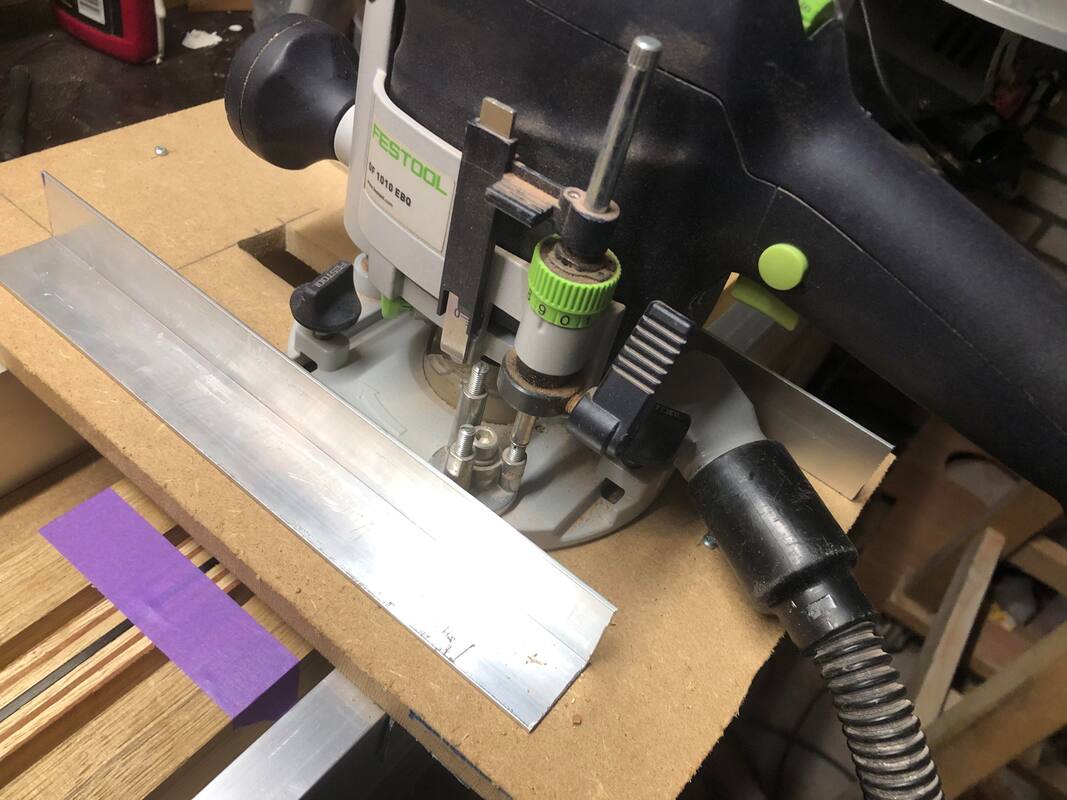
The body would get a 7mm thick bookmatched top of quilted maple. So I had to take away 7 mm thickness on that part of the neckblank. And it need to have a neck/body pitch in order to get the right action at the bridge.
So I made a jig for my handheld router. Place the neck blank under an angle and routed away the desired depth.

brooks-fv-12-qm-routing-jig_orig.jpeg

brooks-fv-12-qm-routing-jig2_orig.jpeg


Here's the routed part. Still had to chisel away the parts next to the fretboard.

brooks-fv-12-qm-routed-body-angle_orig.jpeg


But first I glued the fretboard on. Used a staple tacker and cut off just above the blank to prevent the fretboard from "swimming" away during the clamping.

brooks-fv-12-qm-filled-up-part_orig.jpeg


Then glued it on. Using rubber strip (of bicycle tubes) to get an even pressure

brooks-fv-12-qm-glueing-fretboard_orig.jpeg

brooks-fv-12-qm-fretboard-glued-on_orig.jpeg


Chiseled away the parts next to the fretboard.

brooks-fv-12-qm-cut-out-near-neckjoint_orig.jpeg
 
Drilled the holes for the side position markers

brooks-fv-12-qm-drilling-postion-markers_orig.jpeg


Made a special marker for the 12th position.
Using a small aluminum tube. And a regular black inlay that fits inside the tube.

brooks-fv-12-qm-12th-postion-marker_orig.jpeg


Glued the markers in.

brooks-fv-12-qm-glueing-postion-markers_orig.jpeg

brooks-fv-12-qm-12th-postion_orig.jpeg


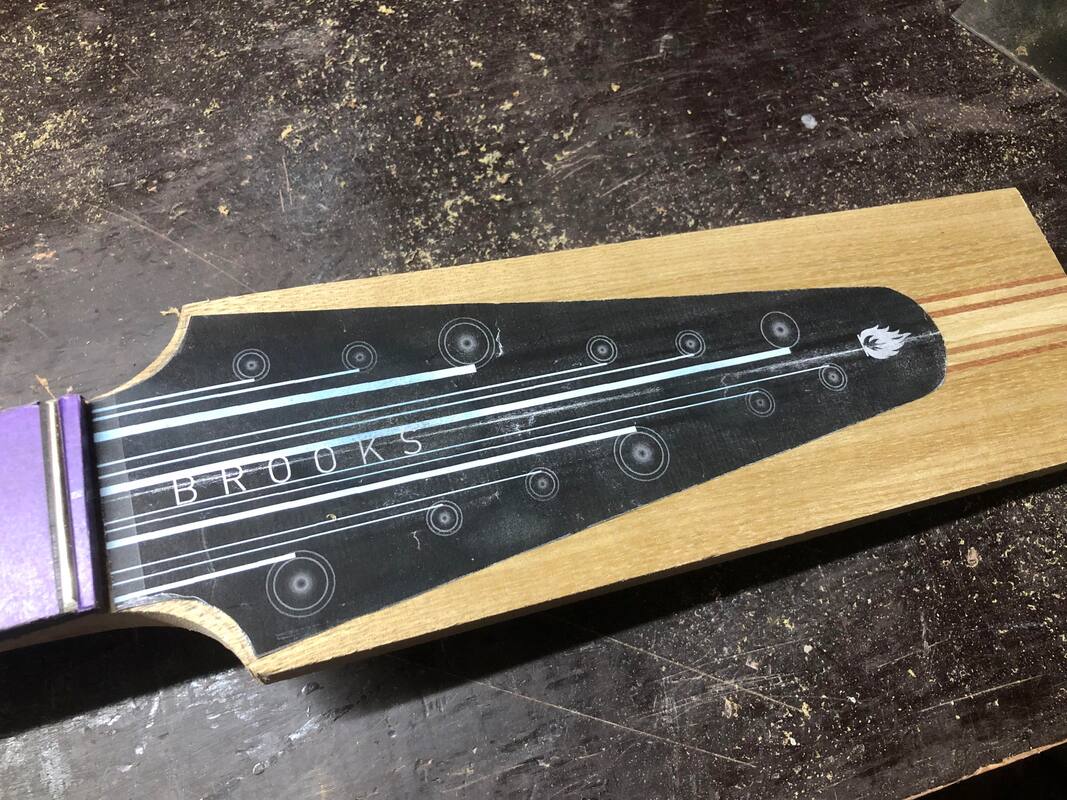
Didn't take a pic where I saw off the headstock angle. So fast forward to the headstock shape.

brooks-fv-12-qm-headstockshape_orig.jpeg

brooks-fv-12-qm-cut-headstockshape_orig.jpeg


Clamped the neckthrough part to the workbench and started shaping te neck.
With a shinto rasp, a spoke shave and strips of very coarse sand paper.

brooks-fv-12-qm-neck-profile-rough_orig.jpeg


Shaped the volute.

brooks-fv-12-qm-working-on-volute2_orig.jpeg


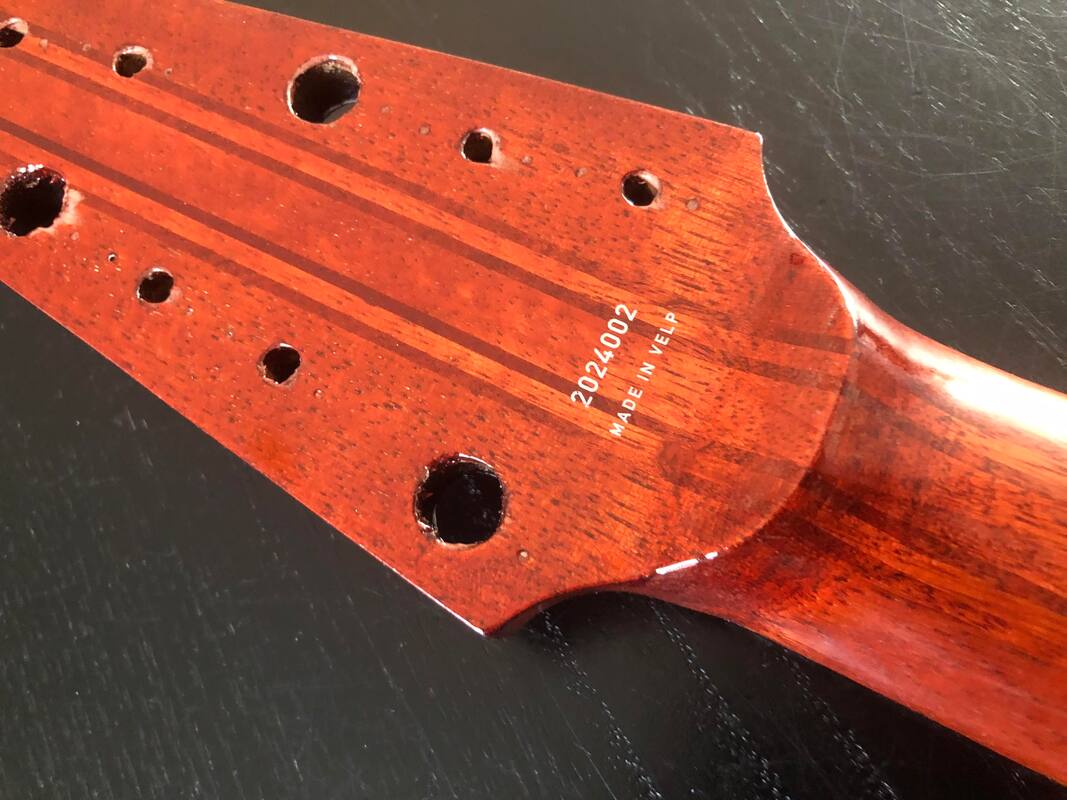
Drilled the tuner holes. I don't drill all the way through. I leave about 1.5 mm thickness on the back. Because I like the holes on the back to be smaller. That makes sure you won't see any gaps when the tuners are installed.


brooks-fv-12-qm-drilling-tuner-holes_orig.jpeg

brooks-fv-12-qm-tuner-holes_orig.jpeg


Glued the body wings on. I cut steps into the sides to make sure the clamps had proper grip. Since you can't clamp a diagonal piece ;-)

brooks-fv-12-qm-glueing-body-wings_orig.jpeg

brooks-fv-12-qm-with-body-wings_orig.jpeg

brooks-fv-12-qm-with-body-wings2_orig.jpeg


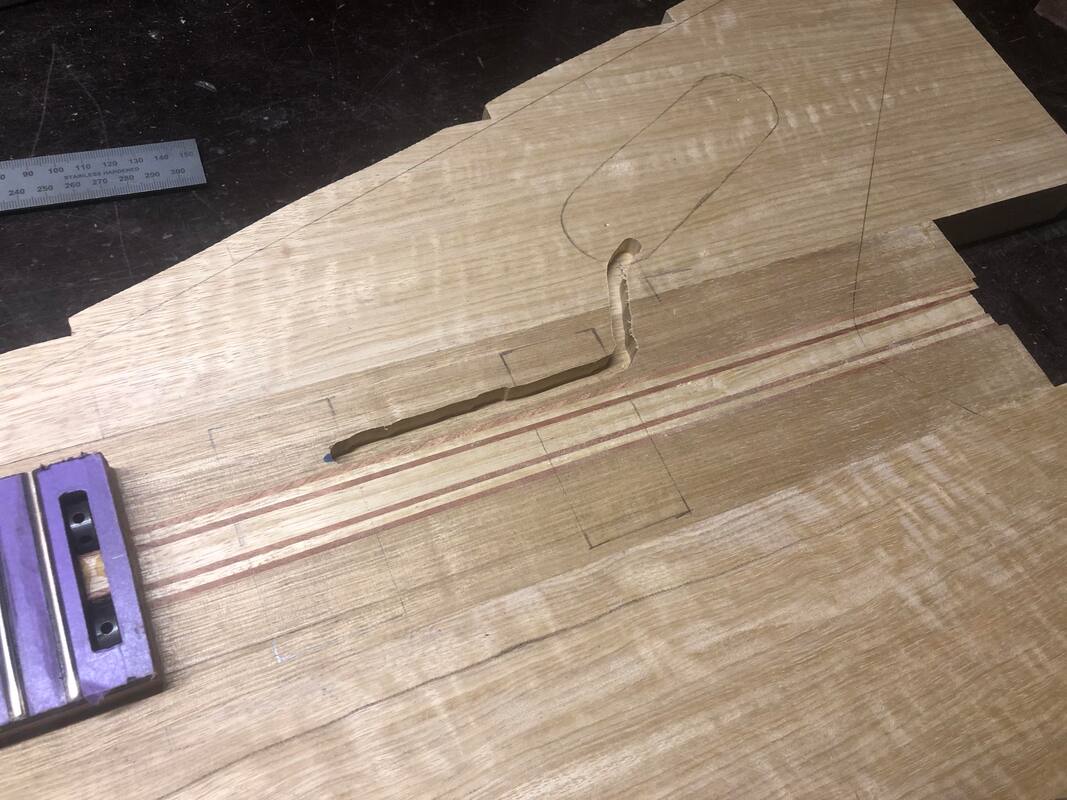
Free hand routed the wiring channel.It was going to be covered up by the maple top. So I didn't bother to make a template.

brooks-fv-12-qm-wire-channel_orig.jpeg
 
Last edited:
The beautiful set of bookmatched quilted maple that I found at Holz Faszination was ready to be glued onto the body.

brooks-fv-12-qm-top-glued-on-rough-outline_orig.jpeg


Then routed along the mdf template to give it the body shape

brooks-fv-12-qm-routing-body-outline_orig.jpeg

brooks-fv-12-qm-routing-body-outline2_orig.jpeg


Looks like a Flying V already!

brooks-fv-12-qm-top-view_orig.jpeg


Shaped the heel area.

brooks-fv-12-qm-shaping-heel-area_orig.jpeg

brooks-fv-12-qm-back-of-body_orig.jpeg


Routed the controls cavity form the back

brooks-fv-12-qm-routing-controls-cavitiy_orig.jpeg

brooks-fv-12-qm-controls-cavitiy_orig.jpeg

brooks-fv-12-qm-routing-profile-controls-cover_orig.jpeg

brooks-fv-12-qm-profile-controls-cover_orig.jpeg


Routed the pickup cavities

brooks-fv-12-qm-routing-pickup-cavities_orig.jpeg

brooks-fv-12-qm-pickup-cavities_orig.jpeg

brooks-fv-12-qm-test-fitting-the-pickups_orig.jpeg


Not the neatest routing job I've ever done. But I was going to use pickup rings so I didn't mind that much.
Wetted the top with a damp rag to make the quilt pop.

brooks-fv-12-qm-popping-the-quilt_orig.jpeg
 
Now was the time to make a decision about the "armpit" in the body.
On my previous (long scale) Flying V Bass builds I had used and extra part in the armpit to allow the bridge to be as far back as possible. This would keep the original V shape visually in tact.

brooks-thundervee-tail-1500_orig.jpg


And my original plan for this bass was to do exactly the same.
I was going to use 24 ferrules for the 12 string through body attachment.

brooks-fv-12-qm-short_orig.jpg


I figured since it is a short scale bass it was not really a problem to have the bridge a bit away from the edge.
And I had my doubts about the strength of the wood with all the holes that would have to be drilled quite close to each other. With all the string pull it might snap a chunk off?
And the binding would ba a quite complex affair. One part would have to follow the original V shape and the other would have to follow the black part.

So after some restless nights I decided not to used the extra part.


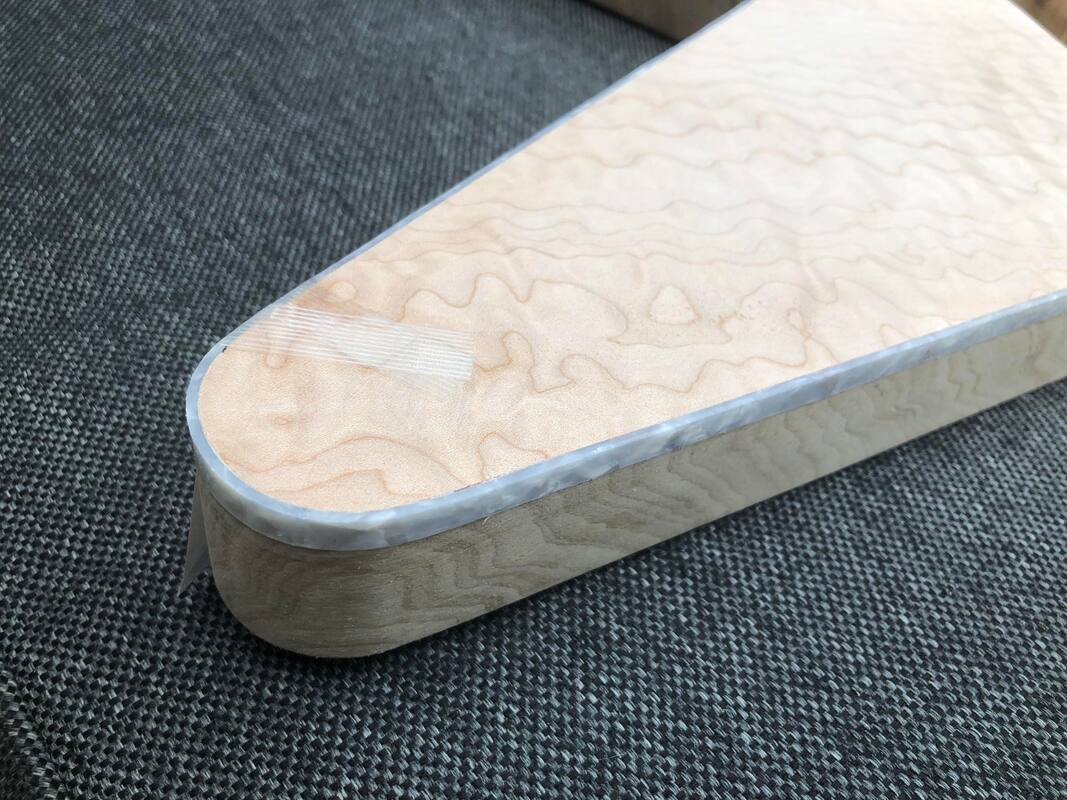
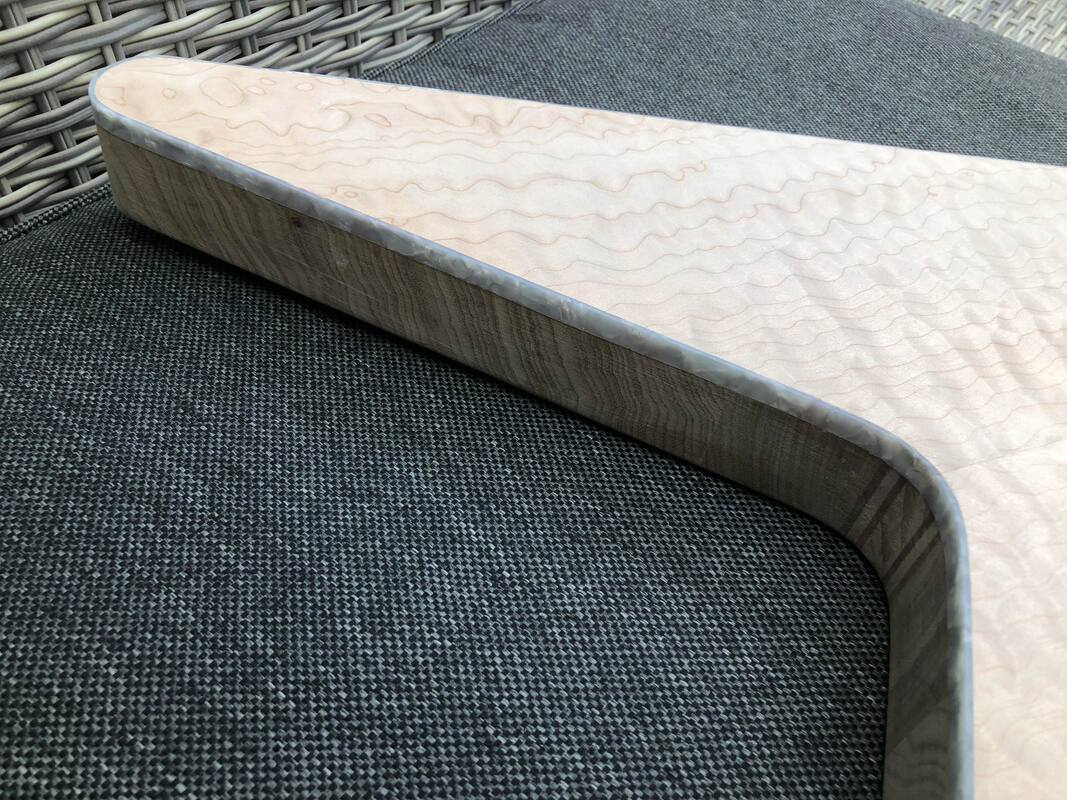
I routed the binding channel (sorry no pics) and glued the pearloid binding in

brooks-fv-12-qm-binding-close_orig.jpeg

brooks-fv-12-qm-binding-in-v_orig.jpeg

brooks-fv-12-qm-binding-glued-in_orig.jpeg


Drilled the output hole for the Telecaster style cup

brooks-fv-12-qm-output-hole_orig.jpeg

brooks-fv-12-qm-output-cup_orig.jpeg


And holes for the potentiometers

brooks-fv-12-qm-potentiometer-holes_orig.jpeg


Holes for the bridge screws

brooks-fv-12-qm-testfitting-bridge_orig.jpeg


Time to stain the bass!
First I did a yellow stain all over.

brooks-fv-12-qm-yellow-stain-top_orig.jpeg

brooks-fv-12-qm-yellow-stain-back_orig.jpeg


I really like the korina with the yellow stain. But my customer wanted a mahogany colour for the back and sides.

brooks-fv-12-qm-light-mahogany-stain_orig.jpeg

brooks-fv-12-qm-light-mahogany-stain2_orig.jpeg


Then took to the burst.
I used a light red stain for the trabsition to yellow. Plus a darker red stain for the outline.

brooks-fv-12-qm-sunburst-stain-top_orig.jpeg


After a few layers of clear lacquer:

brooks-fv-12-qm-after-few-layers-clear_orig.jpeg

brooks-fv-12-qm-after-few-layers-cler_orig.jpeg
 
Last edited:
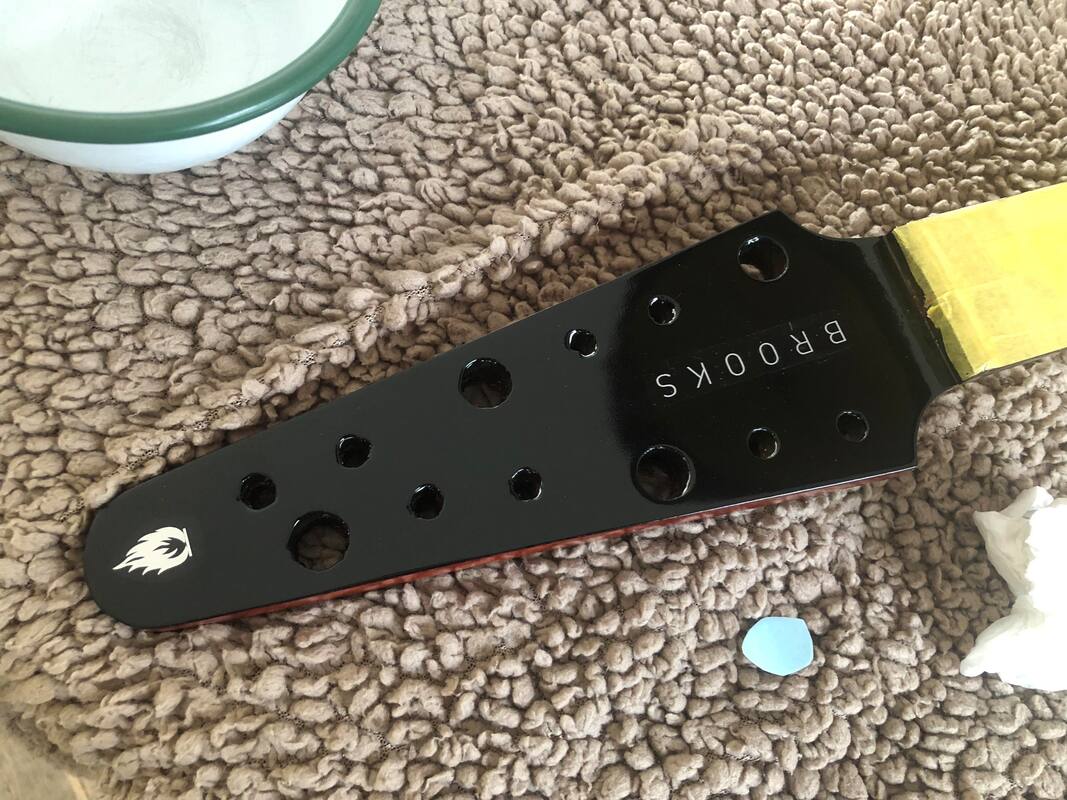
After lots of layers of clear and lots of sanding in between I could apply the decals.

brooks-fv-12-qm-serial-number_orig.jpeg

brooks-fv-12-qm-flame-decal_orig.jpeg

brooks-fv-12-qm-name-decal_orig.jpeg


Sanded it with 800 grits > 1200 grit > 2000 grit > 3000 grit. And then polished it

brooks-fv-12-qm-stringed-body_orig.jpeg

brooks-fv-12-qm-stringed-outdoors2_orig.jpeg


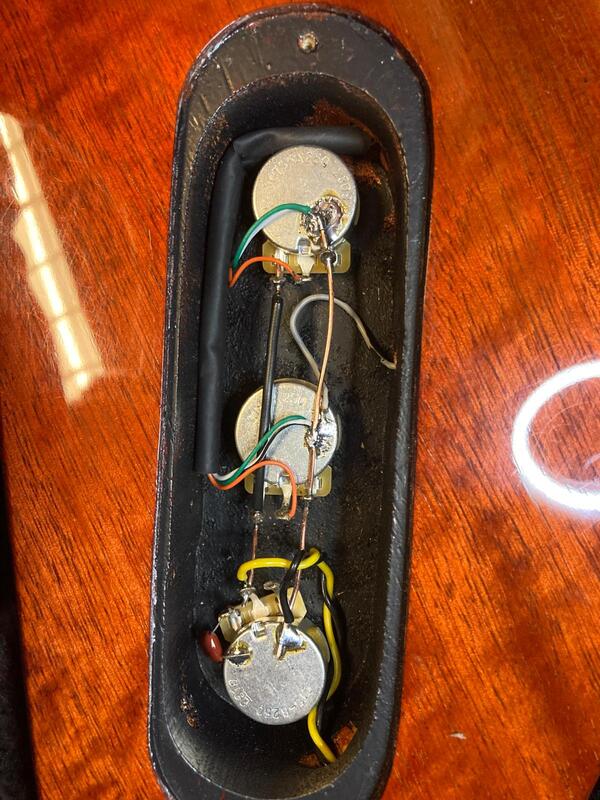
I painted the cavities with shielding paint.
But I'm horrible at soldering. So I had my good friend Sjoerd take care of the wiring for me.
He did a very neat job.

brooks-fv-12-qm-wiring-done_orig.jpeg
 
Last edited:
Why do you prefer to hammer, then press, rather than just press them in?

Just curious.
Good question.
I have always just hammered them in. Always worked fine for me
But a few months ago I acquired a fret press (and a whole bunch of other tools) from a guy who quit his lutherie hobby.
And I figured I had to use it somehow. But it really doesn't add anything ;-)
 
  • Like
Reactions: MCF and T_Bone_TL
Hooray, another Brooks bass is born!

The Brooks FV-12

- Korina body wings
- Bookmatched Quilted Maple top
- Nine ply Korina/Mahogany Neck through
- Cherry Burst high gloss finish
- Pearloid binding
- Ebony fretboard
- Mother of Pearl position dots. Aluminium Circle dot for 12th
- Jumbo frets
- 30 1/2" scale
- Buffalo horn nut
- ETS Custom made twelve string brass bridge and tailpiece. Black
- Two spokewheel double action trussrods
- Carbon reinforcement strip in the neck
- Pickups: Lace Alumitone DB7, Black
- Controls : volume, volume, tone
- 0.047mfd capacitor
- Gotoh GB 350 lightweight bass tuners, Black
- Gotoh ST-31 octave string tuners, Black
- Output: Pure Tone Multi Contact jack
- d'Addario custom strings
- Weight: 4.3 kg


brooks-fv-12-full-front2-1500_orig.jpg

brooks-fv-12-body-side-view-1500_orig.jpg

brooks-fv-12-headstock-1500_orig.jpg

brooks-fv-12-headstock-back-1500_orig.jpg

brooks-fv-12-bridge-tailpiece-1500_orig.jpg

brooks-fv-12-full-back-1500_orig.jpg

brooks-fv-12-output-cup-1500_orig.jpg

brooks-fv-12-bottom-to-top-1500_orig.jpg


In posts below I'll show pics of the build process.
Once again Rob, a fantastic build!
 
  • Like
Reactions: Basvarken

Latest posts