• TalkBass has been independent since 1998. Add your voice.
    Create a free account to reply to discussions, view embedded media, and browse with fewer display ads.
    Join freeLog in
    Want zero display ads or expanded classifieds tools? Compare plans.

Build #2 & #3 - A modern single cut with a twist

turindev

Commercial User
Jul 1, 2005
514
1,594
Chattanooga, Tennessee USA
www.m7bassworks.com
Disclosures
Builder, m7bassworks.com
Having freshly completed my first build, which was a vintage-y jazz inspired build, I am working on a more modern build next.

This design will have a single cut and double cut variant. I am working on the single cut variant first, as it will be for my friend who so generously lets me use his CNC for my builds. Not only is this a more modern design, but it has a few interesting design choices, as inspired by the future owner:

- Single Cut Bass with Walnut/Ash
- Maple Neck with walnut headstock veneer

Here is a quick look at both the single and double cut design variant:

A) Single Cut
B) Single Cut with integrated half body ramp/pickup cover
C) Double Cut
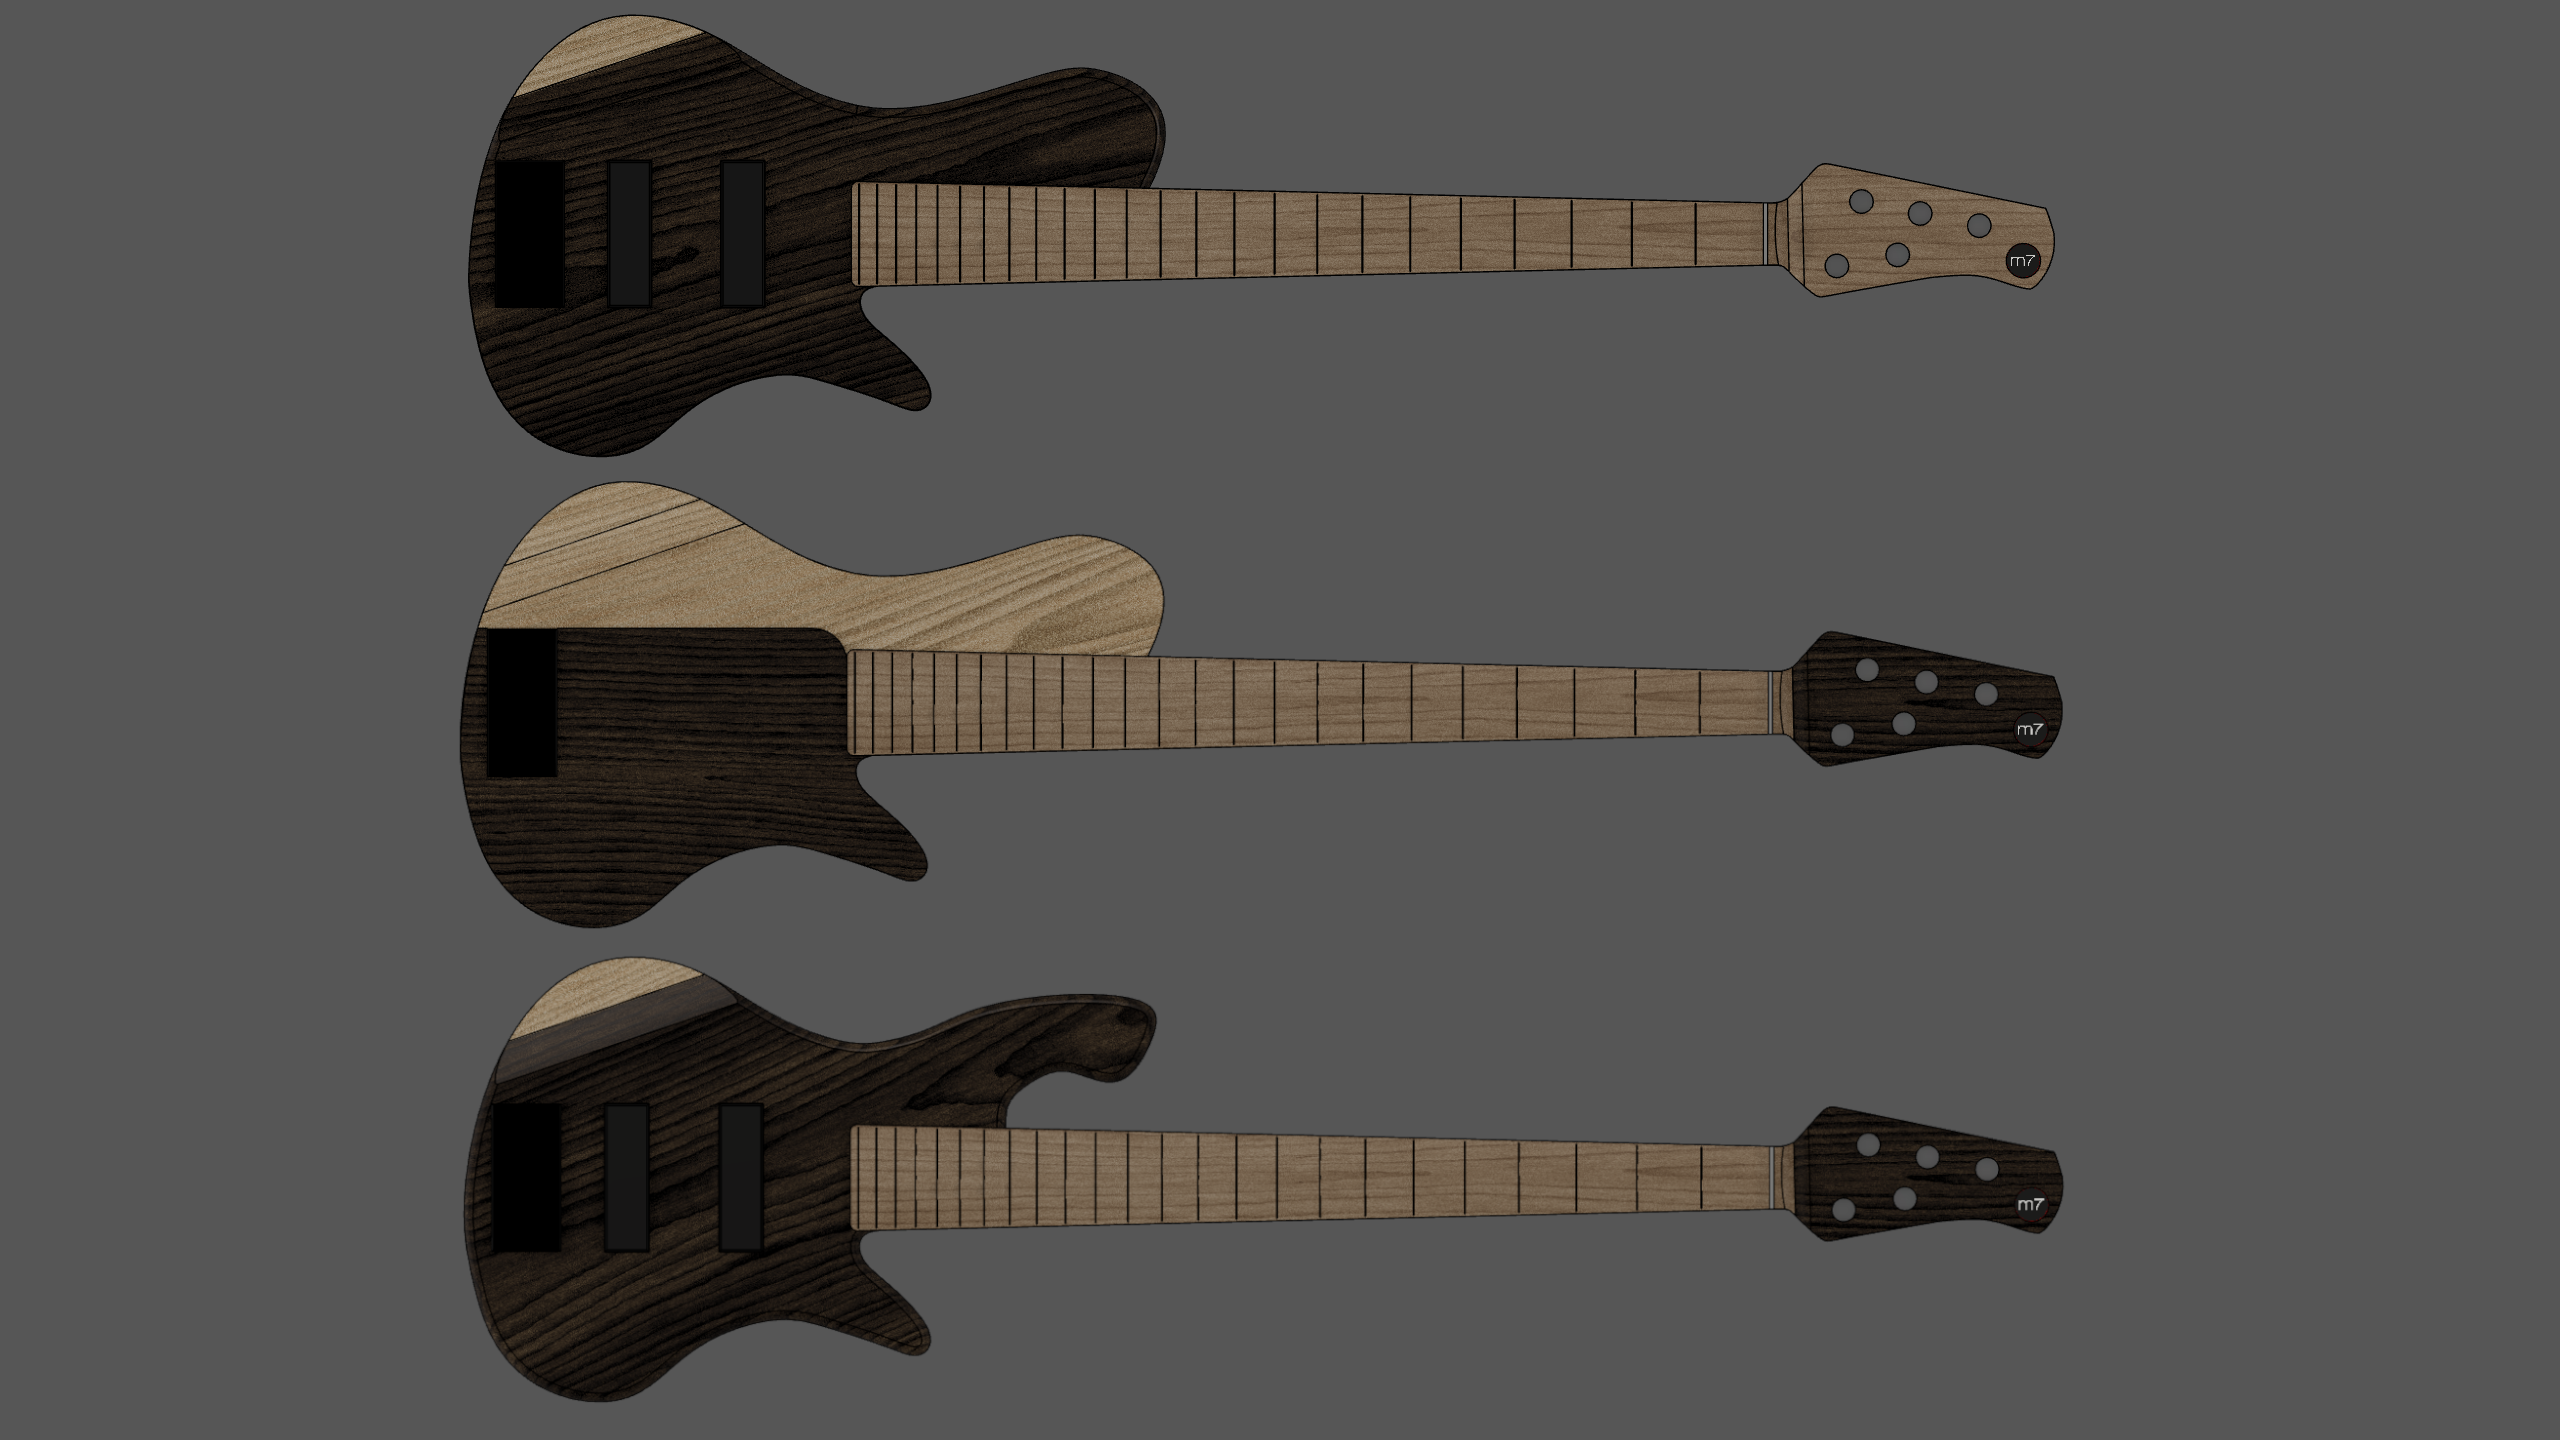
wallpaperModern3.png


For now I will be building designs #1 (for me) and #2 (for my friend)


Now on to the tricky part. Build #2 has an integrated ramp that covers over half of the body and also functions as the pickup cover. As such, it will have to have a very thinly routed pickup cavity, and the pickups will be inserted from the back. Here is a quick look at the ramp:
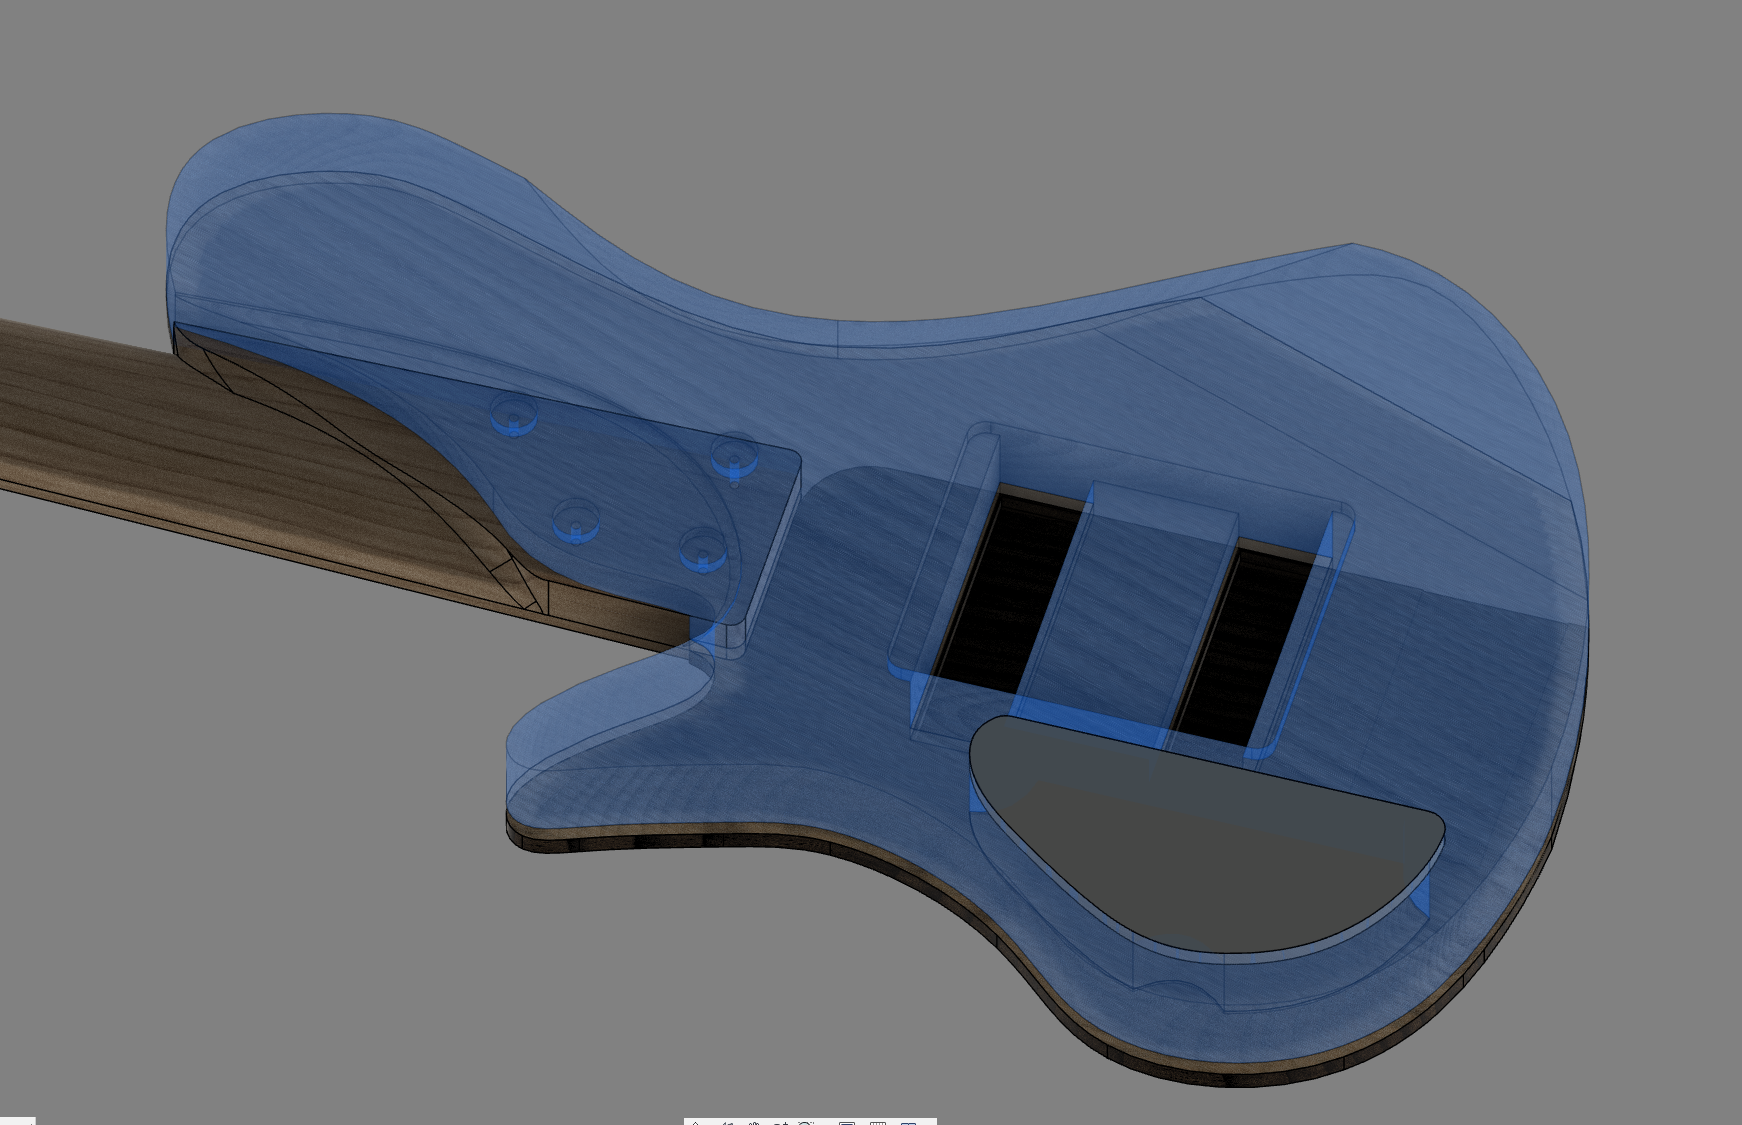
scRampBack.png


The pickups will be held flush to the top of the ramp with foam attached to the pickup cavity cover. The dimensions of the cavities exactly match the profile of the Aguilar DC pickups (w/o cover), which will keep them in place laterally. The control cavity will feature an Aguilar OBP-3 Preamp and a magnetic quick release cover (no tools, yeah!).

The rear profile has also been a bear to design. I want a bolt-on design that still has pleasing aesthetics (this is subjective of course). here is what it looks like right now:
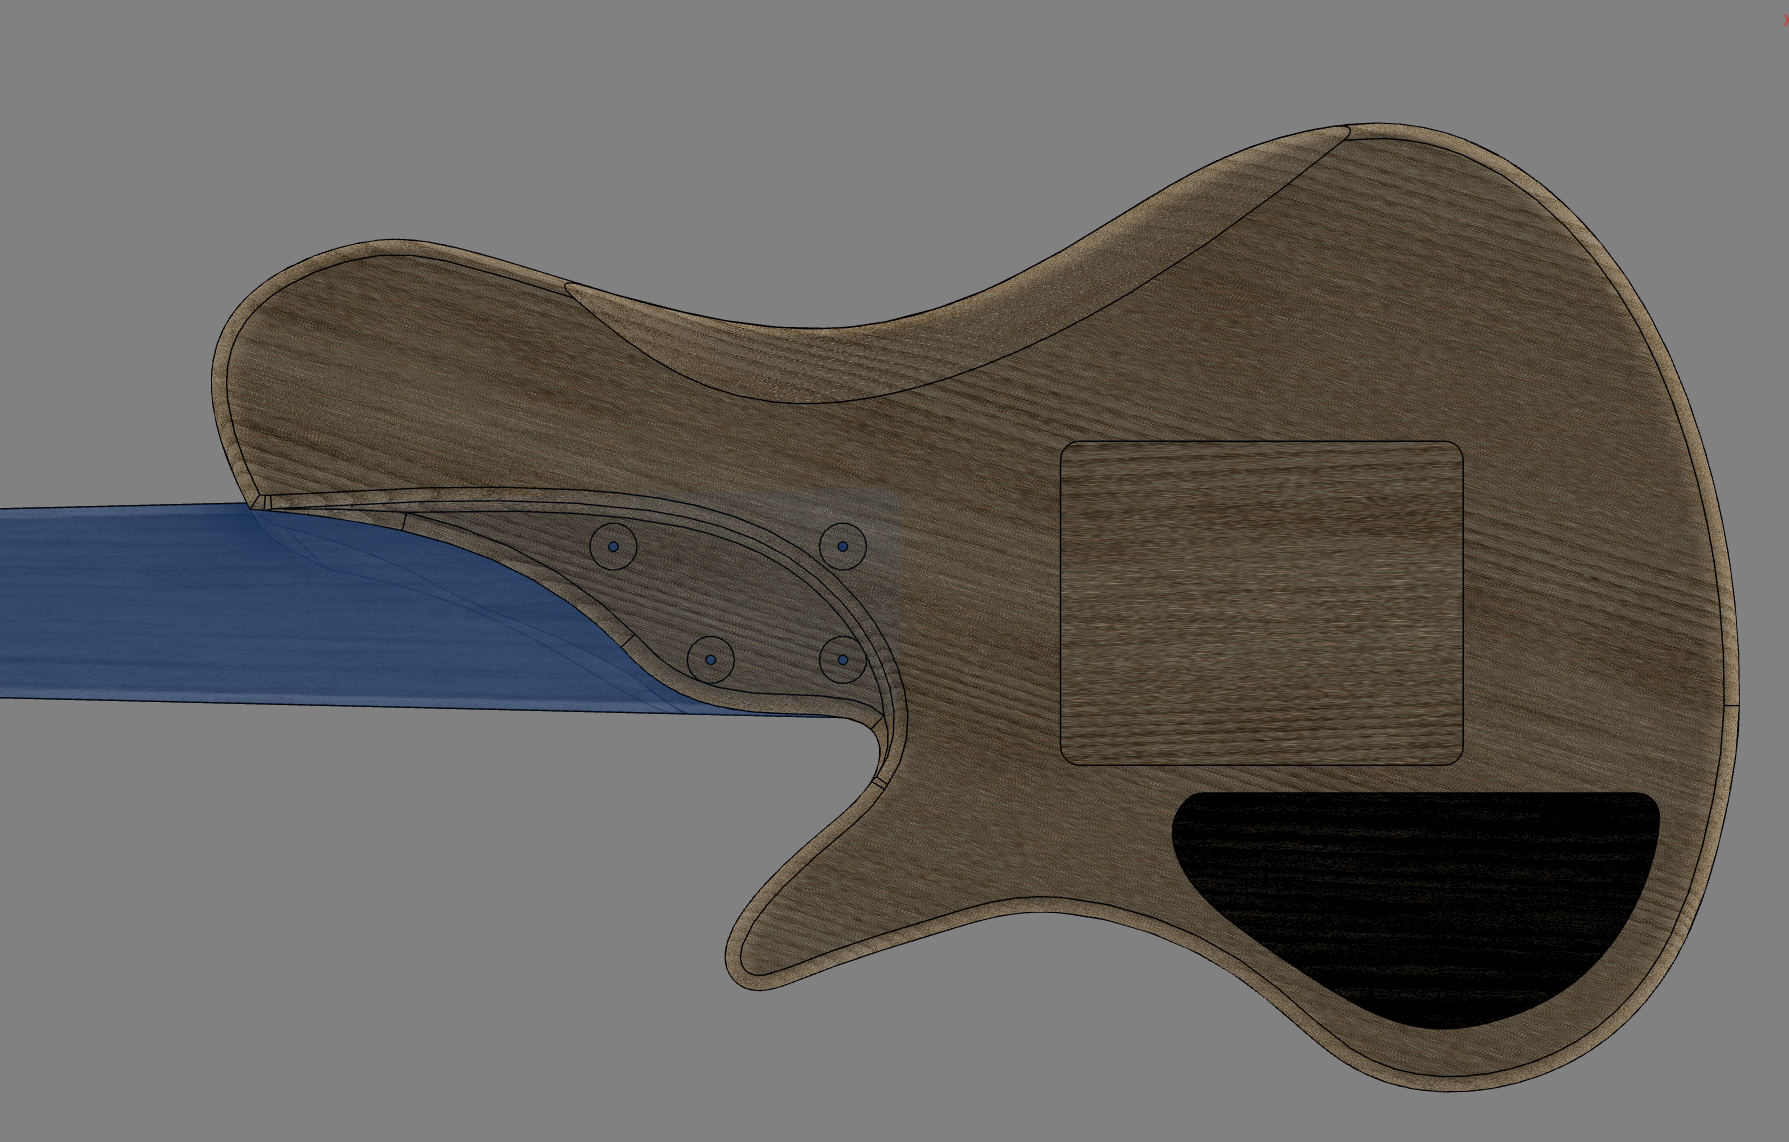
scBack.png


Next step is to cut a prototype out of MDF. The last prototype was foam, and I ran into a lot of issues with the foam moving and being a bit too flexible that didnt give me the feedback I needed during the prototyping phase. Im hoping to cut the body out this weekend. I have also ordered the walnut for the top, really excited to see how this will look with the ash:
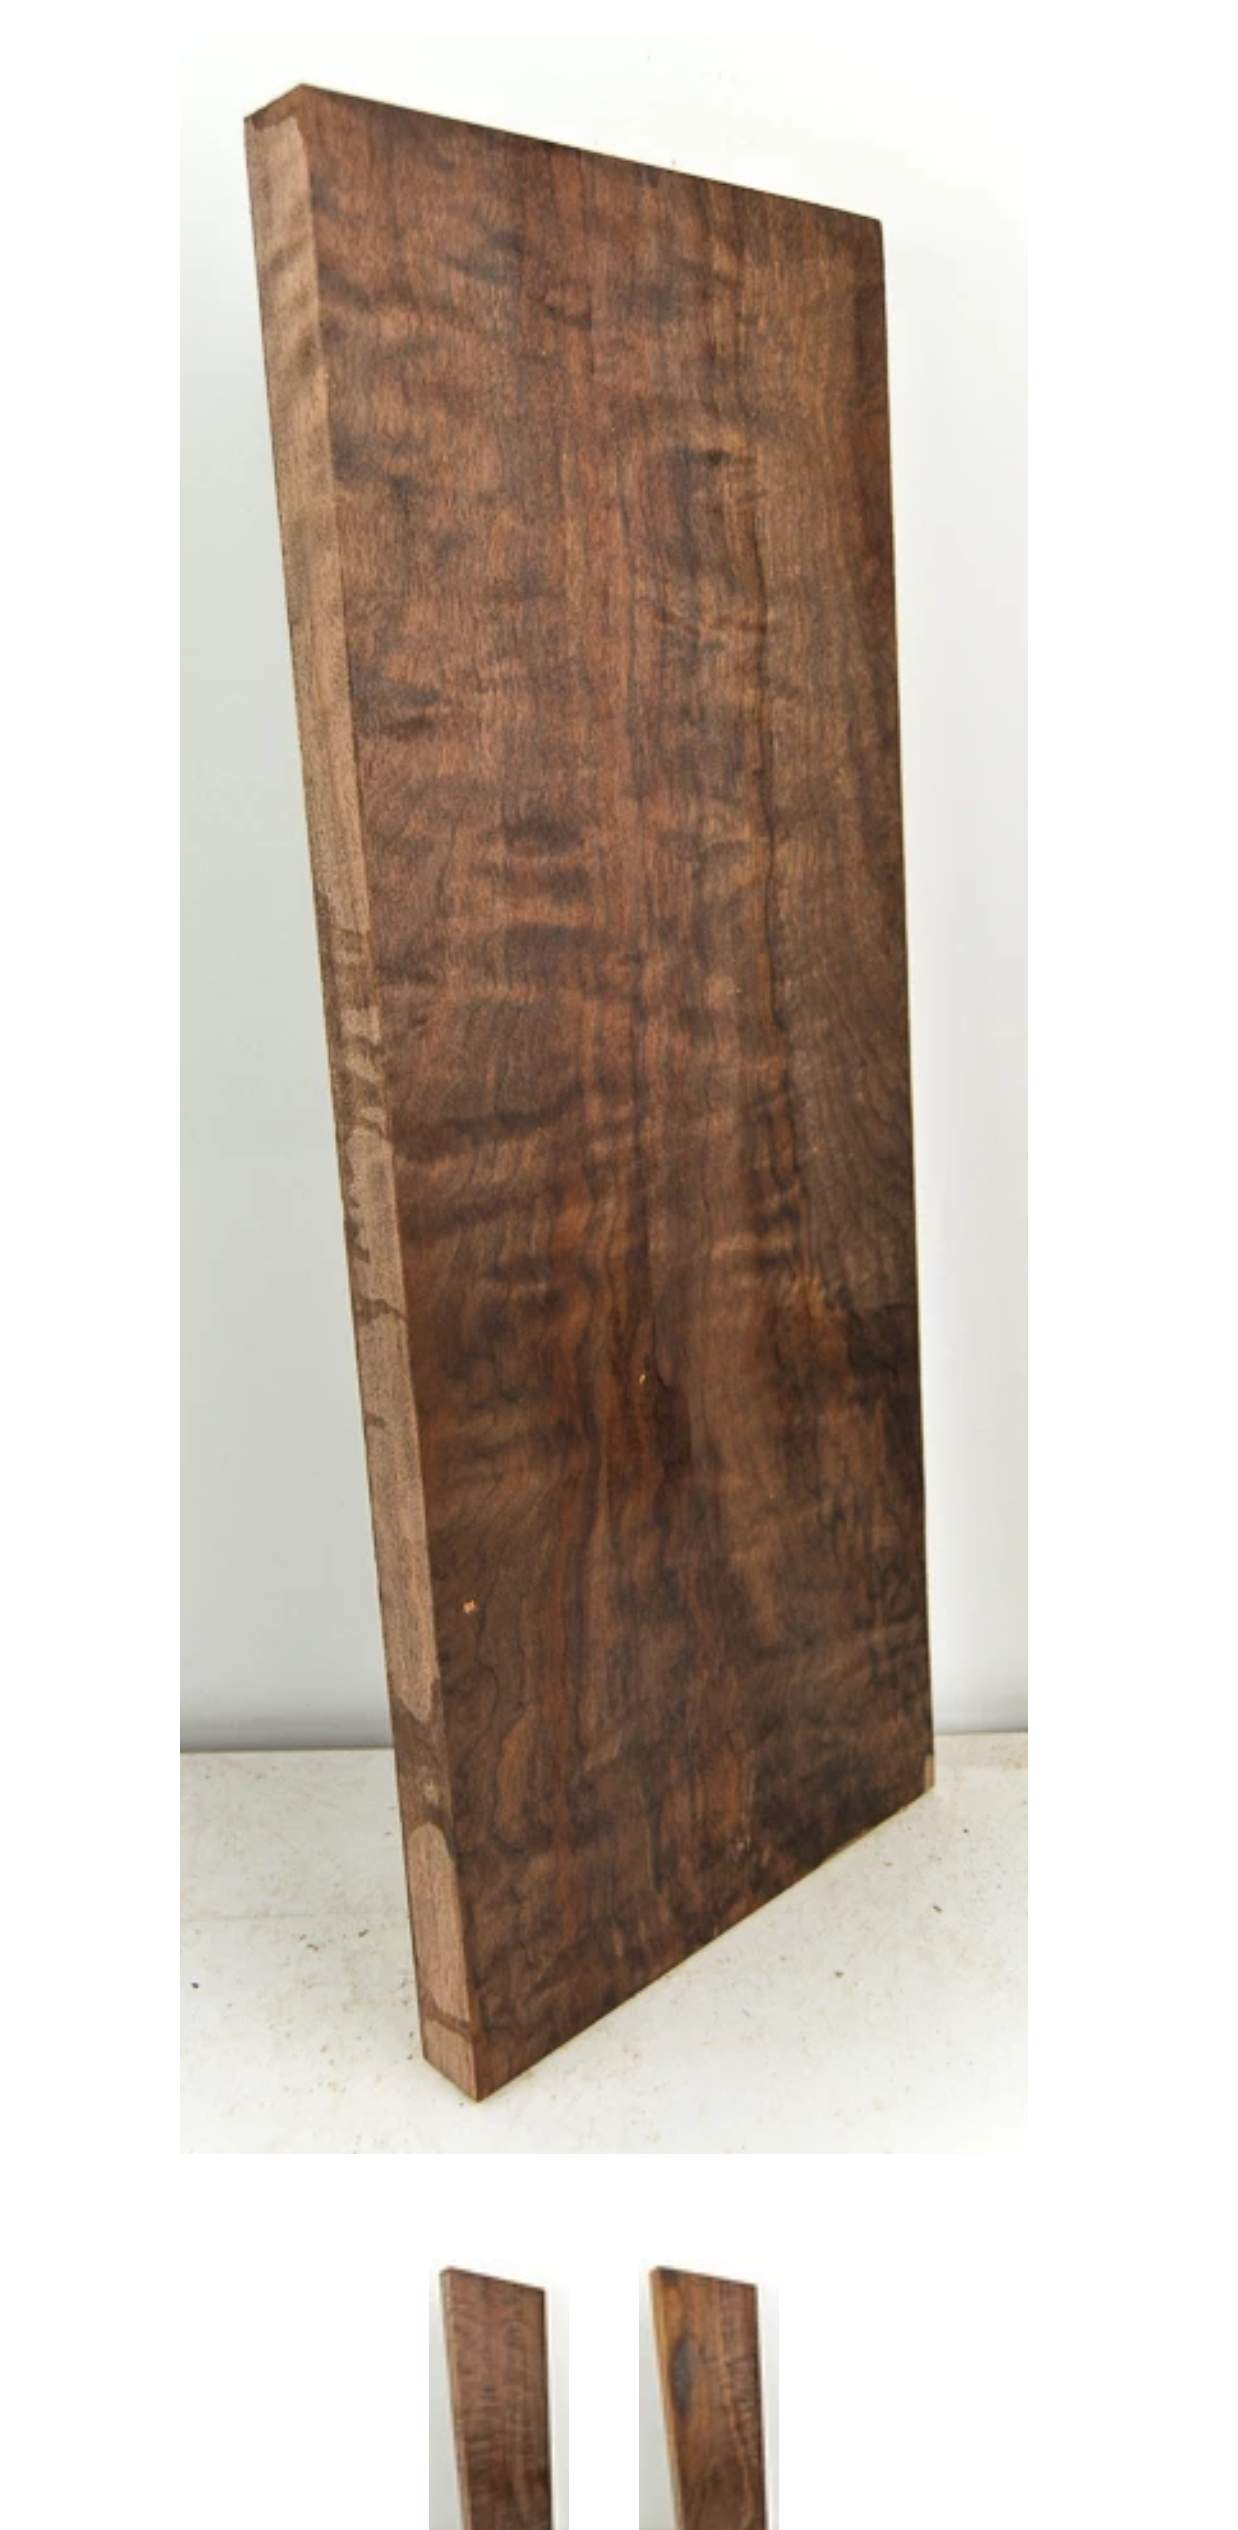
SmartSelect_20190921-112143_Chrome.jpg


More updates to come next week!
 
Last edited:
Quick update

After cutting the prototype out of mdf, I realized that in person the body size is a bit smaller than I would like. Maybe 1/2" on both sides. This is something you can't really tell until you hold the body in your hands, so the prototyping really paid off in this case. In any event, here are some pictures from the fun this weekend.

IMG_20191006_192737_940.jpg

20191006_202508.jpg


The holes in the picture are for the 5 control knobs, a selector switch, led, and Jack. I am making the changes now and we will cut a new prototype in a few days.
 
Took a quick shot of the milled wood blanks alongside the design drawings:


Walnut/Swamp Ash/Maple/Birdseye Maple
IMG_20191009_210557.jpg


East Indian Rosewood/Swamp
Ash/Maple/Birdseye Maple
IMG_20191009_210803.jpg


More MDF prototyping. A couple more tweaks and I should be ready. I keep playing with the control knob layout to give myself enough room in the cavity and still be a good user-friendly layout.
IMG_20191014_090634_510.jpg
 
Last edited:
Time to machine the body on the integrated ramp model! Here is what the design looks like for reference:


Loading up the beautiful figured walnut
20191020_195356.jpg

20191020_200732.jpg


Body after machining (without ramp installed)
IMG_20191020_195612_01.jpg

IMG_20191020_212158_570.jpg


Added roundovers on the table router:
IMG_20191021_203031_182.jpg

20191021_193146.jpg


Dry-fit ramp
20191022_064805.jpg

20191022_064742.jpg

20191022_072847.jpg


Walnut control cover:


Test fit preamp
20191022_073733.jpg


Next up is the ramp glue-up,n fretboard, and a lot of sanding and finishing.
 
Forget leg day, it's neck day! (Ok that was bad).

Drilling tuner holes
20191027_191605.jpg


Test fit logo (very important step)
20191027_192304.jpg


Sanded until I got the perfect neck pocket fit
20191027_195506.jpg

20191027_195522.jpg

IMG_20191027_201620_422.jpg


I also tried my hand at some knobs. The raw stock is a little too tall, so I'll take about 1/4" off the bottom, but otherwise I'm pleased with them
20191026_105945.jpg
 
I have to admit I'm having a but of trouble visualizing how the pickup cover/ramp is going to work but I like the concept! What do you expect the string height to be above the cover?
 
I have to admit I'm having a but of trouble visualizing how the pickup cover/ramp is going to work but I like the concept! What do you expect the string height to be above the cover?

Yep, it's definitely a unique design. The customer wanted a ramp, but hates the disjointed look of normal ramps and wanted it to flow with the bass. I took a measurement of the optimal pickup height on another bass I built (with the same pickups) and used that as a reference. One of the tricky considerations is that the poles themselves are about 1/16 lower because of the walnut cover. So far the measurements are within 0.002" of my target, so I feel good about the chances of success, but I will definitely be nervous the first time I string it up. I will know in about a week :)
 
I have to admit I'm having a but of trouble visualizing how the pickup cover/ramp is going to work but I like the concept! What do you expect the string height to be above the cover?


Just realized I never answered your question. The total ramp height is about 0.28" and the string height (pickup to string) for the G string is about 3mm
 
  • Like
Reactions: dwizum
Time to close this one out. This was definitely a very challenging build, and I learned a lot. There are definitely things I will approach differently next time, but the bass plays wonderfully and sounds incredible. Here are some shots of the finished product:


Finished product and original concept:

IMG_20191105_164435.jpg


Heel contour
20191105_133948.jpg


Ramp face
20191105_134250.jpg


20191105_133750.jpg


20191105_133854.jpg


My friend (who I built it for) playing it for the first time.. he loves it!
20191105_194349.jpg
 
Last edited:
That's really amazing. I love the concept of the ramp hiding the pickups and also continuing down across half the body. It looks more integrated than any other ramp/pickup cover I've seen.

And the fact that the electronics are all attached to that one piece is interesting too. I'm assuming you glued the ramp on, but I wonder if you could have made it removable. Then, you wouldn't have needed access panels in the back - and it could be made "modular" with other ramps, loaded with other electronics/pickups, to give the bass a totally different sound.
 
  • Like
Reactions: turindev
That's really amazing. I love the concept of the ramp hiding the pickups and also continuing down across half the body. It looks more integrated than any other ramp/pickup cover I've seen.
Thanks for your kind words! That was definitely the goal, a lot of credit goes to the owner whose initial requests is what drove this design :)

And the fact that the electronics are all attached to that one piece is interesting too. I'm assuming you glued the ramp on, but I wonder if you could have made it removable. Then, you wouldn't have needed access panels in the back - and it could be made "modular" with other ramps, loaded with other electronics/pickups, to give the bass a totally different sound.

I actually thought about doing something like this as I was finishing the bass, but didnt have the time to execute it. It would be really cool if there was some sort of quick disconnect/quick mounting system for pickups too so you don't have to bother with soldering and screws. There is actually a crazy guitar design I came across that sort of does that, its very cutting edge and interesting, take a look:
Link Removed
 
So. You may remember that when I started this build thread, there were 2 basses mentioned. I finally am starting on the 2nd one. This one is very similar to the first, but without the integrated ramp.

The body is swamp ash core with a strangely light colored East Indian Rosewood top & bottom. I wanted a fairly dark fretboard to offset the lighter rosewood, so I am going with a West African Ebony that has some interesting sapwood, kind of looks like cream in black coffee haha. Here are the woods: (East Indian Rosewood/Ash + West African Ebony/Maple)

20191210_210347.jpg


Here is a look at the East Indian Rosewood Top during glue-up
IMG_20191211_221348_464.jpg


After milling the ash blank, I was ready for the top/bottom glue-up. I made some maple cauls that were slightly concave to put even pressure in the middle when clamped. You can see where I cut out a rectangle for the headstock from the top, and a matching rectangle to create inlay for the fretboard.

20191211_214512.jpg


After a number of small revisions from the previous build in the 3D design, it was time to CNC the body:

20191212_223923.jpg


20191212_232926.jpg

20191212_232931.jpg

Here is a look at the body pre-sanding and roundover:

20191213_081817.jpg

20191213_081832.jpg


Next up is adding a roundover and beginning the sanding regimen.
 
Last edited:
Quick Christmas day update. The body is pretty close to ready. I put down 3 coats of sealer, 3 coats of grain filler, and a few coats of matte. Here is a look at the surface
20191225_214742.jpg


Feels as smooth as glass. I also cut the control cavity cover. I had a cool piece of laminated rosewood/ash scrap that I was able to use that has some sapwood in it. It's pretty sweet because the inside of the cover matches the ash (although it will all end up being covered with shielding). Here is the cover in place.
15773290316828686454437909604448.jpg


This is a magnetic cover, and I made a few tweaks since my last magnetic cover. I designed the cover so that the "shelf" is missing in one spot so that if you press it there, it pivots and opens. I made a quick test video of it:


Lastly I cut the neck and fretboard on Christmas Eve, so I'll start the glue up process in the next day or two. Here is a look at the components. I really love the streaking in the west African ebony. I also cut a ton of rounded inlay dots from my scrap for future builds. I'll pick my favorite 3 for this neck.
20191224_191003.jpg

IMG_20191224_192534_01.jpg
 
Couple of shots from the progress over the past few days:

Neck glue up
20191226_162007.jpg


Filled the inlay border with CA and ebony dust
20191227_101046.jpg


Sanded it:
20191227_140256.jpg


Then sanded the entire neck to 800. I don't want it too glossy looking, so this looks about right to me
20191227_170009.jpg

Another look at the West African Ebony.. I really like the light streaks in this piece:
20191227_150626.jpg


Also, here are some shots of the matte clear going on. I absolutely love this stuff. It is Crystalac Brite Tone matte. Per a tip I found on the web, I brushed it on with a white China bristle brush. When it goes on it looks craaaazy thick, which worried me a tad:
20191227_134327.jpg

20191227_151357.jpg

After an hour or two it flows out like magic and produces a matte sheen that is exactly what I'm looking for:
20191227_165106.jpg

IMG_20191227_150022_01.jpg


Beautiful matte and NO sanding :)
 
Last edited:

Latest posts