

Enjoy the benefits of a premium membership!
Upgrade Account
-
TalkBass has been independent since 1998. Add your voice.
Create a free account to reply to discussions, view embedded media, and browse with fewer display ads.
Join free Log in
Want zero display ads or expanded classifieds tools? Compare plans.
You are using an out of date browser. It may not display this or other websites correctly.
You should upgrade or use an alternative browser.
You should upgrade or use an alternative browser.
Build 4 - headless fretless chambered 6 string
- Thread starter reverendrally
- Start date
More options
Who Replied?

Well, I had tried every other sort of tool. Chisel, files, dremel sanding wheel. I knew that was the logical next step tool-wise. I just tried to get them as sharp as possible and go lightly. Thankfully it worked out well. 
P.s. I really like what you do with them too @b3e
P.s. I really like what you do with them too @b3e

- Apr 18, 2008
- 16,019
- 1
- 31,736
- Disclosures
- I'm highly opinionated and extremely self-assured
Hey, wait a minute, aren’t unicorn horns sharp on the end? Hmmmm....
Well if they're not, 1o minutes on the sharpening stone can fix that.
Last night and this morning I intended to get a bunch more done on the bass. However, I was working in this...
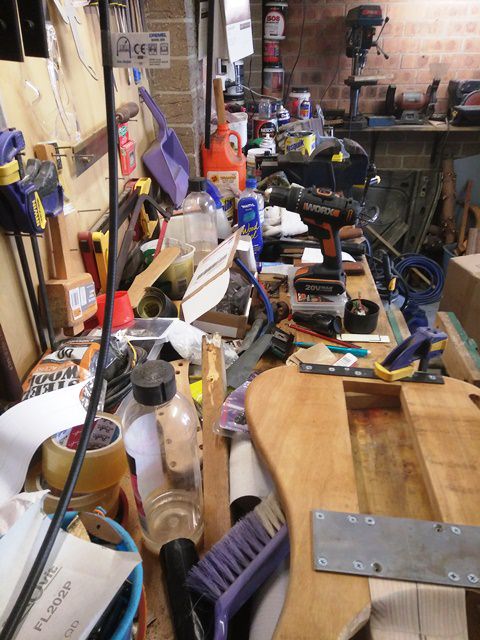
I guess it was about 12 months of build up. I'm a "critical mass" kind of cleaner and it had well and truly got beyond a joke. Much of what was taking up the bench space was odds and ends I didn't know what to do with. Much of it was car bits too. That saga continues. Some are now shoved into corners, but at least they're not cramping my bench space. I also installed a few more hooks and got certain tools off the bench. It's still probably only about 75% done, but by late this morning it was a lot better.
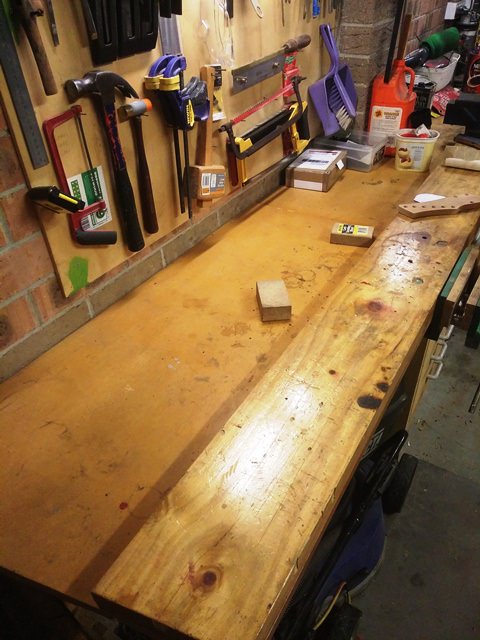
So I was able to spend some time matching the top body wing to the neck joint transition and then I started sanding. Oh man. I forgot about the sanding. And sanding. Then after that some sanding. I guess the top body wing is now about 80% there in the rough. I still have another wing to do. What really messed me up were a few roundover spots where the wood started to tear out. There's more of that on the other wing. I think it's time to sharpen my router bits... or find softer wood.
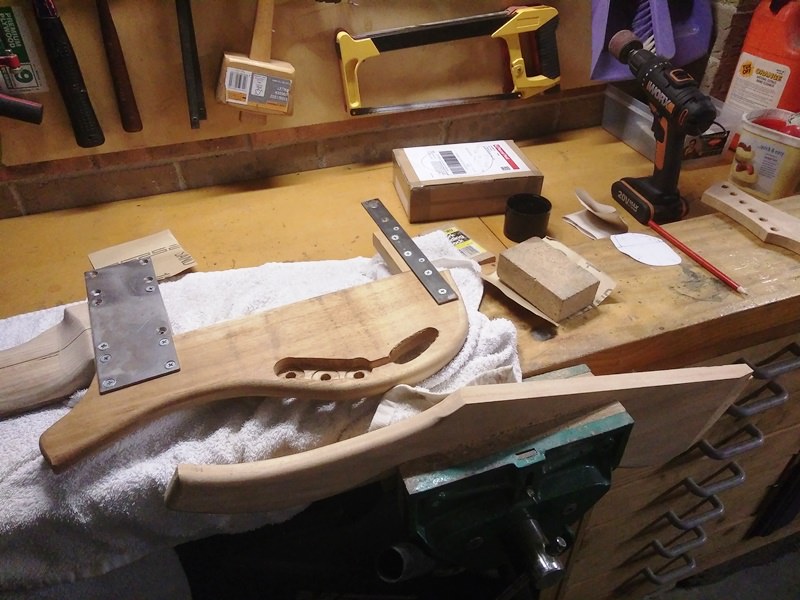
With school holidays, kids and various other things going on, I won't have another chance to touch the bass until late next week. I'm still waiting on my second set of tapewound strings for the bass. They sent me a white set, but I really wanted black strings and Labella was taking ages to make them. Will have follow up bassstringsonline again I think.
I guess it was about 12 months of build up. I'm a "critical mass" kind of cleaner and it had well and truly got beyond a joke. Much of what was taking up the bench space was odds and ends I didn't know what to do with. Much of it was car bits too. That saga continues. Some are now shoved into corners, but at least they're not cramping my bench space. I also installed a few more hooks and got certain tools off the bench. It's still probably only about 75% done, but by late this morning it was a lot better.
So I was able to spend some time matching the top body wing to the neck joint transition and then I started sanding. Oh man. I forgot about the sanding. And sanding. Then after that some sanding. I guess the top body wing is now about 80% there in the rough. I still have another wing to do. What really messed me up were a few roundover spots where the wood started to tear out. There's more of that on the other wing. I think it's time to sharpen my router bits... or find softer wood.
With school holidays, kids and various other things going on, I won't have another chance to touch the bass until late next week. I'm still waiting on my second set of tapewound strings for the bass. They sent me a white set, but I really wanted black strings and Labella was taking ages to make them. Will have follow up bassstringsonline again I think.
Feels like it's been ages getting back to this. Every time I was ready to do some I got distracted by the car, holidays or sickness. Still back in it now. I did some more sanding tonight, getting from 200 down to 400. I briefly entertained 600, but really that's just silly. I still have to hand sand the oil in, so I should be fine.
You may have noticed I changed my mind again and went with the black stain. There are a bunch of reasons for this, but I'm really happy I did now.
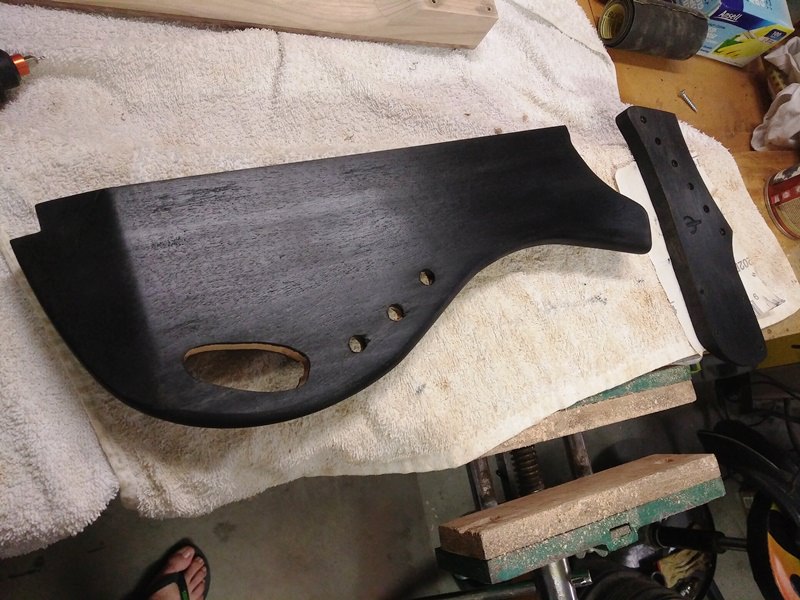
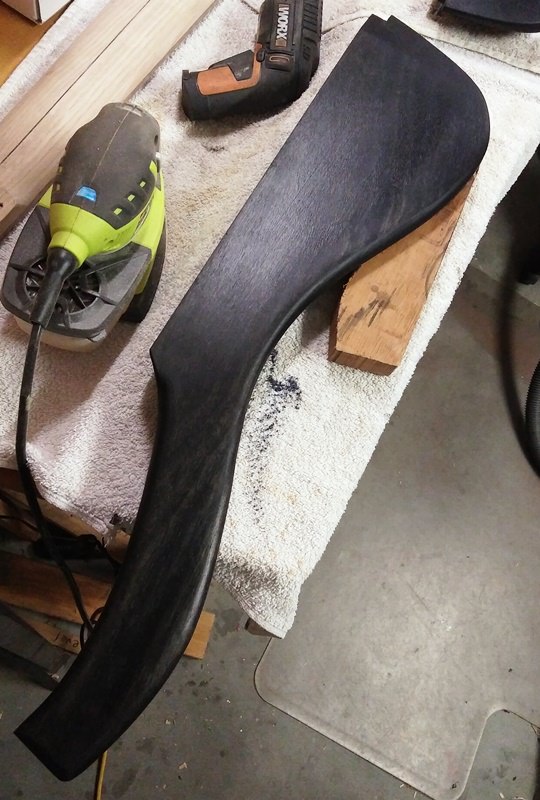
I've had an abiding dislike for black guitar for a long time but this is different. There's a "piano" quality about it when it's wet, so it should look amazing oiled and waxed. I've left the neck natural. I will sand it back some and see what that's like before I start oiling things. I also need to finalize PU positions before I do too much more.
You may have noticed I changed my mind again and went with the black stain. There are a bunch of reasons for this, but I'm really happy I did now.
I've had an abiding dislike for black guitar for a long time but this is different. There's a "piano" quality about it when it's wet, so it should look amazing oiled and waxed. I've left the neck natural. I will sand it back some and see what that's like before I start oiling things. I also need to finalize PU positions before I do too much more.
- Apr 18, 2008
- 16,019
- 1
- 31,736
- Disclosures
- I'm highly opinionated and extremely self-assured

Finally got back to it today for a bit. I need to cut the nut slot. Having been putting it off. Was worried about how I would hold a guide straight. Then this morning as I was do it, it suddenly hit me!
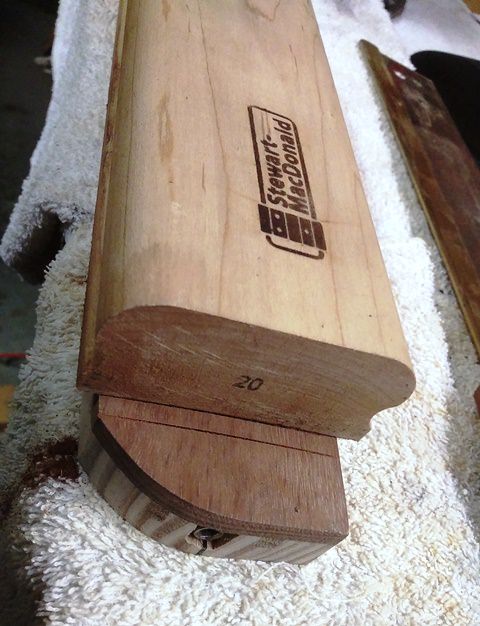
Worked a treat being the same radius as the board.
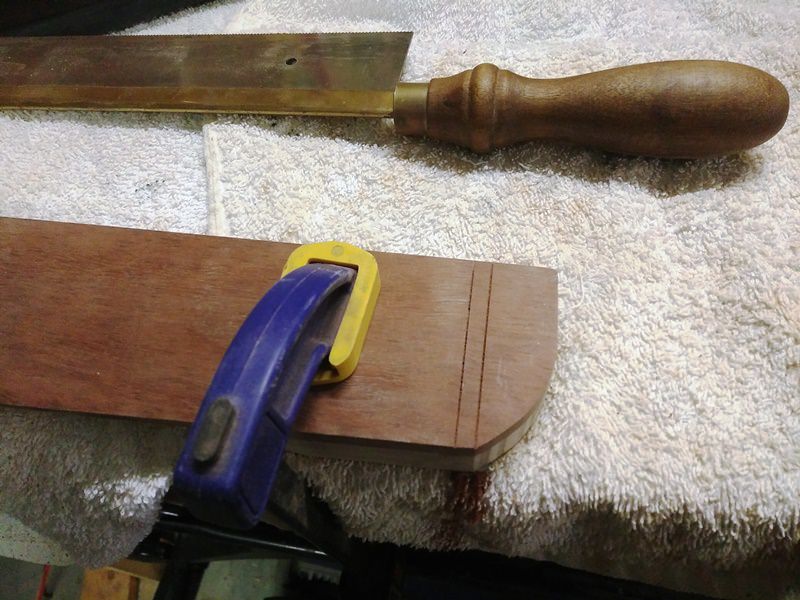
So all done, then roughed out. I started shaping the end of the fingerboard so the strings will curve toward their anchors and not have a hard break angle off the end of the neck.
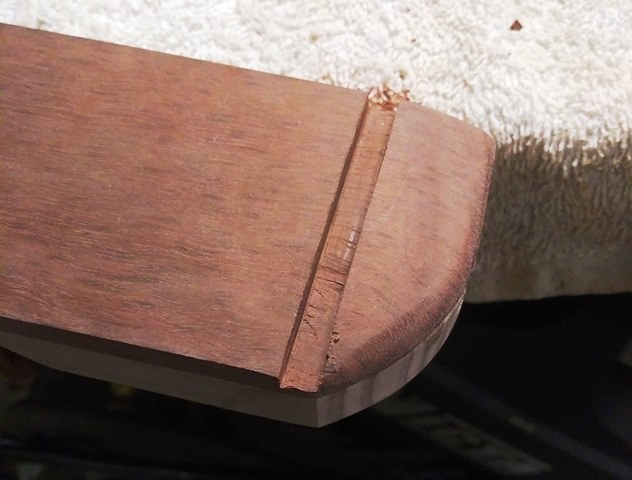
More to do, but I'm on the right track. Not sure if I'll use that nut blank I made now though. Might be just a piece of Jarrah.
Worked a treat being the same radius as the board.
So all done, then roughed out. I started shaping the end of the fingerboard so the strings will curve toward their anchors and not have a hard break angle off the end of the neck.
More to do, but I'm on the right track. Not sure if I'll use that nut blank I made now though. Might be just a piece of Jarrah.
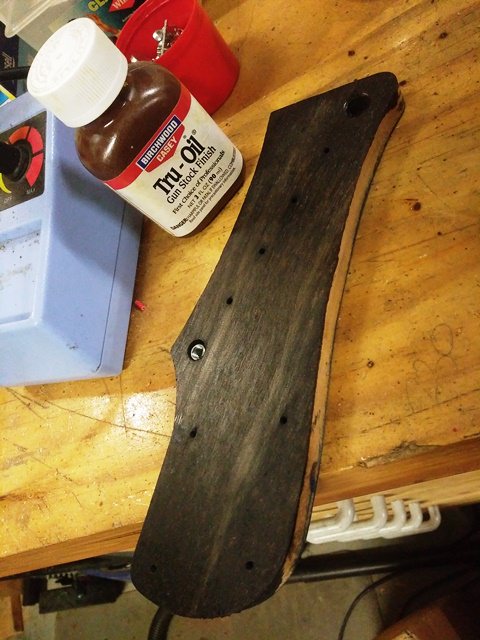
Put a coat of tru-oil on the scrap headstock today. HEAPS better than the danish oil. 
Knocking off the grain ends on the body and headstock at the moment. Then it'll be ready for oiling... or whatever.
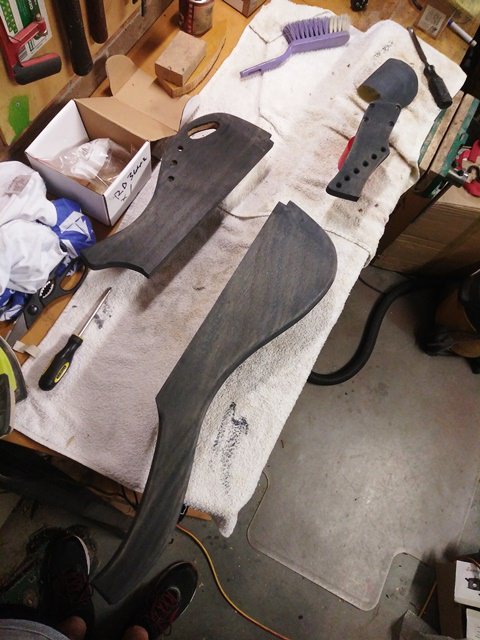
Knocking off the grain ends on the body and headstock at the moment. Then it'll be ready for oiling... or whatever.
Put the final coats of stain on and finally decided on a the finish for the body and headstock today. Was going to buy tru-oil, but at $15 for a thimble full, I decided to make my own again. Mind you, this lot cost me $22. So, all paint seems to be expensive these day. I'll be trying for a slightly different mix this time.
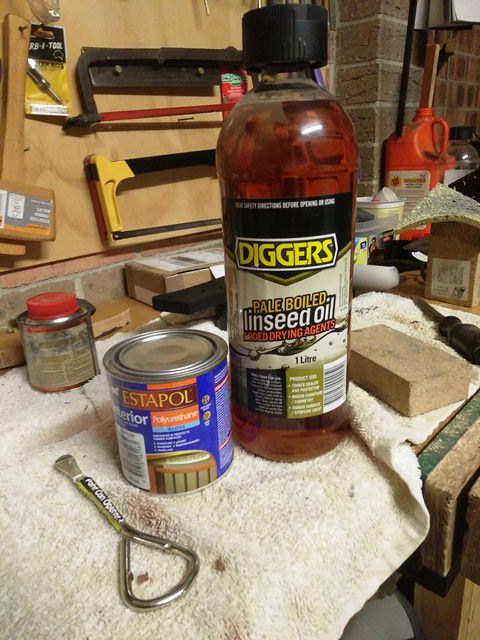
25% linseed oil
25% poly
50% turps
Hoping that will speed up the drying process and I can put on a million thin coats. The neck will get wipe on poly. I've found with my sweaty hands it seems to work better. Not sure about the fingerboard yet, but I think wipe on poly maybe.
25% linseed oil
25% poly
50% turps
Hoping that will speed up the drying process and I can put on a million thin coats. The neck will get wipe on poly. I've found with my sweaty hands it seems to work better. Not sure about the fingerboard yet, but I think wipe on poly maybe.
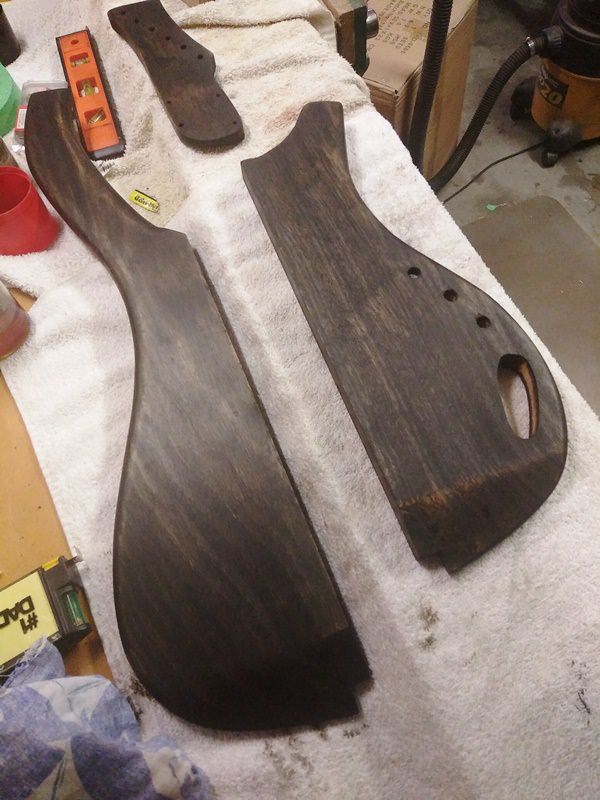
I've done 3 coats on the bass now. It looks pretty black, although I've noticed the same thing happening over and over. That is, as I wipe on the oil/poly, it wipes off some of the stain. In most places that's no great issue, but the headstock isn't as black as it was. Again, I'm not super stress about it, but last night I poured out the old 25/25/50 mix and went back to an equal parts mix to try and get around it. Made difference. Took the stain off just the same. So, I could end up with a greyer bass than a black one. No biggy, but there it is. I'm also yet to 'sand it in', so we'll see how much that takes off as well.
So, the good news is, the stain has stopped wiping off.
The bad new is... actually, there's no bad news.
Some pics of the body before I put another coat on today...
And a pic with the neck and some shellite to show the grain on the board...
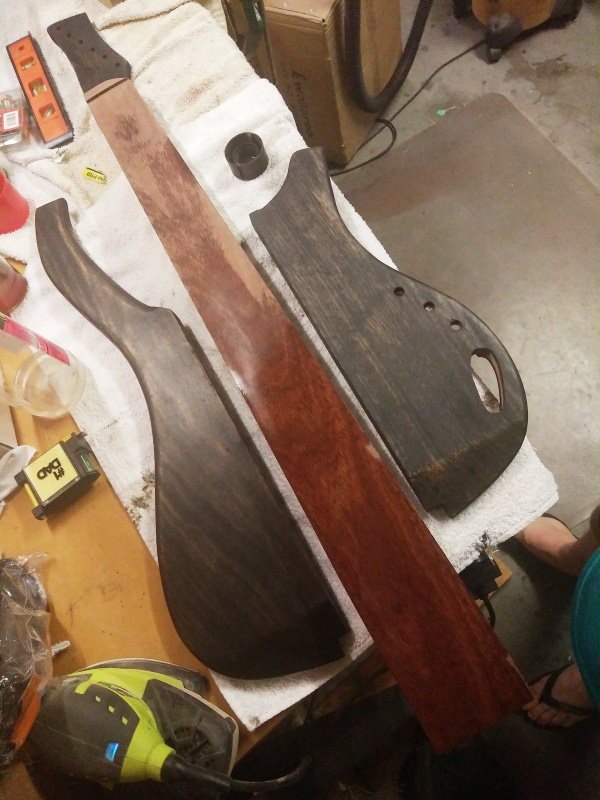
I was tempted to stain the whole neck and board for a few minutes there. Glad I didn't now. I'm pretty happy with how it's turning out. Like a really worn piano polish. It actually has a little more shine than shows up the in pics, but the camera on my phone was struggling to focus on timber. I don't think I'm going to put many more coats on it. Maybe one more coat tomorrow morning and then put it out in the sun to really harden up (like I should). I guess I need to stain the bridge block and some other bits and get the neck ready for finishing.
The bad new is... actually, there's no bad news.
Some pics of the body before I put another coat on today...
And a pic with the neck and some shellite to show the grain on the board...
I was tempted to stain the whole neck and board for a few minutes there. Glad I didn't now. I'm pretty happy with how it's turning out. Like a really worn piano polish. It actually has a little more shine than shows up the in pics, but the camera on my phone was struggling to focus on timber. I don't think I'm going to put many more coats on it. Maybe one more coat tomorrow morning and then put it out in the sun to really harden up (like I should). I guess I need to stain the bridge block and some other bits and get the neck ready for finishing.
Been a bit distracted by the rotten car again. Finally trying to move forward with it again.
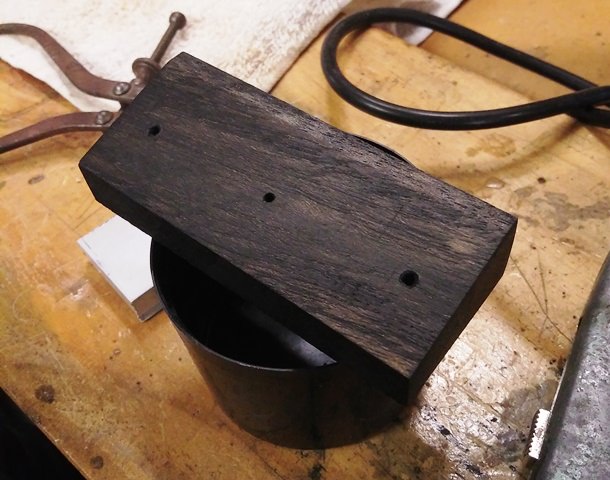
Bridge block (Not tone block) stained and oiled with danish oil.
Neck and bridge plates painted. I meant to use matt paint, but I only had gloss. So that's what they got.
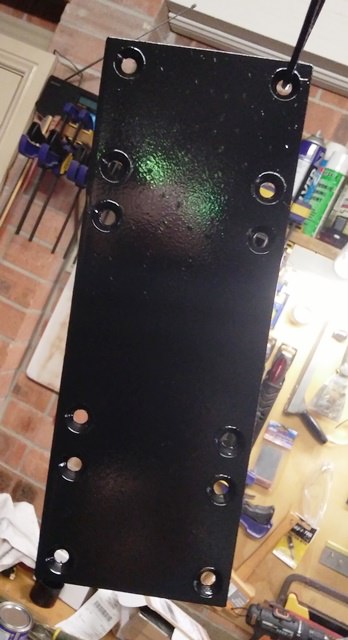
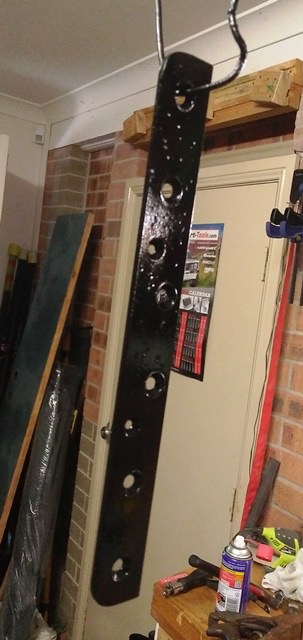
I pocked the surface of the metal before I paint it. I wanted it slightly distressed just like the timber. Didn't come out quite so clearly under the paint though.
I almost put it together, but I need to drill the holes for the PU positions. I'd rather not pull it apart again. I'm thinking J bass positions, but with the neck PU a little closer to the neck. So I guess I'm just building another Fender clone. Right?
Bridge block (Not tone block) stained and oiled with danish oil.
Neck and bridge plates painted. I meant to use matt paint, but I only had gloss. So that's what they got.
I pocked the surface of the metal before I paint it. I wanted it slightly distressed just like the timber. Didn't come out quite so clearly under the paint though.
I almost put it together, but I need to drill the holes for the PU positions. I'd rather not pull it apart again. I'm thinking J bass positions, but with the neck PU a little closer to the neck. So I guess I'm just building another Fender clone. Right?
- Apr 18, 2008
- 16,019
- 1
- 31,736
- Disclosures
- I'm highly opinionated and extremely self-assured

What was that rhyme we had at school? Oh, this is it...
Copy cat!
Dirty rat!
Sitting on a lump'o fat!
Time to put some inserts in the headstock...
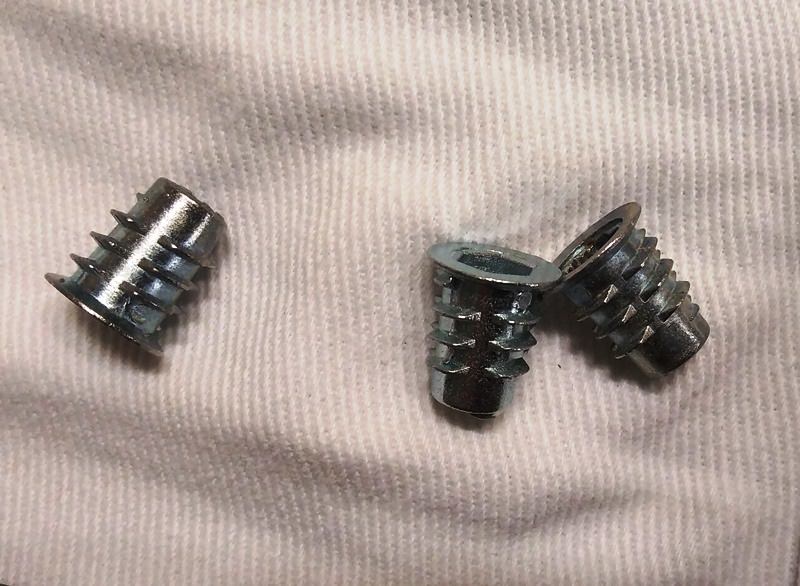
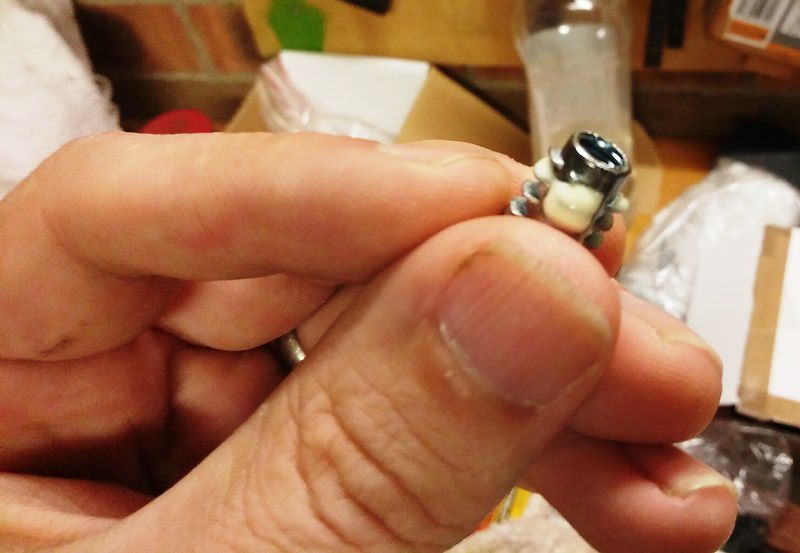
A little glue them wind them in with an Allen key.
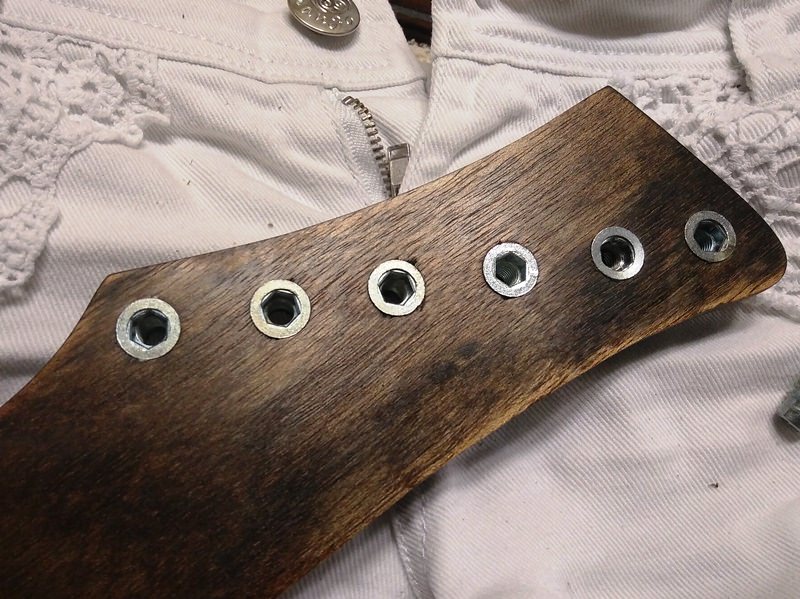
I'm not 100% sold on these. They are made of pretty soft metal and pulling them back out is not an option I think. But they don't have to work particularly hard.
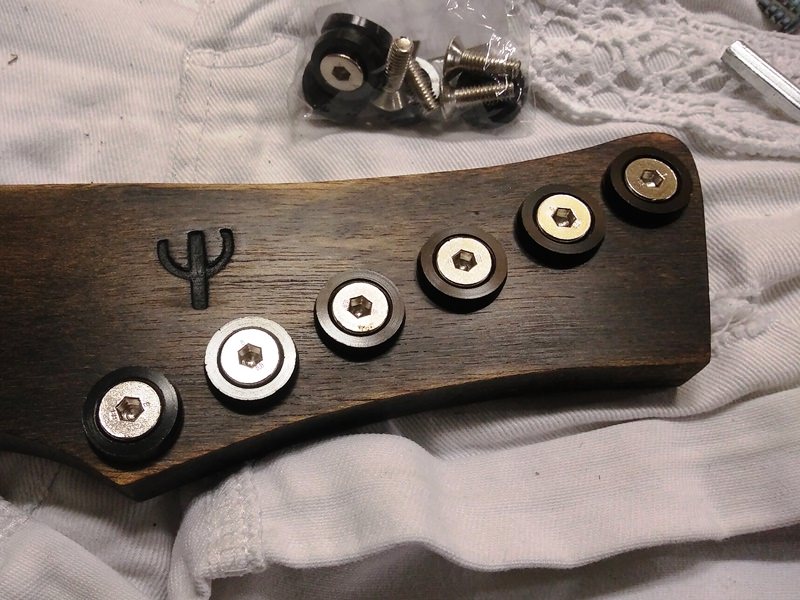
With the anchor screws in place. I still need some black washers to go between the timber and the aluminium caps under the screws. Otherwise the headstock is read to go.
A little glue them wind them in with an Allen key.
I'm not 100% sold on these. They are made of pretty soft metal and pulling them back out is not an option I think. But they don't have to work particularly hard.
With the anchor screws in place. I still need some black washers to go between the timber and the aluminium caps under the screws. Otherwise the headstock is read to go.
Put a few things together last night to measure up PU positions...
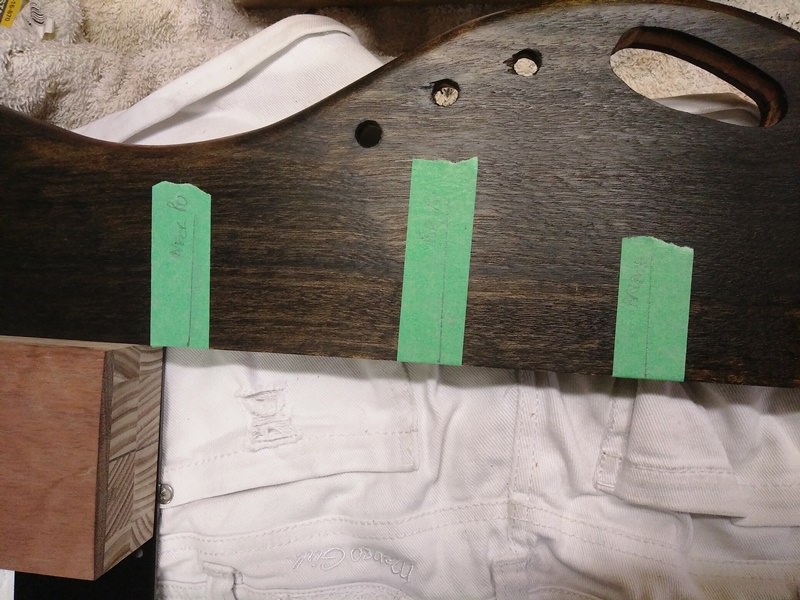
As you can see the neck PU is really close to the neck joint. Hmmm.... Will have to lay it out and see if I'm happy with that. Additionally, I started poking a few pots through the body and noticed this bit of fun. Hmmm...
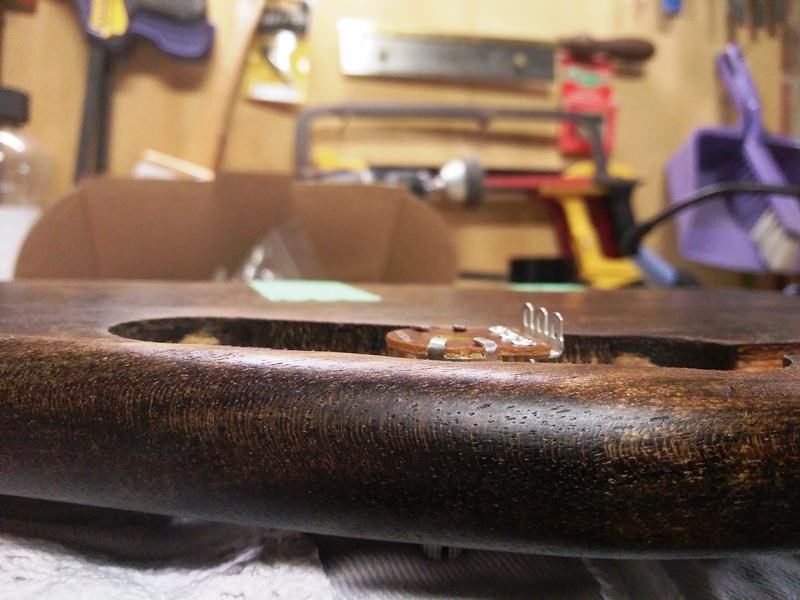
I could bend the tabs over I guess. Yet again, it's going to be pretty crowded in there. For those wondering why I didn't make a bigger cavity, it's all about body strength. Unlike you're average solid body bass, the amount of material in the wings really matters. It will weaken the lower side of the body if I carve out a huge cavity. So I've kept it small and close to the edge. And yes, I'm yet to drill the long holes for PU wires. You can see from the top pic I need three of them, plus one for the earth wire to the bridge. Looking forward to getting three, long holes through 20mm timber right, not. Fun times!
BTW, here's pic of the neck plate all painted. You can see the pock marking under the paint.
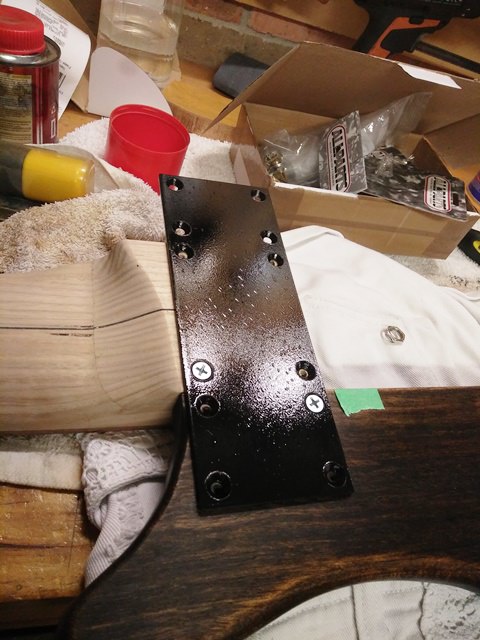
I'm pretty pleased with it.
As you can see the neck PU is really close to the neck joint. Hmmm.... Will have to lay it out and see if I'm happy with that. Additionally, I started poking a few pots through the body and noticed this bit of fun. Hmmm...
I could bend the tabs over I guess. Yet again, it's going to be pretty crowded in there. For those wondering why I didn't make a bigger cavity, it's all about body strength. Unlike you're average solid body bass, the amount of material in the wings really matters. It will weaken the lower side of the body if I carve out a huge cavity. So I've kept it small and close to the edge. And yes, I'm yet to drill the long holes for PU wires. You can see from the top pic I need three of them, plus one for the earth wire to the bridge. Looking forward to getting three, long holes through 20mm timber right, not. Fun times!
BTW, here's pic of the neck plate all painted. You can see the pock marking under the paint.
I'm pretty pleased with it.
Oh, by the way. I think I came up with a better description for the finish. "Cola". No black exactly, but very dark and semi translucent.
Latest posts
-

-

-

-
 Uber Eats class action lawsuit alleges their priority delivery is a scam
- Latest: buldog5151bass
-
