Here's the initial test run. Put my zero in the wrong point so it's backwards, but once I switch to aluminum I'll make sure it doesn't happen. Happy with the overall success of the program tho!Hey everybody, sorry for the long bit of silence. Had actual schoolwork to do.
Finished my first test for the neck, getting the taper down. It worked! ...but not the final product.
I ran the test on a piece of wood, and the top of the fretboard where it meets the nut and headstock is a tad small. Not too big of a problem though, just some minor code tweaking.I'll post pics when I get home and can send them through my phone.

Enjoy the benefits of a premium membership!
Upgrade Account
-
TalkBass has been independent since 1998. Add your voice.
Create a free account to reply to discussions, view embedded media, and browse with fewer display ads.
Join free Log in
Want zero display ads or expanded classifieds tools? Compare plans.
You are using an out of date browser. It may not display this or other websites correctly.
You should upgrade or use an alternative browser.
You should upgrade or use an alternative browser.
Building a bass from the ground up
- Thread starter jakobdoesathing
- Start date
More options
Who Replied?


You might not be following the thread. I believe his neck will be milled from aluminum so hand plane is definitely out and probably tapping with a hammer would not accomplish much eitherCode tweaking?Back in my day, we'd fix that with a swipe of a hand plane. Or maybe a subtle tap of a hammer.......

Code tweaking?
That would be an analog code tweak?


You might not be following the thread. I believe his neck will be milled from aluminum so hand plane is definitely out and probably tapping with a hammer would not accomplish much either
I'm just makin' old man jokes. Back in my day, we made bass necks from hard maple, hand shaped with planes and files! By sunlight and candle light! We didn't sit in air-conditioned rooms tapping keys on a new-fangled computer machine.If you need to tweak the data on an aluminum neck, I'd go for an angle grinder or a small hydraulic press. That'll correct the measurements to make it fit your computer model.

I have seen a lot of episodes of "Forged in Fire" and now I picture you, hammer in hand, making those fine neck adjustments.
If you need to tweak the data on an aluminum neck, I'd go for an angle grinder or a small hydraulic press. That'll correct the measurements to make it fit your computer model.
Hey yall, it's been a bit. As the school year's winding down, I'm having more free time to work on this. I've finished the neck CNC code, and am starting to cut out the body.
The body wood I have actually isn't oak like I originally thought, its apparently cherry, which is great.
With my lack of time, I've resorted to just buying most of the hardware. I picked up a Fender P bass bridge, and I found a Switchcraft 3-way switch in my pile of sacrifices.
I recently got an Ibanez RB-800 in fountain blue, and I'm enjoying that PJ sound, however, for this build, I think I'm going to drop the PJ-All-J switch wiring and make it just P-All-J.
I'm also dropping the pickguard, the overall shape I'm cutting this into doesn't allow for one to fit smoothly, and also, I've had a change of heart and don't really feel like I need one.
I'm allowing myself a bit of leeway on the deadline, because other than the neck, I can do all of the body and hardware work at home. So, the deadline for the neck, maximum is mid June.
Finally, for a finish, I'm thinking a transparent burgundy burst would look cool, with a black sort of outline around the body into a transparent Rickenbacker like burgundy.
I'll post updates as they come, and I'm super excited to get back working on this.
The body wood I have actually isn't oak like I originally thought, its apparently cherry, which is great.
With my lack of time, I've resorted to just buying most of the hardware. I picked up a Fender P bass bridge, and I found a Switchcraft 3-way switch in my pile of sacrifices.
I recently got an Ibanez RB-800 in fountain blue, and I'm enjoying that PJ sound, however, for this build, I think I'm going to drop the PJ-All-J switch wiring and make it just P-All-J.
I'm also dropping the pickguard, the overall shape I'm cutting this into doesn't allow for one to fit smoothly, and also, I've had a change of heart and don't really feel like I need one.
I'm allowing myself a bit of leeway on the deadline, because other than the neck, I can do all of the body and hardware work at home. So, the deadline for the neck, maximum is mid June.
Finally, for a finish, I'm thinking a transparent burgundy burst would look cool, with a black sort of outline around the body into a transparent Rickenbacker like burgundy.
I'll post updates as they come, and I'm super excited to get back working on this.


Day 2, I routed the edges. I'm honestly thinking about dropping the stain idea at this point. Flame up the edges fully, and just use the natural grain with some oil and a clear coat. The air compressor is down here so I'm just waiting for that to get working again so I can work on the neck and figure out hardware placement.
Attachments

Hey y'all, the cnc is back up and I've been running tests and fine tuning like crazy to get this neck done before the school year is over. Currently, the back of the neck is looking good on the test pieces I've ran, the radius is nice and thin, and all the dimensions are set. I'm going to attempt to write something and use a tiny endmill to cut fret slots, and once that's done we can finally run it on the actual piece of aluminum. (if you have any suggestions for the best way to set frets in aluminum that would be great. I was thinking glue would be the only real option, but a second opinion would be nice  ) I would have ran it on the aluminum before, but I only have one piece to work with that's to size, so that's why things have been slow. I get out on the 16th, but I can come back and spend all day of the 17th and 18th working on this if needed. More coming soon.
) I would have ran it on the aluminum before, but I only have one piece to work with that's to size, so that's why things have been slow. I get out on the 16th, but I can come back and spend all day of the 17th and 18th working on this if needed. More coming soon. So, I wrote some code to cut out fret slots, and it worked really well. Just very, very slowly. Gotta run it at 20% speed so the bit doesn't break. Anyway, the plan to cut out the neck in one piece, is to put the raw slab of aluminum in, get everything leveled out and zeroed, then run the radius code, then the taper/outline code until its ready to be flipped over. This is where I get to shave off almost 2 inches of metal to get the fretboard where I want. Once that's done, I'll run the fret code, and then its ready to be sent off to the mill so I can manually make the headstock. It's a lot of work, but we're almost there.Hey y'all, the cnc is back up and I've been running tests and fine tuning like crazy to get this neck done before the school year is over. Currently, the back of the neck is looking good on the test pieces I've ran, the radius is nice and thin, and all the dimensions are set. I'm going to attempt to write something and use a tiny endmill to cut fret slots, and once that's done we can finally run it on the actual piece of aluminum. (if you have any suggestions for the best way to set frets in aluminum that would be great. I was thinking glue would be the only real option, but a second opinion would be nice
Cnc work is done! Fret slots are a bit wide, but it should be fine. I went through 4 endmills finding the sweet spot. Up next is all mill work, shaping the headstock and slotting it onto the body. We're almost there people
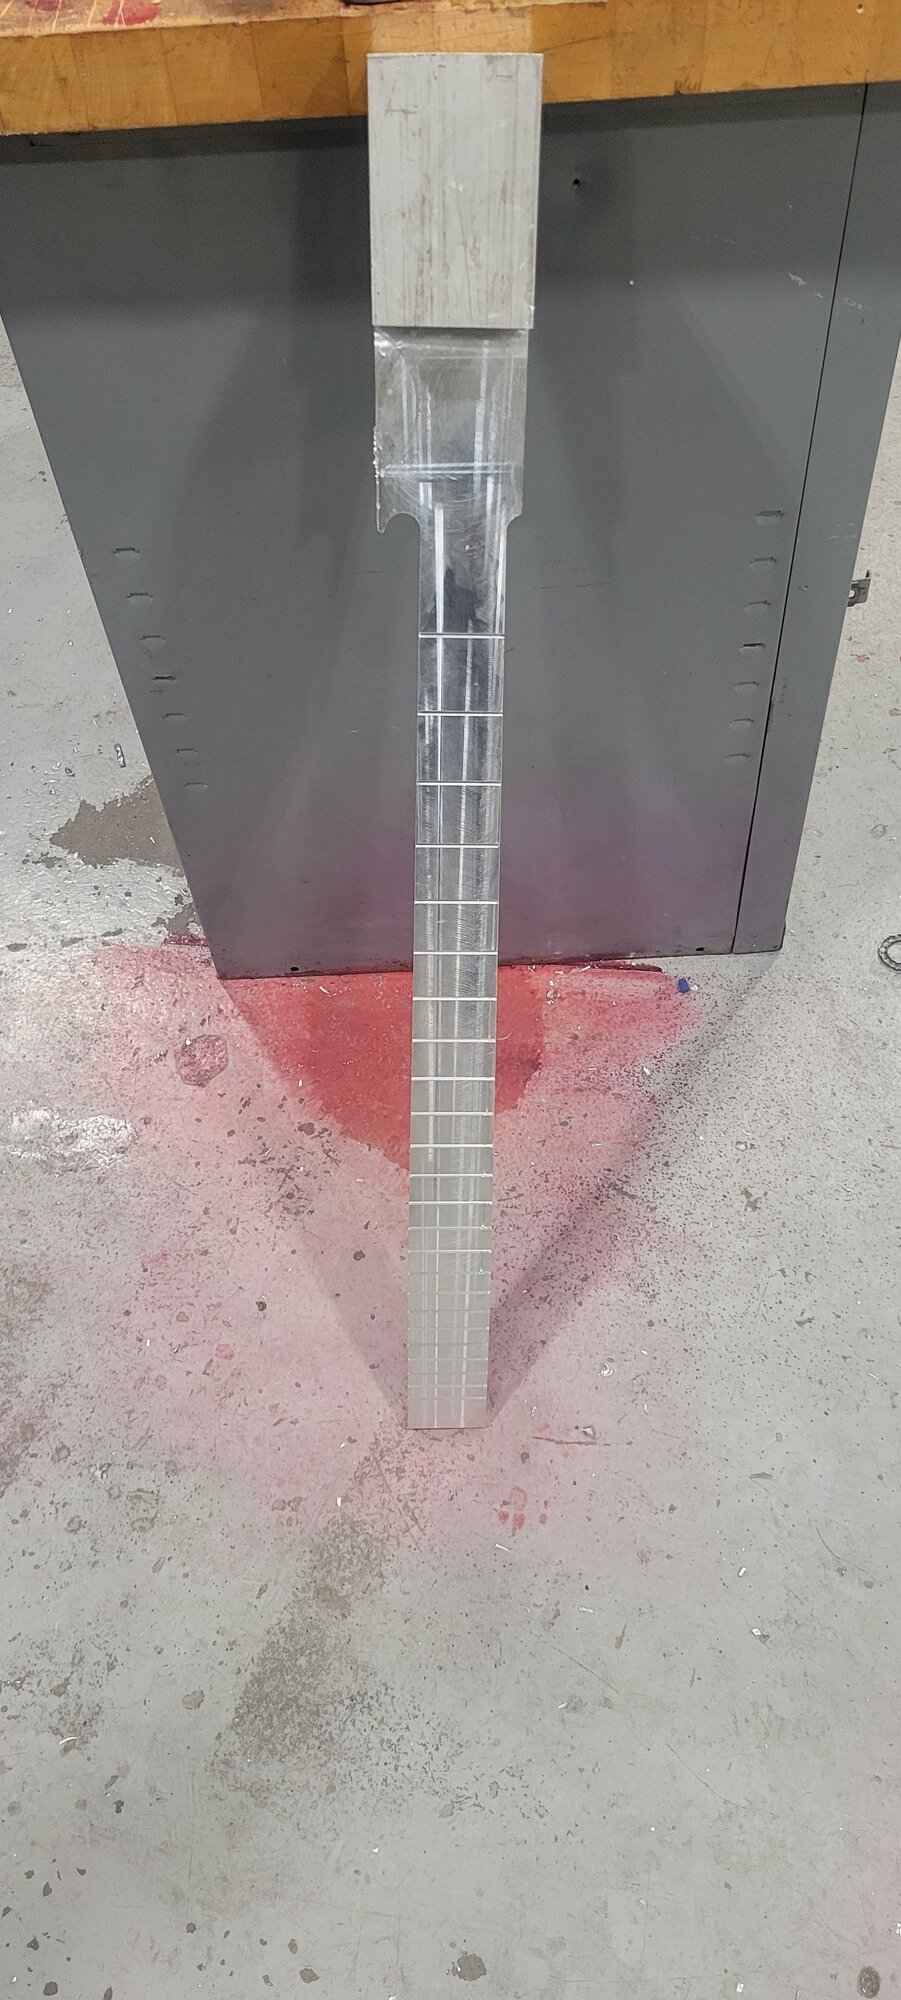
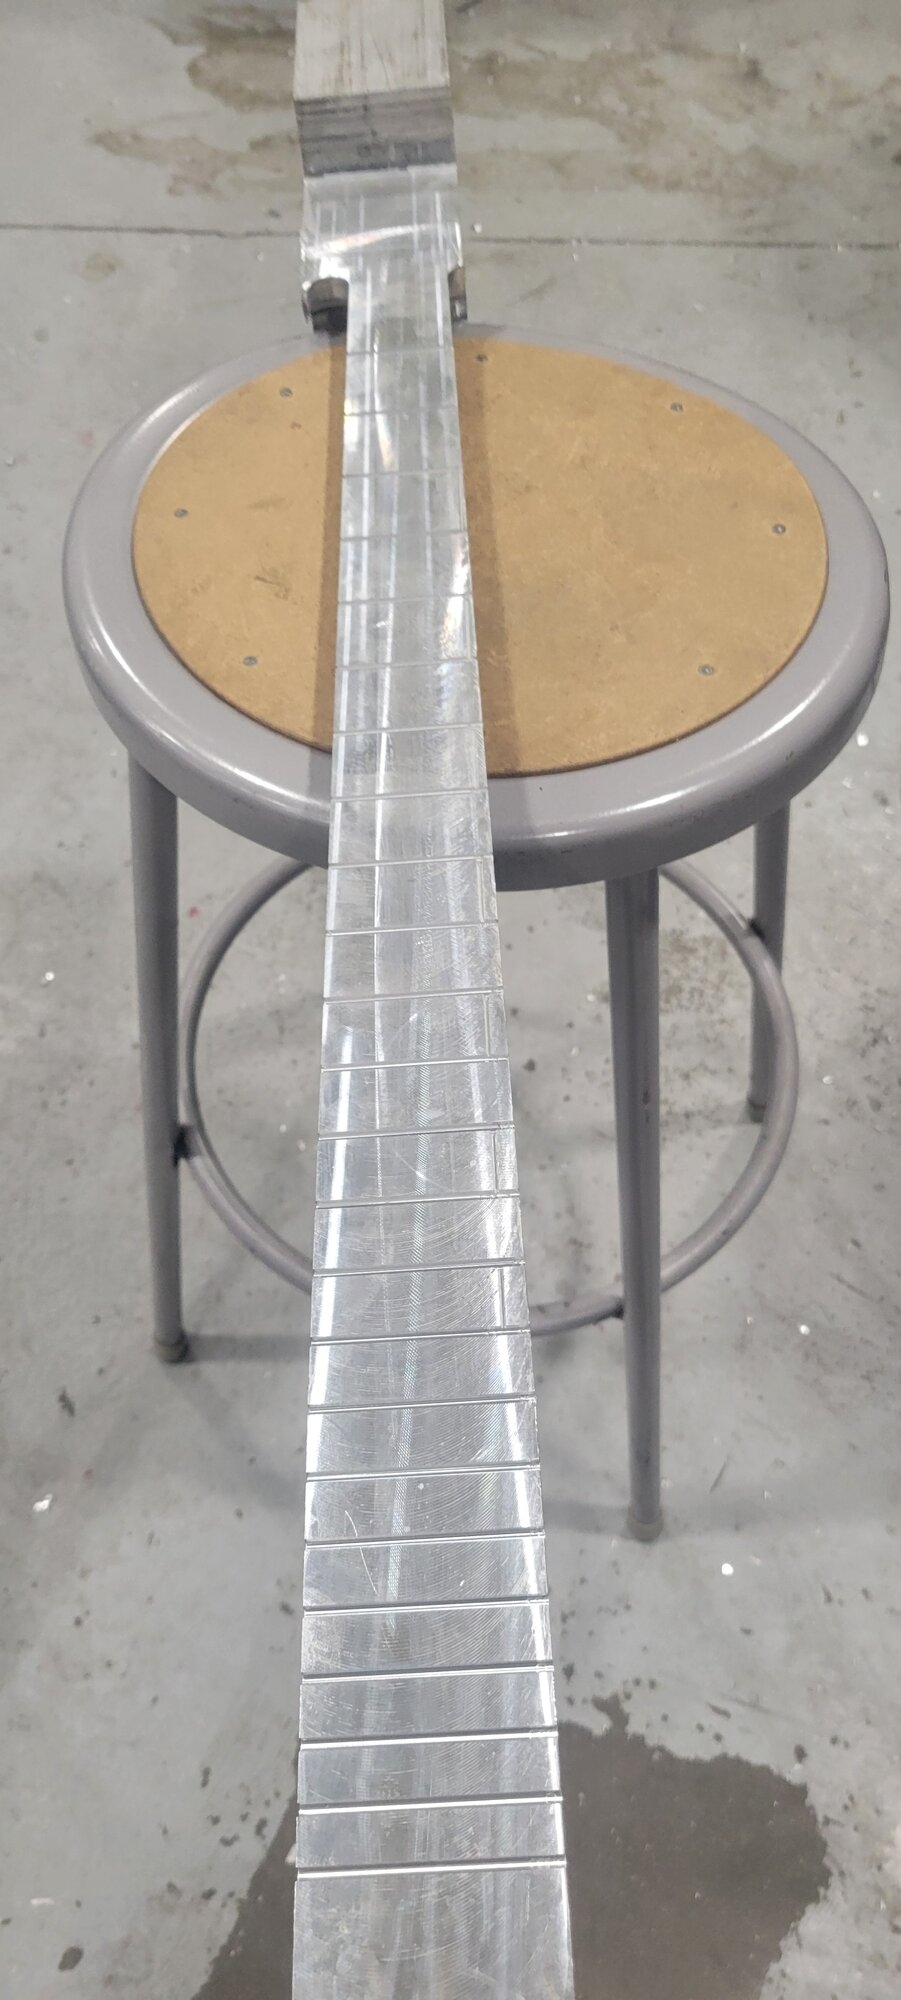
Tumor cut off, and gave it a slight angle. Next is a nut slot, headstock shaping, and tuners holes. After that it's the homestretch with body work. He's heavy, I might need to throw some counter weights in the body to fight back neck dive, but we'll see. I'll probably take those 2 extra days just to finish little details, but we're so close.
Attachments

Here it is. All I can/am willing to do for now. Its a bit wide at the nut, but I can handle it. Cut out the neck cavity, drilled 6 holes, 4 half inch ones for bolts, and 2 quarter ones for the slight overhang just above the 24th fret. Its super stable, and super heavy. Milled out a control cavity, i might need to increase it a bit later, but we'll see when we have hardware in hand. I marked where the bridge needs to go, I can do that at home when I have the wood screws. Over the summer Ill finish up the electronic and fret work, and next semester I'll get around to shaping the headstock. Ill keep updates coming over the summer when I get cash for the hardware


