• TalkBass has been independent since 1998. Add your voice.
    Create a free account to reply to discussions, view embedded media, and browse with fewer display ads.
    Join freeLog in
    Want zero display ads or expanded classifieds tools? Compare plans.

Building A Short Scale P Bass

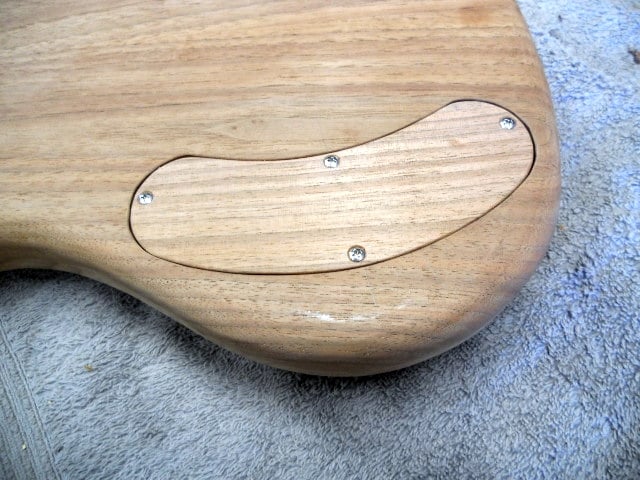
Edges are sanded and the control cavity cover drilled 7/64" and countersunk for the #4 by 1/2" stainless steel oval head screws.
efcb8gp.jpg


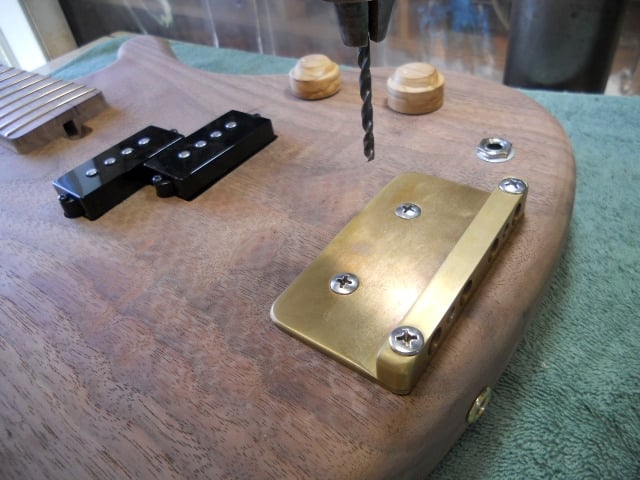
The mounting holes are drilled using a 5/32" bit and the bridge attached with two #10 by 1-1/4" stainless steel oval head screws through the plate and 1-1/2" screws through the rear string bar.
Z1Kd9Rm.jpg


A couple of simple wood knobs are positioned on the pot shafts. The details for the knobs are on the construction print. I had the olive wood left over from a project to replace all the split and cracked walnut handles on our Chicago Cutlery knives. It has some nice figure and I thought it would be nice to add a bit of contrast to the walnut body. (Details for making the knobs has already been posted a bit earlier in this topic starting at post #53.)

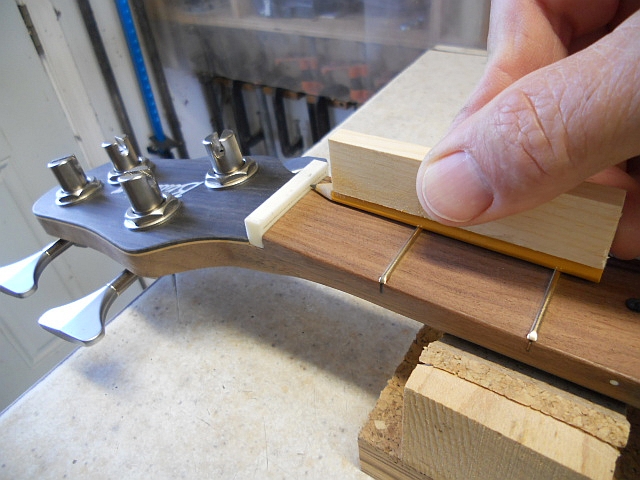
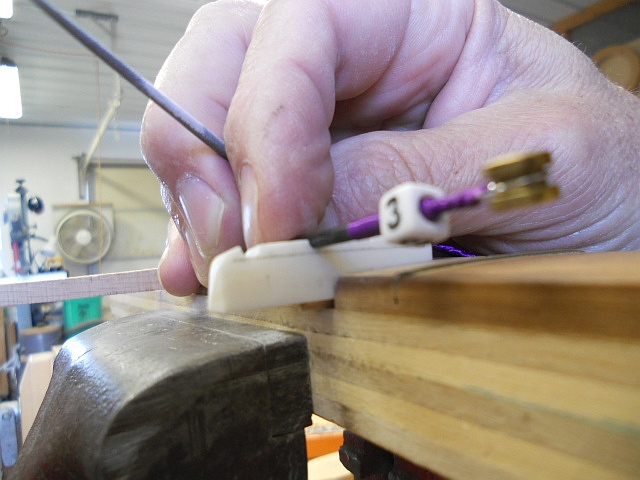
The nut is prepared by marking the string height with the half-pencil placed so it rides on the first and second fret. I glue the pencil to a small scrap of wood so it's easier to sand off the lower half, but it also makes the half pencil easier to hold.

The tuners are added at some point when the body and neck have been assembled so the angle can be checked visually and the small screw added to the rear so the tuners can be properly positioned again after final disassembly for finish application.
rPCj5bl.jpg


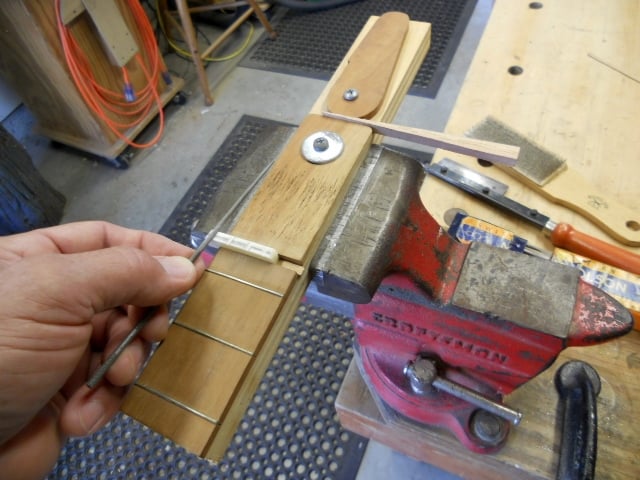
The top edge of the nut is sanded at an angle matching the headstock angle 1/8" above the string depth line drawn on the nut face. The string locations are marked on the top surface. I angle them so the string slot runs directly to the string post of the tuner. I use a small saw initially and enlarge and refine the string slot with a small round file. Any excess height of the nut is removed with the angled disc sander after the strings go through their final fitting during assembly.
1v0oTV8.jpg


The slots are filed until the string is just above the pencil line. The slot depth will be tweaked when the bass is assembled to do an initial setup in case any changes need to be made before applying the finish.
we1ZSS3.jpg
 
Time to attach the neck and string the bass to test it "in the white" to make sure there are no changes that need to be made before applying the finish. This one needed nothing other than setting nut slot depth, adjusting the saddle height, and setting the saddle positions for proper intonation. Since this was an untested design I also wanted to verify the balance with the strap position chosen over the 10th fret. It feels great standing or sitting and there is no "neck dive". The neck elevates about 30 degrees upward if suspended only by the front strap above the upper horn, which turns out to be ideal for me. Based on this observation it would be safe to shorten the upper horn so the end was directly over the 11th or 12th fret. That's shown on the final plan if a shorter upper horn would be desired, although it would be more of a visual choice rather than a balance issue.

All in all, success! It weighs in at a very comfortable 6-3/4 pounds without the strap attached. Oh, and it sounds great plugged into my Fender Rumble 100. It sounds like a P bass, and that’s a good thing. I took a day off and spent a little time feeling the love. It’s gonna be a keeper.

C6cSEL5.jpg


Next comes the EASY part.

Finishing is often the most dreaded part of instrument construction, but I'm doing a rather unique finish option that's quick, easy, foolproof, protective, and produces a super-comfortable "non-stick" neck.

Wait... what? It sounds too good to be true...

Yes, Virginia, there IS a finish that meets all of those prerequisites!
 
Last edited:
Photogenic I ain't. It's really about the bass and not my face. ;)

I don't know what's worse, photos with the head cropped off or suffering comments about my physical anomalies. :)
...?

Having seen a version of this where your head was not cut off (I assume you edited to change the picture), I don't recall anything particularly anomalous, nor do I think a comment that you look happy about it (I would agree, from my recall of the picture as it was) as being intended to make you suffer.
 
  • Like
Reactions: RodRy and Beej
...?

Having seen a version of this where your head was not cut off (I assume you edited to change the picture), I don't recall anything particularly anomalous, nor do I think a comment that you look happy about it (I would agree, from my recall of the picture as it was) as being intended to make you suffer.

No suffering was done. :)

I have natural wrinkle lines which make me appear to be frowning unless I am purposefully smiling, so there's no need to inflict that on fellow forum members. It was a photo that resulted from asking my wife to snap a picture as she was passing by. My bad for not doing a crop in advance. ;)
 
  • Like
Reactions: TerribleTim68
Might be that I pay more attention to the eyes than the mouth when assessing how folks are really feeling, but I'll still go with "you looked happy" as best I recall, or at least not in any way remarkably not happy.

In other news, Hero and Claudio get married, as do Beatrice and Benedick, while Don John is revealed as dastardly...
 
Last edited:
Tear down is pretty fast… the “in the white” assembled bass was reduced to these individual pieces in about 15 minutes. There are time-saving shortcuts like slacking the strings and removing the bridge with the strings in place, curled up, and set to the side while doing the wood finishing.

CezzSsW.jpg


After a final finish sanding and carefully checking over for any remaining imperfections or scratches it’s time to put on a pair of gloves and apply Osmo #3054 Polyx-oil clear satin finish liberally. After 15 minutes you use a soft cloth and remove any of the oil which hasn’t soaked in or bonded with the wood surface. I did EVERYTHING, including the fretboard surface. Set all the parts aside for 24 hours and repeat the wipe-on / wipe-off procedure the next day.

That’s all there is to the entire finish procedure! After the second 24 hours the bass is assembled for the last time and is ready to play. It’s best to play minimally and continue to let the finish reach a full cure which takes about a week. It’s fine to play it during that time, but you’ll know when the finish is fully dry by the disappearance of any residual odor. Osmo Poly-X has only a very slight smell when it is applied or as it dries which is “unique” but not unpleasant. I actually like the smell while applying it.

Osmo Polyx-oil is a unique finish, offering a fair amount of abrasion resistance and a really great under-the-hand feel for the neck surface. In addition, it’s super-easy to repair. In the shot of the rear surface control cavity there was a small patch of the gray shielding paint that I accidentally brushed on the body. It required only a few quick swipes with 220 grit sandpaper and a re-wipe of Polyx-oil to fix the problem.

I highly recommend its use as a wipe-on finish; it is unlike anything I’ve ever used before. This stuff has been used in Europe for something like 50 years as a floor finish so it has stood the test of time. Lots of good information if you do a search on the web. It’s expensive, but the small $20 can would do 3 or 4 instruments easily.

2yxfBV0.jpg


The body after the Osmo Polyx-oil finish application:

NjdbnU3.jpg
 
Osmo Polyx-oil sounds as easy to use as Danish oil, yet gives a more durable finish but still allow you to feel the wood. Do I have that right? Hmm ... I'm taking note of this stuff.
Yes, that's the general idea.

There are many reviews of the Osmo product as well as the other brands of "hard oils". It helps to read up a bit to understand how these differ from other penetrating oil products.

https://napervillehardwood.com/blog/the-hardwax-oil-experiment-part-1-osmo/
 
The control knobs are placed on a short length of ¼” all thread and the Osmo PolyX oil is applied to them as well.

v1CEWtj.jpg


Here’s a side shot of the body to show the grain match of the body halves. The grain match is close enough that you have to look closely to see the glue joint.

U2kHA93.jpg


The nickel bearing shielding paint is water-based and is pleasant to use and dries fast. I used a Q tip to add the paint to the drilled wire passage between the pickup routes and the control cavity. I wince occasionally when paying the asking price for stuff in small bottles, but what's my time worth? :)

Yaq9FPi.jpg


I managed to hit the edge of the control cavity with the shielding paint, but since Osmo PolyX was used for a finish it was an easy matter to sand it off and touch up the sanded area with a bit of PolyX. This stuff is great when you want to spot-repair the finish!

The “temporary” disk caps were removed and the proper Orange Drop cap installed in their place. The pots and jack were moved to their proper places within the control cavity after attaching the pickup wires and the wire used to ground the bridge. Not shown, the control cavity cover has its rear surface covered with copper foil self adhesive tape.

Now its "put everything back together" time!

lhIOjzN.jpg