• TalkBass has been independent since 1998. Add your voice.
    Create a free account to reply to discussions, view embedded media, and browse with fewer display ads.
    Join freeLog in
    Want zero display ads or expanded classifieds tools? Compare plans.

Building A Short Scale P Bass

It’s quick and easy to do the final assembly and check out the new bass.
krYy3XC.jpg


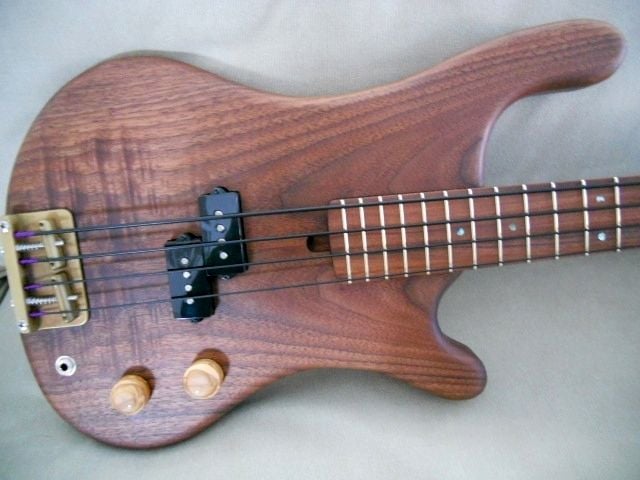
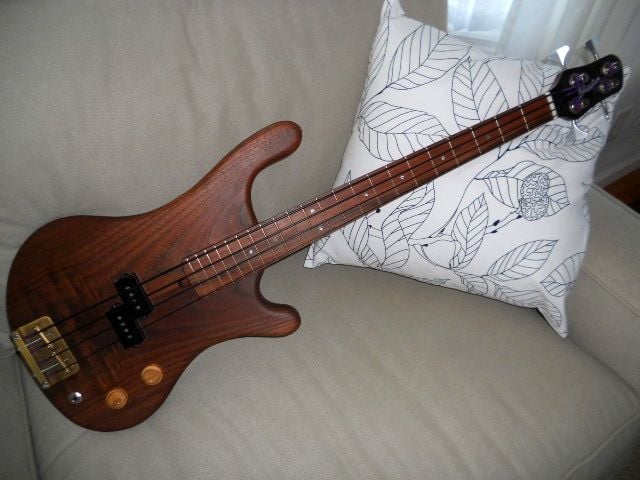
Front of body...

1MzX00q.jpg


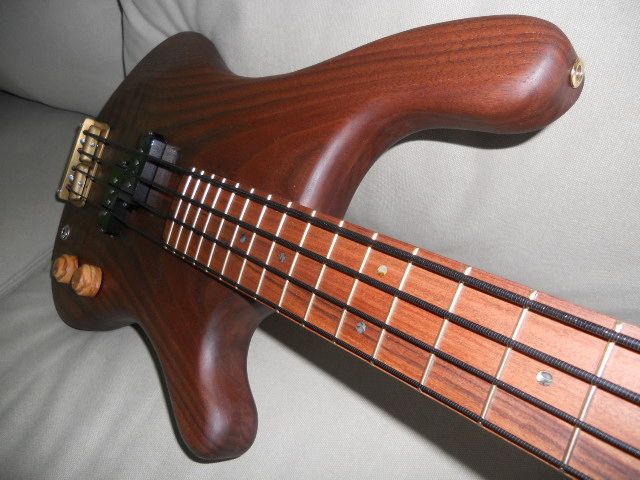
Long view of body...

LzRcMPz.jpg


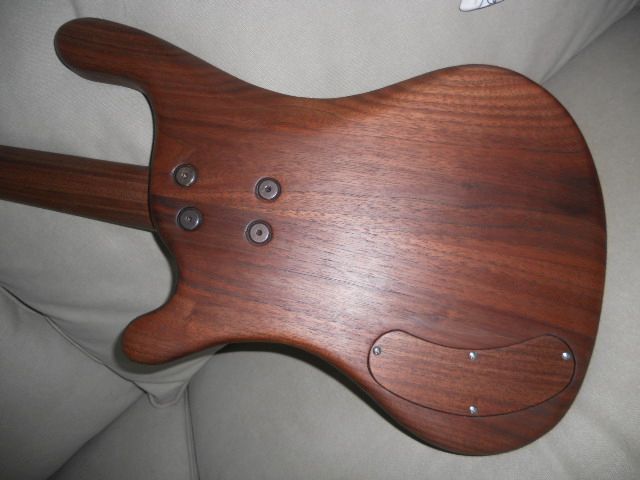
Rear of body...

cgveBGY.jpg


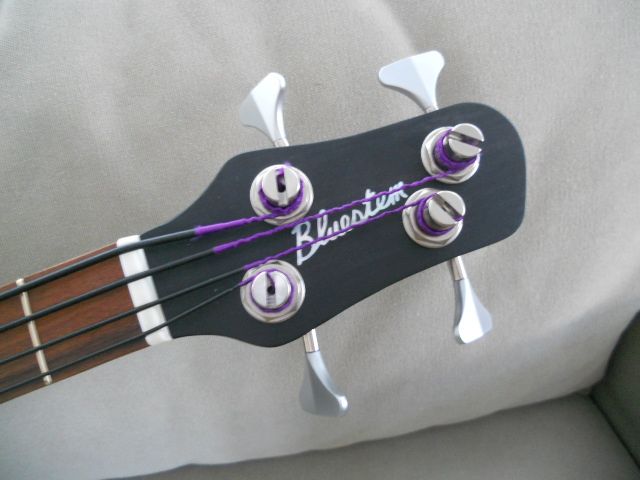
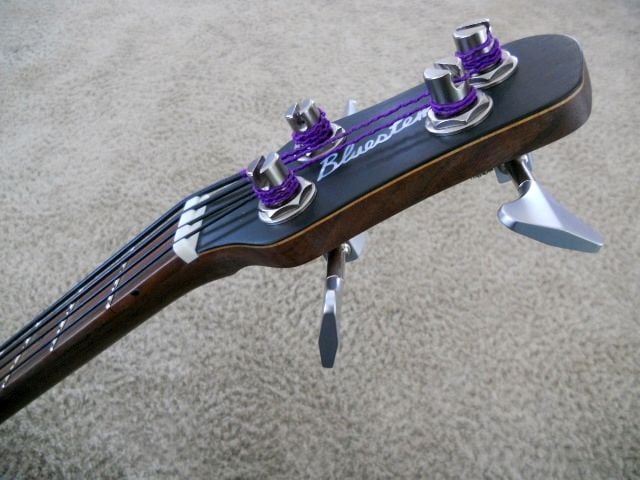
Headstock...

kcybp1I.jpg


Headstock side view...

iFPRDgy.jpg


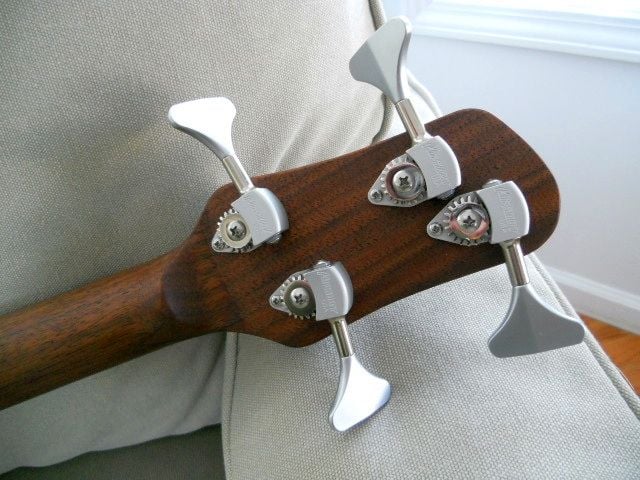
Rear of headstock...

Xl041hG.jpg


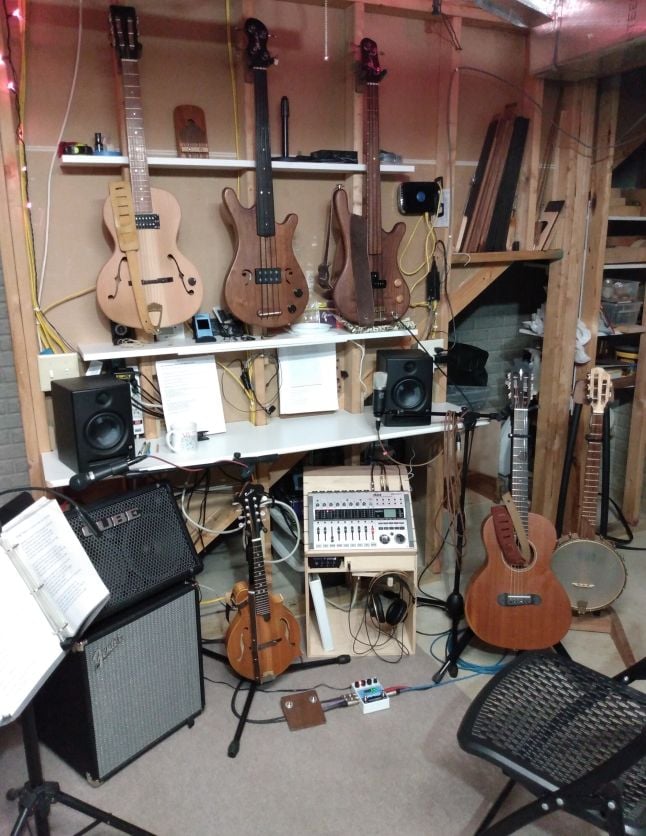
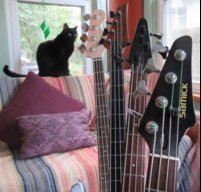
Hanging out with several other members of the family…
PjmL598.jpg


Especially during the pandemic I find great comfort in my lil' looping and recording area. It's super to be able to flip a single power strip switch, loop a verse / chorus, and add a bass line to play and sing over. The power strip even turns on my overhead party lights and makes for a very relaxing and comforting place to enjoy some quality playing time. It's the next best thing to having your playing buddies waiting for you to join them.

As my fav-o-rite little pig sez, “That’s all folks!”

Now I can move on to my Ronroco build ...
 
As my fav-o-rite little pig sez, “That’s all folks!”

Now I can move on to my Ronroco build ...
Another fine build Rudy! As others here have said, I like your final results, but I really love the attention you put into the notes, ideas, and photos along the way.

Wonderful documentation, and I'm sure there will be builders reading this for many years to come.
Thanks again!
:laugh:
 
Another fine build Rudy! As others here have said, I like your final results, but I really love the attention you put into the notes, ideas, and photos along the way.

Wonderful documentation, and I'm sure there will be builders reading this for many years to come.
Thanks again!
:laugh:

Thanks, RodRy.

I appreciate your comments and I hope that the work I put into the documentation inspires someone else to build their muse, or at the very least, provides some solid entertainment value.

As per my last photo and comments, I love building what I play and playing what I build. It's not a path for everyone to follow, but it provides a special perspective that only playing instruments created from your own hand can really fulfill.

As the perfect trifecta, often I also end up using these instruments on tunes and songs that I have composed. There's really something very satisfying in the entire process.
 
Thanks, RodRy.

I appreciate your comments and I hope that the work I put into the documentation inspires someone else to build their muse, or at the very least, provides some solid entertainment value.

As per my last photo and comments, I love building what I play and playing what I build. It's not a path for everyone to follow, but it provides a special perspective that only playing instruments created from your own hand can really fulfill.

As the perfect trifecta, often I also end up using these instruments on tunes and songs that I have composed. There's really something very satisfying in the entire process.
I was surprised you decided to make your own bridge. I guess I should not have been - you clearly are able to make items of metal and wood both - just don't see many woodworkers / instrument builders taking that direction.

I find your process both inspiring and illuminating. And if you get to have fun with it too, then that is icing!

Hope the bug bites again. I look forward to reading that one as well!

Now time for me to do some design work myself...
:D
 
Hey Rudy,

What an inspiration!

Once again I land on one of your build threads and it’s a “page turner”. For this super nicely designed “little” masterpiece I especially like the deep inset neck pocket and placement. I was beginning to research Osmo hard finish oil as I saw that Andrew Drake mentioned using it on a re-finish/update on a customers bass.

I’m keenly interested because like many others, I’m in a continual cycle for finding the straight forward, repeatable, easy, durable, and not so toxic finish!

Anyway, congrats on this wonderful bass!

Cheers!!!
 
  • Like
Reactions: RodRy
Hey Rudy,

What an inspiration!

Once again I land on one of your build threads and it’s a “page turner”. For this super nicely designed “little” masterpiece I especially like the deep inset neck pocket and placement. I was beginning to research Osmo hard finish oil as I saw that Andrew Drake mentioned using it on a re-finish/update on a customers bass.

I’m keenly interested because like many others, I’m in a continual cycle for finding the straight forward, repeatable, easy, durable, and not so toxic finish!

Anyway, congrats on this wonderful bass!

Cheers!!!

Glad you enjoyed it. Inspiration is what I aim for.

The hard oils are pretty much ideal for a natural finish instrument. I mostly build natural finish instruments as I very much appreciate the look of wood. Basses are often painted, so the hard oil could still be used as a neck finish if building a painted instrument.

I'll be sure to check out Andrew Drake's posts regarding his thoughts on Osmo PolyX hard oil. The only "drawback" is the price, but since you only do two coats it actually ends up being economical to use. If you count the reduced amount of time it takes as well as the ease of application it ends up being a very good alternative to the more conventional finishes.

A lot of hobbiest builders like to use Tru-oil, but I've always found it's a giant PITA when you factor in how many coats it takes and figure in the drying time. I would highly recommend those folks give Osmo a try. I'm all about easy!
 
  • Like
Reactions: chinjazz and RodRy
Hey Rudy,

I bought a few cans of osmo and can’t wait to try it out. Another thing I’m inspired to try is using 1/4-20 furniture bolts (inset like yours and @Beej). Instead of using the neck ferrules and machine screws. Save on hardware costs for sure.

Thanks again for the great build thread, and Happy Holidays :)

I'm always glad to hear when someone is inspired to try out one of the techniques that I've found to be advantageous over the many years of building instruments.

I think you'll find the Osmo PolyX "hard oil" to be a joy to work with and to produce a very nice feel under the hand as well as being beautiful and easy to repair should you ever need to do so. It's not for everyone, but for what I make it's the best option by a long way.

The furniture bolts and tee nuts are an ideal method of neck to body connection where there may be a need to disassemble or assemble several times over an instrument's lifetime. I use them with the matching barrel nut connectors they were designed to be used with on other types of instruments such as guitars, octave mandolins, banjos, etc. where the neck heel pulls tightly against a body surface.

The furniture bolt and tee nut / barrel nut combination is a great example of adapting more modern hardware that did not exist when other less desirable methods such as common screws or threaded inserts were used. I started using the furniture bolt / barrel nuts as an alternative when building instruments where it was common to add other types of hardware such as threaded inserts into neck heel end grain, a practice that's ill-advised in any case.

Cost-wise it's cheaper to use a simple screw with a back plate or ferrules, but the furniture bolt / tee nut is vastly superior to the other methods and well worth the additional cost and time it takes to use them.

Using brass to make my own bridge is simply an extension of working with it regularly. I've built a ton of banjos where I make all of the tension bands, tone rings, attachment shoes, and tailpiece components from raw brass, so a bass bridge seemed like a good application of that practice. Brass is an easy to work with material, so I advise anyone to give it a try.

Since I do the CAD plan prior to building it's easy to provide them as printable pdfs as I did in the opening post of this topic. It also gives me the opportunity to provide the pdf sheets like the string spacing guides. I have a few different versions of those in the shop and use them often. After I started using the string spacing guides I wondered how I ever got along without them!

In any case, enjoy your building endeavors in the coming year. We all need a little comfort and R&R after what 2020 has brought us. I miss playing with my jamming buddies regularly or the occasional gig. I retired from playing out a few years back, but even that sounds good now!

I head up a group of us "retired gentlemen" for horseshoes in the park or billiards n' pizza on Tuesday mornings, usually having about a dozen participants, and Covid interrupted that for pretty much the entire year. I miss that opportunity for social activity as much as my jamming time, so I'll be more than happy when CV-19 is a thing of the past.

Here's to a better 2021!
 
  • Like
Reactions: Beej and RodRy
Yes, Cheers to a better 2021! - I'm all in for that :thumbsup:

I've always wanted to make my own bridge. Maybe you'll inspire me even more - I guess that's a tri·fect·a.
In in my opinion one of the most functional bridge designs are the original Fender Vintage with the threaded saddles. If I could make one for a Fiver, I'd be happy. I would most likely not make the threaded saddles, but who knows...
 
  • Like
Reactions: RodRy
Yes, Cheers to a better 2021! - I'm all in for that :thumbsup:

I've always wanted to make my own bridge. Maybe you'll inspire me even more - I guess that's a tri·fect·a.
In in my opinion one of the most functional bridge designs are the original Fender Vintage with the threaded saddles. If I could make one for a Fiver, I'd be happy. I would most likely not make the threaded saddles, but who knows...
The brass threaded rod in various sizes (such as 3/8"-16) is commonly available. Give it a go!
 
  • Like
Reactions: RodRy
My favorite fretless basses have all been ebony boarded. Other than a light protective finish to provide an attractive surface that resists being overly-dry I don't think durability is much of an issue. Fretless basses ideally should use flat wound, pressure round, half-flat, or tape strings to prevent the string wraps from "denting" the fingerboard.

I would say that any wood that is reasonably hard could work well as a fretless board, but the farther you deviate from woods such as ebony or rosewoods the less resistant to string wear they become. The synthetic boards such as Rocklite would be good candidates, too.

I have done a couple using walnut and "hardened" with CA, but it's still not as dent-resistant as a ebony or rosewood board.

Osmo PolyX does not appreciably harden the surface of any board it is applied to, the resistance to string wear is more a simple function of the actual wood.
 
Last edited:
  • Like
Reactions: RodRy
My favorite fretless basses have all been ebony boarded. Other than a light protective finish to provide an attractive surface that resists being overly-dry I don't think durability is much of an issue. Fretless basses ideally should use flat wound, pressure round, half-flat, or tape strings to prevent the string wraps from "denting" the fingerboard.

I would say that any wood that is reasonably hard could work well as a fretless board, but the farther you deviate from woods such as ebony or rosewoods the less resistant to string wear they become. The synthetic boards such as Rocklite would be good candidates, too.

I have done a couple using walnut and "hardened" with CA, but it's still not as dent-resistant as a ebony or rosewood board.

Osmo PolyX does not appreciably harden the surface of any board it is applied to, the resistance to string wear is more a simple function of the actual wood.
My ebony fretboard bass has a few permanent lines on it from a number of years of playing, and I thought that perhaps the Osmo could extend the life of the board.

It sings best with roundwounds, but after the first couple of years, I switched to tape wounds (which I did not like on there) then pressure wounds for several years, then to halfwounds a couple years back. Now I'm contemplating TI flats, just to see if I like the combination.

From the Osmo Polyx website, they reported that it both hardens in the wood, and puts a thin hard layer down on top of the wood, which is why it is so good as a floor finish. Sounds to me like that would be ideal for a fretless board. A hardening layer both on top of and within the first cell layers of the wood, but not a thick layer like cyanoacrylate or polyurethane finishes.
upload_2020-12-27_20-28-59.png


Just wondered if you'd tried it.

Also, do you have a good idea what the difference is between the 3043 clear satin or the 3054 clear satin? I've found both, but can't really tell a difference from the descriptions on the cans. They don't mention the 3054 on their website.

Thanks!
 
  • Like
Reactions: chinjazz
I can't say I have tried Osmo PolyX for surface treatment on a fretless board but From what I have done with it I'd say the sales blurb about hardening might be "gently over-inflated". I love it on the back of a neck, as it has a great under-hand feel and seems to hold up well to hand contact. That's all I can really offer for my knowledge of the product.
I can say that the numbering / labeling system of the product is somewhat bewildering. I can't make a lot of sense in their different label numbers for what seems to be the same product.

I would say that if I had a fretless in the process of finishing up I'd certainly use Osmo PolyX for a finish. The beauty of this product is if it ever "wears through" you can simply wipe over the worn areas. It will only stick to the bare areas and will simply wipe off any areas where finish remains. This is one of the advantages to this finish classification of "hard oils".

The bass featured in this build topic has the fret board top-coated with Osmo PolyX hard oil.
 
Last edited:
  • Like
Reactions: RodRy
I can't say I have tried Osmo PolyX for surface treatment on a fretless board but From what I have done with it I'd say the sales blurb about hardening might be "gently over-inflated". I love it on the back of a neck, as it has a great under-hand feel and seems to hold up well to hand contact. That's all I can really offer for my knowledge of the product.
I can say that the numbering / labeling system of the product is somewhat bewildering. I can't make a lot of sense in their different label numbers for what seems to be the same product.

I would say that if I had a fretless in the process of finishing up I'd certainly use Osmo PolyX for a finish. The beauty of this product is if it ever "wears through" you can simply wipe over the worn areas. It will only stick to the bare areas and will simply wipe off any areas where finish remains. This is one of the advantages to this finish classification of "hard oils".

The bass featured in this build topic has the fret board top-coated with Osmo PolyX hard oil.
I wondered how much over-inflated their hardening claim was. Thanks for your insight on it!

I've ordered up some of the 3043 clear satin from Lee Valley. Next time I change strings, the plan is to use a bit if 320 and a sanding block to gently remove some of the dents in the wood (it is very minor) and apply the Osmo. I've only used lemon and Watkins teak oil (tung oil?) on it so far.

I'll let you know once I have something to report!
:D
 
When I first became aware of the hard wax finishes I started with Rubio Monocoat, the only hard wax that I could locate and purchase. The Rubio product is a true one coat application, and you CAN'T apply a second coat. It's also a two part system with the two parts being mixed before they are applied, so it's a bit more finicky.

Their popularity (and availability) has increased rapidly as more folks get a chance to try them. Along with that, the number of Youtube videos has also blossomed, some of them good, some not so good! The video above has good information, but his process is WAY more finicky than it needs to be. My entire application procedure is outlined in post #73 and might be good to review for those who may have forgotten that post.

The important points; don't sand beyond 220 (final sanding with the grain direction) apply enough to just wet the surface and let it soak in 15 minutes, wipe off COMPLETELY with a soft cotton cloth, repeat the entire process 24 hours later. That's the whole banana.

Just for fun, here's a partial list of Osmo Poly-x product identification numbers:

3011 Gloss
3031 Clear Matt
3043 Clear Satin
3044 Poly-x Raw
3054 Poly-x Original Clear Satin
3062 Matt
3065 Semi-Matt

There's probably several more!

I'd personally simply look for specifications rather than the bewildering product numbers.

"Osmo Poly-x high solids Matt or Satin" will get you there.

If you want a gloss then that's easy enough to figure out...