Enjoy the benefits of a premium membership!
Upgrade Account
-
TalkBass has been independent since 1998. Add your voice.
Create a free account to reply to discussions, view embedded media, and browse with fewer display ads.
Join free Log in
Want zero display ads or expanded classifieds tools? Compare plans.
You are using an out of date browser. It may not display this or other websites correctly.
You should upgrade or use an alternative browser.
You should upgrade or use an alternative browser.
Building an Ampeg SVT-810E
- Thread starter Vintage-Blue
- Start date
More options
Who Replied?
Holy cow! Just read it all! You are a great builder!!! Wish I could do the same! Here in Brazil it would be way cheaper than buying the Ampeg one. And judging by your work maybe even better. Thanks for that!

Fantastic build. Interesting and informative thread with great pics.
Thanks and congrats

Thanks and congrats

Can't wait to see the grill come together! Please post lots of detail on that if you can, I've always been very curious about that step.

As the owner of a Heritage 810e, I can tell you how it will sound...freaking AWESOME! The Heritage speakers are as good sounding as the old CTS alnicos in the flatbacks, plus together they handle 800w before you even reach fartout, let alone voice coils blowing, so it will be a sound of beauty as well as a look of beauty.
Ive got a late 90s 810E. Could the stock speakers be Upgraydedd to heritage speakers? You guys are making me want a heritage 810. BAD.

You could, I suppose, but judging by what Mark says about the price, it's not much more to get the cab with the awesome tolex and grillcloth.

Ive got a late 90s 810E. Could the stock speakers be Upgraydedd to heritage speakers? You guys are making me want a heritage 810. BAD.
The box volume, etc. hasn't changed much from the first ones in '69 to the newest ones. Not enough to matter anyway. Meaning you can swap speakers between any of these fridges no matter the year.
As Jimmy and others in-the-know say though, on the used market you could get a whole 'nother cab for equal or more likely less than what it would cost for 8 new speakers to put in your cab.
If you are hellbent on replacement speakers, have a good look at the 8ohm FaitalPro 10FE200. Sweet, smooth mids and plenty of topend for anybody. More reminiscent of the old flatbacks but with a poopie-ton more power handling in the lows. Kind of a best-of-both-worlds driver.
At around $53 each with a few bucks discount for buying a quantity of 8, is really something to seriously look at.
You would have to do series/parallel wiring, just like two 8ohm 410's hooked together in parallel, but in the end it'd still be a 4ohm 810 that closely resembles the fridge, but would run even louder due to the increased sensitivity of that driver.
It would have a similar tone profile but take a crapload load more power, and bass if you want, than the oldest design Ampeg 810's, which are the best ones, IMO.

Dont use the fe200 drivers! Ive loaded a cab with them. They have great specs but trust me, no matter what the modellinfs says, and i did that first, the low end isnt that great. Its not voiced right. The vintage drivers actually have a nicer kow end and punch. So, you can actually buy a brand new heritage cab for about the same price as buying the 8 heritage drivers. Just buy the cab, you will save money and heartache. Trust me on that!

- Feb 13, 2008
- 1,247
- 1,916
- Disclosures
- Owner, Vintage Blue (repro cabinets)
I decided it would be easier to lay out and mark the holes for the grille fasteners before the cloth was applied:
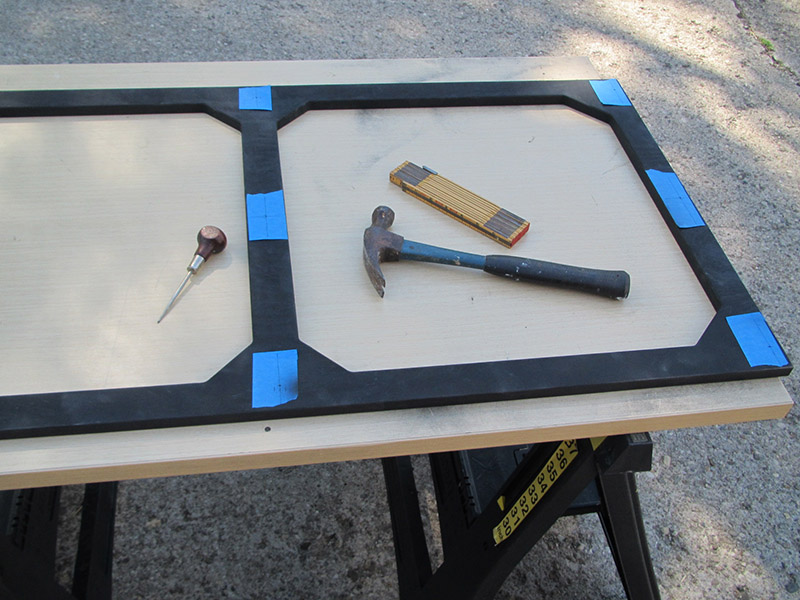
Getting the frame lined up on the grille cloth:

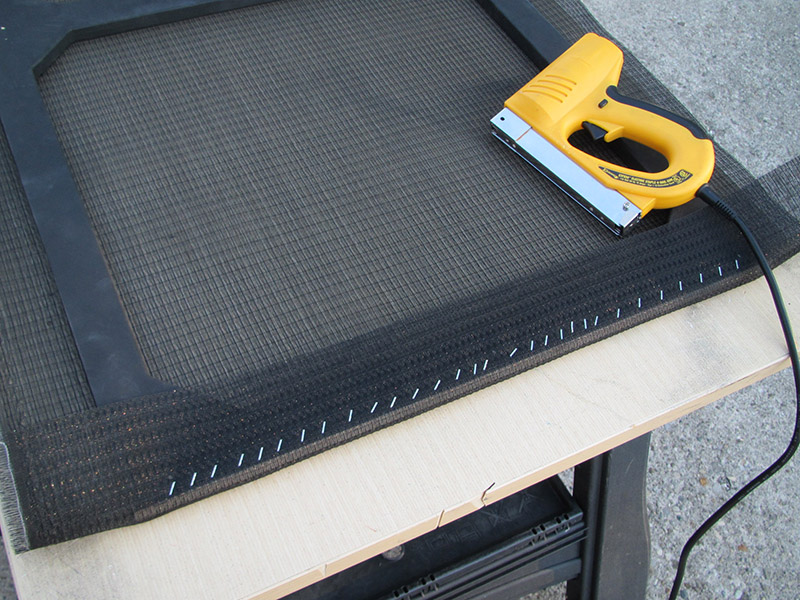
Installing grille cloth is one of my least favorite tasks! I start off by stapling the cloth to one end, keeping the horizontal pattern aligned with the end of the frame. I start in the middle and work out toward each side. You want to be sure you don't pull the cloth to one side or the other while doing this:
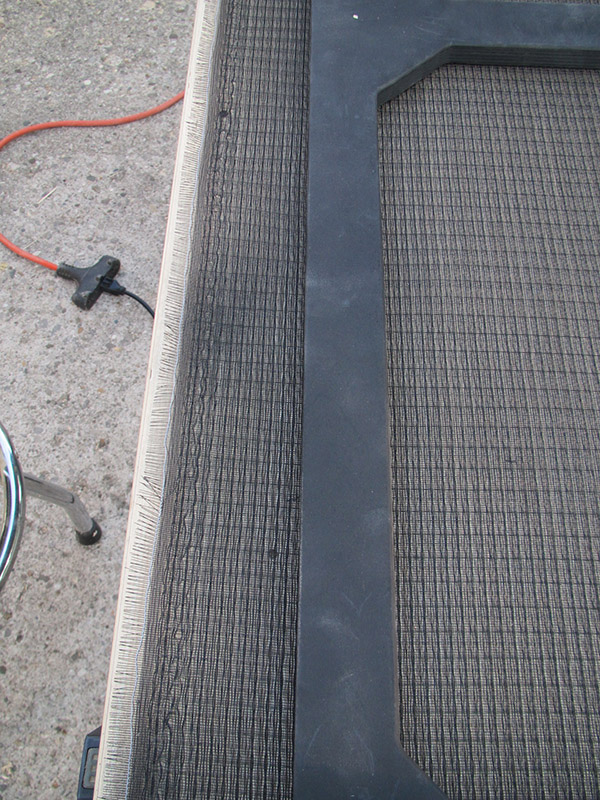
While preparing to staple the other end make sure that the vertical pattern is aligned properly by sighting up the side of the frame:
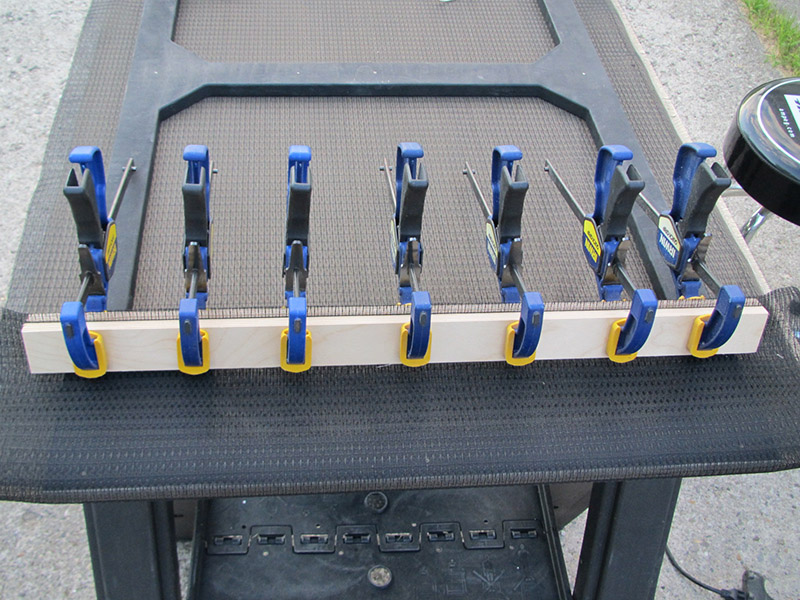
To pull the cloth before stapling the other end I decided to try something that I attempted a few years ago for covering the grilles on my B15 cabinets. In that case it didn't work well because the B15 grille has four protruding mounting studs that got in the way. This frame doesn't have those so I thought I would give it a try again. Basically I take two strips of plywood and attach a piece of non-slip tape (the stuff with grit) to each:
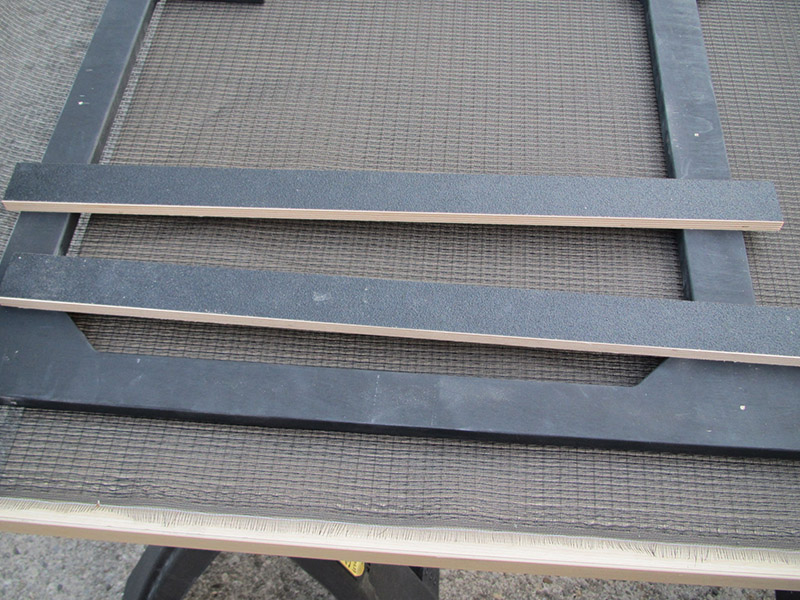
Then I clamp the loose end of the cloth between the plywood strips. This gives me something to hold to try to pull the cloth evenly. I pull the cloth as tight as I can but have never had good luck if I try to pull it too tight. I tend to skew the pattern somewhere when I do that:
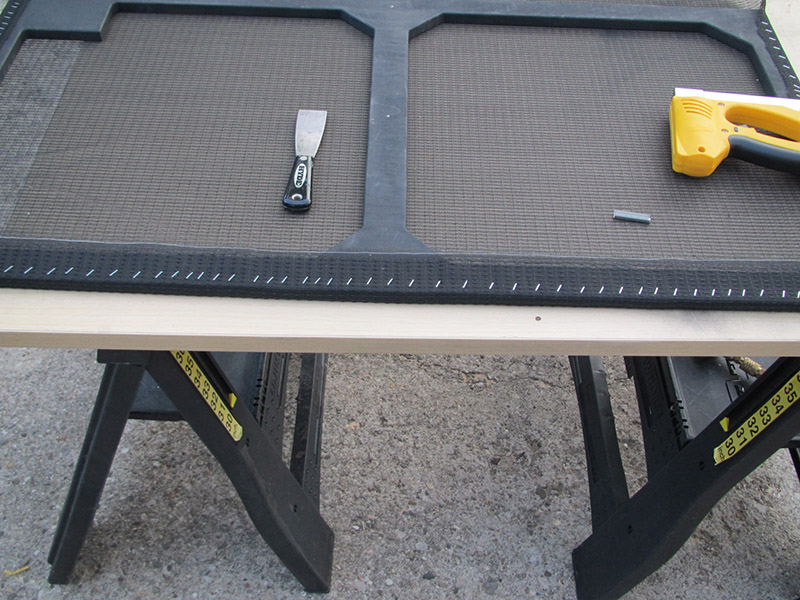
Here I have stapled one side. You don't really want to do any pulling here or the vertical lines will get all out of whack. The important thing is to keep the pattern straight and aligned with the side of the frame:
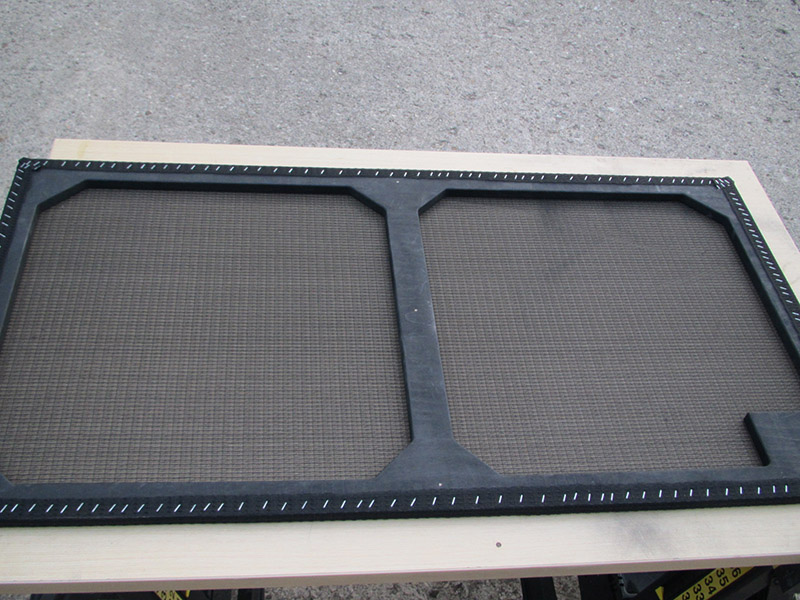
All four sides have been stapled and the excess grill cloth has been trimmed away:
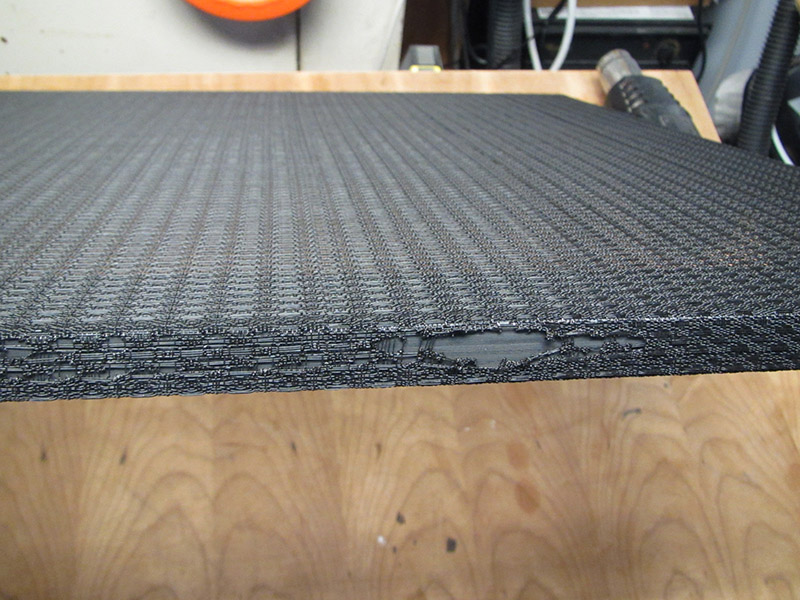
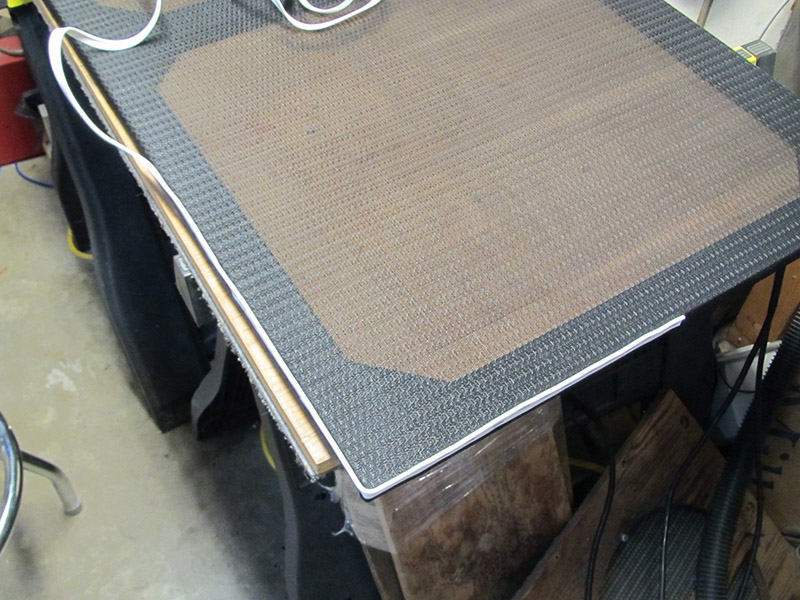
I use heat to tighten the cloth once the stapling is finished. I had planned on using a heat lamp for this but in the past I have had trouble controlling the heat this way. I decided to go much less aggressive and try a blow dryer instead. Unfortunately the dryer I have here didn't do anything to this cloth, even if I just held it in place. That left me with the heat gun option. This is a much more aggressive option and you have to be very careful. As you can see I wasn't careful enough. The only good thing was that I was heating the edges at the time, since the cloth tends to be kind of puffy there. So far the face of the cloth is undamaged so I'm going to hope that the hole doesn't grow. I hope that the white welting that gets stapled around the frame will help with this:
Here I've stapled on enough of the welting to see how it would cover the hole. So far so good:
Getting the frame lined up on the grille cloth:
Installing grille cloth is one of my least favorite tasks! I start off by stapling the cloth to one end, keeping the horizontal pattern aligned with the end of the frame. I start in the middle and work out toward each side. You want to be sure you don't pull the cloth to one side or the other while doing this:
While preparing to staple the other end make sure that the vertical pattern is aligned properly by sighting up the side of the frame:
To pull the cloth before stapling the other end I decided to try something that I attempted a few years ago for covering the grilles on my B15 cabinets. In that case it didn't work well because the B15 grille has four protruding mounting studs that got in the way. This frame doesn't have those so I thought I would give it a try again. Basically I take two strips of plywood and attach a piece of non-slip tape (the stuff with grit) to each:
Then I clamp the loose end of the cloth between the plywood strips. This gives me something to hold to try to pull the cloth evenly. I pull the cloth as tight as I can but have never had good luck if I try to pull it too tight. I tend to skew the pattern somewhere when I do that:
Here I have stapled one side. You don't really want to do any pulling here or the vertical lines will get all out of whack. The important thing is to keep the pattern straight and aligned with the side of the frame:
All four sides have been stapled and the excess grill cloth has been trimmed away:
I use heat to tighten the cloth once the stapling is finished. I had planned on using a heat lamp for this but in the past I have had trouble controlling the heat this way. I decided to go much less aggressive and try a blow dryer instead. Unfortunately the dryer I have here didn't do anything to this cloth, even if I just held it in place. That left me with the heat gun option. This is a much more aggressive option and you have to be very careful. As you can see I wasn't careful enough. The only good thing was that I was heating the edges at the time, since the cloth tends to be kind of puffy there. So far the face of the cloth is undamaged so I'm going to hope that the hole doesn't grow. I hope that the white welting that gets stapled around the frame will help with this:
Here I've stapled on enough of the welting to see how it would cover the hole. So far so good:

The perils of using a heat gun. I've done the same thing.
I like your electric stapler. Looks like it has less bounce when it shoots a staple than the manual spring type has.
I like your electric stapler. Looks like it has less bounce when it shoots a staple than the manual spring type has.

Hey that's nothing. My ex-wife has an uncle who lit his house on fire with a heat gun.
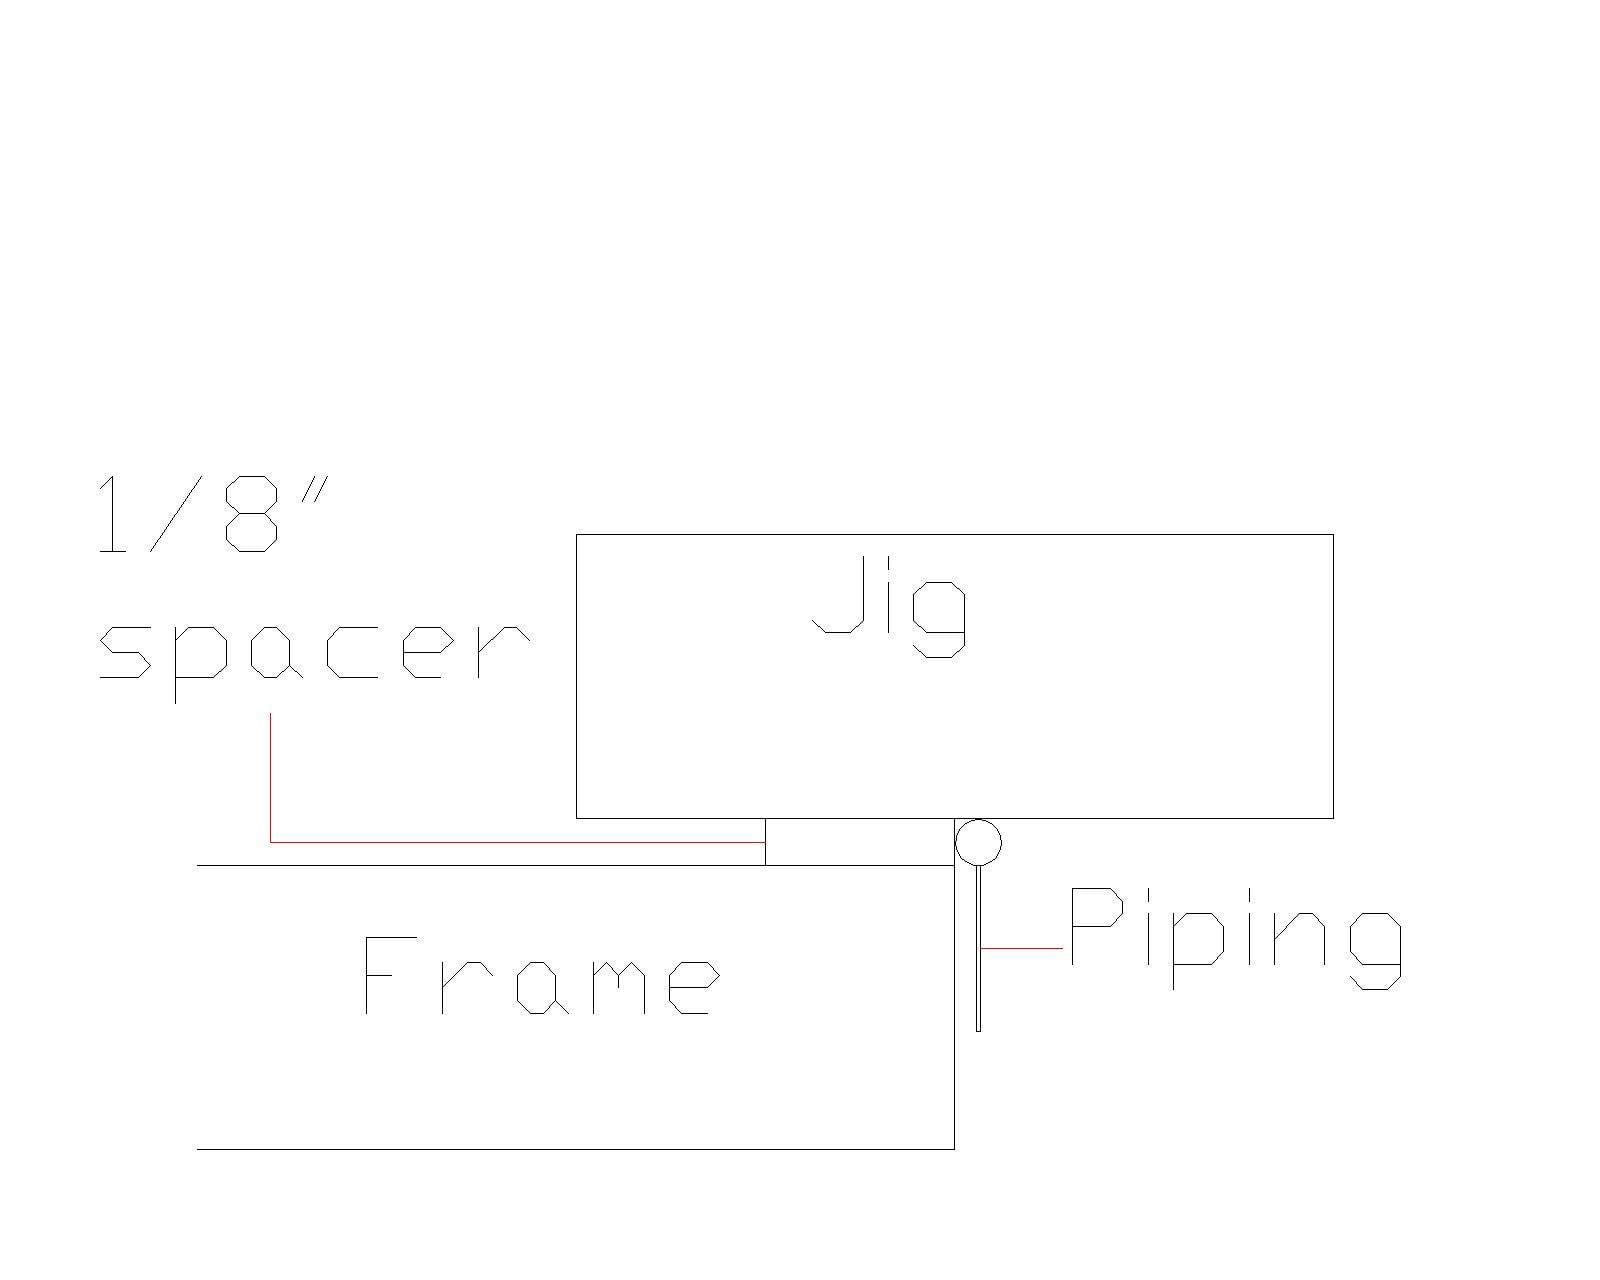
When I replaced the piping on my Ampeg cab, I built a jig to get it lined up straight. It’s basically a strip of scrap wood with a piece of 1/8” aluminum (or wood) strip, clamped to the edge of the frame, to allow for the overhang of the “head” of the piping. Here’s a cross section diagram of how it works. Hope this makes sense and helps.
- Feb 13, 2008
- 1,247
- 1,916
- Disclosures
- Owner, Vintage Blue (repro cabinets)
Yep, I hadn't covered too many grilles before I decided that an electric stapler would be a good investment. I still use a manual one for stuff like temporarily tacking down the Tolex though.The perils of using a heat gun. I've done the same thing.
I like your electric stapler. Looks like it has less bounce when it shoots a staple than the manual spring type has.
- Feb 13, 2008
- 1,247
- 1,916
- Disclosures
- Owner, Vintage Blue (repro cabinets)
That's a great tip - thanks!When I replaced the piping on my Ampeg cab, I built a jig to get it lined up straight. It’s basically a strip of scrap wood with a piece of 1/8” aluminum (or wood) strip, clamped to the edge of the frame, to allow for the overhang of the “head” of the piping. Here’s a cross section diagram of how it works. Hope this makes sense and helps.View attachment 451766

I use an embossing heat gun for shrink wrap, Techflex and grill cloth tightening. It has a smaller heat zone, lower heat levels... more easily regulated... but still is risky. Practice on scrap until you get it down. Mine's purple sparkle and I got it at Michael's.
Last edited:
- Feb 13, 2008
- 1,247
- 1,916
- Disclosures
- Owner, Vintage Blue (repro cabinets)
49,000 staples later (or so it seems) the welting is installed on the frame:
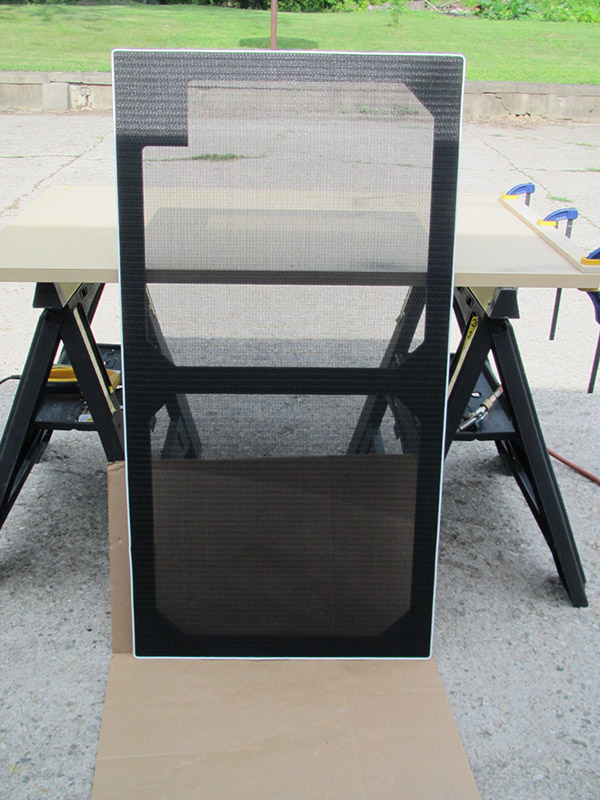
The end kind of sneaked up on me but I guess the cabinet is finally finished:

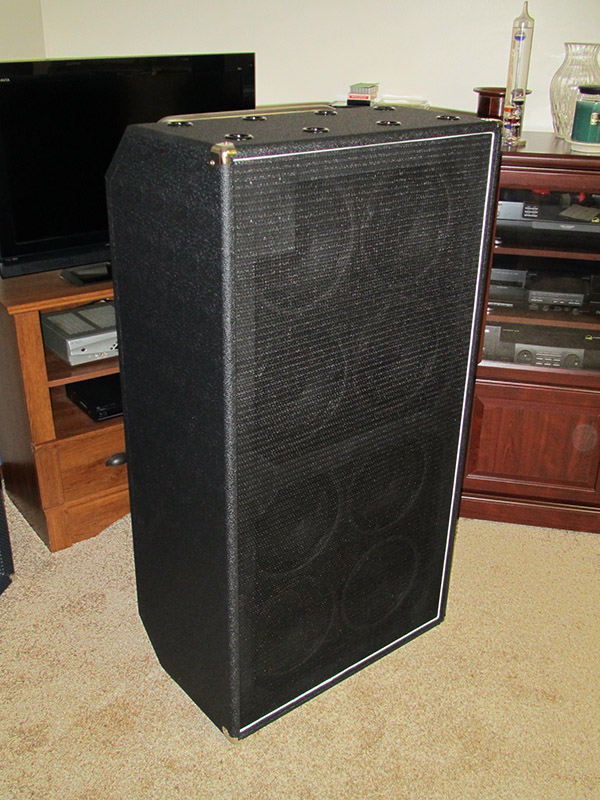
Here's another shot of the finished cabinet:
The next thing I need to do is catch up with my son so I can see how the cabinet sounds. Ideally I hope to be able to A/B it with his current cabinet too. When I do I will try to post clips for comparison.
The end kind of sneaked up on me but I guess the cabinet is finally finished:
Here's another shot of the finished cabinet:
The next thing I need to do is catch up with my son so I can see how the cabinet sounds. Ideally I hope to be able to A/B it with his current cabinet too. When I do I will try to post clips for comparison.
You'll want to give those speakers some time to break in, too. My experience with recones is that they tend to open up and gain a little bottom end over the course of the first 6-8 hours of play time.

- Apr 3, 2003
- 35,515
- 19,941
- Disclosures
- Editor-in-Chief, Bass Gear Magazine