
- Apr 18, 2008
- 16,015
- 1
- 31,728
- Disclosures
- I'm highly opinionated and extremely self-assured

TalkBass has been independent since 1998. Add your voice.
Create a free account to reply to discussions, view embedded media, and browse with fewer display ads.
Join free Log in
Want zero display ads or expanded classifieds tools? Compare plans.


If anyone asks, just say it's a mild case of Hansen's.I don't know what your day job is but I see you mention meetings a lot. If it involves a lot of hand shakes, I encourage you to just leave the CA on your hand. Make 'em wonder.

Ha! it's too much fun to peel it off, my hands are pretty much clear of it now.I don't know what your day job is but I see you mention meetings a lot. If it involves a lot of hand shakes, I encourage you to just leave the CA on your hand. Make 'em wonder.
I found the Paypal receipt for them, but I'm not sure where I actually bought them. I think they were on Ebay, I found this ad, but this is a different seller than who I bought them from: Brass Knob Inserts & Steel Set Screws (Hex Cup Head) for 1/4" Shaft Radio Guitar | eBayJisch, pleasepleaseplease share your source for the knob inserts.
Please?
Great build! I love the "peghead" addition.

Easy, buddy. There could be children reading this.I did the final sand, I'll do a QA in the morning then I'll start the Tru Oil. I'll have to do slurry coat on this one, the wenge has wide open grain.
I found the Paypal receipt for them, but I'm not sure where I actually bought them. I think they were on Ebay, I found this ad, but this is a different seller than who I bought them from: Brass Knob Inserts & Steel Set Screws (Hex Cup Head) for 1/4" Shaft Radio Guitar | eBay


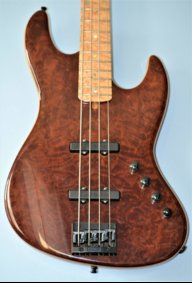
QA failed miserably this morning. Another couple hours of sanding and it was ready for the first coat of oil. As I applied the oil I found three places that need further attention - two spots on the wenge on back that apparently still had some glue on it and one spot that needs a little sanding. Not bad, the first coat always reveals issues. Besides those minor issues, it looks great. This top is beautiful.
View attachment 3390423
The back isn't bad either!
View attachment 3390424 View attachment 3390425 ...the pickup and control cavity covers
View attachment 3390427



I feel your pain...This morning I tackled the CA on the fingerboard. I started by checking the flatness again, it hasn't changed since last time, of course. It's a beautiful day today so I opened up the hatchway door and set up the fan to blow that way. It worked great to keep the fumes at bay.
View attachment 3389503
I cut the fingers off rubber gloves and use them to spread the glue. I drip the glue on the fingerboard and spread it with the covered finger. I've tried using a whole glove, but the fingers end up getting stuck together and they become impossible to control.
View attachment 3389509
Once the glue is almost dry I run my hand over it, I can squish out some of the ridges, at that point the glue isn't sticky, so an uncovered hand is fine. I put 2 or 3 coats and let it dry for 20 minutes or so then sand it back using 220 on my sanding bar. I repeat that process a few times until it's "thick enough". I ordered more thin viscosity CA the other day, which is good because I emptied the bottle I have on this board.
I've sanded through plenty of times, even after it's thick enough.
I use Abralon pads from 500 up to 4000 to buff it up. After buffing this one up the first time I wasn't happy with one spot, so I went back to 220 to flatten it out more (this is where sand through happens). Luckily I didn't sand through. I went back to the Abralon pads then finished with polishing compound. I can get them much glossier with anti-swirl, but I like the semi-gloss look.
So that step is done. It was really not bad at all with the fan sitting right there and the door open, I don't think I shed a single tear.
View attachment 3389527
The bottle I was using had a leak in the top apparently, peeling this off will give me something to do this afternoon. View attachment 3389529


Thanks! I've done that when I've not used inserts, agreed it works great. The pots have split shafts so it makes not using inserts easier anyway.If you want to forgo the inserts ... I had some set screws in softer wood knobs that weren't holding. It was suggested here on this forum (don't remember from who) to put CA glue on the threads, make sure it dries, then use a tap to clean up the threads. I did that and now my set screws are very solid. I was surprised at how much of a difference this little trick made.


