• TalkBass has been independent since 1998. Add your voice.
    Create a free account to reply to discussions, view embedded media, and browse with fewer display ads.
    Join freeLog in
    Want zero display ads or expanded classifieds tools? Compare plans.

Current Project: Headless 4

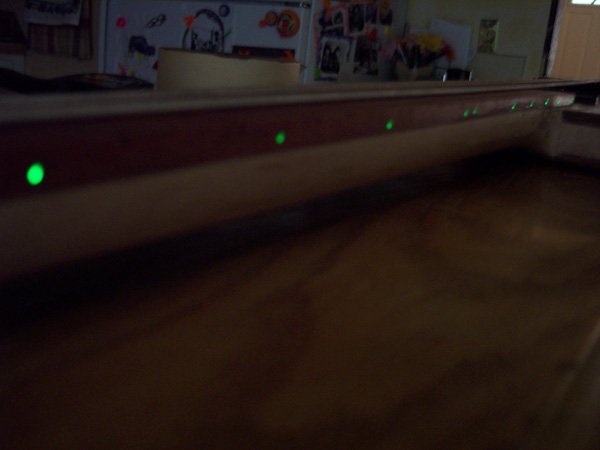
Thanks Erik you da man, Tim Ill take lots of pics. On all of my last builds using fibers I simply ran the fiber to the edge of the board. They are .75mm so when they are off you really have to look to see them. Kinda cool when the bass is unplugged (light comes on when plugged in off ground of stereo jack) and someones checking it out and they kinda get a look on thier face:confused: cause there are no fretmarkings :) But when they are on they light to about the size of a normal side dot maybe a little smaller. I have been kinda thinking about maybe getting some kind of transparent side dot though and backlighting them. Still deciding on that.

Heres a better example on how they look. This was the first time I used them and my method of drilling the little .75mm holes was lackluster so they ended up a little out of line. Got that worked out now though.
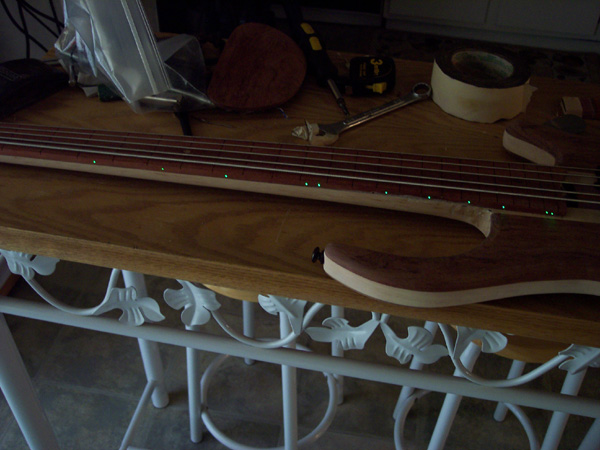
fiberoptics.jpg

fiberoptics2.jpg


Now with them off.
fibersoff.jpg
 
Goals for this weekend are, route pickup holes, control cavity, trussrod slot, all channels drilled, get tuners primed and painted. I started on the tuners today and got all the bodys built, just need to file and smooth before I paint them gloss black. These tuners will have independent bridges built on them that will control string height, and intonation. Also I started on the neck pup hole with a forstner bit. Bass body's shaped a little more, horns will be thinner and a recess will be cut for the tuner knobs. The fingerboard is scheduled to be delivered the 28th (I can't wait!). Heres a pic.


sdgfsgf.jpg
 
wilser said:
scottyd, could you detail your truss rod construction method a little more?

Thanks,
w.

Sure thing, Ill do the best I can :hmm: I bought the stuff at Home Depot heres what I bought.
1-3/16x34" square rod
1-3/16x34" round rod ( Edit:I suppose you could use all thread and not have to cut threads)
Tools you'll need- Welder, Tap and Die set, (at least a 10-32 die), a clamp

This will get you a single action truss rod. Basically you cut the 2 rods to desired length, the round rod about 1/4" longer than the square. Thread the round rod to 10-32 pitch on one side. Get a small piece of flat steel about 1/8" thick, drill a hole big enough that the now threaded round stock will go through it. Weld flat steel to end of square stock making sure that to that the hole and the round stock are even and straight with teh square stock stock. :confused: :p Grind down the weld and the flat stock so that it will fit best. Have your threads go past the flat stock just about 1/4" Clamp the other ends of the rods together weld both sides about 3/4" from the rear foward, grind flush. I made my own adjusting nut on a lathe, but you can buy one from StewMac or Lmi fairly cheap just make sure its 10-32 threaded. Thats about it, heres a diagram to help.

untitled-2.jpg
 
scottyd said:
Goals for this weekend are, route pickup holes, control cavity, trussrod slot, all channels drilled, get tuners primed and painted. I started on the tuners today and got all the bodys built, just need to file and smooth before I paint them gloss black. These tuners will have independent bridges built on them that will control string height, and intonation. Also I started on the neck pup hole with a forstner bit. Bass body's shaped a little more, horns will be thinner and a recess will be cut for the tuner knobs. The fingerboard is scheduled to be delivered the 28th (I can't wait!). Heres a pic.


sdgfsgf.jpg


Hi,

Nice bass. Can you show the inner part of that wooden PU cover? Thanks
 
Cocobolo fingerboard came in today:D I bought this from Lmi. Why is it this wood is so cheap? I love it! I bought a fivestring board because first grade fours were on back order. I Also started messing around with the dies on scrap and a control cavity cover. I dont like the results, so back to the drawing board with that. Its supposed to be purple but it looks more blue to me, I mixed the die somewhat weak so thats probably all it is. I started with black and sanded back, then applied the purple. Just experimenting at this stage.

shgs.jpg


fgafg2.jpg
 
scottyd said:
Cocobolo fingerboard came in today:D I bought this from Lmi. Why is it this wood is so cheap? I love it! I bought a fivestring board because first grade fours were on back order. I Also started messing around with the dies on scrap and a control cavity cover. I dont like the results, so back to the drawing board with that. Its supposed to be purple but it looks more blue to me, I mixed the die somewhat weak so thats probably all it is. I started with black and sanded back, then applied the purple. Just experimenting at this stage.

shgs.jpg


fgafg2.jpg

I don't know, I kind of like the bluish color.

And about that cocobolo: isn't it a steal for such quality wood? I bought a board about a year and a half ago, and it was absolutely wonderful. It hurt my nose like all get up, but boy was it worth the pain.
 
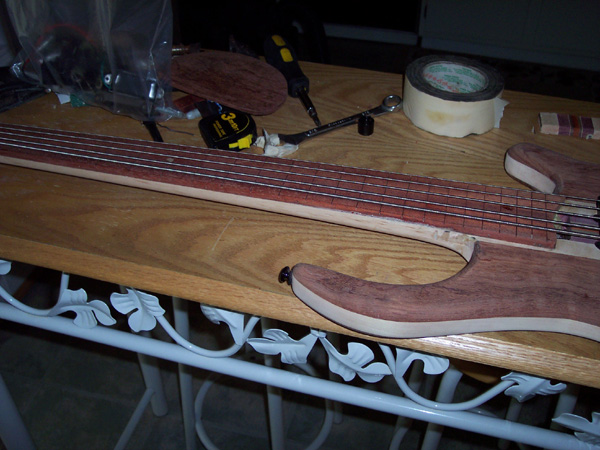
Last night I got the fingerboard tapered and the fiberOptics installed. Today I glued the board on the neck.

Here is a pic showing the installation of the fibers.
A channel is routed in the board 1/4" wide and 2mm deep, the channel stops at the 24th fret, and at the 17th-24th gets a little wider. Next .75mm holes are drilled on the side of the board, where I previously penciled in marks for sidemarkers. The drilled holes go from the penciled marks to the channel. Fibers are installed in through the holes and ran in the channel.
lkhji.jpg


Heres where things can get a little frustrating. Starting at the first fiber (fret 3) I put titebond down the channel as I hold the fiber down. On top of the glue I put wood chips and dust and press them into the glue. This makes the glue harden quicker. It also fills the channel with a solid presswood type material. Its a task to keep all of the fibers in order while I do this and requires alot of patience. Once the channel is filled I make sure that the bottom of the board is still perfectly flat. Using a razor I scrape the channel until its the same height as the surrounding wood. I use titebond because I can't use C.A. (super) glue with the fibers because it will melt them. An alternative way would be to fill the channel with epoxy, which may actually be easier because it sets up quicker, its also safe for the fibers.
lkhji6.jpg


The bass is currently sitting with clamps on the fingerboard so I will post pictures of them lit up later! :bassist:
 
Scottyd,
Thanks for the picks! How flexible are the fibers, how tight a radi can you get them to without damage. I was thinking about tring to keep all the fibers in the top half of the finger board do you think this would be possible? Where do you get your fibers, Fiber Optic Products, Inc? Tim
 
This is what it currently looks like. I still have to route the other pup hole, shape the body more, and then I will start on the board radius and fretwork. Also the purple cavity cover is how the maple top will look.

ihhhg5.jpg


ihhhg4.jpg


ihhhg3.jpg
 
The .75mm fiber is really flexible, you can really get tight on angles with it. I had my wenge fretboard outfitted using the same method, but used epoxy. It warped on me :eek::mad:. I now have a nice cocobolo board on the way, plan on using the same method scottyd uses, which is basically the same method I used last time. I think the epoxy may have pulled on the board as it dried, warping it, so I'll try the titebond and chips method this time instead.

Also, once the glue starts to set up, you can run a piece of blue tape down the channel, over top. Helps control the outflow, and then put some wax paper on the bottom of the board, then a flat piece of wood or metal on it, and put it under weight. This should help as well. When it's dry, you can gently pull the tape off, and it should be pretty much flat to the bottom of the board. Always check for flatness!

scottyd, I PM'd you with a few questions...
 
Wow. I am utterly speechless. Your board has a much nicer grain than mine (but then, I used mine for the better part of fifteen months, so it's all scratched to death). I will DEFINITELY be using LMI for cocobolo boards.
 
I kinda changed my mind on the lower horn. :p I also just about got the tuners done still need to make the built in bridge parts, I broke my 1/4" tap this morning and would have been done if not for that.

Picture007-1.jpg