

Enjoy the benefits of a premium membership!
Upgrade Account
-
TalkBass has been independent since 1998. Add your voice.
Create a free account to reply to discussions, view embedded media, and browse with fewer display ads.
Join free Log in
Want zero display ads or expanded classifieds tools? Compare plans.
You are using an out of date browser. It may not display this or other websites correctly.
You should upgrade or use an alternative browser.
You should upgrade or use an alternative browser.
Different Thru neck methods for determining angle
- Thread starter chinjazz
- Start date
More options
Who Replied?
I had a prfoessor in college, name was Rick Hrycaj, last name pronounced "Rick-sigh". Go figure.
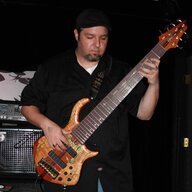
It's like halfway between Sam Elliot and David Crosby. (More Sam Elliot... It's a Good thing.)View attachment 4633613
Pretty scary, eh? That's the intended effect. Blend into the California underground, and get people to leave me alone. They think I'm one of "them".

It's like halfway between Sam Elliot and David Crosby. (More Sam Elliot... It's a Good thing.)
Beat me to it! I was going to ask @Bruce Johnson didnt I see you at a Crosby, Stills and Nash concert? On stage?

May I just say, I have yet to read a post from @Bruce Johnson where I didn't learn something new.
Same here!

So I think what we were trying to say was...
Neck angle...
Bald spot....
Hippy...
Wacky names.
This thread is informative.
These things are all related........What is the cause, and what is the effect?
I'm not clear what your question is? The layout is mostly about what you want the neck angle to be. The fixed element is the height of the bridge.
Most aftermarket bridges are designed to be 3/8" high, to fit onto Fenders. That is, the bottom side of the strings (center strings, if it has radius) are a nominal 3/8" above the surface of the body. Obviously, the saddles have some range of vertical adjustment, to set the action, but 3/8" is the low setting; where the strings are resting on the frets at the heel.
That's what most bridges are designed for. You can change that by recessing the bridge down into the body, or raising it up on a spacer plate. But the standard is 3/8".
Working backward from that, if you make the heel of the neck 3/8" above the surface of the body (including the fingerboard thickness and the frets), then the strings go parallel across the top of the body with 3/8" clearance under them. That's a Flat bass, no neck angle, like a Fender. The majority of basses are built flat.
But some builders/manufacturers design in some neck angle, for their own reasons. They lower the heel down into the body, so the gap between the strings and the body is smaller at the neck heel. The strings aren't parallel to the body surface.
If you do that, lowering the neck heel, the whole neck has to tilt back at a small angle. A line drawn along the top surface of the fingerboard has to point at the bridge saddle point, which is 3/8" above the body surface. In the layout, the entire neck needs to be rotated about that bridge saddle point. That's what determines the final neck angle, in relation to the body top surface. The top of the fingerboard has to aim right at the bridge saddle point.
That's how the geometry is laid out. Examples of basses with neck angle are Rickenbackers and Gibsons. Look at where the neck joins the body. The fingerboard/neck glue line is about at the body top surface. The top of the heel is barely 1/4" above the body surface. The bridge is about 3/8". The strings taper down over the body and the neck is tilted back about 2 degrees. That's a common layout for tilt back neck neck-through basses. It gets impractical to tilt the neck back further than that on a bass.
Many neck-through basses have flat geometry, no neck angle. Look at Carvins. There are a lot of practical reasons to do that. The choice is up to the designer.
Does that answer your question? Or are you asking about how to machine the center tang of a neck-through?
Actually, Your explanation on getting the neck angle makes perfect sense. Pretty much the same as if I wanted to put an angle into a neck pocket in a bolt on neck.
Something peaked my interest When I watched the video above the guy showed how he went about determining the angle then proceeded to route the center tang with a jig that had the “angle built in”, which I didn’t bother asking him a question about in the comments section. My thought was if he ever used a different bridge, or frets that were higher than 1 mil then then he was ok with ball parking his angle all the time or has many jigs for different angles.
This just got me thinking about how others we’re going about it.
Certainly drawing the angle on the side and sanding it on a belt sander would work. Or with the same line drawn out on the sides put the neck in a straight router fixture and prop it up so the line is parallel to the sides and route it.
I think I have a few other questions mainly due to the “once it’s glued to the body wings” that’s it with thru necks.
The book by Melvyn Hiscock (he of the unfortunate name) is the only book ive ever seen that gets into methodology for calculating neck angle, specifically for a neck through bass. It was out of print for a while, but looks like its available again. Im on my third neck through, and havent found adding any neck angle necessary yet with the bridge options Ive used, and unless you have a really tall bridge, or just like the ergonomics of a neck.angle, Im not sure its worth the extra hassle. Check out the book though, it really is excellent.
https://www.melvynhiscock.com/
Thanks
 It actually may not be worth the extra hassle for sure. I definitely would like to know. I found “blankcocks” book in Kindle format as well
I build my neckthroughs just like I build bolt ons. Following Fender standard formula of having the top of the fretboard at 3/8" above the surface of the body, with zero neck angle. Pretty much ensures compatibility with the vast majority of aftermarket bridges and it's easy to build since everything is flat.
I built two Ric clone basses using stock Ric bridges and no neck angle, and it worked perfectly. The fingerboard was just over 3/8" above the body plane IIRC, more like 7/16". With the bridge saddles at their lowest, the strings lay right on the frets. I lay all this out in CAD before I even touch wood, but you can do it on trace paper easily enough.

In my experience, receiving a lecture on how I'm not pronouncing my last name properly has been a pretty great reason to cut short a transaction. My family's been saying it the way we do for a few centuries already, the bunch of us have a better idea how to pronounce it than some random behind a counter.You'd be shocked at the number of people I've met in my lifetime that don't know how to pronounce their own name.
I can think of only one counter-example and why a home builder wouldn't want to follow it: The Cort Curbow has a bridge plate that slopes backwards relative to the fingerboard plane. Ergonomically this was kind of nice, because I like to pick near the bridge and that slope is subtle but it helps get the hardware out of the way (the whole instrument looks fairly avant-garde but is surprisingly comfortable, so this detail seems in spirit with it). But since it's sloped, it means that every change in string height affects intonation and vice versa -- it can be more trouble than it's worth, especially if you change strings often.The layout is mostly about what you want the neck angle to be. The fixed element is the height of the bridge.

Here's a good one:
When I was 10, I had a friend with the last name Ruggeiro.
It's pronounced Ra jeer oh.
They pronounced it Ra jeer ee oh.
I saw it spelled out one day and asked my friends mom why they said it with EE OH at the end, because it's spelled Ruggiero, not Ruggerio.
I was 10. I was curious. It turned into a debate between a 10 yr old and a 40 yr old. She basically thought that as long as there was an "I" in there ...somewhere......you say it EE OH at the end.
It's not something I find important or find upsetting, if people don't pronounce their name the way it's traditionally pronounced. Just something I notice when I hear it and I'm curious about.
My wife's family actually knows and told me the way their last name is pronounced. I didn't even ask. Yet, they choose to say an odd way that's not even close. I found that odd and curious.
It's pronounced Krahv-check.
But they pronounce it Kraw-zick.
Um,...okay?
When I was 10, I had a friend with the last name Ruggeiro.
It's pronounced Ra jeer oh.
They pronounced it Ra jeer ee oh.
I saw it spelled out one day and asked my friends mom why they said it with EE OH at the end, because it's spelled Ruggiero, not Ruggerio.
I was 10. I was curious. It turned into a debate between a 10 yr old and a 40 yr old. She basically thought that as long as there was an "I" in there ...somewhere......you say it EE OH at the end.
It's not something I find important or find upsetting, if people don't pronounce their name the way it's traditionally pronounced. Just something I notice when I hear it and I'm curious about.
My wife's family actually knows and told me the way their last name is pronounced. I didn't even ask. Yet, they choose to say an odd way that's not even close. I found that odd and curious.
It's pronounced Krahv-check.
But they pronounce it Kraw-zick.
Um,...okay?
Last edited:

What are you talking about? That’s the greatest name I’ve ever heard!The book by Melvyn Hiscock (he of the unfortunate name) is the only book ive ever seen that gets into methodology for calculating neck angle, specifically for a neck through bass. It was out of print for a while, but looks like its available again. Im on my third neck through, and havent found adding any neck angle necessary yet with the bridge options Ive used, and unless you have a really tall bridge, or just like the ergonomics of a neck.angle, Im not sure its worth the extra hassle. Check out the book though, it really is excellent.
https://www.melvynhiscock.com/
Certainly drawing the angle on the side and sanding it on a belt sander would work. Or with the same line drawn out on the sides put the neck in a straight router fixture and prop it up so the line is parallel to the sides and route it.
I think I have a few other questions mainly due to the “once it’s glued to the body wings” that’s it with thru necks.
Yes, that's how I make a neck-through. Figure out what I want to do with the neck angle, lay it out on the sides of the neck blank, on the sides of the tang. If you use a neck angle, keep the grain straight down the length of the neck, angled on the tang. Clamp the tang in a routing fixture to cut the top and back surfaces of the tang. Make up the body wings; dowel pin them to the tang, but don't glue them yet. Gluing the wings on is one of the last steps in building. Finish all the shaping, fretting, etc on the neck, and all of the cavities, wiring holes, and perimeter shaping of the wings before gluing the wings on.
Is an angled neck something that's better suited to a set neck rather than a neck through?
I dunno. Better suited? A neck-through is really just another variant on a set neck, with a really big heel.
Dude, it’s however the family pronounces it. Telling someone otherwise is rather rude.It's pronounced Krahv-check.
But they pronounce it Kraw-zick.
Um,...okay?


