
Enjoy the benefits of a premium membership!
Upgrade Account
-
TalkBass has been independent since 1998. Add your voice.
Create a free account to reply to discussions, view embedded media, and browse with fewer display ads.
Join free Log in
Want zero display ads or expanded classifieds tools? Compare plans.
You are using an out of date browser. It may not display this or other websites correctly.
You should upgrade or use an alternative browser.
You should upgrade or use an alternative browser.
fEARful Part Twelve (12)
- Thread starter greenboy
- Start date
- Status
- Not open for further replies.
More options
Who Replied?
I gotta say that cab with the finish and the dovetailing it has is the coolest looking cabinet I've ever seen . In about 50 years the antique roadshow will be displaying it and oohing and aahing about it being a work of art . The 12/6/1 I built with Duratex looked good but that looks awesome!
Wow. Thanks for the gushing compliment! And thanks to others who liked my take on the finish. It's sitting in the office/piano room shared by me and my wife, so I wanted to make something that looked a little more furniture-like.
Someone else asked about the sound: It may look pretty, but there's a monster inside! I'm powering it with a Little Mark II, , and this cab takes the full 500 watts and runs with it! And I gotta say the fEARful does my Rickenbacker justice as well. I can get the full spectrum of sounds, from thudding to growly to trebley, with no problem. I'm so glad I did this, instead of buying something out of the store.
I just compiled some of my build and completed pics for the wiki page, which can be seen here.
Also, note to Greenboy: Thanks a million for sharing your design with the public. Building this cab helped me to get through a rough couple of months without going nuts, and I couldn't have done it without you (and the dozens of TBers who helped along the way).
hi all, so my long journey began with many, Many, MANY hours of reading hundreds of posts here on the TB forum, BFM forum, and eventually found my way to the fEARful forum, spent many hours considering the build options and advantages.
ok, my starting point was with a Warwick x-treme bass head, up till now have been using a Warwick 2x10+horn and a crappy peavey 15 cab, (originally loaded with a BW 4ohm driver) not ideal at all, i've known that it wasnt matching for a while now but have been making the best of it due to financial constraints along the way, i originally wanted a 4x10 to replace the 2x10, but after some reading discovered that this really wouldnt give me what im looking for, so decided to look at the self build options open to me.
building an entire stack in 1 go is simply not an option to me, money does not allow me to do this, so have decided to stick with the best of what i have and work on the weaker parts 1st.
part 1 of my build now complete (nearly)
[Invalid or Expired Link Removed][Invalid or Expired Link Removed]
[Invalid or Expired Link Removed][Invalid or Expired Link Removed][Invalid or Expired Link Removed]
1 15sub Cab built and nearly finished, a lil frustrating tho, still awaiting x-over bits from ERSE
tried the cab without the x-over, ooof , this thing moves some air, sounds really fantastic, ive been using the 3015LF in my crappy peavey cab, sounded ok (ish... by comparison) , the original BW speaker is now back in the peavey, up for sale...
3015LF supplied by Lean business
corners, connector plate, handles, grill clamps and T-nuts/bolts from Stagebeat
wheels and PL equivalent from Ebay
Warnex paint from thommanns
birch ply from local Jewson's builders merchants
damping from ASDA
X-over bits from ERSE When they get here :x
tools used :-
jack saw
jigsaw
drill
screwdrivers
sanding block
rope
NO CLAMPS
Day 1
fun and games getting the wood home, lol, small car, 8' x 4' sheet of ply, fortunately Jewsons is virtually next door to my mothers house, carried the sheet there and cut to smaller pieces with a Jack saw (to correct dimensions)
got the wood home and marked and cut all the panels with a jigsaw, tbh i did not get perfectly straight cuts with the jigsaw but all were within a 1/16th of an inch. marked the circle on the baffle piece, cocked it up, cut another baffle out of what was left of the sheet and made sure we got it right the next time.
Day 2
i know some glue the bracing on the panels 1st but i had no clamps (or weights..as shown in another thread) so i went straight for building the box 1st,
patience is not a strong point for me, and was awaiting the PL glue, it didnt turn up when i wanted it to so i used a tube of unibond HARD AS NAILS from ASDA's for the initial assembly.
started with the baffle (upside down), glued and nailed the side panels on and then the back panel, lined this up square on top of the Top panel, once the back, baffle and sides was glued i nailed and glued the Top panel in place (see the 1st pic above)i wrapped a rope around the cab to hold it all tight overnight for the glue to set
Day 3
PL glue arrived, i used this for all the bracing pieces and the port shelf and divider, messy and nasty stuff to work with to be honest, but definitely sticks and fills those lil gaps where the cuts were not quite as straight as i would've liked. went back to the nails HARD AS NAILS glue for the bottom panel where the cuts were near perfect (jack saw)
Day 4
started with a lil bit of filling over nail heads and any other imperfections found, marked and cut holes for the handles and connector plate, cut handle backs to give more meat for the screws to hold the handles in place, also ensured no air leaks.
marked and drilled all the holes for speaker mounting, handles, connector plate, corners and wheels.
started painting with the WARNEX paint, the 1KG tin was just enough for 2-3 coats on the whole cab
Day 5 whilst the second coat of paint was drying i cut up a DUVET to use for damping, a significantly cheaper option than buying the wadding needed so i discovered happy days, all held in place with staples inside, small hole cut for the speaker cables to go through.
all the hardware installed, see pics above.
when i eventually get my x-over bit i will mount them on a small piece of ply, solder the connections, and glue in place on the port shelf.
thanks again GreenBoy, great looking cab design, great sounding (even without the LP filter), so far very happy, and looking forward to the next part of my build, Cab 2
ok, my starting point was with a Warwick x-treme bass head, up till now have been using a Warwick 2x10+horn and a crappy peavey 15 cab, (originally loaded with a BW 4ohm driver) not ideal at all, i've known that it wasnt matching for a while now but have been making the best of it due to financial constraints along the way, i originally wanted a 4x10 to replace the 2x10, but after some reading discovered that this really wouldnt give me what im looking for, so decided to look at the self build options open to me.
building an entire stack in 1 go is simply not an option to me, money does not allow me to do this, so have decided to stick with the best of what i have and work on the weaker parts 1st.
part 1 of my build now complete (nearly)
[Invalid or Expired Link Removed][Invalid or Expired Link Removed]
[Invalid or Expired Link Removed][Invalid or Expired Link Removed][Invalid or Expired Link Removed]
1 15sub Cab built
and nearly finished, a lil frustrating tho, still awaiting x-over bits from ERSE tried the cab without the x-over, ooof , this thing moves some air, sounds really fantastic, ive been using the 3015LF in my crappy peavey cab, sounded ok (ish... by comparison) , the original BW speaker is now back in the peavey, up for sale...
3015LF supplied by Lean business
corners, connector plate, handles, grill clamps and T-nuts/bolts from Stagebeat
wheels and PL equivalent from Ebay
Warnex paint from thommanns
birch ply from local Jewson's builders merchants
damping from ASDA
X-over bits from ERSE When they get here :x
tools used :-
jack saw
jigsaw
drill
screwdrivers
sanding block
rope
NO CLAMPS
Day 1
fun and games getting the wood home, lol, small car, 8' x 4' sheet of ply, fortunately Jewsons is virtually next door to my mothers house, carried the sheet there and cut to smaller pieces with a Jack saw (to correct dimensions)
got the wood home and marked and cut all the panels with a jigsaw, tbh i did not get perfectly straight cuts with the jigsaw but all were within a 1/16th of an inch. marked the circle on the baffle piece, cocked it up, cut another baffle out of what was left of the sheet and made sure we got it right the next time.
Day 2
i know some glue the bracing on the panels 1st but i had no clamps (or weights..as shown in another thread) so i went straight for building the box 1st,
patience is not a strong point for me, and was awaiting the PL glue, it didnt turn up when i wanted it to so i used a tube of unibond HARD AS NAILS from ASDA's for the initial assembly.
started with the baffle (upside down), glued and nailed the side panels on and then the back panel, lined this up square on top of the Top panel, once the back, baffle and sides was glued i nailed and glued the Top panel in place (see the 1st pic above)i wrapped a rope around the cab to hold it all tight overnight for the glue to set
Day 3
PL glue arrived, i used this for all the bracing pieces and the port shelf and divider, messy and nasty stuff to work with to be honest, but definitely sticks and fills those lil gaps where the cuts were not quite as straight as i would've liked. went back to the nails HARD AS NAILS glue for the bottom panel where the cuts were near perfect (jack saw)
Day 4
started with a lil bit of filling over nail heads and any other imperfections found, marked and cut holes for the handles and connector plate, cut handle backs to give more meat for the screws to hold the handles in place, also ensured no air leaks.
marked and drilled all the holes for speaker mounting, handles, connector plate, corners and wheels.
started painting with the WARNEX paint, the 1KG tin was just enough for 2-3 coats on the whole cab
Day 5 whilst the second coat of paint was drying i cut up a DUVET to use for damping, a significantly cheaper option than buying the wadding needed so i discovered
happy days, all held in place with staples inside, small hole cut for the speaker cables to go through.all the hardware installed, see pics above.
when i eventually get my x-over bit i will mount them on a small piece of ply, solder the connections, and glue in place on the port shelf.
thanks again GreenBoy, great looking cab design, great sounding (even without the LP filter), so far very happy, and looking forward to the next part of my build, Cab 2
I finished assembling/soldering the lowpass and mid crossovers last night. (Finished too late to post pics in my build thread but will update tonight). I will do the highpass tonight, but have a question about it.
I will test the crossovers using the actual drivers (at very low volume) on my kitchen table before assembling it all into the cab.
Are there any tests I can perform with a DMM to show whether or not things are working as spec'd? I've done basic continuity tests from point to point, checked that the parallel resistor bank (l-pad on mid xover) is reading the proper ohm value (it is). Is there anything else I can do to test them out? I.E. "your resistance from this point to this point should be b/t 123 and 234 ohms" or something like that?
Also, on the highpass crossover, how do I wire in the variable l-pad? Do the three legs just attach (with wires, of course!) directly to the PCB? Anyone have pics of the high pass crossover and how to wire in the l-pad? Thanks.
I will test the crossovers using the actual drivers (at very low volume) on my kitchen table before assembling it all into the cab.
Are there any tests I can perform with a DMM to show whether or not things are working as spec'd? I've done basic continuity tests from point to point, checked that the parallel resistor bank (l-pad on mid xover) is reading the proper ohm value (it is). Is there anything else I can do to test them out? I.E. "your resistance from this point to this point should be b/t 123 and 234 ohms" or something like that?
Also, on the highpass crossover, how do I wire in the variable l-pad? Do the three legs just attach (with wires, of course!) directly to the PCB? Anyone have pics of the high pass crossover and how to wire in the l-pad? Thanks.
Rad bassman: I can't see the pics as they block everything on the net at my work, but your build sounds interesting. You should start a Wiki page for your build! Go here:
Builds in progress or completed - TalkBass Wiki
Builds in progress or completed - TalkBass Wiki
Bump. I might not have time to work on the build tonight, but just in case, I'd like some input on my questions below. Thanks!
I finished assembling/soldering the lowpass and mid crossovers last night. (Finished too late to post pics in my build thread but will update tonight). I will do the highpass tonight, but have a question about it.
I will test the crossovers using the actual drivers (at very low volume) on my kitchen table before assembling it all into the cab.
Are there any tests I can perform with a DMM to show whether or not things are working as spec'd? I've done basic continuity tests from point to point, checked that the parallel resistor bank (l-pad on mid xover) is reading the proper ohm value (it is). Is there anything else I can do to test them out? I.E. "your resistance from this point to this point should be b/t 123 and 234 ohms" or something like that?
Also, on the highpass crossover, how do I wire in the variable l-pad? Do the three legs just attach (with wires, of course!) directly to the PCB? Anyone have pics of the high pass crossover and how to wire in the l-pad? Thanks.
I bought the x-over from SpeakerHardware.com and I have got a few questions.
1. Can I mount the two pc boards next to each other or must there be some space between them?
2. What is more practical: Mount the boards on the shelf and then solder the wires or the other way around?
1. Can I mount the two pc boards next to each other or must there be some space between them?
2. What is more practical: Mount the boards on the shelf and then solder the wires or the other way around?
1. You can mount the boards next to each other. Just make sure there are no parts or wires shorting out against each other.
2. When you say "solder the wires" are you referring to the wires that connect from the speakers/jack to the crossover? You can use push terminals which would make things a little easier for both the install and any future servicing. Of course, solder is permanent but that could be the problem later. FWIW, I will be using push terminals and a terminal strip (aka barrier strip) to connect wires to the PCBs.
The speakers will all connect to the terminal strip, with their respective wires stapled down in the cab. Then, short wires with push terminals on the PCB end will connect the PCB to the terminal strip. Makes for easy servicing should the need arise.
2. When you say "solder the wires" are you referring to the wires that connect from the speakers/jack to the crossover? You can use push terminals which would make things a little easier for both the install and any future servicing. Of course, solder is permanent but that could be the problem later. FWIW, I will be using push terminals and a terminal strip (aka barrier strip) to connect wires to the PCBs.
The speakers will all connect to the terminal strip, with their respective wires stapled down in the cab. Then, short wires with push terminals on the PCB end will connect the PCB to the terminal strip. Makes for easy servicing should the need arise.
I bought the x-over from SpeakerHardware.com and I have got a few questions.
1. Can I mount the two pc boards next to each other or must there be some space between them?
2. What is more practical: Mount the boards on the shelf and then solder the wires or the other way around?
I bought the x-over from SpeakerHardware.com and I have got a few questions.
1. Can I mount the two pc boards next to each other or must there be some space between them?
2. What is more practical: Mount the boards on the shelf and then solder the wires or the other way around?
1. You can mount the boards next to each other. Just make sure there are no parts or wires shorting out against each other.
2. When you say "solder the wires" are you referring to the wires that connect from the speakers/jack to the crossover? You can use push terminals which would make things a little easier for both the install and any future servicing. Of course, solder is permanent but that could be the problem later. FWIW, I will be using push terminals and a terminal strip (aka barrier strip) to connect wires to the PCBs.
The speakers will all connect to the terminal strip, with their respective wires stapled down in the cab. Then, short wires with push terminals on the PCB end will connect the PCB to the terminal strip. Makes for easy servicing should the need arise.
1 point to bare in mind when placing the x-overs...
do NOT have the inductor coils close together, at least 4" apart i believe, maybe some1 else could confirm this??!!



Rig finally done. LH1000 with ART 31 band EQ in a fEARful 12/6 cab.
The cab weighs 44lbs. The rack 46lbs (ouch).
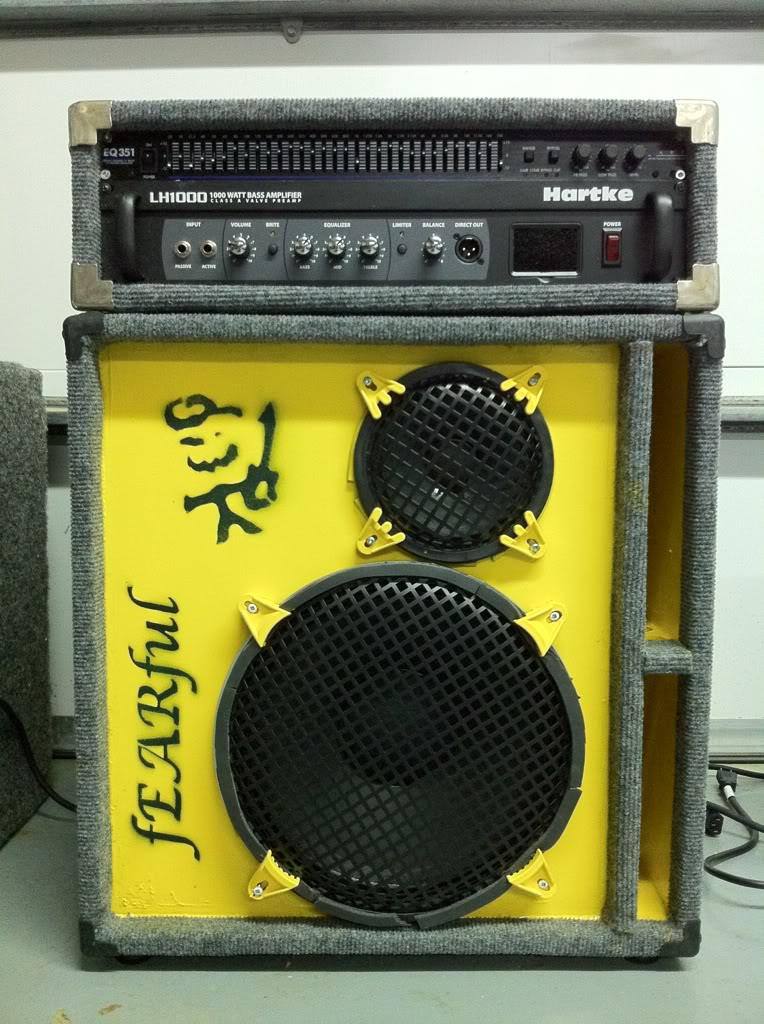
The cab weighs 44lbs. The rack 46lbs (ouch).
I totally dig that cab. It's got that street-skater type vibe to it. Matching baffle and port and grill tabs seal the deal. 

BurningSkies
CRAZY BALDHEAD
- Feb 20, 2005
- 27,956
- 20,348
- Disclosures
- Endorsing artist: Dingwall Guitars
Rig finally done. LH1000 with ART 31 band EQ in a fEARful 12/6 cab.
The cab weighs 44lbs. The rack 46lbs (ouch).
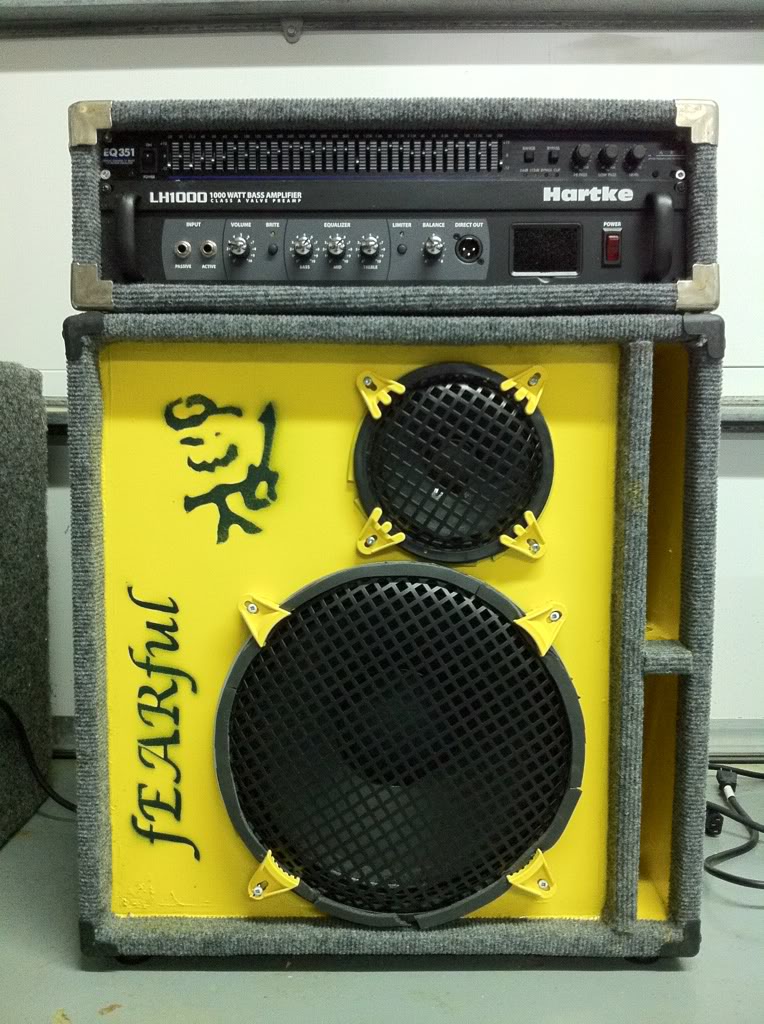
I love it...that cab is soooo DIY/punkrock/in your face.

The speakers will all connect to the terminal strip, with their respective wires stapled down in the cab. Then, short wires with push terminals on the PCB end will connect the PCB to the terminal strip. Makes for easy servicing should the need arise.
Hey mike, what size push terminals do I need for the crossovers? I was planning on getting bits and pieces together this weekend as I am ordering the crossovers.
Also, my flat pack and more parts arrived from Leland. It will probably be next week before I get anything done on it. I have sound gigs all weekend.
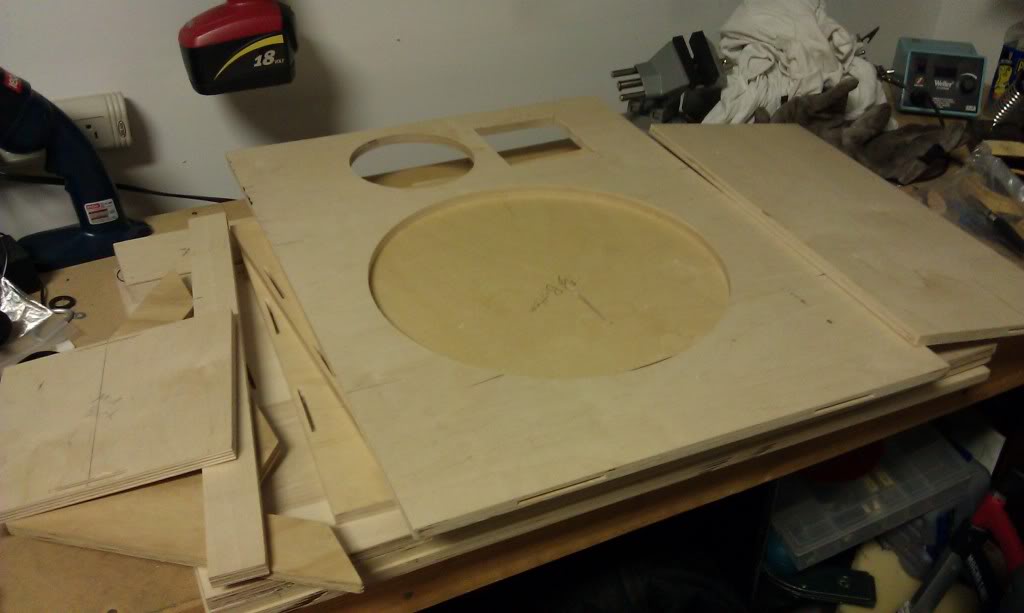

Also, my flat pack and more parts arrived from Leland. It will probably be next week before I get anything done on it. I have sound gigs all weekend.
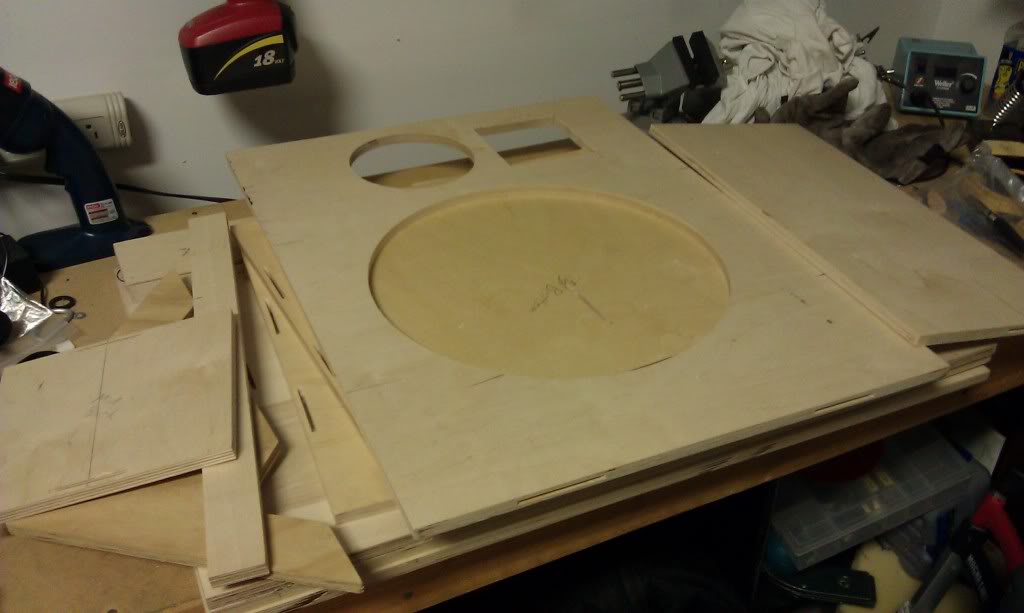
Good luck on the build. The kits make it a piece of cake. There is something really satisfying about building your own speaker cab. Especially when it's all done, you plug it in for the first time and crank it up and it takes a couple of weeks to wipe that huge smile off your face!

Hey mike, what size push terminals do I need for the crossovers? I was planning on getting bits and pieces together this weekend as I am ordering the crossovers.
The male/female terminals are all standard-sized (1/4" I think). What is different is the size of the ferrule where you insert the wire and crimp it. So, what gauge wire you use will determine which terminals you get.
It's been awhile but if I remember correctly:
Yellow = 10-12 gauge wire
Blue = 14-16 gauge wire
Red = 18-22 gauge wire
Personally, I would not use anything smaller than 16 gauge. FWIW I will wire my 15/6/1 with 14 gauge stranded hookup wire. Home Depot/Lowes sells them in small rolls...I think they are 20 feet long.
I'll be wiring the cab this weekend and bench testing the crossovers/drivers. Last night I siliconed the back of the jack plate (Speakons and tweet level control). I also cut backing wood plates for the handles and PL'd them in the cab. I'll get the handles mounted this weekend too.
The last big challenge will be stuffing the cab. There's a fine line b/t over and under damping and I don't know where that line is. I really don't want to do the "stuff, listen, take out woofer, add stuffing, put woofer back, repeat" cycle. I'd like to get it right the first time. I bought the hi-loft batting that comes in a roll (vs. loose polyfill stuffing). I am planning on a single layer everywhere in the cab. The crossovers will take up the entire shelf so I won't be able to get any stuffing there. That won't hurt things badly, will it?
Do you know what some of the symptoms might be of over dampening the cab? I, too, am unsure about that part.
As for wire, I have plenty of leftover 14/2 speaker wire that I plan on using. Thanks for the info. Following your build has been a big help.
As for wire, I have plenty of leftover 14/2 speaker wire that I plan on using. Thanks for the info. Following your build has been a big help.
- Status
- Not open for further replies.


