

Enjoy the benefits of a premium membership!
Upgrade Account
-
TalkBass has been independent since 1998. Add your voice.
Create a free account to reply to discussions, view embedded media, and browse with fewer display ads.
Join free Log in
Want zero display ads or expanded classifieds tools? Compare plans.
You are using an out of date browser. It may not display this or other websites correctly.
You should upgrade or use an alternative browser.
You should upgrade or use an alternative browser.
Fender Performer Build
- Thread starter BassHappy
- Start date
More options
Who Replied?

I am really enjoying watching the progress here. I had a Gun Metal Blue (pewter?) one many years ago and this is like old home week seeing the shapes and everything going together. Thanks for sharing!
Hey Favorite!
Believe me it has been a lot of fun sharing these details. Thanks for the kind words!
Looking good!
Cheers for a most cool build thread. Thanks for sharing this.

subscribed. I have to follow this. Very interesting thread to follow.
Will look forward to an early 2015 resurrection of this cool build thread - what's worth anything is always worth waiting for.
Hey thanks to all for the kind words....
The anticipation is actually quite sweet....
The Burst Finish for this build....
This is the example of the standard three color burst I provided to Pat for this build. He said it was exactly his 1959 Fender burst, so it's a no brainer for him. Of course, as previously mentioned this one will be a satin finish:
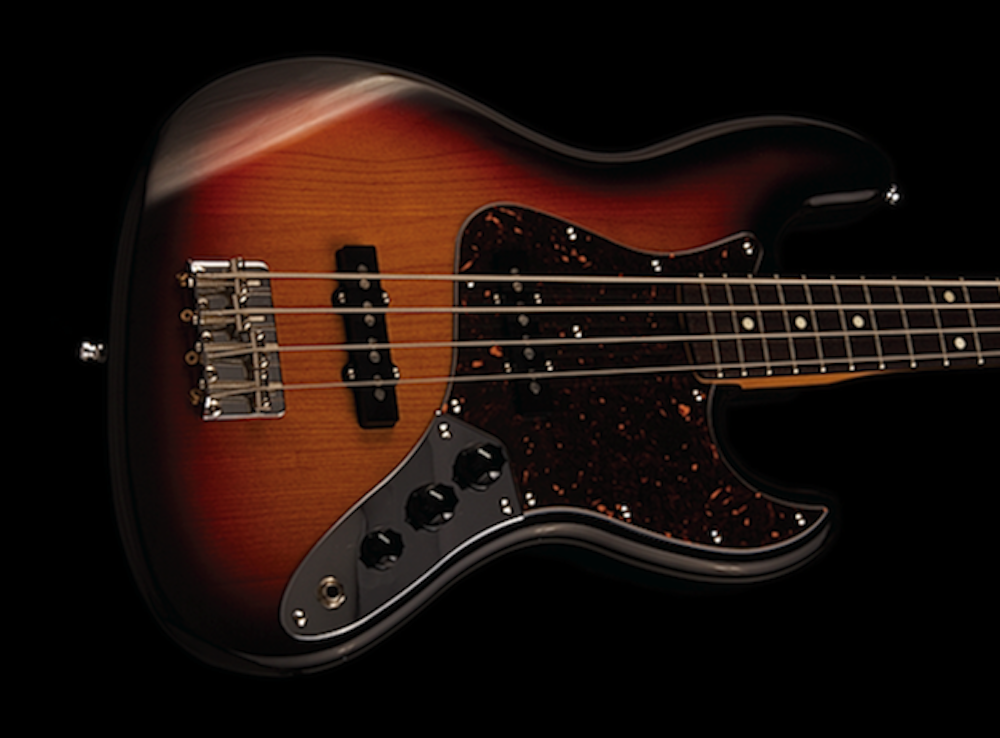
This is the example of the standard three color burst I provided to Pat for this build. He said it was exactly his 1959 Fender burst, so it's a no brainer for him. Of course, as previously mentioned this one will be a satin finish:
FROM PAT - PROGRESS AND DECALS!!!!
Hey Bruce
Surprise, surprise - got an email from Pat this morning which reads, in part:
"Your "transformer" bass is coming along nicely. I'll have it done way sooner than I thought. I should have some pics for you very soon. I'd like to know where those decals came from and the particular paper that was used. That was a great decal. It went on easily and the backing vanished perfectly. I don't get great water decals like that very often and especially not the laser printer type. If I could get that paper I might make some decals of my own."
Bruce - it looks like we are going to be ready for the bridge, bridge block and pickups very soon!!!!!
To Mapleglo:
I can't take any credit whatsoever for the decals, it was 100% your suggestion and your experience that created them. So - a hearty shout out and thanks to you for providing me with a solution when I could find none. You could say your decal solution is now officially "Pat Wilkins approved."
Of course, I furnished him with all the info on where to get the laser water slide sheets!
I'd be surprised if you got the Performer back before the end of January. Pat will need a week to sleep.
Hey Bruce
Surprise, surprise - got an email from Pat this morning which reads, in part:
"Your "transformer" bass is coming along nicely. I'll have it done way sooner than I thought. I should have some pics for you very soon. I'd like to know where those decals came from and the particular paper that was used. That was a great decal. It went on easily and the backing vanished perfectly. I don't get great water decals like that very often and especially not the laser printer type. If I could get that paper I might make some decals of my own."
Bruce - it looks like we are going to be ready for the bridge, bridge block and pickups very soon!!!!!
To Mapleglo:
I can't take any credit whatsoever for the decals, it was 100% your suggestion and your experience that created them. So - a hearty shout out and thanks to you for providing me with a solution when I could find none. You could say your decal solution is now officially "Pat Wilkins approved."
Of course, I furnished him with all the info on where to get the laser water slide sheets!
Last edited:

Hmmm....I've got another major NAMM show project coming together; two prototypes that I'll be painting and finishing up in early January. Hopefully not too much of a scramble, but they are going to be my priority. I'll see if I can get started on the Performer parts during this coming week, but I can't promise delivery in early January. I was planning to do your parts after the other project is finished.

FROM PAT - PROGRESS AND DECALS!!!!
Hey Bruce
Surprise, surprise - got an email from Pat this morning which reads, in part:
"Your "transformer" bass is coming along nicely. I'll have it done way sooner than I thought. I should have some pics for you very soon. I'd like to know where those decals came from and the particular paper that was used. That was a great decal. It went on easily and the backing vanished perfectly. I don't get great water decals like that very often and especially not the laser printer type. If I could get that paper I might make some decals of my own."
Bruce - it looks like we are going to be ready for the bridge, bridge block and pickups very soon!!!!!
To Mapleglo:
I can't take any credit whatsoever for the decals, it was 100% your suggestion and your experience that created them. So - a hearty shout out and thanks to you for providing me with a solution when I could find none. You could say your decal solution is now officially "Pat Wilkins approved."
Of course, I furnished him with all the info on where to get the laser water slide sheets!
I'm glad both you and Pat were able to make use of the decal paper. This is one of the many things about this community that I love. Everyone is always very willing to share resources and experience.
I'm glad both you and Pat were able to make use of the decal paper. This is one of the many things about this community that I love. Everyone is always very willing to share resources and experience.
Hey Mapleglo
Well said! And boy is it the truth!
Some mighty good and very knowledgable folks on here - that is for certain!
Keith had asked me to do a decal for him on another project - and I used the same process with the paper you recommended and the color HP - and he had great success with that one too!
So thanks again so much!
Last edited:

- Jun 30, 2010
- 49,612
- 222,129
- Disclosures
- musician/artist/owner - Gildaxe
Glad to hear the decal worked so well - wish my Supernova did. Where was the specific post (what number and thread) that you refer to? I obviously did something wrong but next time…
Hmmm....I've got another major NAMM show project coming together; two prototypes that I'll be painting and finishing up in early January. Hopefully not too much of a scramble, but they are going to be my priority. I'll see if I can get started on the Performer parts during this coming week, but I can't promise delivery in early January. I was planning to do your parts after the other project is finished.
By the way Bruce, not sure if you are interested - I will leave that to you and Keith - but my next build is starting next week.
The thread is here if you want to check it out: http://www.talkbass.com/threads/my-les-paul-bass-build-i-need-a-gibby-too.1120298/
Last edited:
Glad to hear the decal worked so well - wish my Supernova did. Where was the specific post (what number and thread) that you refer to? I obviously did something wrong but next time…
Hey JIO
I think mapleglo might remember which thread - but the gist of it was me complaining that the water slide inkjet decal paper I had purchased was too thick to work in the state-of-the-art inkjet printers at the color group I use.
Mapleglo had mentioned how she used the laser water slide decal stock in her laser printer and how well it worked. I thought - hey I have a pretty decent color HP laserjet - so I went out and bought the laser water slide decal sheets she recommended. Unfortunately, they had a disappointing 25 sheet purchase minimum, so it was like $22 bucks. Mapleglo with her generous nature admonished me for buying them and kindly offered to send me a sheet or two of hers. She got stuck buying 25 sheets too, I think. So only a couple of rules - at least from my experience:
There is a super thin slice of tissue paper over the water slide side of the decal sheet. Make sure you peel it away before printing - but keep it - it is GREAT to use a a protector after the decal is completely set. Also detailed or intricate full color decals are all about resolution. If you are using Photoshop/Illustrator learn how to convert (if possible) or at least keep everything in the highest resolution possible - 300 dpi minimum but 1200 dpi if you can manage it.
Make sure the printer is super cold - especially if you are using colors. Turn it on in the morning or after a resting period - but when you do - have the print dialog up and ready on your computer. As soon as the printer hits "READY" fire away immediately and push "PRINT". If you have a problem with that sheet for any reason - shut the printer down and wait at least 15 minutes. I tried experimenting with this a bit and the second sheet - hitting "PRINT" within 30 seconds after the first one - was already starting to smear. The printer heats up really quick - I suppose the newer the technology is on your printer the quicker it heats up.
No need to hit it with lacquer to set it - or anything else for that matter. Just don't get near it or touch it for at least 45 minutes. I think they suggest 20 minutes. I used a fan because it was a humid day outside and I wanted to be sure it crisped up right away. I printed out a test sheet and it was still smearing with HARD ABUSE (rubbing it hard with a rag) at 30 mintues with the fan. Obviously, I would actually feel better letting it set for a day or two if you have it. Sorry that sounds so crazy to rub that sucker, but I had to know....
Last edited:
- Jun 30, 2010
- 49,612
- 222,129
- Disclosures
- musician/artist/owner - Gildaxe
Thanks for that info - looks like your Performer will be done sooner than anticipated. You must be on Pat's A-list.

Would you still have the template files? That would save me a lot of work.
Hey Worker
I assume you are looking for the body template? I pulled mine courtesy of JIO from here:
http://www.talkbass.com/threads/custom-performer-supersonic-bass.904968/
It might be a Fender Performer guitar template, it shows the angled jack mounted in the body, which the Performer bass did not have. However the jack detail looks to be added in after the fact so I can't be sure. I also can't swear that the guitar body template is exactly the same as the bass body template might be, but it is what I used. I didn't have access to a Fender Performer bass to verify the dimensions.
Good luck on your project!
- Jun 30, 2010
- 49,612
- 222,129
- Disclosures
- musician/artist/owner - Gildaxe
Thanks so much, I wont be devoting any where near the energy you put out making a replica, I just like the body and the neck shapes.
Looking forward to the build thread!
The mighty Performer will reinhabit the world! 


From Pat:
Looks like it is all about the pickups and the bridge now, as Pat has finished his work. In the end he settled on a '64 burst. Just a couple of rough phone shots because I begged:
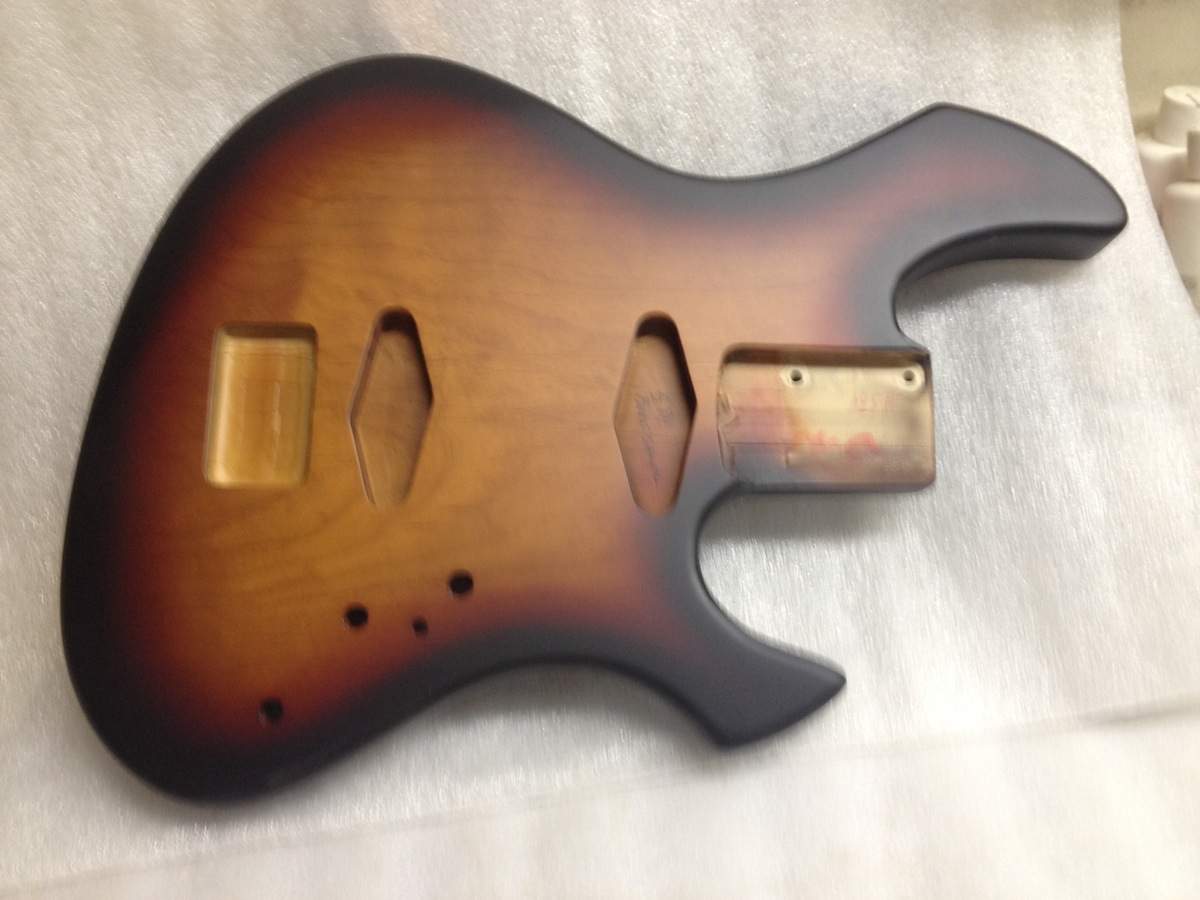
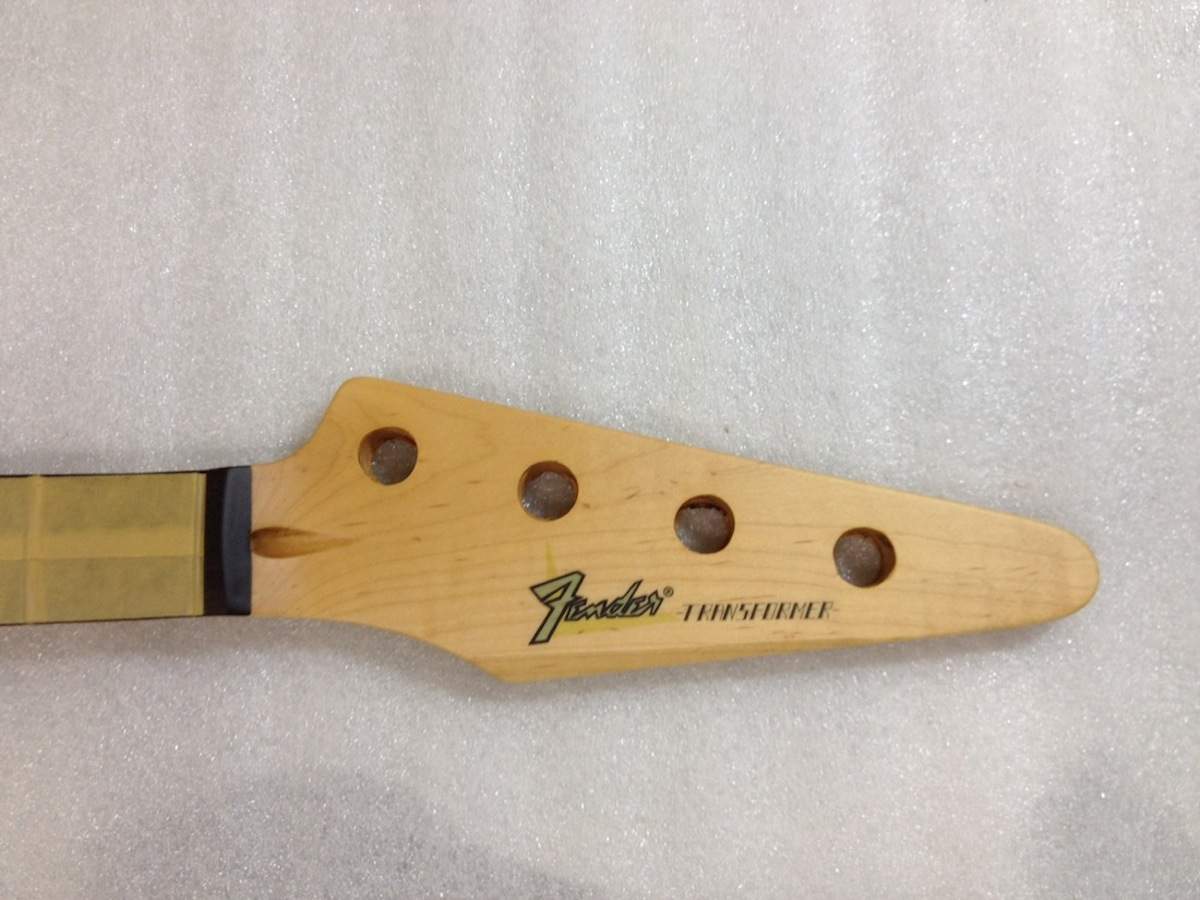
When Keith gets a chance, he is going to stop by and pick it up!
Looks like it is all about the pickups and the bridge now, as Pat has finished his work. In the end he settled on a '64 burst. Just a couple of rough phone shots because I begged:
When Keith gets a chance, he is going to stop by and pick it up!
Last edited:

I like that satin burst. Reminds me of the '54 fender P you have.
I also like the idea of a countersunk plate for the bridge to mount on.
It kind of reminds me of Alembic's bridge block option seen here
Link Removed
I also like the idea of a countersunk plate for the bridge to mount on.
It kind of reminds me of Alembic's bridge block option seen here
Link Removed
I like that satin burst. Reminds me of the '54 fender P you have.
I also like the idea of a countersunk plate for the bridge to mount on.
It kind of reminds me of Alembic's bridge block option seen here
Link Removed
Thanks Dedpool!
Yeah it is similar, until you see them side by side. We wanted the '54 to look aged so we used a burnt orange two tone burst. With the Performer it's more of an aged '64 tri color burst using the burnt orange as the middle color to give it a slightly aged appearance:
I didn't realize that Alembic had played around with bridge blocks too. Thanks for sharing that! This is the first time I will be able to check it out as none of my other basses have that feature.
Last edited:


