• TalkBass has been independent since 1998. Add your voice.
    Create a free account to reply to discussions, view embedded media, and browse with fewer display ads.
    Join freeLog in
    Want zero display ads or expanded classifieds tools? Compare plans.

finished making a 100w valve amp

Why? He used true point to point and not a terminal board like Hiwatt et al. The mans' building method though not neat iS electronically sound and will have less stray capacitance than using terminal boards. The amp will be a pain to service but if BlackLabb has used conservatively rated components that should not be too much of a problem.

Output tube screen resistors, I have found, work well with 1KΩ 5W. I use this value for any of the tubes I use.

Paul

In your own words:
(Another thing if I may. You are using radial filter caps just standing there hanging by their leads. That will not last too long before the leads break. You have to stabilize them mechanically. I have used silicone calk to affix such caps to the chassis and then the leads can be wired to the tag strips, upside down to the way you have them. I've never had a problem of them coming loose.

Paul)
 
BlackLabb, My only reservation is the differing anode to anode loading of say four EL34 about 1700Ω compared with a pair of 6550 at about 4-5K. If you are swapping outputs you'll have to change output taps to compensate.

Paul

i'm running a 16ohm speaker into the 8 ohm tap, to get it where it should be. from my measurements (5v in, cant remember how much out) the impedance ratio showed 2k. so that will be fine with 4 el34's using the correct taps, or 2 6550's when you double the impedance of the speaker compared to the tap.


reguarding the electrolytic caps, that was a consideration. i was thinking of a couple ways to secure them. upside down like you said was considered. i was thinking of using bottle caps on the top of them and holding them down somehow. there will be some things that i'll do to fix it up a bit before i put it into a shell.
 
In your own words:
(Another thing if I may. You are using radial filter caps just standing there hanging by their leads. That will not last too long before the leads break. You have to stabilize them mechanically. I have used silicone calk to affix such caps to the chassis and then the leads can be wired to the tag strips, upside down to the way you have them. I've never had a problem of them coming loose.

Paul)

Sure some things can be improved but don't think that turret boards are the only proper way to wire an amp or that Hiwatt and Reeves are the perfect examples.

Paul
 
Hi.

In my very limited experience with tube amp wiring I have noticed that the "neat and tidy" approach takes either massive amounts of knowledge and/or a lot of time.

It's way easier and faster to use "loose" wires and chopstick the wiring to the least interference. Any parallel wires react with eachother, some more some less.

In this case the amp was said to be so quiet that black labb thought that it wasn't on :).

Regards
Sam
 
i think the idea was that there is no perfect way, and just because it looks nice it doesnt mean its better than other methods.

How about this example? What would make it better, particularly from a maintenance/durability standpoint? IMO it looks fairly straight forward from a maintenance aspect, and pretty physical abuse resistant as well.

I'm not trying to be quarrelsome, I just want to have my perspective expanded. ;)
 

Attachments

  • JbuiltEL34.jpg
    JbuiltEL34.jpg
    64.6 KB · Views: 125
Hi.

My view about the subject is that there's two different approaches, which don't necessarily go hand in hand.

One is the athetics side, making the wiring with right angles, precise component placements, precise component orientations etc.

Then there is the hum/interference.

No-one exept the designer of that amp in the example knows how much time went in designing a layout that combines both of the above mentioned aspects. Often You'll see transformers seemingly scattered across the chassis, at odd angles, weird orientations. That's a result of minimizing hum and interference. If the space is at premium, it's hard to avoid interference without careful planning and testing.

Regards
Sam
 
Hi.

My view about the subject is that there's two different approaches, which don't necessarily go hand in hand.

One is the athetics side, making the wiring with right angles, precise component placements, precise component orientations etc.

Then there is the hum/interference.

No-one exept the designer of that amp in the example knows how much time went in designing a layout that combines both of the above mentioned aspects. Often You'll see transformers seemingly scattered across the chassis, at odd angles, weird orientations. That's a result of minimizing hum and interference. If the space is at premium, it's hard to avoid interference without careful planning and testing.

Regards
Sam

I think the aesthetics are purely coincidental in the example I posted. It’s not about making the amp “pretty”, it’s about functionality. The basis for that layout utilizes a military specification wiring standard. Well, “pseudo” mil-spec anyway; true mil-spec would have a redundancy of circuits and probably specify a 10 gauge chassis and heavier transformer mountings.
The idea is to enhance reliability, facilitate ease of repair and maintenance, AND not compromise the integrity of the circuit through transient interference, outside RF sources, etc.
In this respect, your two schools of thought must go hand in hand. Surely you aren’t suggesting that all of those old Dave Reeves era Hiwatts and current Reeves amps sacrifice tonal integrity for the sake of aesthetics? Quite the contrary IMO, I believe the #1 design goal was likely the uncompromised application the circuit was designed for i.e; Musical instrument amplification for professional musician use.
I think secondary would be a “bullet proof” construction, able to handle the rigors of a touring band without “moulting” vital amplifier components along the way. Although this is a very labor intensive process requiring employees with above average soldering skills to accomplish properly, cost would not compromise this objective.
Thirdly, an amp built (and priced) for the professional touring musician would need to be able to be quickly diagnosed and repaired by any competent tech with a schematic. I personally believe the Reeves/Hiwatt wiring to be infinitely more practical than rats nest wiring schemes from this aspect.
I can’t imagine that appearance was even a design consideration other than physical size constraints.

All of the above is of course my opinion, derived from personal research and experience over the years. I sincerely would love to see examples of alternate amp construction methods with explanations why they may be superior to mil-spec turret board for a non-PCB, hand crafted, “gigable” bass guitar amp. I’m all about expanding my viewpoints.

Also, sorry for straying from your original subject, black_labb. Kudos on your project, I would imagine that there are at best only a handful of posters on these forums that have your ability to actually design and build a functional amp, particularly around a static parameter like your trannies. Very impressive, a skill that is hopefully enjoying resurgence after near extermination at the hands of cheaply made, mass produced, cookie cutter transistor amps.
Do you anticipate posting samples in the near future?
 
Ed, your example is indeed a beautifully made amplifier. It is a great example of the art of turret board wiring. Another, if you know of them, were the Leak range of products. They too were beautifully wired. As Sam says, there are more ways than one to build an amp. Most have pros and cons. When I use true point to point I run a solid buss along the length of the tube sockets. links connect to the centers of the 9 pin sockets. All components are wired from the buss to the sockets with other connections terminating on tag strips. This method makes a highly stable wiring structure. Along with 2W 1% resistors it's as solid as a rock. I can lift the weight of the entire amplifier using the ground bus. Servicing would be a bear if it ever needed it but I have never had one of my amplifiers go wrong.

Paul
 
Aesthetics under the chassis isn't that important for a one-off DIY as long as the wiring is sound, grounding is done properly to minimize noise and groundloops, and the components are well supported. As for a commercial endeavor that's a different story. Looks like a fine project and I applaud Black_Labb for his initiative. It's actually quite fun and gives one a great sense of satisfaction to build something useful that works well AND costs practically nothing (I know first hand).

If you're into amateur radio, you might know that hams regularly build projects using "ugly construction" which lends itself easily to experimentation, modding, etc:

Link Removed
 
reguarding serviceability, i find that the point to point method is very easy to service as you can clearly see what is connected to where on the tube sockets. following wires can be confusing sometimes, especially if they go under something like a tagboard. the final soldering may be a bit more annoying getting things in position, but it will be easy to diagnose.
 
I wouldn't know the difference between a clean or messy amp except for the beer can rings on the top.

I'm interested in the cost of the build. Is it worth it monitarily to build your own tube monster or spend the money searching for an operational tube amp and modifying it to the specs you were trying to get when you decided to do the build?
 
here's an update since getting some new tubes and having a band practice with it. to clarify the title, i doubt that the amp is putting out 100w, probably more like 60-80w. more on that in the last paragraph.

got the amp fitted with jj E34L (EL34's with a bit more headroom and handling for high voltages). one of the tubes in the first quad sent was defective when i put it in (wasn't conducting at all) so i got a replacement for it sent to me, which worked great.

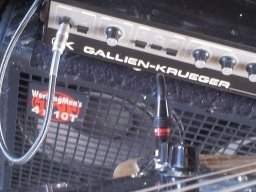
i had band practice yesterday (first time since mid december as the drummer was in thailand then visiting her boyfriends family out of state). was playing bass through a bigger version of the 1x15 showed above (same speaker, but slightly bigger enclosure and a slightly higher port tuning) and the bass in the same set of photo's. the speaker is a fairly modern sounding 15, that has plenty of xmax to not fart out and plenty of highs (i have been asked if it has a tweeter in it, as it provides plenty of highs which people dont usually associate with 15's) it sounded great, and pushed just the right power for band practice (and probably recording too). i was a bit worried that the eq would be a bit lacking, but it seemed to be plenty responsive and the controls worked as expected. im very happy with how the eq worked out.
here comes the description of the sound, which tends to mean something different to everyone, but here goes. playing fingerstyle the amp sounded deep but still punchy. digging in a bit harder the power tubes would compress and distort a bit in a nice way (quite growly as opposed to gainy sounding, deffinately not a harsh distortion, but fairly suddent onset which i believe is due to the fact that i had it on the highest level of -ve feedback). the amp seemed to retain its punch when distorting a bit which is nice. i also play with a pick a fair bit with my band, as it is a 3 piece where the guitarist/singer plays almost exclusively with a slide, and the extra mids seems to fill out the sound nicely. using a pick it sounded nice. there was not any noticeable distortion (possibly due to less lows or possibly masked by the extra mids generated by the pick) but there was a bit of compression when i dug in, which was nice. the pick sound was also good, and worked well.

the amp doesnt seem to have too much power/headroom, which i believe would be due to the lower voltages (around 390v on the plates, depending on the wall voltage). i dont know if i'd bring it to a gig, (not that we're gigging yet) but it would probably cut it with pa backing and/or both 1x15's.
i have 2 200w valve amps running on 6550's, which would be better suited to gigs where the bass cant go into the pa. if i got a PT with 350-450v ac out then im sure it would have more power (probably apraching 110w or so) but i think this is perfect for a smaller bass amp for practices/pa/recording or just using plenty of sensitive speakers.
i'm not sure wether the amp would "cut through" well in a bigger band (deeper guitars), but the eq seems plenty versatile so i wouldnt doubt it, but volume would probably be an issue. alternatively "biamping" using the 2 1x15's and 1 200w amp and this amp each connected to one. i could get a distorted sound from this one and the 200w amp to generate the extra power and get a nice clean low end.
 
Nice amp build! Dont worry too much about layout. I have refurbished and repaired many "popular" layouts and even with heaters twisting wires together is cheap. It increases capacitance, and most people dont know that, ignore it, and dont take that into account in layout design. Not just heaters but other signal, power ground etc. Fender/cbs is notorious for this.

I believe Hammond makes a 450-0-450 volt tranny, if you wanted more B+. And you can always buy a small 1A 12volt center tap tranny for heater supply to the preamp valves if need be.

Morgan Jones' Building Valve Amplifiers has some good construction and layout info, even if its "light" on info at times.
 

Latest posts