• TalkBass has been independent since 1998. Add your voice.
    Create a free account to reply to discussions, view embedded media, and browse with fewer display ads.
    Join freeLog in
    Want zero display ads or expanded classifieds tools? Compare plans.

First Commission Build - Is A Super-Tele A Thing?

And....once again without much context, for those interested in watching the visual version....

I've used the spindle-sander-as-poor-man's-thicknesser trick a bunch of times, and it can work really well.

I can tell from the video that you're going way too heavy. You want to (a) do multiple passes and (b) set it so that the resistance is low enough that you can almost push the work-piece through like a planer-thicknesser. Typically, this means taking significantly less than 1mm (1/32") at a time. When I do it, I tend to use 80 grit at 0.5mm (just over 1/64") increments. You then adjust the fence and go again. It doesn't take any longer as the passes are fast. You can use drill bits / bolts / shim stock as gauge pins to set the spacing between the fence and the abrasive. This way, the action of the spindle sander actually helps push the work-piece into referencing against the fence without the work being in the same place long enough for it to twist or lean into the abrasive which is what deforms the work. When you're about 1mm (1/32") from where you want to be, swap to 120 or 150 grit and use smaller increments for the last couple of passes.

You're also right that it helps to have some kind of reference edge to run against the table -- but it's not completely necessary if you do the above.
 
I've used the spindle-sander-as-poor-man's-thicknesser trick a bunch of times, and it can work really well.

I can tell from the video that you're going way too heavy. You want to (a) do multiple passes and (b) set it so that the resistance is low enough that you can almost push the work-piece through like a planer-thicknesser. Typically, this means taking significantly less than 1mm (1/32") at a time. When I do it, I tend to use 80 grit at 0.5mm (just over 1/64") increments. You then adjust the fence and go again. It doesn't take any longer as the passes are fast. You can use drill bits / bolts / shim stock as gauge pins to set the spacing between the fence and the abrasive. This way, the action of the spindle sander actually helps push the work-piece into referencing against the fence without the work being in the same place long enough for it to twist or lean into the abrasive which is what deforms the work. When you're about 1mm (1/32") from where you want to be, swap to 120 or 150 grit and use smaller increments for the last couple of passes.

You're also right that it helps to have some kind of reference edge to run against the table -- but it's not completely necessary if you do the above.
Yeah, I've seen some super cool jigs like you mentioned, like this -
1DCF7681.jpg

I just haven't built one yet, mostly because with the current cost of plywood that's like a $300 jig! :roflmao:
But it's 100% on my radar. :thumbsup:

Appreciate the input. :cool:
 
  • Like
Reactions: Quills
Okay, we officially have a FSO -

20240119_164406.jpg


I got the body wings doweled on, so that I can remove them to do other tasks, but still put them back on so I can see where I am for certain operations, like neck carving. My band saw isn't the greatest so I tend to stay much farther away from the lines than most people would advise, yes I'm aware of it. But better to leave too much material than end up going too far. Still a lot to do, but it looks like a thing now, which is nice to see. :cool:
 
A little more progress today. Well, this is actually over the last week or so because I just tinker with it here and there. Got the top jointed, glued up and then sanded flat. -
20240216_150306.jpg


I don't have a wide belt drum sander, so this was just sanding it with my very old Black & Decker handheld belt sander that I got from my neighbor's garage sale. Most of you probably know these from the belt sander drag races on the interwebs, and if you haven't seen that, just Google it. :roflmao: -
s-l1600.jpg
It was so old and he just wanted it gone so I literally got it for free. But hey, it just earned every penny I spent on it! :D
I just attacked it with a 60 grit belt until it felt smooth. I think the joint came out pretty good, as they say down South "I ain't mad at it!" -
20240216_150314.jpg

I'll go back over it with finer grit sandpaper later, it's fine for now.

Next up was trimming some of the neck blank so the top can go across it. I just clamped it in my leg vice and went at it with a hand saw, because the hand saw isn't near as loud or messy as power tools and I feel like I have a larger window to keep from making horrible mistakes. So now I have this situation -
20240216_151814.jpg


So with the bulk of that out of there, I plan on building a router sled to remove the rest of it and flatten the neck through section and wings all together. But with the bulk of it removed, the router will have to do much less work anyways and I also saved that chunk of wood for another project, so it was a win-win. ;)

So yeah, next up, building a router sled. I've been saying I need to do that for about two years now so it looks like now is the right time. :smug:
I also need to start trimming the "neck pocket" in the top to fit down over the end of that fretboard. My fretboard end isn't exactly Telecaster shaped so it'll take some fiddling. If anybody has any tips for how to mark that out, lemme know. I do plan on cleaning up the end of the neck through portion first so I can get a good clean fit.

It's not much, but it's forward movement. :cool:
 
Okay, a little time in the shop and we've got a fairly janky router planing... fixture... jig... thingy. -
20240216_212633.jpg


20240216_212639.jpg


Yes, I still need to cut the slot in it that the router bit will stick down through, but it's getting late and I need to stop making noise.
This was a bunch of scrap wood I had laying around. The "rails" clamped to my bench are poplar, not super hard, but hard enough to be able to plane to a matching height, with some plywood scraps pocket-screwed to them to give me something to clamp to. The "box" the router rides in was a scrap piece of plywood and some more poplar scraps from a chair I built (pic not of my chair, but same same) -
Screenshot 2024-02-16 213453.png
And again, just pocket-screwed together, because down and dirty. :cool:
For those wondering, I'll just double-sided tape the guitar (or whatever else I use this for, probably cutting boards if I'm being honest) to the bench when I do this operation. I have a rather large flattening bit that I bought some time back. It kinda scares me, but it works really well for this sort of thing. I just didn't have a fixture to do it in like this, so maybe this will make it... less scary. :roflmao:
The fixture ain't perfect, but it'll do. I'll get the slot cut later and then give it a good lube with the paste wax so everything slides easier. Yeah, again, I ain't mad at it. :cool:
 
Okay, more progress today. I built my planing jig a bit too tall (on purpose) so this guitar will need some shims under it to get it up high enough that my router bit can reach it. No worries, more scraps of that chair I built, because I know they are an even 3/4" and flat. Double-sided tape those to the bench...
20240218_113831.jpg


Then tape the guitar to them and....
20240218_114748.jpg

Uhh.....that's.....that's not gonna work. :meh:

Okay, audible. I've got some 1/2" MDF, that stuff is generally dead level and flat! Tape a couple chunks of that down, then tape the guitar to those...
20240218_120038_HDR.jpg

Yeah, that'll work! I think we're in business here!

So after running the router over it I was left with this -
20240218_121243.jpg


Yeah man, that's exactly what I was looking for! :cool: I honestly can't believe I stressed over this for so long. I should have built that jig years ago. I was so worried about it not being perfect that I totally let it get in the way of the good enough. After that process, I flipped it over and did the same procedure to the back, so now both sides are nice and flat across the whole thing. No, it's not perfect. As I usually see with these jigs, something wasn't perfectly aligned and there's small "stripes" across it. You can see them in the photo and you can feel that edge when you run your fingernail across it. Will it sand out? Oh yeah, it'll totally sand out, and that should work just fine. I need to take my chisels and clean up the area right around the fretboard end, but we're in really good shape here! :cool:
It's for sure in thinline tele range now. I measured the body thickness with the top on it and we're right at 1-9/16", so I am kind of stressing over that now. My Floyd plate that sticks through the body is somewhere around 1-7/16", so depending on how high the Floyd mounts on the posts it's gonna start getting tight under that rear cover plate. I suspect I have some wiggle room as the top of the...top is a millimeter or two below the top of the fretboard. I ended up cutting a bit deeper just to give myself some play when it comes to the string height part of this, which factored in to the body thickness, but may also provide the extra room I need anyways. I'll just have to burn that bridge when I get to it I guess. :smug:

Next I can start getting that top prepped to go over this!
 
Last edited:
I measured the body thickness with the top on it and we're right at 1-9/16", so I am kind of stressing over that now. My Floyd plate that sticks through the body is somewhere around 1-7/16", so depending on how high the Floyd mounts on the posts it's gonna start getting tight under that rear cover plate. I suspect I have some wiggle room as the top of the...top is a millimeter or two below the top of the fretboard. I ended up cutting a bit deeper just to give myself some play when it comes to the string height part of this, which factored in to the body thickness, but may also provide the extra room I need anyways. I'll just have to burn that bridge when I get to it I guess. :smug:
If I'm visualizing this correctly, the clearance between the underside of the bridge and the rear cover plate is already fully dictated by the distance from the back of the body to the fretboard and the height of the bridge assembly, and the top doesn't really factor into it. The bridge needs to be positioned with respect to the fretboard to get the action correct, and the back face of the body is already positioned at some fixed distance with respect to the fretboard. The distance from the back of the body to the top will dictate how much the bridge protrudes above the top, but doesn't really factor into whether the bridge block will clear the rear cover plate. I may be totally out to lunch here.
 
  • Like
Reactions: TerribleTim68
If I'm visualizing this correctly, the clearance between the underside of the bridge and the rear cover plate is already fully dictated by the distance from the back of the body to the fretboard and the height of the bridge assembly, and the top doesn't really factor into it. The bridge needs to be positioned with respect to the fretboard to get the action correct, and the back face of the body is already positioned at some fixed distance with respect to the fretboard. The distance from the back of the body to the top will dictate how much the bridge protrudes above the top, but doesn't really factor into whether the bridge block will clear the rear cover plate. I may be totally out to lunch here.
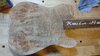
No, you're tracking right. And yes, I have kind of mapped it out in relation to the "top" of the fretboard, because that's the relationship that matters. So I should be okay here, but it's something I'm stressing over, because if I don't stress over that I'll have to find something else to stress over. :roflmao:
 
Bit more progress today. Got the top cut to rough shape and then cleaned up my neck blank end with the chisels. Then got it fitting my neck pocket template real nice and then finally used the same neck pocket template to cut the "pocket" in the top. In the end, here's what I got ...

20240301_132341.jpg 20240301_132336.jpg
The actual joint came out good, I'm pretty happy with this...
20240301_132404.jpg 20240301_132409.jpg
I'm sure it could have been better, because, you know, never perfect. But I'm really happy with it and I think it's gonna be great.
So this will eventually get a layer of black veneer under it between the top and the body, which should help it pop a bit more. I will say, for a reject top that my wife got for like $25, I'm pretty happy with that figure. It should look pretty good when we're done here. :cool:

I think I'm gonna focus on the neck itself next. Side dots, neck carve, that stuff. Then we can move on to fretting after that. I think I want to carve it before fretting. I see a lot of people do it that way and it makes sense to not have to protect the frets during the carving process. I think I fretted the last one before carving because it made sense to me to do it while it was still a "block", but I think I wanna try the other way around this time. You know how it goes....6 in one, a half dozen in the other. :cautious:
 
Last edited: