So, the reason I am posting this is because it was all the "refurbing cheap basses" threads that inspired me to finally give it a shot in the first place. I also haven't been in a good financial position for basses/gear for a few years now and was in need of an inexpensive back-up/other tonal option for recording.
A little background: I've been playing for 17 years and doing my own set-ups and minor repairs for a lot of that time, BUT I have no woodworking experience to speak of and would not even consider doing anything resembling "building" an instrument. However, I spent a couple of years following a lot of your refin/upgrade threads and after learning a lot, I decided I could do it.
So, I went CL hunting and I found a Jay Turser MM 5 copy and a hard case for just over 100 bucks. I thought "perfect!".
Here was my original plan: Strip paint and if wood is good -natural finish (boiled linseed oil/nitro), if it's pressboard or something -metallic purple.
Change all hardware to black. Change p/g to black.
Upgrade wiring, pots and caps. Shield cavity.
Here are the things I did not think through as I should have: I don't own many tools (at all), I live in a small apartment and have no garage/shop space (at all) but, you know, I dun lernt it from TB.
The "before" pics are from the seller (read: no they're not my shoes, messy house, etc.)
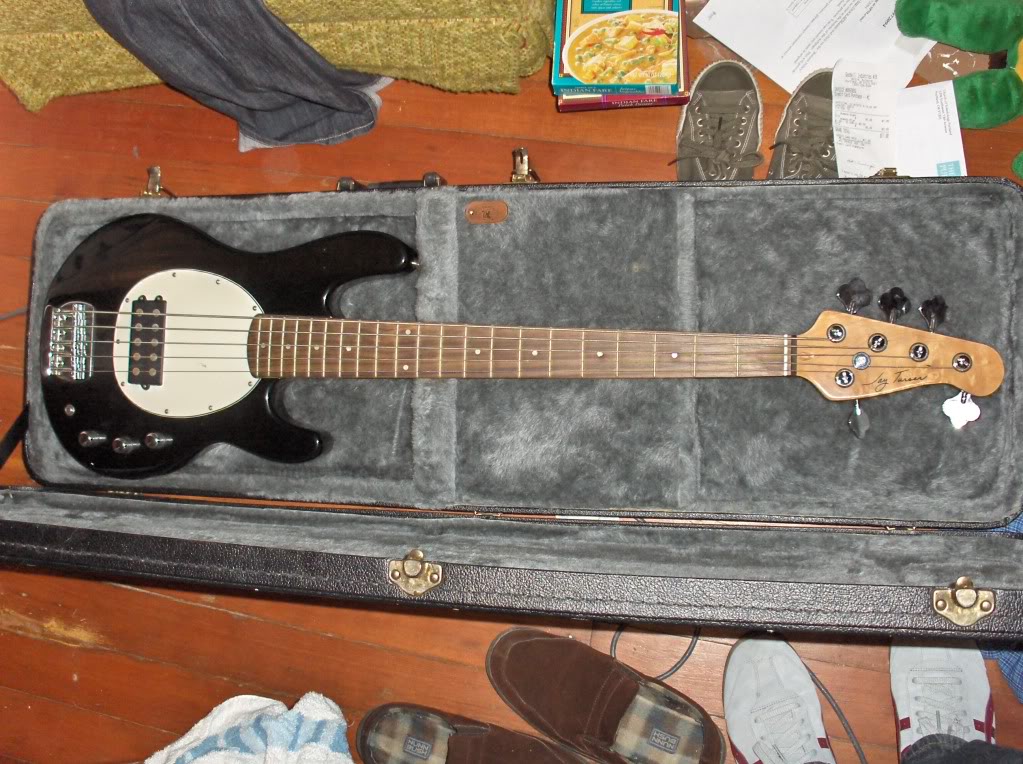
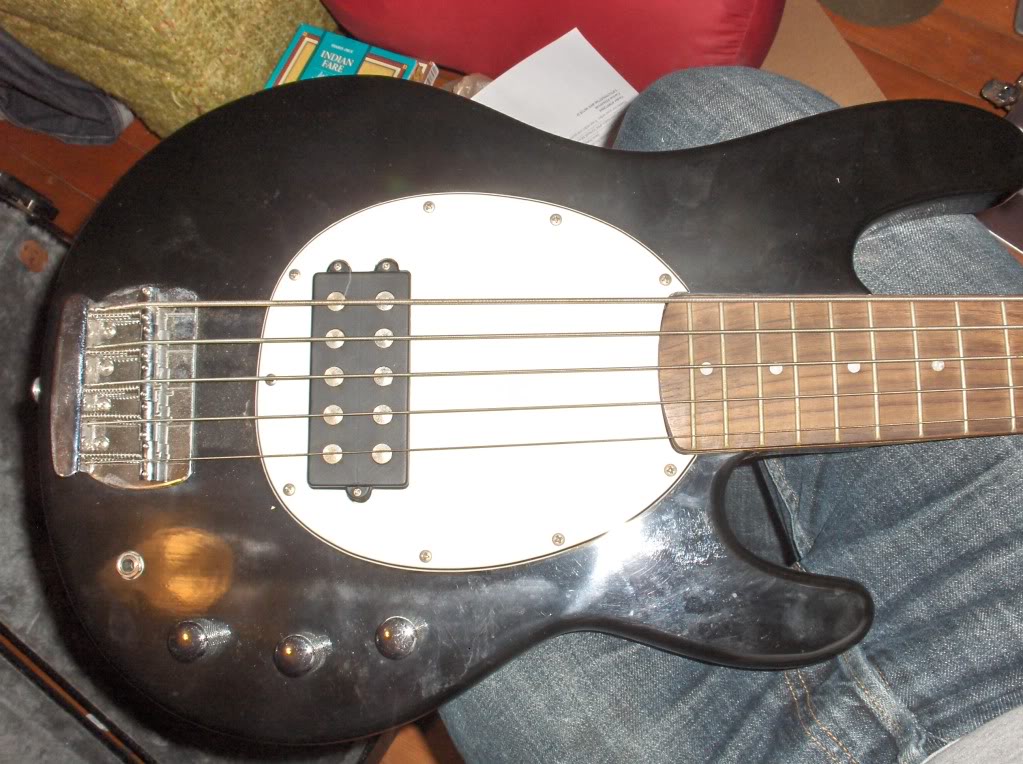
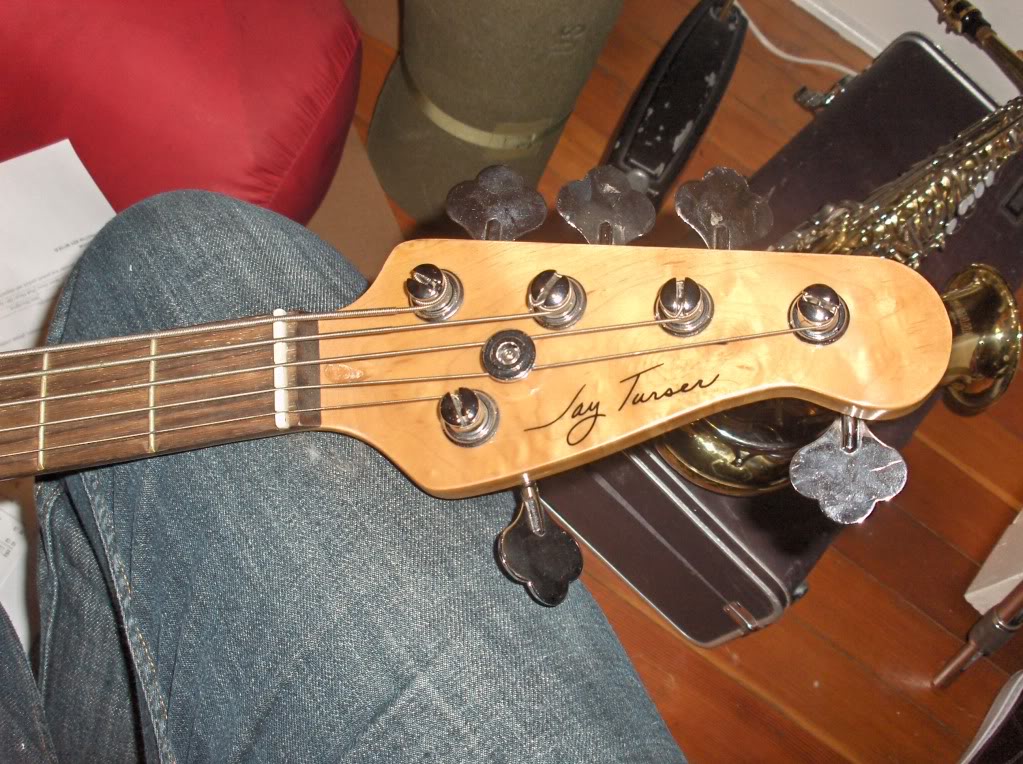
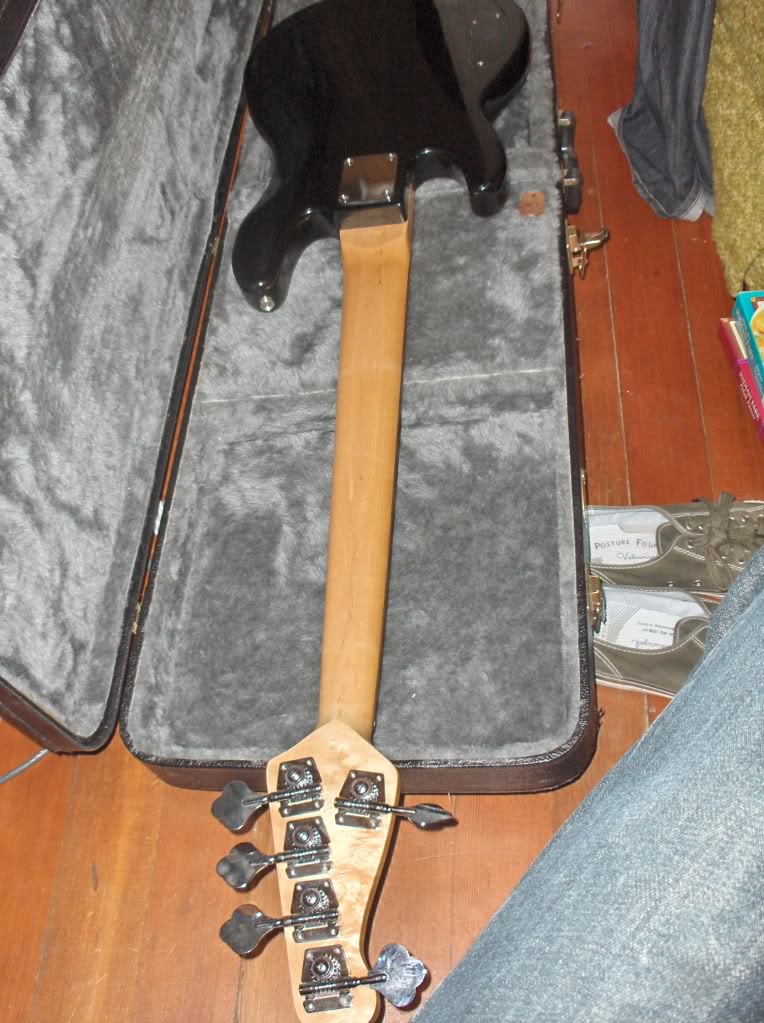
It's really hard to see in the seller's pics (and I didn't get any 'befores' myself) but the string alignment is off. It lined up fine from the bridge and over the pu poles but at the nut, the B was almost off the board and lots of room between the other side and the G. I said something about it here and some people thought that bridge placement was the only cause and any other theory was "hogwash". Well, it was pretty obvious that the professionals in whatever country this bass was built in simply carved all the nut slots too far to the bass side. So, being one of those things I'm not set up to do, I took it to my trusted tech who carved up a new bone nut and got the alignment problem solved (cost me $50). I found that the bridge, neckplate and pickup were all solid (but we're going all back) but the tuning gears were made of some type of hardened plastic and slipped easily. Also the pots were in real bad shape.
Got myself Citristrip, sanding paper and block.
I was hoping that the Citristrip would only take one application since the paint/finish was obviously very thin and because I'd have to leave it poorly hidden on my small apartment porch for 24 hours. I did exactly that... and it did nothing (actually I think it did soften the clear on the neck and headstock). But, my lack of a safe, private space stopped me from continuing down the Citristrip road. Elbow grease time! Here are a couple shots during sanding (by hand).
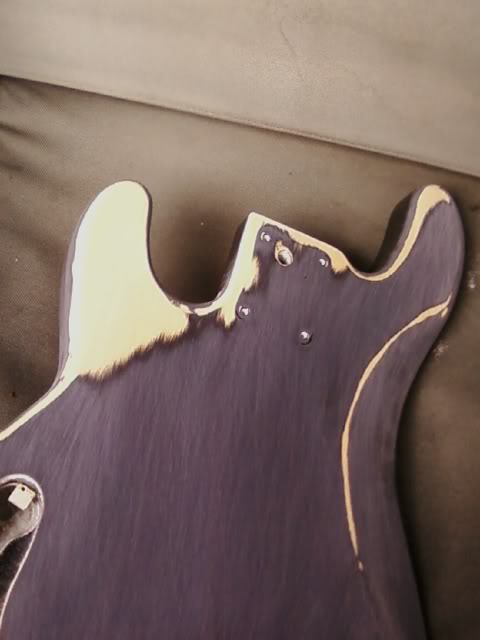
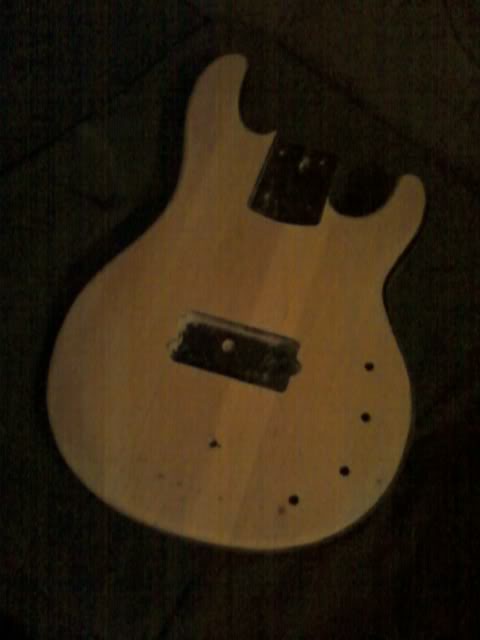
After lots and lots of sanding, all the paint is gone and the wood looks good enough to keep natural. BUT, once the paint was off I discovered the sealant. Ugh. I tried to sand it away, but it was 10x tougher than the paint and really gummed up the sandpaper (plus this was after many hours of sanding the paint off) so, I decided that I needed help. The only person I could think of with a good collection of tools was a friend/housemate of my brother-in-law's. I bring the body to him (the neck had no sealer) and I find out that he doesn't have an orbital, belt or finish sander but he does have a grinder and an even finer grit sandpaper wheel on it than I had been using by hand (and I couldn't put a scratch in it). So I say "let's give it a shot".
It only took him about a minute while my back was turned to get the the sealant off the back and almost half the front. However, those places on the body were now covered in HUGE gashes! Great (sorry but I did not get pics of that. Wish I had). Now I still have sealant to get off and I have to sand all these gashes out.
Enter forced tool purchase: A mouse palm-sander with bag and lots of sandpaper and buffing attachments (I also got this on CL for $25). Luckily, it only took about an hour with the sander to get the back smooth and level again and now only the very deepest gashes are reduced to little "dings". After that, the weather got bad and I haven't had a chance to do anymore sanding, but it's clearing up this weekend so I'll finish the sanding next week (I have 3 kids, a business, a band and a recording project, so I have very little time to work on it).
One night in middle of all this, I thought "painting the pickgaurd just seems unimaginative and lame. What can I do to make this more creative/personalized?" Then it hit me.
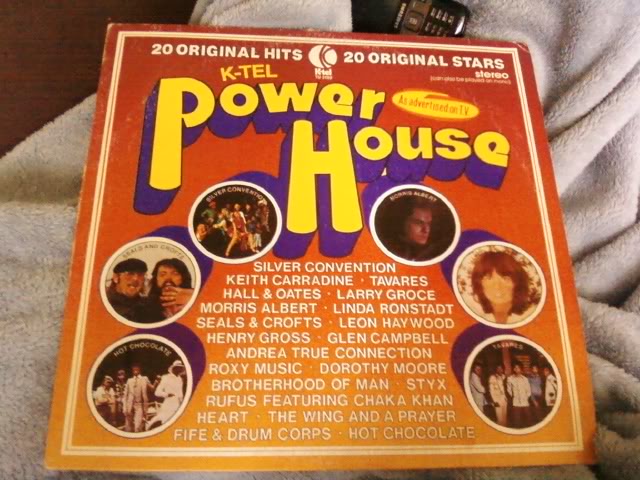
It took me about 30 minutes at Salvation Army and a total of $0.88 to find the perfect pickgaurd: K-tel's Power House, 1976, 20 original hits 20 original artists. This includes one of my favorites; Leon Haywood's "I wanna do something freaky to you".
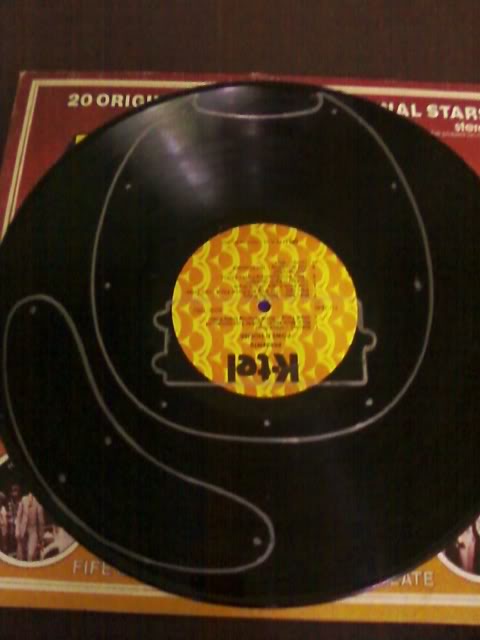
So, the other day while it was raining (again), I made my template. Don't know if you can tell but Leon Haywood (as well as Hot Chocolate) will still be visible above the pickup. And I'll have enough room to make a new cavity cover too:
Also, while shopping for cheap black parts, I endlessly searched for a retrofit bridge. Nope. Can't find a single one with the same screw configuration. I was getting really frustrated until I had another brilliant idea. One phone call and I find out that I can get the neckplate and bridge parts (sans springs) powder coated for around $20! (remember, these are solid and definitely usable) We like cheap and easy solutions.
I promise the progress posts won't be this long and have lots of pics, just wanted you to know the story up to this point.
One thing I could use some advice on is; how should I cut this record without it cracking or breaking? Thanks.
A little background: I've been playing for 17 years and doing my own set-ups and minor repairs for a lot of that time, BUT I have no woodworking experience to speak of and would not even consider doing anything resembling "building" an instrument. However, I spent a couple of years following a lot of your refin/upgrade threads and after learning a lot, I decided I could do it.
So, I went CL hunting and I found a Jay Turser MM 5 copy and a hard case for just over 100 bucks. I thought "perfect!".
Here was my original plan: Strip paint and if wood is good -natural finish (boiled linseed oil/nitro), if it's pressboard or something -metallic purple.
Change all hardware to black. Change p/g to black.
Upgrade wiring, pots and caps. Shield cavity.
Here are the things I did not think through as I should have: I don't own many tools (at all), I live in a small apartment and have no garage/shop space (at all) but, you know, I dun lernt it from TB.
The "before" pics are from the seller (read: no they're not my shoes, messy house, etc.)
It's really hard to see in the seller's pics (and I didn't get any 'befores' myself) but the string alignment is off. It lined up fine from the bridge and over the pu poles but at the nut, the B was almost off the board and lots of room between the other side and the G. I said something about it here and some people thought that bridge placement was the only cause and any other theory was "hogwash". Well, it was pretty obvious that the professionals in whatever country this bass was built in simply carved all the nut slots too far to the bass side. So, being one of those things I'm not set up to do, I took it to my trusted tech who carved up a new bone nut and got the alignment problem solved (cost me $50). I found that the bridge, neckplate and pickup were all solid (but we're going all back) but the tuning gears were made of some type of hardened plastic and slipped easily. Also the pots were in real bad shape.
Got myself Citristrip, sanding paper and block.
I was hoping that the Citristrip would only take one application since the paint/finish was obviously very thin and because I'd have to leave it poorly hidden on my small apartment porch for 24 hours. I did exactly that... and it did nothing (actually I think it did soften the clear on the neck and headstock). But, my lack of a safe, private space stopped me from continuing down the Citristrip road. Elbow grease time! Here are a couple shots during sanding (by hand).
After lots and lots of sanding, all the paint is gone and the wood looks good enough to keep natural. BUT, once the paint was off I discovered the sealant. Ugh. I tried to sand it away, but it was 10x tougher than the paint and really gummed up the sandpaper (plus this was after many hours of sanding the paint off) so, I decided that I needed help. The only person I could think of with a good collection of tools was a friend/housemate of my brother-in-law's. I bring the body to him (the neck had no sealer) and I find out that he doesn't have an orbital, belt or finish sander but he does have a grinder and an even finer grit sandpaper wheel on it than I had been using by hand (and I couldn't put a scratch in it). So I say "let's give it a shot".
It only took him about a minute while my back was turned to get the the sealant off the back and almost half the front. However, those places on the body were now covered in HUGE gashes! Great
(sorry but I did not get pics of that. Wish I had). Now I still have sealant to get off and I have to sand all these gashes out. Enter forced tool purchase: A mouse palm-sander with bag and lots of sandpaper and buffing attachments (I also got this on CL for $25). Luckily, it only took about an hour with the sander to get the back smooth and level again and now only the very deepest gashes are reduced to little "dings". After that, the weather got bad and I haven't had a chance to do anymore sanding, but it's clearing up this weekend so I'll finish the sanding next week (I have 3 kids, a business, a band and a recording project, so I have very little time to work on it).
One night in middle of all this, I thought "painting the pickgaurd just seems unimaginative and lame. What can I do to make this more creative/personalized?" Then it hit me.
It took me about 30 minutes at Salvation Army and a total of $0.88 to find the perfect pickgaurd: K-tel's Power House, 1976, 20 original hits 20 original artists. This includes one of my favorites; Leon Haywood's "I wanna do something freaky to you".
So, the other day while it was raining (again), I made my template. Don't know if you can tell but Leon Haywood (as well as Hot Chocolate) will still be visible above the pickup. And I'll have enough room to make a new cavity cover too:
Also, while shopping for cheap black parts, I endlessly searched for a retrofit bridge. Nope. Can't find a single one with the same screw configuration. I was getting really frustrated until I had another brilliant idea. One phone call and I find out that I can get the neckplate and bridge parts (sans springs) powder coated for around $20! (remember, these are solid and definitely usable) We like cheap and easy solutions.
I promise the progress posts won't be this long and have lots of pics, just wanted you to know the story up to this point.
One thing I could use some advice on is; how should I cut this record without it cracking or breaking? Thanks.
 .
.