• TalkBass has been independent since 1998. Add your voice.
    Create a free account to reply to discussions, view embedded media, and browse with fewer display ads.
    Join freeLog in
    Want zero display ads or expanded classifieds tools? Compare plans.

Gene Simmons LoBue Tribute Build

Tonight was a very brief start to my project. My father was gracious enough to make me a two piece pine blank to practice on. Maybe it's over cautious, but that's how I roll.

Finding center of the blank
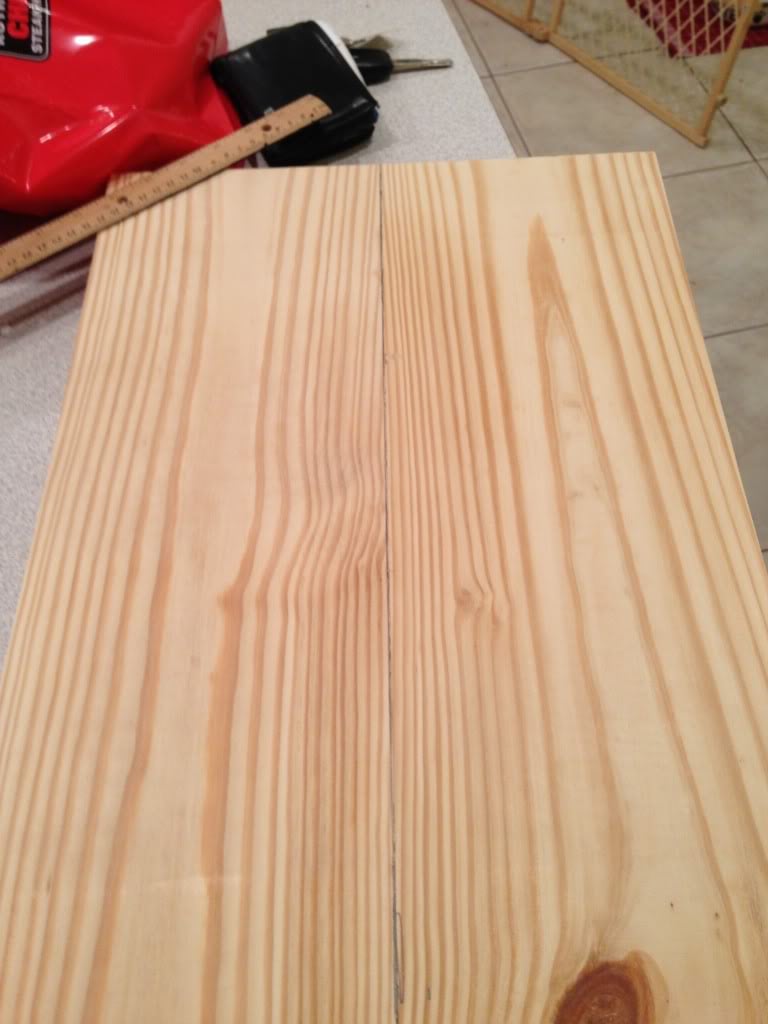
photo_zps2c45f002.jpg


Taping on the template
photo_zps0f9268be-1.jpg


Traced out! It was easier than I expected.
photo_zps63036445.jpg


I cut it out after work, tomorrow!
 
Well tonight was the body cut with my practice wood. I am SO happy I went with practice wood. I learned many things on what NOT to do.
Starting to cut with the band saw.
photo_zps1220ece0.jpg


Sanding the edges.
photo_zpsc478cfe5.jpg


Not bad.
photo_zpsb2d5188a.jpg


I'm still trying to get some of the bumpy areas out. I think I killed the sand paper on my dad's oscillating sander. Perhaps new sand paper will smooth out the concave parts of the body.
photo_zps3be0a279.jpg


I know that adding relief cuts is good when using a band saw (wood shop, high school). Tonight I learned that getting too close to the piece results in unwanted marks that sanding may not remove without compromising the body. So glad I practiced first!
photo_zps1d763ea1.jpg
 
If I might make a suggestion; rather than taking your actual body blank, and cutting and shaping it like you did the test blank, you should get a piece of 3/4" plywood or MDF and make a pattern.

This way you can take you time and shape it, and if you mess up, you can start over. it's also easier to shape than a thick piece of wood.

Then when you have it perfect, attach it to your rough cut body blank, and use a router with a pattern bit. The baring on the bit will follow the pattern and you will have the exact shape. Then you just have to round over the edge with a round over bit, and get busy with the sanding!

You can even use the practice body as a pattern to make the pattern, if it came out well.
 
If I might make a suggestion; rather than taking your actual body blank, and cutting and shaping it like you did the test blank, you should get a piece of 3/4" plywood or MDF and make a pattern.

This way you can take you time and shape it, and if you mess up, you can start over. it's also easier to shape than a thick piece of wood.

Then when you have it perfect, attach it to your rough cut body blank, and use a router with a pattern bit. The baring on the bit will follow the pattern and you will have the exact shape. Then you just have to round over the edge with a round over bit, and get busy with the sanding!

You can even use the practice body as a pattern to make the pattern, if it came out well.

I think that's a better idea. I will try tomorrow
 
Hi.

Cool build.

Even though it was highly unpopular to be a KISS fan over her when I was growing up, those guys are the reason I started to play, love LP's (guitars) and quite fast swithched to bass.

If only had I become as succesful as a few other Finnish KISS fans from that period...

The only regret I have nowadays that I didn't build an AXE bass back in the 80's when I started building instruments, a friend of mine talked me out of it "because it wouldn't look cool and it wouldn't have any re-sale value". I had the tracing and most of the parts ready, but designed something rather different.

Rather regret WHAT YOU DID BUILD than what You didn't has been my motto ever since.

Just to let everyone know what I'm doing, I'll be rewinding his mudbucker to make it a non mudbucker. Since they are sidewinder style humbuckers, they can sound just like a single coil. So I'll be winding what sounds like a fat aggressive sounding single coil.

I just rewound one from an Epiphone. It's a good way to get a different tone from your mudbucker while keeping the original look. They are also brighter than the DiMarzio Model One.

Care to reveal some details on that ;).

I bought 2 Gotohs for the parts a few years back and swapped one for a broken Epi about a year ago, so I'd like to hear some experienced observations and pointers if You'd be so kind.

On a separate thread perhaps ;).

Regards
Sam
 
I've found the key to using the spindle sander is to keep the piece moving and not to use a lot of pressure. Let the sandpaper do the work. That goes for any sanding actually. I ended up drawing random curves on scrap and practicing the bandsaw/spindle sander techniques til I got pretty good at it, then had at the MDF templates.

I like to use 3/4" MDF for templates. That way it's tall enough that you can make shallow passes if you need to and still have enough thickness to ride on
 
I've found the key to using the spindle sander is to keep the piece moving and not to use a lot of pressure. Let the sandpaper do the work. That goes for any sanding actually. I ended up drawing random curves on scrap and practicing the bandsaw/spindle sander techniques til I got pretty good at it, then had at the MDF templates.

I like to use 3/4" MDF for templates. That way it's tall enough that you can make shallow passes if you need to and still have enough thickness to ride on

Good advice. I also use a belt and disk sander, depending on if it's a concave or convex surface.
 
Today I headed to Home Depot for a sheet of MDF. $6 for a 2'X4' sheet was a steal, so messing up is pretty guilt free. Plus, I could get 3 tries with this size sheet.
photo_zps38b892e6.jpg


I also checked the thickness of my router collar. The piece I bought will work!
photo_zps96a2ea47.jpg

Cutting off a piece of MDF, I line up the template, tape, and trace it.
photo_zpse4191316.jpg

Traced out!
photo_zps2ae704e6.jpg

I used a table saw to cut the neck part.
photo_zps6c524a6d.jpg

This was a lot easier to cut and sand.

photo_zps226950cb.jpg


I still have some sanding bumps, but its much better. I will do another template tomorrow.
photo_zps9af42bfe.jpg
 

Latest posts