• TalkBass has been independent since 1998. Add your voice.
    Create a free account to reply to discussions, view embedded media, and browse with fewer display ads.
    Join freeLog in
    Want zero display ads or expanded classifieds tools? Compare plans.

Headless "bodyless" one piece Bubinga 5 string

Greetings everyone! Last year I finished up a solid Cocobolo bass for my own use, the thread is here..http://www.talkbass.com/forum/showthread.php?p=7199591&posted=1#post7199591

This new headless project I have been working on for about 6 months. During that time my camera died, so it's taken until now to get around to getting a new camera and posting what I'm doing. This will be for my own use also.

One solid plank of figured Bubinga
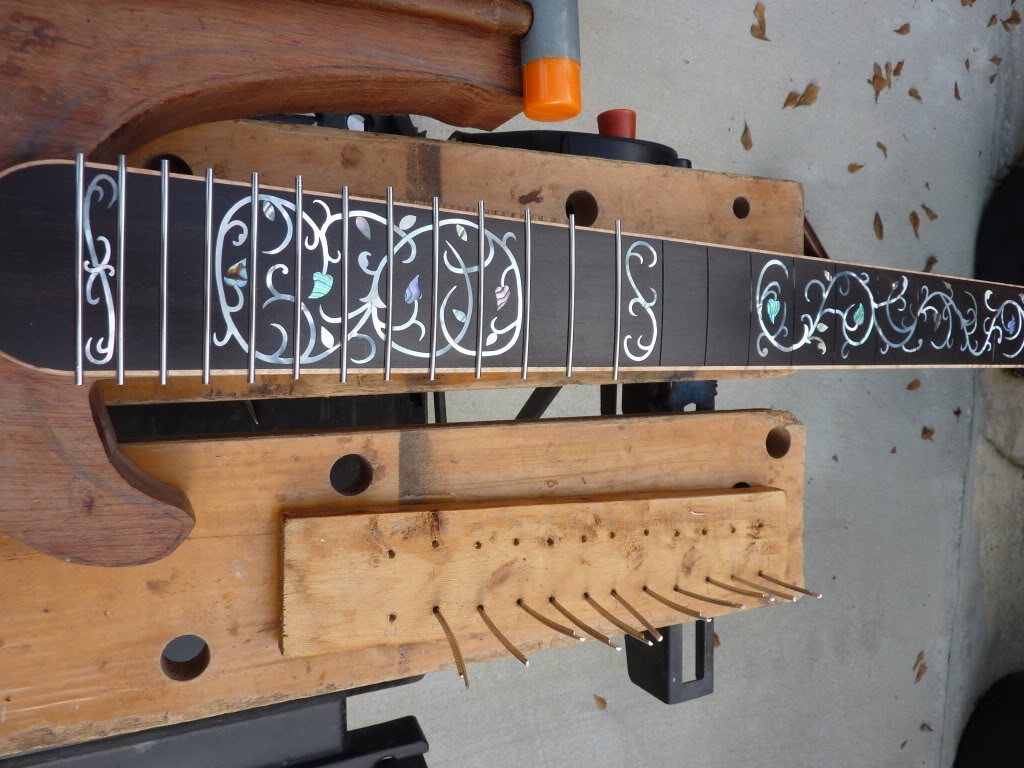
Ebony fingerboard with vine of life pearl inlay
two way truss rod and CF rods - 34" scale
Figured maple binding on the neck
EMG humbucking pickups
chrome hardware
Controls will be mounted in the top of the upper horn

Here is the pattern layed out on the 2 1/4 " X 10" X 42" solid plank of Bubinga. I got this wood from Gilmer wood in Oregon.
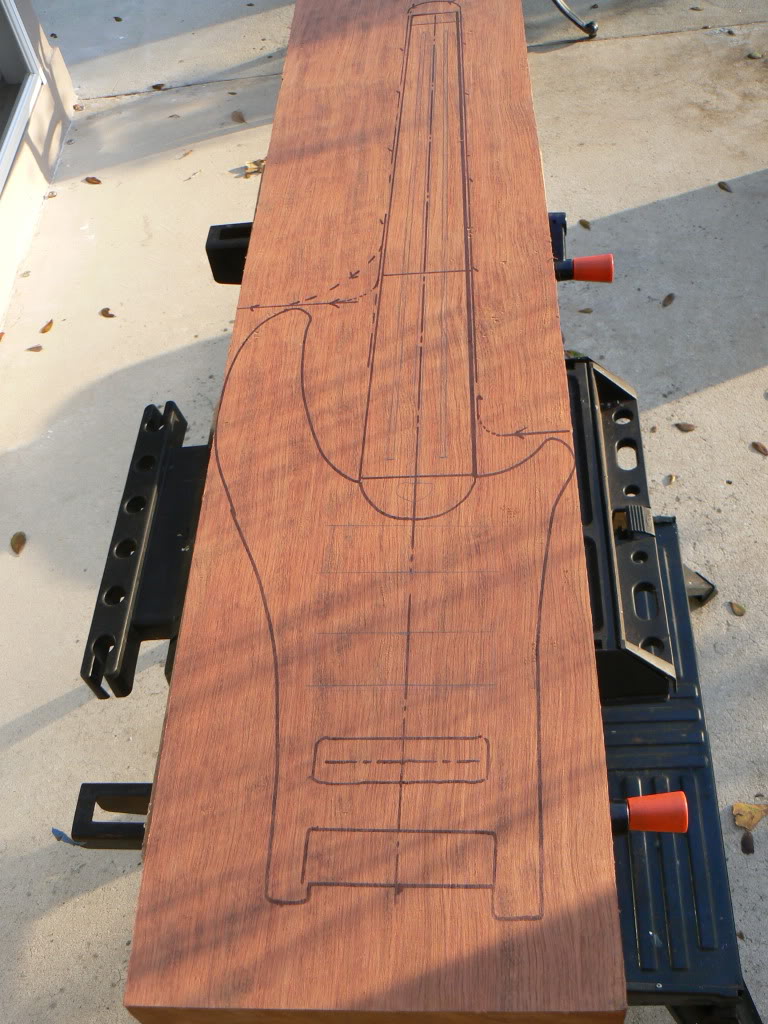
P1000277.jpg


While it was a nice big flat chuck of wood, I did all the routing I could, also taking down the body's top a little.
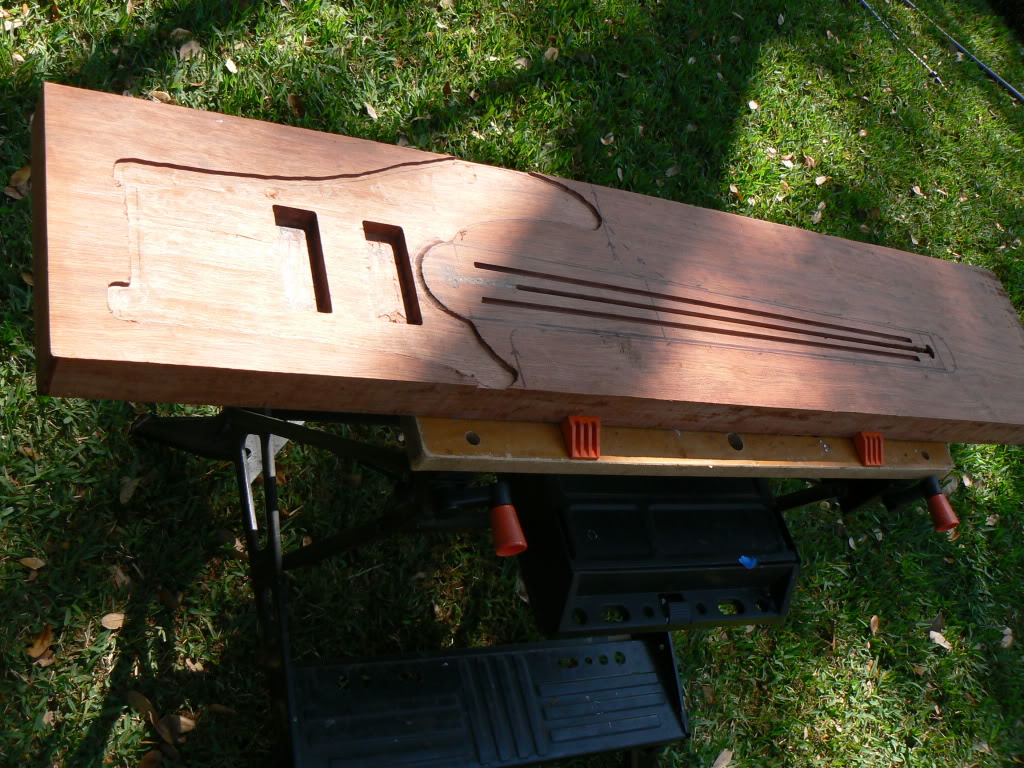
P1000296.jpg


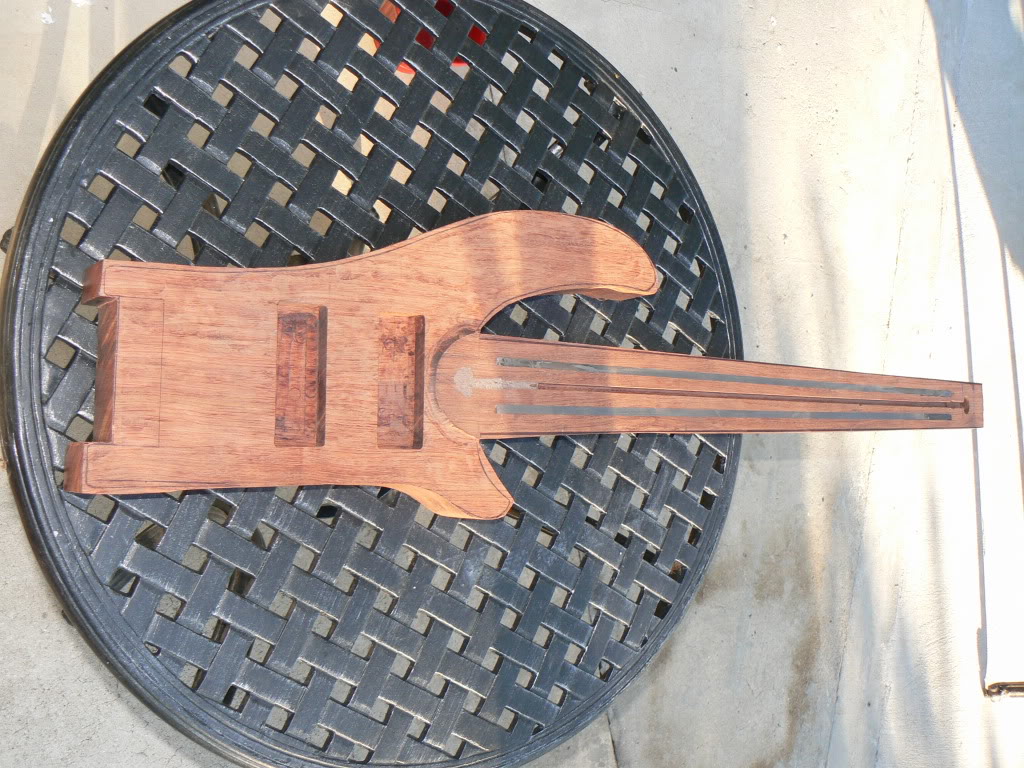
Here's bass roughed out.

P1000369.jpg


Here it is with the fingerboard attached.
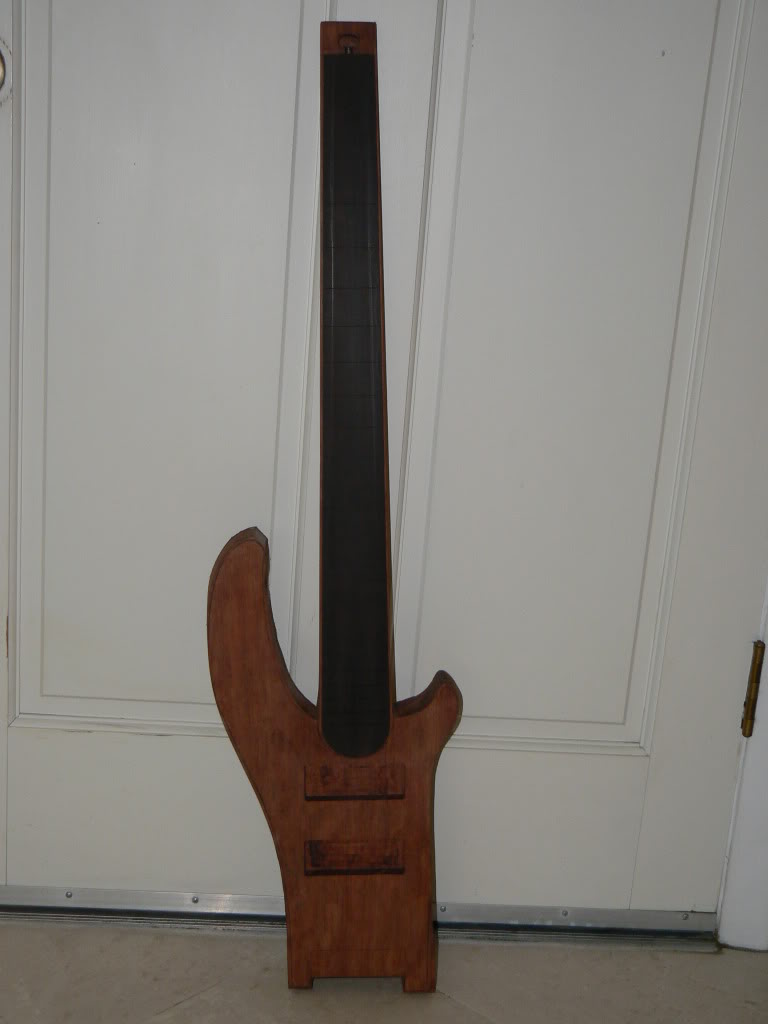
P1000373.jpg


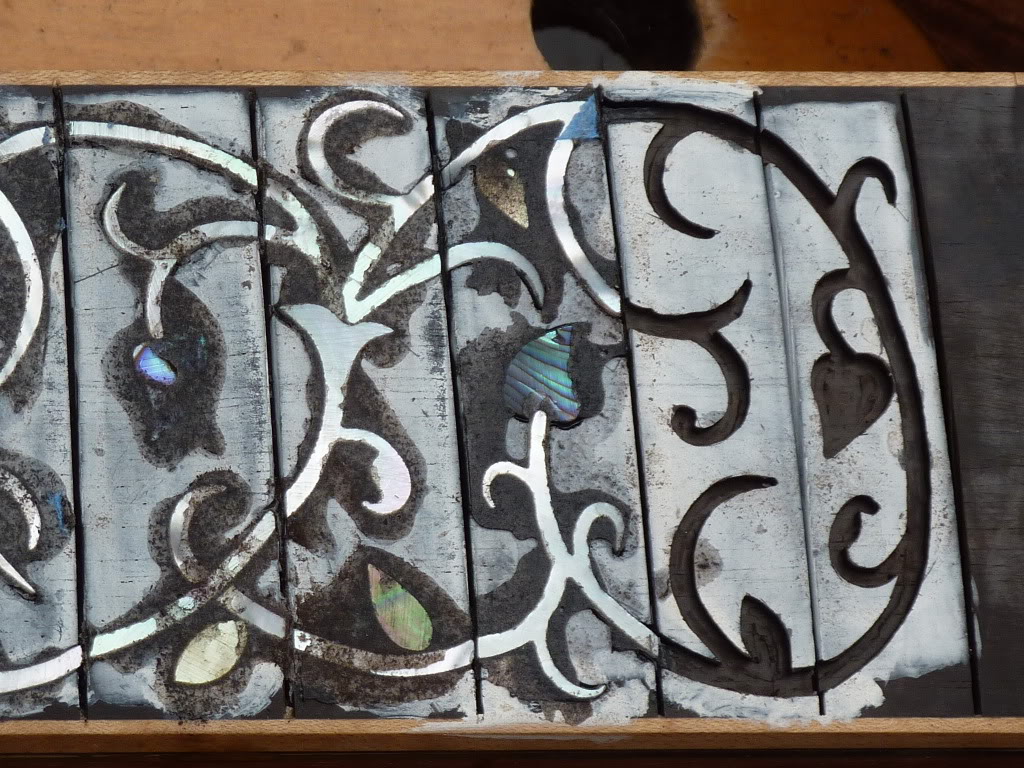
And now, the inlay work. This is VERY tedious work! I enjoy doing the inlay work, but vines like this take forever, the parts are small and hard to hang onto, and "you're putting together a puzzle, but you have to make the pieces". It turned out pretty good, and I will enjoy looking at it. I made tiny mother of pearl diamonds for the side position markers.
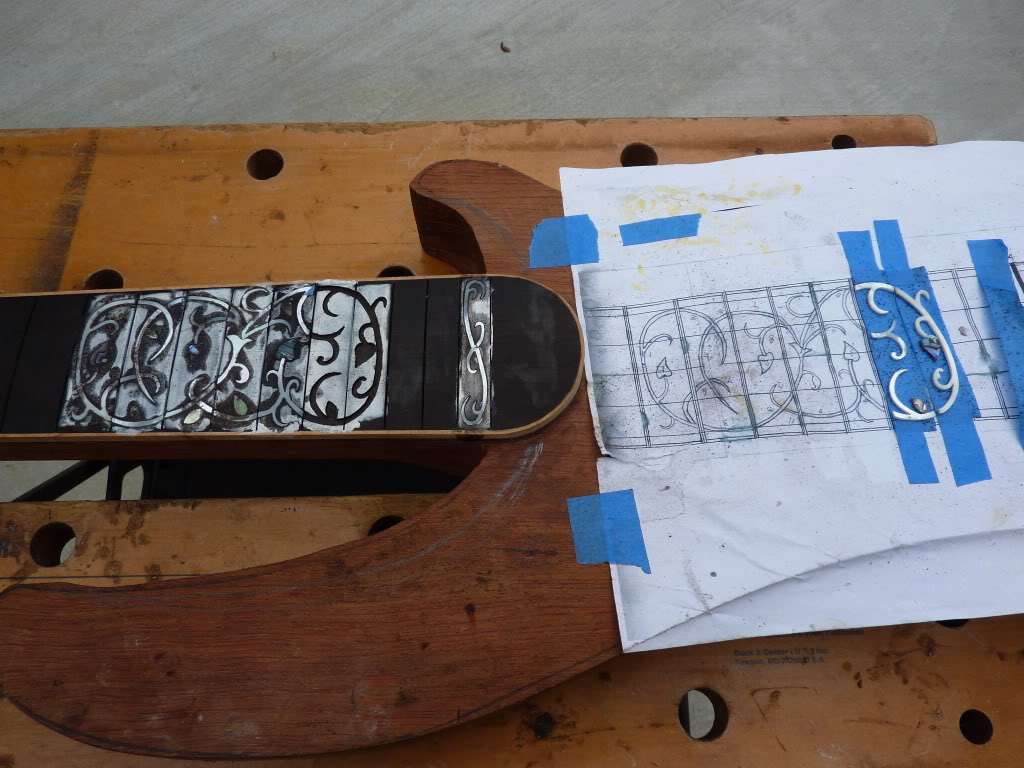
P1000035.jpg


Close-up showning the area left routed out and ready for the pearl to be epoxied in. I use a Dremel tool and 1/32" downcut router bits I get from Stewart-Mac.
P1000036.jpg


It's fret time! These are jumbo stainless steel frets.
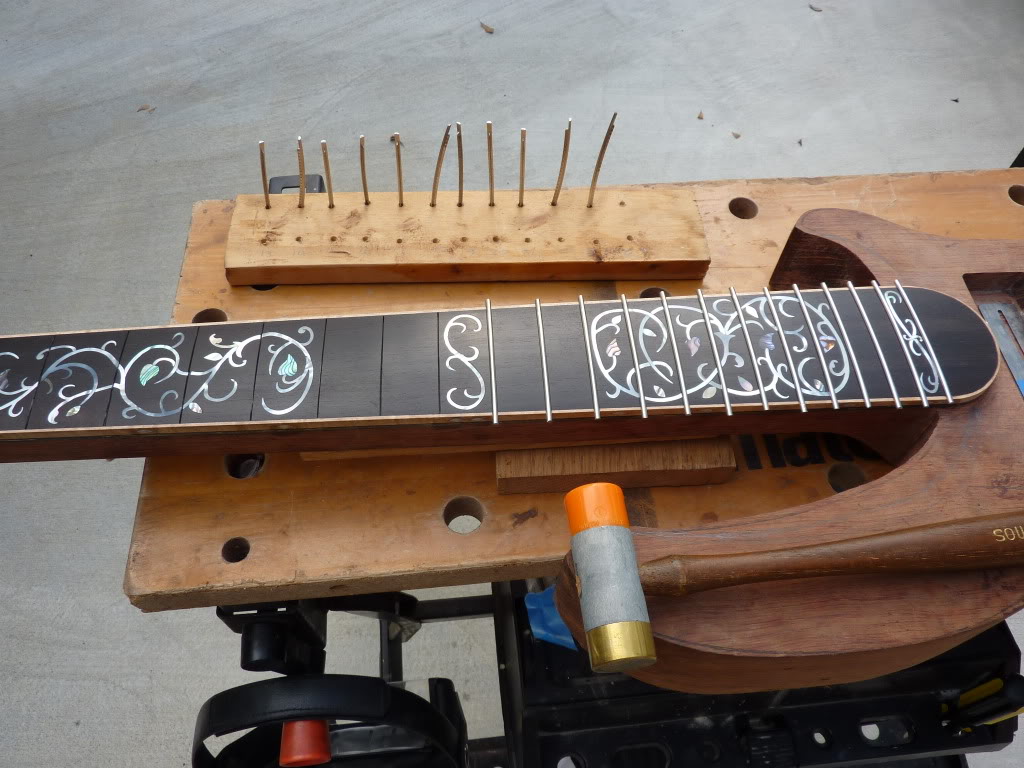
P1000073.jpg


Looking down the whole neck.

P1000075.jpg


The last two days I have been shaping down the neck, then I will start shaping down the body. I'll post more as I move along. Jim
 
:eek:

Holy sh.... that inlay work is awesome! Great job on that. To be honest, I'm a little meh about the body style (I'm kinda a traditionalist), but its not too bad if your goal is to reduce weight and increase the portability of the bass.

Overall, looking great!
 
I have to agree with the others. Inlay has always scared me I bough the holder for the dremel and a couple of bits and have done nothing with it. You did very nice work!! Can you recommend a book or how did you learn?.....Tom
 
Well, all I knew was it was a bass featured on the cover of the July issue of Bass Player magazine! Mike Gordon of the band "Phish" uses it, and I thought, "I've always wanted to make a headless, and there's a style that will work." Years ago a hardwood shop had some large pieces of ebony, and I wondered if a headless could be made out of that, but I didn't get into it.

I know I do things different, as I always make guitars and basses out of one piece of wood. I just think it's as solid a contruction plan as can be. This is more possible with something like this bass, as it's much more narrow than a full bodied bass.

A headless bass will be really different to play at first, I'm sure! It should be good when playing in cramped conditions, and as long as it sounds the same, I don't see any disadvantage. The Cocobolo bass I'm playing now is the other end of the spectrum - 35 1/2" scale and weighs 14 lb.

atBobapalusa.jpg


And, there's some beer money in the jar!! :hyper:
 
I have to agree with the others. Inlay has always scared me I bough the holder for the dremel and a couple of bits and have done nothing with it. You did very nice work!! Can you recommend a book or how did you learn?.....Tom


Thanks a lot Tom, and everyone else! I did this years ago by working for a Luthier in my two years in California from 1978-1980, and watching him. As a refresher, I bought the book "Pearl Inlay, by James E. Patterson." Here's a link...http://www.stewmac.com/shop/Books,_plans/Building_and_repair:_Inlay,_pearl_cutting.html
You just have to draw up the exact plans of what you want to make, transfer that to pearl blanks, cut them out, finish shape them with needle files. Then, I paint the fingerboard or whatever's being inlaid with white Tempura paint, use dots of glue to fasten then in place, and using a really sharp scribe tool, scribe around them. Then carefully pry the piece of pearl up WITHOUT breaking it, put on you magnifier headset, and rout out the areas until the pearl just fits in. The secret is to put some of the wood dust routed out into the epoxy that goes into the cavity so it oozes up around your work. When it's sanded down, it will be an airtight fit!
 
Thanks a lot Tom, and everyone else! I did this years ago by working for a Luthier in my two years in California from 1978-1980, and watching him. As a refresher, I bought the book "Pearl Inlay, by James E. Patterson." Here's a link...http://www.stewmac.com/shop/Books,_plans/Building_and_repair:_Inlay,_pearl_cutting.html
You just have to draw up the exact plans of what you want to make, transfer that to pearl blanks, cut them out, finish shape them with needle files. Then, I paint the fingerboard or whatever's being inlaid with white Tempura paint, use dots of glue to fasten then in place, and using a really sharp scribe tool, scribe around them. Then carefully pry the piece of pearl up WITHOUT breaking it, put on you magnifier headset, and rout out the areas until the pearl just fits in. The secret is to put some of the wood dust routed out into the epoxy that goes into the cavity so it oozes up around your work. When it's sanded down, it will be an airtight fit!

Here's a little "trick" I learned watching the guys here at Roscoe:

After you scribe the inlay and pop it off the board (and yeah, VERY carefully! :eek: ), take a piece of standard white chalk and rub it into the scribe. When the router bit hits the chalk, you will get a little "puff" of white smoke, letting you know to STOP NOW.

:)
 
Look at banjo's they have all kinds of inlay work and the fb is radiused, somewhere between 10-14.

Yes, this is a 16" radiused fingerboard. So, some of the pieces that go all the way across the board will be flush with it in the middle, and sticking up at the ends. Later, they are sanded down level with it, so you have to use a fairly thick pearl blank. These were extra large blanks, where you only get three blanks to an ounce for around $35 and are .060" thick. Regular sized blanks would have maybe 10 - 12 per oz.

Yes, I designed and cut all the pearl myself. I used a fingerboard pattern made at Fretfind.com and sketched out the design in pencil, then inked it in when I liked it. I made a couple of copies of it, then number each little segment, cut them out and white glue them to the pearl, and it's jewelers saw time!

I have made a couple of guitars for other people, but mostly just get ideas for things and make them. In the '70's, I played a solid maple bass-12 string guitar electric doubleneck that I made. This thing must have weighed 20 lbs! I haven't advertised about doing pearl work, or bass building, but think that if I'm out playing my stuff, some rich musician will see them, and ask me to build them something. I really am just a "backyard builder." I have a work bench with a band saw, but just set up a folding wood working table in the yard and work out there a few hours whenever I can. Who knows, maybe I'll look into advertising my stuff. There's a couple of guitars makers around the area that I've thought I could approach to do work for, inlay, whatever. BUT, now that I'm retired, my job is to just do as little or as much as I want. Hey, the sun's out, gotta head down to the beach! :cool:
 
Yes, this is a 16" radiused fingerboard. So, some of the pieces that go all the way across the board will be flush with it in the middle, and sticking up at the ends. Later, they are sanded down level with it, so you have to use a fairly thick pearl blank. These were extra large blanks, where you only get three blanks to an ounce for around $35 and are .060" thick. Regular sized blanks would have maybe 10 - 12 per oz.

Yes, I designed and cut all the pearl myself. I used a fingerboard pattern made at Fretfind.com and sketched out the design in pencil, then inked it in when I liked it. I made a couple of copies of it, then number each little segment, cut them out and white glue them to the pearl, and it's jewelers saw time!

I have made a couple of guitars for other people, but mostly just get ideas for things and make them. In the '70's, I played a solid maple bass-12 string guitar electric doubleneck that I made. This thing must have weighed 20 lbs! I haven't advertised about doing pearl work, or bass building, but think that if I'm out playing my stuff, some rich musician will see them, and ask me to build them something. I really am just a "backyard builder." I have a work bench with a band saw, but just set up a folding wood working table in the yard and work out there a few hours whenever I can. Who knows, maybe I'll look into advertising my stuff. There's a couple of guitars makers around the area that I've thought I could approach to do work for, inlay, whatever. BUT, now that I'm retired, my job is to just do as little or as much as I want. Hey, the sun's out, gotta head down to the beach! :cool:

I didn't realize pearl came that thick. thanks

Sun out? Today? Man you are in a big time different part of Florida then I am chilly and nasty here 30miles SW of Daytona beach.....t
 
Here's a little "trick" I learned watching the guys here at Roscoe:

After you scribe the inlay and pop it off the board (and yeah, VERY carefully! :eek: ), take a piece of standard white chalk and rub it into the scribe. When the router bit hits the chalk, you will get a little "puff" of white smoke, letting you know to STOP NOW.

:)

wow, that is neat. Thanks for the chalk tip; when i finally move into real inlay i'll give it a try.
 

Latest posts