• TalkBass has been independent since 1998. Add your voice.
    Create a free account to reply to discussions, view embedded media, and browse with fewer display ads.
    Join freeLog in
    Want zero display ads or expanded classifieds tools? Compare plans.

How do you avoid sand throughs?

Hey everyone, hoping you could help me. I joined the forum in part due to my recent interest in bass, but also because I've often noticed that there are many finishing experts here:

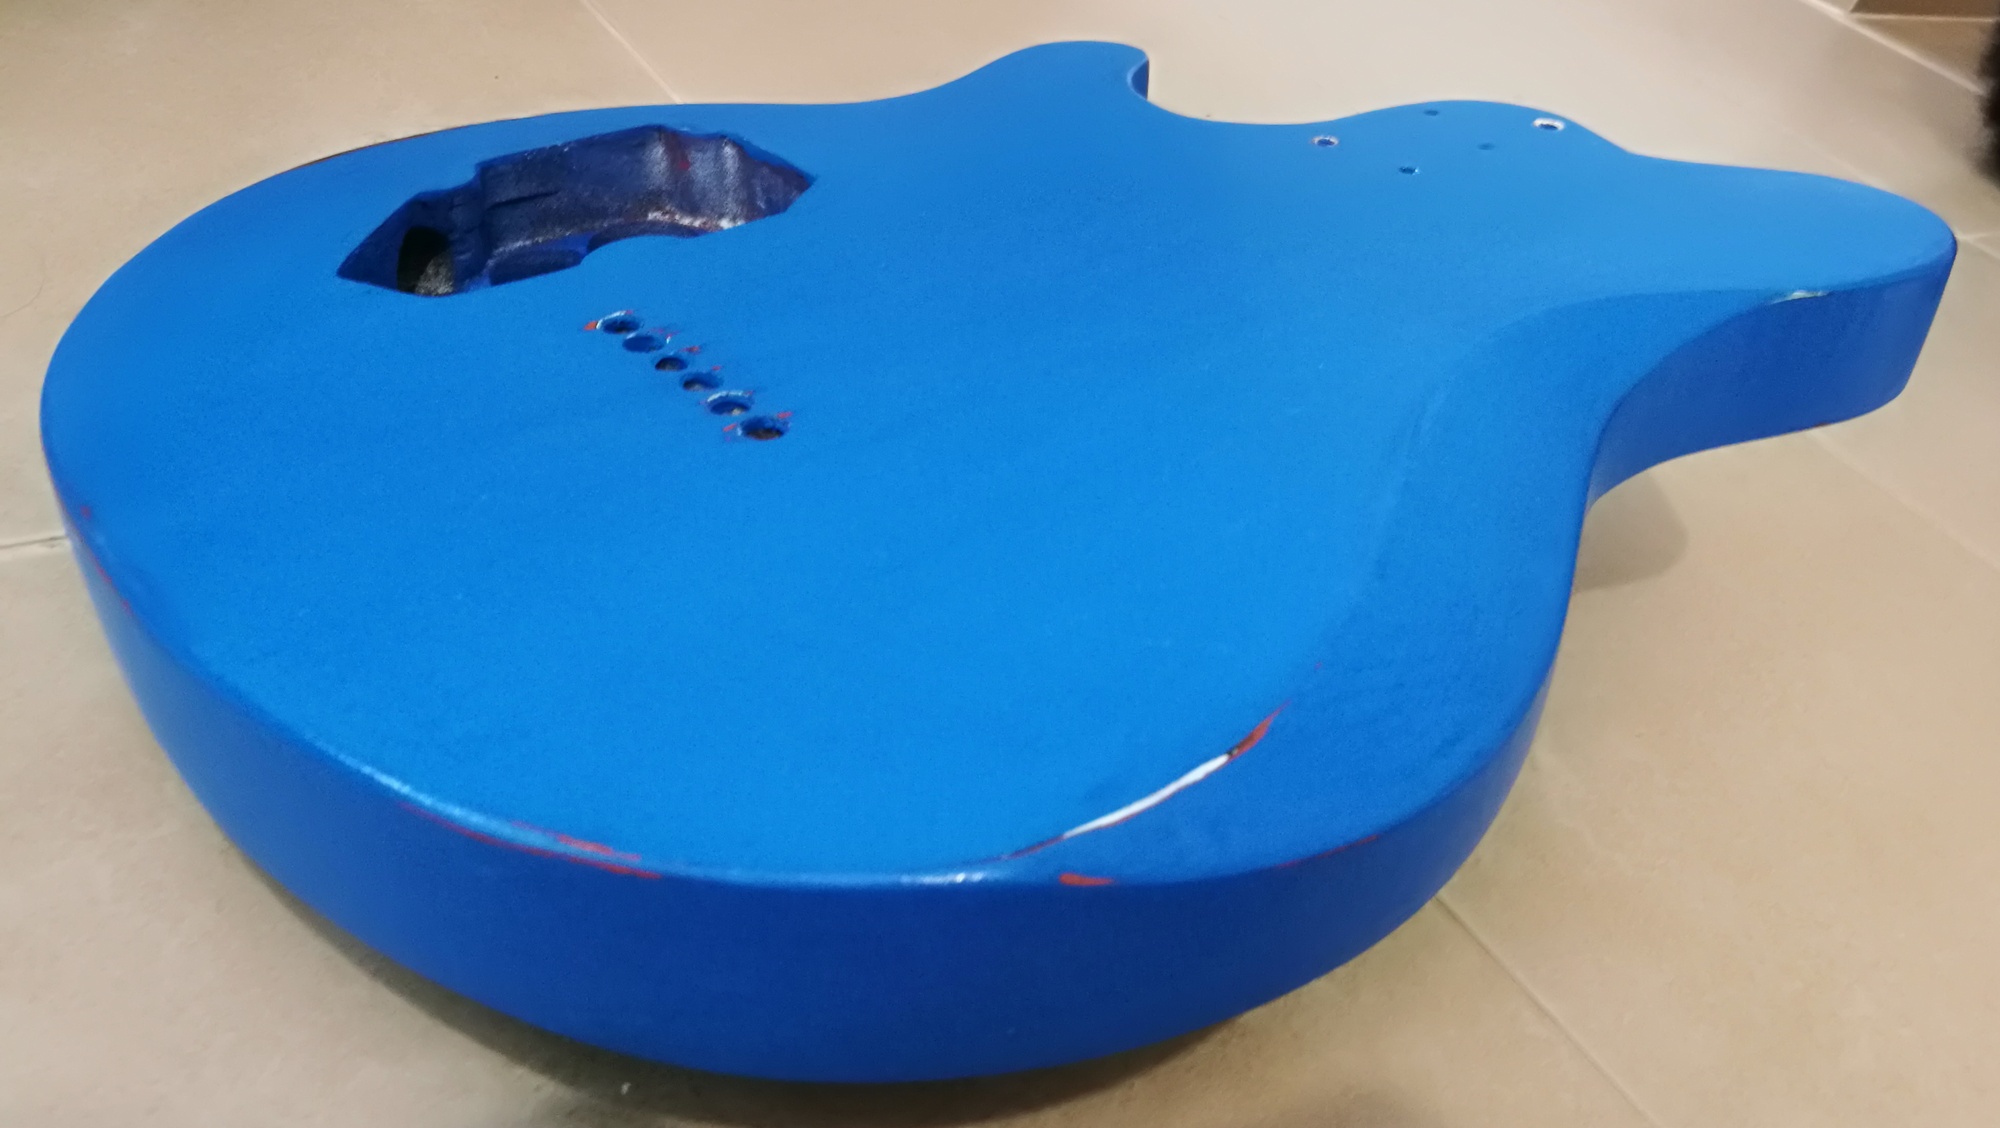
This is my current build. I sprayed Rust-Oleum 2x color (that's all I've got available...), and the plan is to paint some designs before the clear coat (so I can't just spray the clear within the respray window of the color), so I sanded the color coat now, in order to help the clear coat adhere when I spray it, but I can't seem to avoid sand throughs.

This was with wet sanding with P400 (not CAMI 400).

Obviously I'll have to respray the color, but then what? Should I try wet sanding with P800 I instead of P400? I'm concerned that if I move to too fine of a grit, then the clear coat won't stick i.e. I'll be defeating the whole purpose of the sanding in the first place.
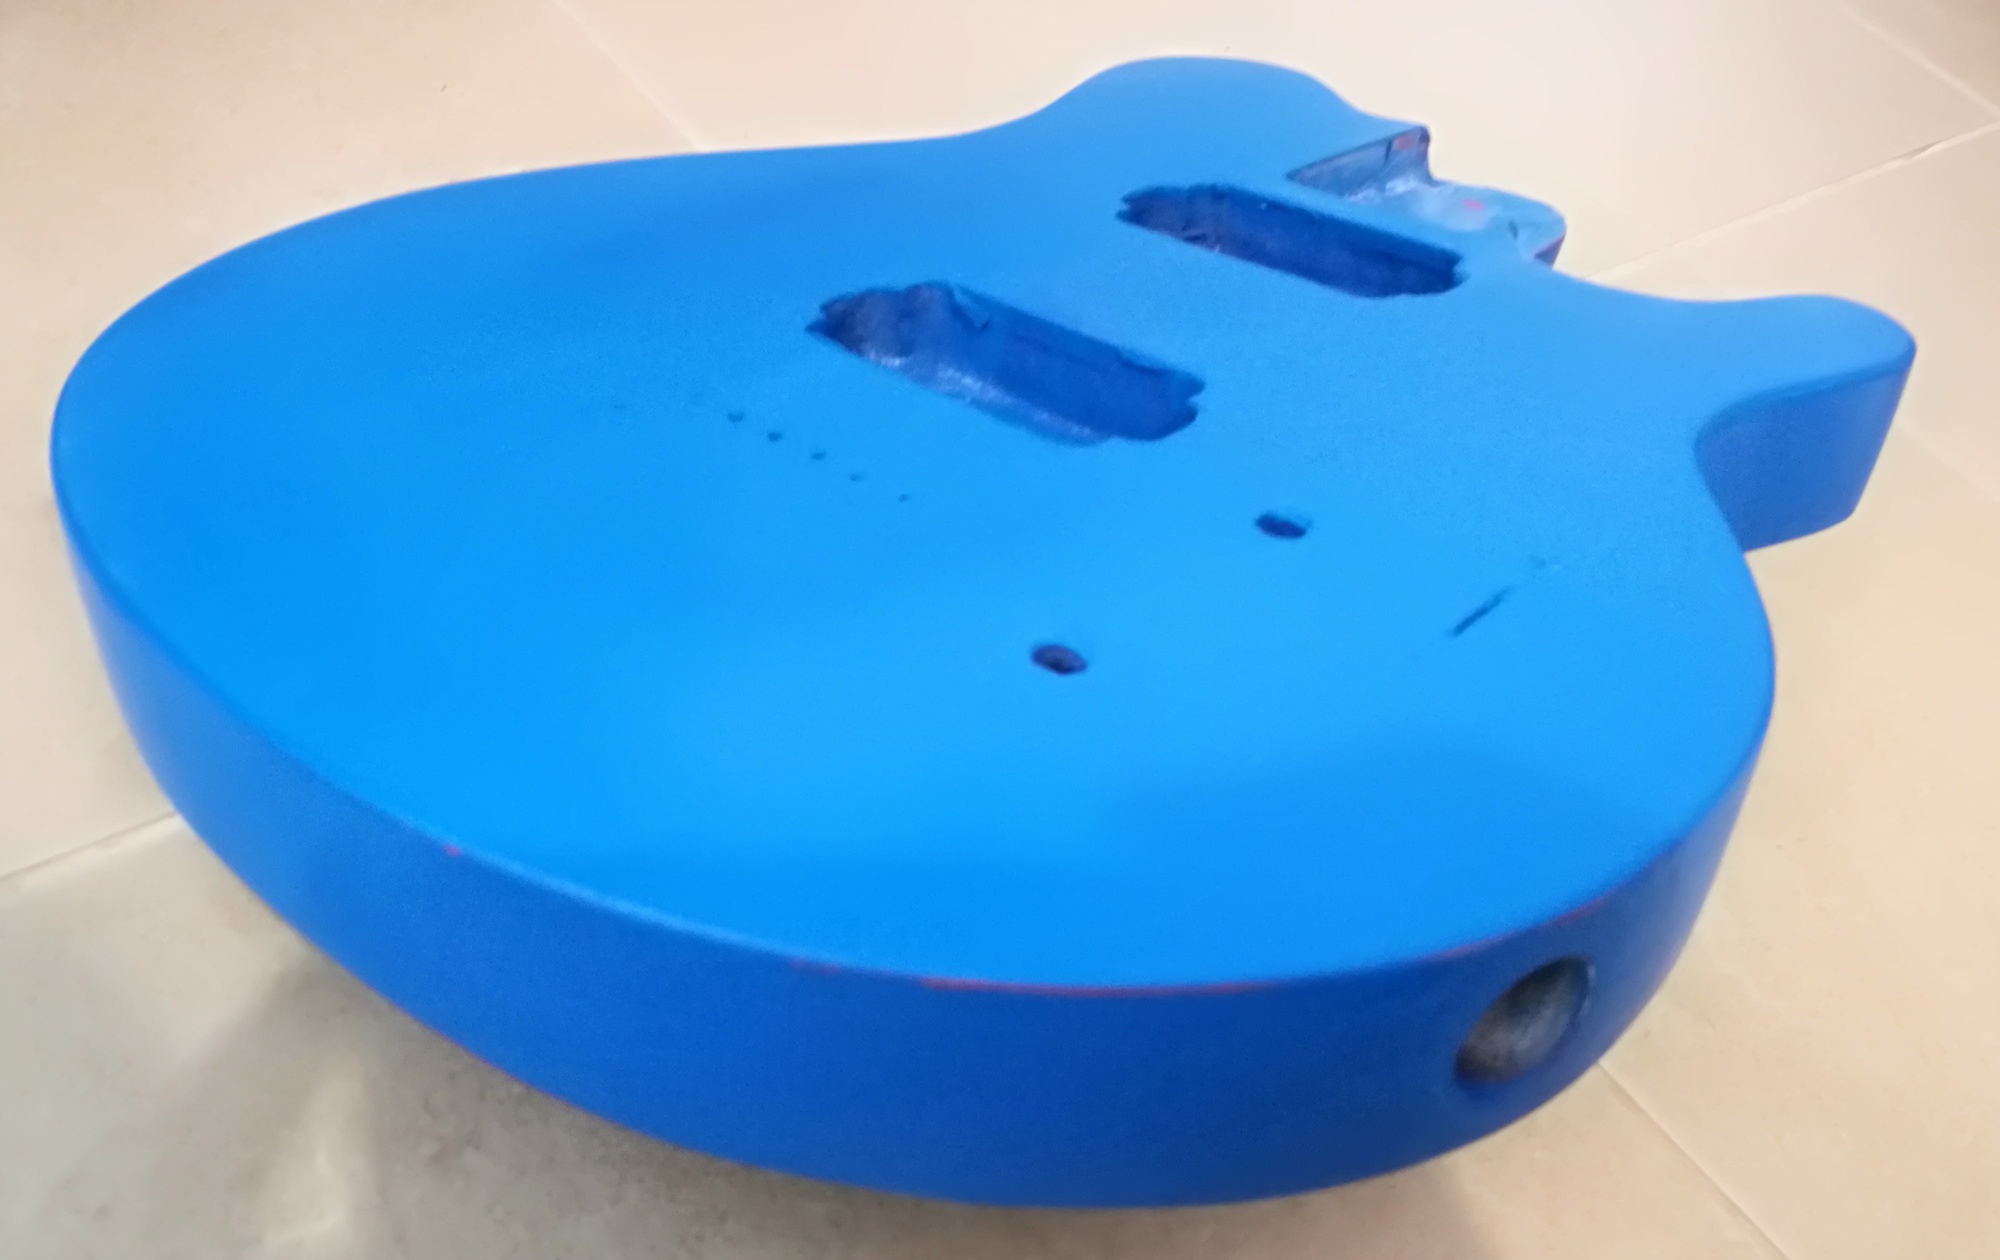
pinetopsanded_edited.jpeg
pinebacksanded_edited.jpeg
 
The common wisdom seems to be dont sand the color coat, except maybe very lightly to remove dust motes, and then lay on enough clearcoat to avoid sanding through that. Easier said than done, of course. One trick I read is to use a white cloth to wipe down while you are wetsanding clearcoat, if you cut through, the color will show on your white rag, at which point you STOP, and add a couple more clearcoats. I did that on a black painted bass, and it worked pretty well. When in doubt, add more layers of clearcoat. I dont happen to believe that a thick layer of finish somehow "strangles the tone", but some do. Until I see a convincing blind test proving it, I'll keep going as thick as I need to to avoid sanding through. The only other advice I can think of is avoid the edges until you get to much higher grit. Those edges are a small % of the total area, you kind of have to concentrate on them late in the process. Some people dont sand them at all, and just rely on the buffer. I just do it by hand, really slow, really careful.
 
Last edited:
The common wisdom seems to be dont sand the color coat, except maybe very lightly to remove dust motes, and then lay on enough clearcoat to avoid sanding through that.
The question is if it's needed for the clear coat to have something stick to, as this isn't lacquer which would blend into itself, but enamel. I've seen so many differing opinions on this, some people say that you absolutely must rough up the surface before the clear (unless you're spraying it while the color is still wet), other poeple seem to be in the "don't sand" camp, even when it comes to enamel (and not only lacquer)

By the way, that's a great tip about the clear coat sanding (to detect color on the rag)!
 
  • Like
Reactions: Gilmourisgod
Only sand the color if needed to fix dust nibs or other “issues.” If you want, scuff the color with a grey or white Scotchbrite pad, carefully, before the clear but it’s not always necessary. If in doubt, follow the manufacturer recommendations.

To avoid sand throughs on the clear, use more then you think you need. IME spray cans don’t lay down a whole lot of material anyway so if, for example, you think you’re good after 2 cans, lay down another can or two of clear.

Check out some of Brad Angove’s videos on the YouTubes. He has a number of good spray can tutorials.

Also, in the basses section there’s a rattle can refinish club. Someone there probably has experience with Rustoleum.
 
I guess the question is, how rough does the colorcoat have to be to get some "tooth", Im guessing not a whole lot, but havent worked much with enamel. I did some dreadful rattlecan jobs when I was younger, and a fair bit of back yard auto painting, but I still find finish work the most difficult part of building a bass. Ive chickened out recently and gone with oil finishes, but I have at least one more painted bass in mind, so I'll be doing this again! You might get better advice by posting this in the Rattlecan Refinish Club thread. Those guys got some Chops!
 
I've done some work with Rustoleum 2x, so I'll add my $1.95 (two cents after inflation and current exchange rates).
I've used the Rustoleum 2x primer on all of my swirl projects, never scuffed it at all before applying the swirl coat (which is the color coat), and then never scuffed the "color coat" before applying clear. I've done this both with Rustoleum 2x clear and with automotive 2K clear (not the same thing), and never scuffed the color coat before applying the clear. When doing either "brand" of clear, I will empty a whole can on a single guitar body. The 2K will harden in the can anyways once punctured, so why not just put it all on? You paid for it. Either way, I want plenty to sand. Stay away from sharp edges, I like the white cloth method. Reapply more clear if needed, don't be stingy with it.
 
I avoid sand throughs by not sanding the edges. :D I've also found that the surface preparation process has a lot to do with successful painting, especially ensuring you've blocked it flat. I also raise the grain +++ and micro-steam the surface before final sanding and sealing. When I used rustoleum 2x to paint my daughter's shelves gloss white, I did one coat of primer and two coats of 2x gloss and then just wetsanded the paint itself. It's definitely very glossy. :) I also didn't sand the corners or edges at all, just let the block ride over the flat surfaces. On the final buff, I buffed the corners and edges and didn't burn through. I like rustoleum 2x, it's so very much different from rattle can formulations from a decade ago. :thumbsup:
 
  • Like
Reactions: Changed5Times
I’ve got a few guitar finish jobs under my belt. Few thousand that is. So. You don’t need to sand the color coat at all. Couple of other people in this thread have said it and they are correct.

Now, for the place where you’re going to run into a meatgrinder; you’re using that damn Rustoleum stuff. What do you plan to use for clear coat? That rustoleum is going to come up in chunks if you use lacquer. So you can’t use lacquer.

(you can put enamel on lacquer - shouldn’t but you can - but not the other way around)
 
Last edited:
Well, I don't finish guitars but I do tons of woodworking. What I've learned is that 400 grit is actually pretty aggressive stuff if all you are trying to do is knock down finish. Try 800 or even 1200, and as others have said, avoid the curves- its very easy to remove too much on a curved plane. And never use the paper dry, always wet.
 
Well, I don't finish guitars but I do tons of woodworking. What I've learned is that 400 grit is actually pretty aggressive stuff if all you are trying to do is knock down finish. Try 800 or even 1200, and as others have said, avoid the curves- its very easy to remove too much on a curved plane. And never use the paper dry, always wet.
Quoted for emphasis. I missed the same comment in my post above - I start wetsanding with 1000 and only work back down to 800 if the 1000 can't completely level the surface. If I need to go lower than 800, the surface prep didn't get it flat enough or it's laid on too rough and orange peely. :thumbsup:
 
Last edited:
I use a bowl full of water and dish soap with a good light. I typically use 600 grit but often 800 to 1000. You are going to sand through…it happens. Just respray and keep at it.

Once you get the paint good enough (you really don’t need to get the paint perfectly flat…I often don’t even bother sanding it at all) move onto spraying as much clear as you feel needed with the understanding that you’ll likely sand through and have to spray more coats to cover certain areas. Take your time, patience is key. Follow the directions on the can and watch the humidity. Once dried, progress from 400/600 to 800—3000 and then buff. Only buff once fully cured. Voila, a nice finish.

As another poster said, use common sense in the grit choice. I like to start at 600, but I may start at 800 if I feel like the surface is pretty level.
 
  • Like
Reactions: Changed5Times
Don't sand the color coat, use enough clear with the least amount of sanding possible. Also use finer sandpaper. I've done refinishing for over 20 years and the only "sand throughs" were from an issue in the clear that wouldn't easily sand smooth. (runs or dirt). I also was using pro grade finishes with catalyzed urethane clear. It has higher build and is a lot more forgiving.
 
  • Like
Reactions: Changed5Times
Keep in mind that the "P" grits are more course... and this shows up more when going into higher grits. Sand the color coat minimally if at all. If you must, use 600-800. Unless you have a sag or a run, there is no need.

Let the clear coats bury the imperfections, then level sand the clear coats. I start level sanding my clear coats at 1000, and I do it dry with a random orbit sander, very quickly. I wet sand at 1500 and 2000, then it's on to polishing. (I've been using a small car detail buffer with foam pads and 3M compounds for that)

Above all, I never, ever, sand the outside corners by hand. The polishing steps take care of those automatically.
 
spray the color coats til satisficed.. let set for 3 days.. clean with windex just to get excess dust off.. put design on.. once dry.. then very light coat of clear.. the coat it 4 more times(i thick coat, 3 regular coats) the sand and polish for orange peel.. you go though 2 cans of clear.. guessing..