- Dec 20, 2004
- 4,267
- 2,481
- Disclosures
- Player-Builder-Founder: Honey Badger Pickups & Regenerate Guitar Works
Just completed my second neck in two days, and thought I'd share the process I'm currently using. I won't go into how I determined the locations for the inserts, as it matches the same process you'd use if using wood screws instead.
Once I have the locations determined, it's time to head out to the ShopSmith for a little action. I am utilizing the horizontal boring capbility for all of this activity, so rest assured that the images do not need rotation.
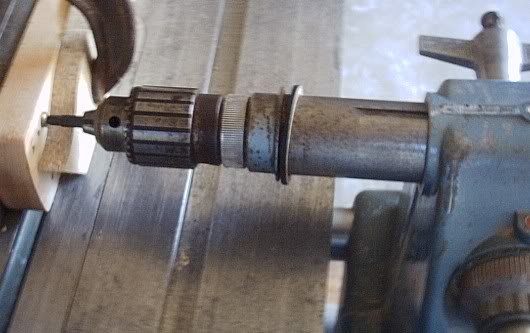
In the first image, I have lined-up the hole location, and clamped the neck. I have also set the bore depth, but I have the drill bit marked with blue tape as a reference just in case.
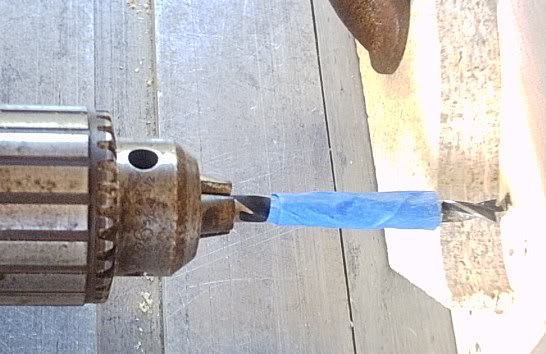
After the hole is properly bored, it's time to switch out the drill bit for a phillips head bit. Take note that I do not unclamp the neck at this point - everything must remain aligned! After the bit is locked in, I thread a phillips screw into the insert and add it to the end of the bit before bringing it into contact with the neck.
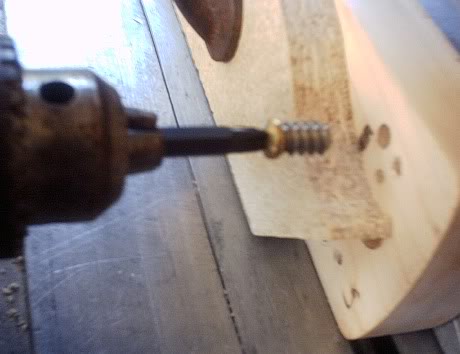
After I have contact and double check that everything is going in straight, I keep gentle pressure on the bore while slowly turning the insert into the neck. SLOW and steady is the key to a successful install. It's also a good idea to use the screw as your tunring point vs the slotted ears on the insert. This will keep you from breaking off one of the ears and finding yourself in a real jam.
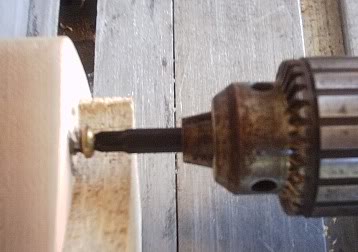
I continue to thread the insert into the neck until the screw is snugly flush with the neck. I'm thinking that I may utilize a small washer on my next install so I can set the insert just a smidge deeper than flush.
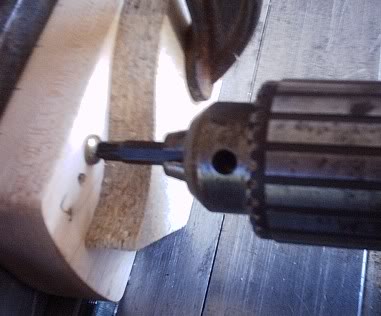
Now it's time to back the bore away and remove the screw from the insert. Three more to go and this neck is ready for installation on the bass.
Here's the insert completely installed. I'll update this with a better image from my next neck, as this is a little blurry. Still, you get the idea.
All the best, and may all your threaded neck inserts be crack free!
R
Once I have the locations determined, it's time to head out to the ShopSmith for a little action. I am utilizing the horizontal boring capbility for all of this activity, so rest assured that the images do not need rotation.
In the first image, I have lined-up the hole location, and clamped the neck. I have also set the bore depth, but I have the drill bit marked with blue tape as a reference just in case.
After the hole is properly bored, it's time to switch out the drill bit for a phillips head bit. Take note that I do not unclamp the neck at this point - everything must remain aligned! After the bit is locked in, I thread a phillips screw into the insert and add it to the end of the bit before bringing it into contact with the neck.
After I have contact and double check that everything is going in straight, I keep gentle pressure on the bore while slowly turning the insert into the neck. SLOW and steady is the key to a successful install. It's also a good idea to use the screw as your tunring point vs the slotted ears on the insert. This will keep you from breaking off one of the ears and finding yourself in a real jam.
I continue to thread the insert into the neck until the screw is snugly flush with the neck. I'm thinking that I may utilize a small washer on my next install so I can set the insert just a smidge deeper than flush.
Now it's time to back the bore away and remove the screw from the insert. Three more to go and this neck is ready for installation on the bass.
Here's the insert completely installed. I'll update this with a better image from my next neck, as this is a little blurry. Still, you get the idea.
All the best, and may all your threaded neck inserts be crack free!
R