

Enjoy the benefits of a premium membership!
Upgrade Account
-
TalkBass has been independent since 1998. Add your voice.
Create a free account to reply to discussions, view embedded media, and browse with fewer display ads.
Join free Log in
Want zero display ads or expanded classifieds tools? Compare plans.
You are using an out of date browser. It may not display this or other websites correctly.
You should upgrade or use an alternative browser.
You should upgrade or use an alternative browser.
Leafenbacker
- Thread starter mapleglo
- Start date
More options
Who Replied?
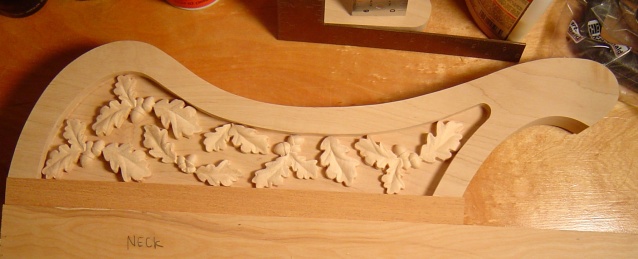
I tried a few different layouts for the upper wing after I spent some time sanding today. Too sparse again?
You know, if it weren't for that darn day job, I could get a lot more done, much more quickly...
That looks really good. Not to a forest, but not a desert either.
Just perfect! Glue it up!


That looks pretty good. If you look at Lemmy's bass there's a texture carves in between the leaves. Are you planning on doing something similar?
The texture adds nothing.
I actually like the look of this bass better than Lemmy's. It's a little more clean of a design.
When she gets it done, she will have to make sure Lemmy sees it.

Thanks for all the input, everyone 
Yes, I've decided that I'm going to keep the insert areas smooth. And I'd be happy to show it off to Lemmy when it's done
I plan on gluing up the mahogany strips to the wings tomorrow, and I'll place the order for the neck and last few oak leaf onlays. Pictures forthcoming.
Still trying to decide how I'm going to glue in the onlays, though I'm leaning toward the super glue. I'll have to take a look at the available super glue options. I'd like to see some of the gel CA. If it's not available locally, I'll have to order some. I seem to remember seeing some at StewMac.
Yes, I've decided that I'm going to keep the insert areas smooth. And I'd be happy to show it off to Lemmy when it's done
I plan on gluing up the mahogany strips to the wings tomorrow, and I'll place the order for the neck and last few oak leaf onlays. Pictures forthcoming.
Still trying to decide how I'm going to glue in the onlays, though I'm leaning toward the super glue. I'll have to take a look at the available super glue options. I'd like to see some of the gel CA. If it's not available locally, I'll have to order some. I seem to remember seeing some at StewMac.
I glued up the mahogany strips to the body wings this morning.
Lower wing:
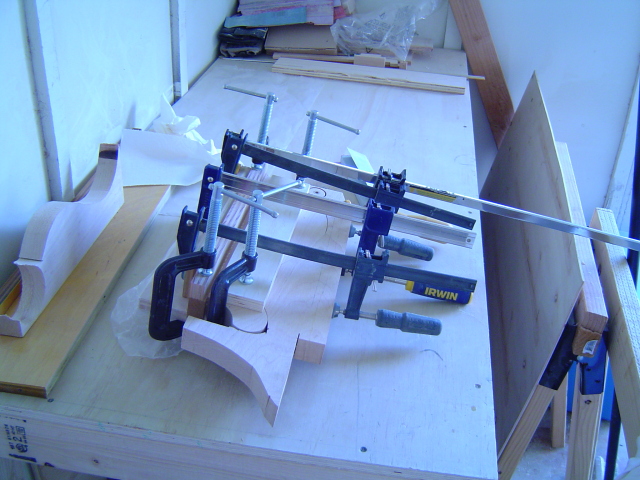
and upper wing:
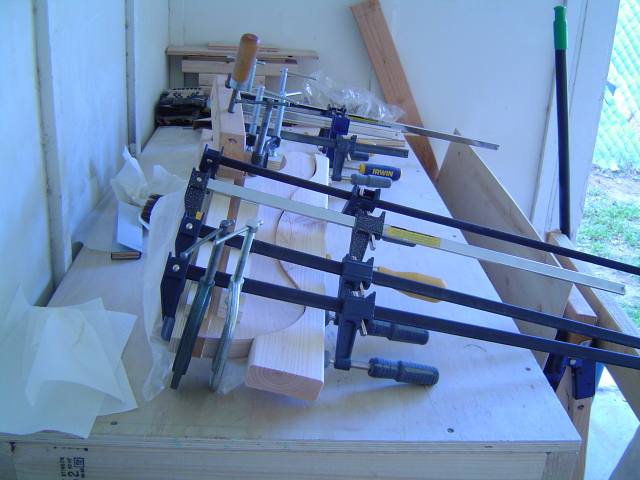
I couldn't find the maple cutout from the upper wing, so I just cut one from a piece of 2x4.
I also ordered the neck from Carvin, complete with the upgraded TUSQ nut for better compatibility with the soon to be ordered tremolo bridge. And placed the *final* order for a few more oak leaf onlays. I think the onlays were the most expensive part of this build.
Once the glue cures for the mahogany strips, I'll do a final shaping of that area of the body wings, and at that point, it'll be a waiting game for the neck to arrive. In the interim, I'll pay down the credit card and order the bridge, and make a final decision about the pickups. Sam Ash shows the RIC HB1 pickups on their website for $75.00, but they have never been in stock for the past 6 months or so. If it remains that way, I'll either order the standard single coil ones from Classic Amplification, or, I've been toying with the idea of rolling my own. I saw an old sewing machine on Craig's List for $25.00, which could be converted to a pickup winder. That might be an interesting experience.
Lower wing:
and upper wing:
I couldn't find the maple cutout from the upper wing, so I just cut one from a piece of 2x4.
I also ordered the neck from Carvin, complete with the upgraded TUSQ nut for better compatibility with the soon to be ordered tremolo bridge. And placed the *final* order for a few more oak leaf onlays. I think the onlays were the most expensive part of this build.
Once the glue cures for the mahogany strips, I'll do a final shaping of that area of the body wings, and at that point, it'll be a waiting game for the neck to arrive. In the interim, I'll pay down the credit card and order the bridge, and make a final decision about the pickups. Sam Ash shows the RIC HB1 pickups on their website for $75.00, but they have never been in stock for the past 6 months or so. If it remains that way, I'll either order the standard single coil ones from Classic Amplification, or, I've been toying with the idea of rolling my own. I saw an old sewing machine on Craig's List for $25.00, which could be converted to a pickup winder. That might be an interesting experience.
Found this sewing machine at the thrift store for $40.00. Time to do some pickup winding research.

Try here:
music-electronics-forum.com/f11/
These guys are a good mix of pros and newbies and quite helpful. Some talkbass members in there, like David Schwab of SGD Lutherie for example.
music-electronics-forum.com/f11/
These guys are a good mix of pros and newbies and quite helpful. Some talkbass members in there, like David Schwab of SGD Lutherie for example.
Try here:
music-electronics-forum.com/f11/
These guys are a good mix of pros and newbies and quite helpful. Some talkbass members in there, like David Schwab of SGD Lutherie for example.
Wow, thanks! What a great resource. Just killed about an hour watching videos and looking at parts. This looks very doable. Of course, I say that now...

The bass looks great, i think that rickenbacker should employ you , the mahogany looks beautifull.
cheers!
, the mahogany looks beautifull.cheers!
The bass looks great, i think that rickenbacker should employ you
cheers!
Thanks! That would be a dream job, working for Rickenbacker
The mahogany should darken some more once I spray it with lacquer.

Thanks! That would be a dream job, working for Rickenbacker
Try dealing with Mr. Hall et al, and then get back to us.
Regardless, what you've got looks good to me.
Try dealing with Mr. Hall et al, and then get back to us.
Regardless, what you've got looks good to me.
But think of the employee discounts!
Thanks


this is awesome! subbed!
Thanks!
I've wanted to build a Ric 4080/6 for so long. I am getting inspired but sadly do not have your skills. Keep inspiring me!!!
I'll do my best
Sorry for the lack of updates lately. I had an audition last weekend for a classic rock band, so I spent the previous week practicing. Some songs, I haven't played in, dare I say, 40 years. The audition went well, and I got the position, so after all these years, I'm once again a bass player in a band

Of course, I'm spending this week preparing for the first official band practice this weekend. My fingers lost their calluses years ago, so building them back up has been a journey. This may slow down this build to some degree.
I did receive the last order of onlays, so now I have enough. As projected, those have been the most expensive part of the build so far, coming in at $281.91 for all of them. I should have one or two left over though, one of which I may use as the truss rod cover, and/or some other decorative element.
The order of steps going forward is going to be important. Before I finalize the onlay positioning, I'll have to finalize the positioning of the control panel. Once done, I'll need to make a template so I can route out the control cavity, both into the body, and the control cavity cover. But before I do that, I'll need to finalize how I'm going to hold the control cavity cover on to the bass. I've been thinking I'll use 3 stainless steel allen screws - also known as socket head cap screws, with threaded inserts. I'll sink them level with the surface of the control cavity cover. I can also use those holes to secure the cover as I route out the cavity on the cover itself to about 1/4", to allow the mounting of the pots.
Of course, before I do all that, I'll need to buy three pots to confirm the route size needed. It's going to be tight. I may have to wait until this weekend, or two weekends from that, to pay the credit card down enough to order more parts, including pickup parts, the tremolo bridge, and some assorted other odds and ends. Strap locks, knobs, strings - the list goes on.
The neck has been ordered, and should come in around the end of this month or early next month.
The order of assembling the body wings to the neck-through will also be critical, so I can be sure the holes for the wiring from the pickup locations/bridge ground to the control panel is right. I'm thinking of drilling those holes before I glue up the body wings. But that's a story for another day.


It's look so VERY nice!!!
I'm curious to know, and sorry if it's already been asked, are the edges of the "pockets" where the onlays are sitting, rounded? I'd have to assume they need to be, at least a bit, so that you don't have a sharp edge around your picking hand.
I can't wait to see more. Keep up the good work!
I'm curious to know, and sorry if it's already been asked, are the edges of the "pockets" where the onlays are sitting, rounded? I'd have to assume they need to be, at least a bit, so that you don't have a sharp edge around your picking hand.
I can't wait to see more. Keep up the good work!
It's look so VERY nice!!!
I'm curious to know, and sorry if it's already been asked, are the edges of the "pockets" where the onlays are sitting, rounded? I'd have to assume they need to be, at least a bit, so that you don't have a sharp edge around your picking hand.
I can't wait to see more. Keep up the good work!
At this time, the edges are not rounded. Looking at the original, it doesn't appear they are rounded over either.
And thanks for your kind words


