• TalkBass has been independent since 1998. Add your voice.
    Create a free account to reply to discussions, view embedded media, and browse with fewer display ads.
    Join freeLog in
    Want zero display ads or expanded classifieds tools? Compare plans.

Medium scale, semi-hollow, single cut bass w/ CNC content

Hey all!

I've got a new project going on that I have been working on for a bit. I am doing a good bit of the work with a CNC router so I am building a "practice" bass with less-fancy woods before I get to the woods I want to actually use for the build.

Also, I wasn't initially planning a build thread so there are no pics of some of the process.


Jumping right in, I started by cutting out an MDF template so I could get an idea of proportions in real life. After staring at CAD drawings for a while it's good to see a physical representation.
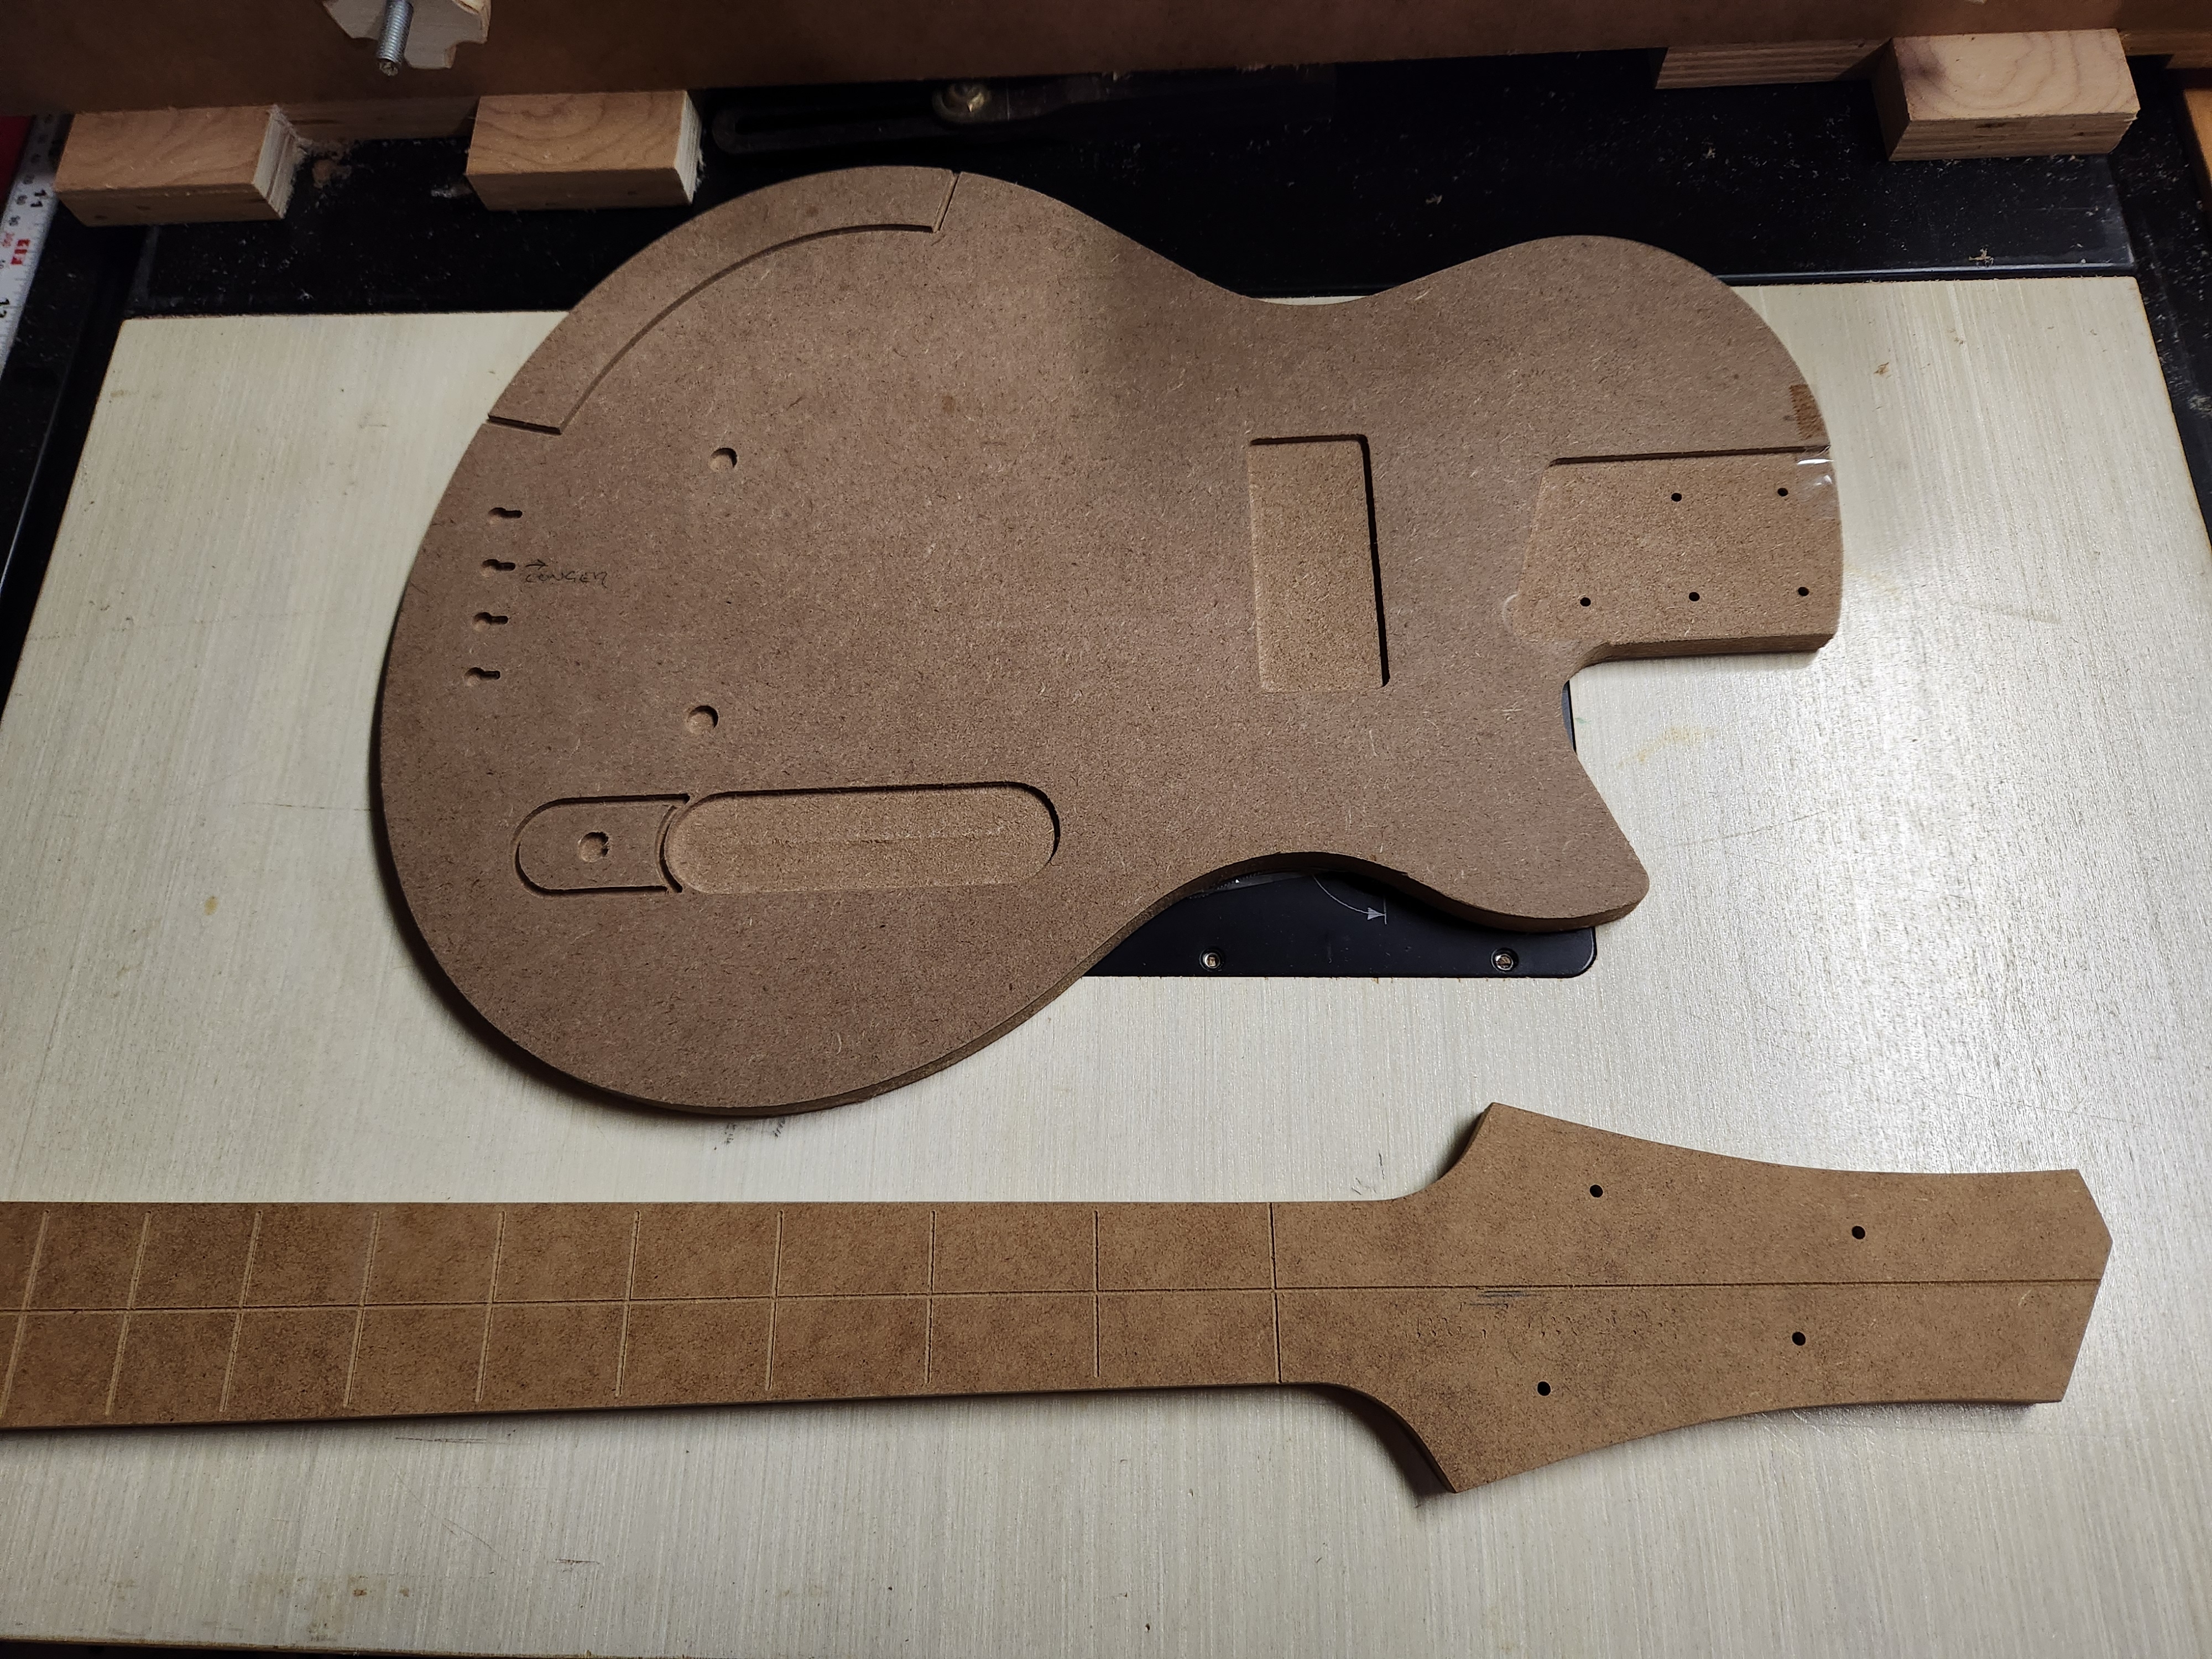
20240916_162846.jpg

After seeing sitting with this, I abandoned the control plate idea. Going with a rear route control cavity but have not quite worked out the details.

Satisfied with the design as it stands, I proceeded cutting wood. I made a neck, but didn't take any pics, so on to the body!

So here is a big slab of poplar, approx 18.5" x 13.25" by 1.625" thick...
20240730_115544.jpg

...mark the center line, and the center of the center line. I will zero the machine at this center point.

Cut and fit the neck pocket...
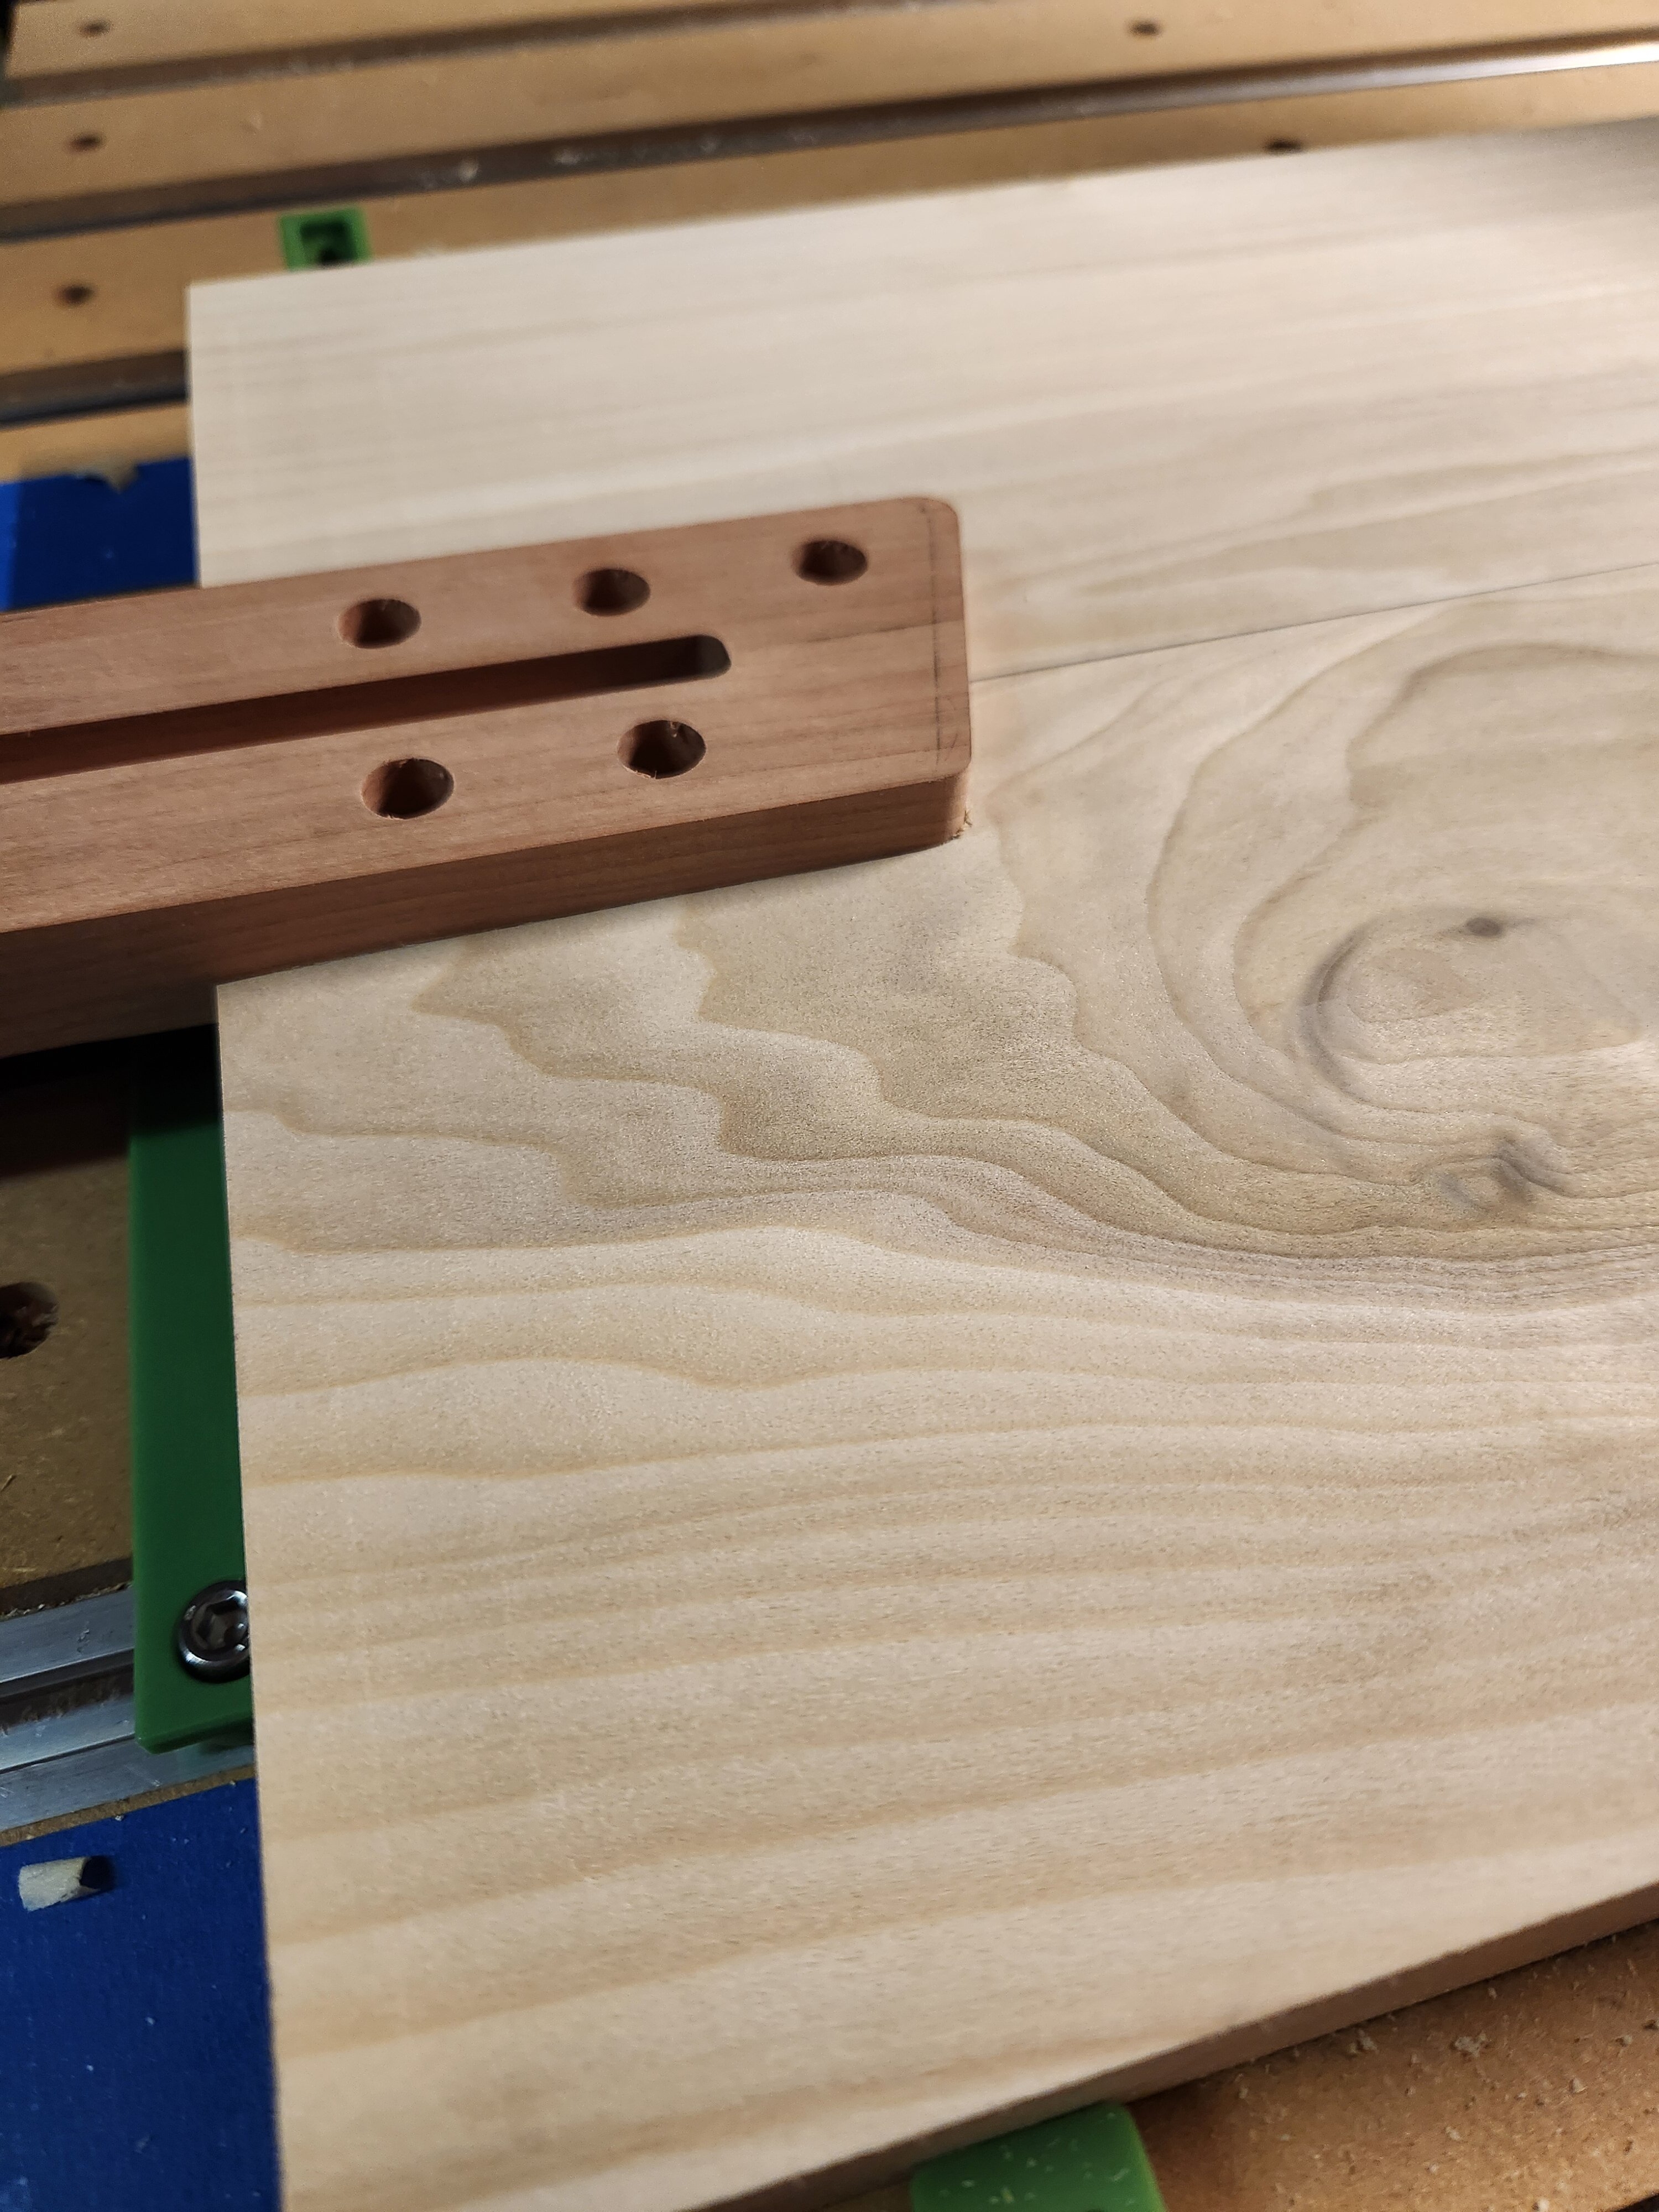
20240730_125105.jpg


All good there, so machine the rest of the body...
20240730_151022.jpg
...going with a single, P-90 size pickup for this one. The slots in the middle are weight relief, not really necessary on this poplar body. Everything looks good, though I neglected to to a finishing pass inside the upper cavity; you can see in the right side of the pic where the toolpaths did not overlap enough to get smoth surface.
 
The strings will top load through the top in keyhole slots. I don't want the strings pulling up on the top wood, so I made an aluminum plate to recess into the body.

Making the plate by hand, but I used the CNC to make atemplate...
20240812_103912.jpg
...I attached the template to a scrap of 1/8" aluminum and drilled the pilot holes.

I used a counter sink bit to make a recess that will catch the ball end and hopefully keep it from slipping out...
20240812_104726.jpg


I used a step-bit to drill out the holes where the ball ends go through the plate and files to connect the holes and make slots.
20240812_114815.jpg
...the counter-sunk holes shown here will be for screwing the plate into the body.

Testing the string retention...
20240826_151206.jpg
 
The strings will top load through the top in keyhole slots. I don't want the strings pulling up on the top wood, so I made an aluminum plate to recess into the body.

Making the plate by hand, but I used the CNC to make atemplate...
View attachment 7031682...I attached the template to a scrap of 1/8" aluminum and drilled the pilot holes.

I used a counter sink bit to make a recess that will catch the ball end and hopefully keep it from slipping out...
View attachment 7031683

I used a step-bit to drill out the holes where the ball ends go through the plate and files to connect the holes and make slots.
View attachment 7031684...the counter-sunk holes shown here will be for screwing the plate into the body.

Testing the string retention...
View attachment 7031686

I like it! Good design, good build technique.
 
  • Like
Reactions: BishopJP
Dang,
That is so clean and precise. Starting to get a little CNC envy, but with my microscopic build output, I really can't justify the investment. Sub'd

Aw, come on.......You don't need a CNC to do those operations. That can all be done with a hand router and MDF templates.

BishopJP is just having some fun with his new toy!
 
Last edited:
The strings will top load through the top in keyhole slots. I don't want the strings pulling up on the top wood, so I made an aluminum plate to recess into the body.

Making the plate by hand, but I used the CNC to make atemplate...
View attachment 7031682...I attached the template to a scrap of 1/8" aluminum and drilled the pilot holes.

I used a counter sink bit to make a recess that will catch the ball end and hopefully keep it from slipping out...
View attachment 7031683

I used a step-bit to drill out the holes where the ball ends go through the plate and files to connect the holes and make slots.
View attachment 7031684...the counter-sunk holes shown here will be for screwing the plate into the body.

Testing the string retention...
View attachment 7031686
I enjoy seeing innovative ideas like the plate for top loading the strings. Great work!
 
I like your string retention plate, I may steal it for a future build. I had a similar idea floating around in my head, but yours is better than what I was thinking.
Feel free, I'm sure I stole the idea from someone else!
We haven't seen if it works yet, though. Initial tests showed that I had to be deliberate about setting the ball end or it would pop out of the slot. We'll see...

I've done a surface mount string plate and that worked as intended, but the added thickness of the top wood changes to angle the string leaves the slot.

Jazzmaster string plate

20240221_185459.jpg
 
Feel free, I'm sure I stole the idea from someone else!
We haven't seen if it works yet, though. Initial tests showed that I had to be deliberate about setting the ball end or it would pop out of the slot. We'll see...

I've done a surface mount string plate and that worked as intended, but the added thickness of the top wood changes to angle the string leaves the slot.

Jazzmaster string plate

View attachment 7032204


What if you do like an acoustic guitar bridge and angle the slots in the wood towards the bridge so the strings come out of the slot at an angle instead of straight up?
 
  • Like
Reactions: BishopJP
What if you do like an acoustic guitar bridge and angle the slots in the wood towards the bridge so the strings come out of the slot at an angle instead of straight up?

I was thinking the same thing. My thought was something between an acoustic guitar and top loader bass bridge. On thing to maybe work out, is to make sure the ball ends seat and release cleanly. In an acoustic, you can always reach into the sound hole but you might not have that option here, and I definitely won't with my plan (i'll be making a fully solid body and probably hide the plate under the top wood). The angled string paths through the wood will help it seat cleaner, but you'll need to get the geometry right to make sure the strings can come back out easily. I suspect its just a matter of making sure the holes and slots are big enough to let the ball end through cleanly without being so big it slips out. Shouldn't be a problem, I'd imagine.


That's a good idea. Maybe nut slotting files would work for that; smooth sides so I could lengthen the slots without inadvertently widening them?

They make a saw toothed file just for cutting the slots on an acoustic guitar bridge but its probably too narrow for bass strings. The nut files that I use seem like they'd work as long as they fit in the narrow space. If not, sandpaper on a stick or a small needle file might work.

I probably won't have a chance to test it out until next summer. I have a few non-bass projects to finish before it gets too cold in my unheated shop, so next bass probably isn't until spring at the earliest.
 
I was thinking the same thing. My thought was something between an acoustic guitar and top loader bass bridge. On thing to maybe work out, is to make sure the ball ends seat and release cleanly. In an acoustic, you can always reach into the sound hole but you might not have that option here, and I definitely won't with my plan (i'll be making a fully solid body and probably hide the plate under the top wood). The angled string paths through the wood will help it seat cleaner, but you'll need to get the geometry right to make sure the strings can come back out easily. I suspect its just a matter of making sure the holes and slots are big enough to let the ball end through cleanly without being so big it slips out. Shouldn't be a problem, I'd imagine.


They make a saw toothed file just for cutting the slots on an acoustic guitar bridge but its probably too narrow for bass strings. The nut files that I use seem like they'd work as long as they fit in the narrow space. If not, sandpaper on a stick or a small needle file might work.

I probably won't have a chance to test it out until next summer. I have a few non-bass projects to finish before it gets too cold in my unheated shop, so next bass probably isn't until spring at the earliest.

The string plate is embedded in the body so no possibility accessing through a sound hole, but so far, I have had no issues getting the ball end to come out.

Once I get to the pre-assembly stage, I will fiddle around with the string slots. I won't know how much angle I need until I get the bridge installed.
 
  • Like
Reactions: Matt Liebenau
The one place I’d really like to try CNC is for fancy fretboard inlays. That could be done on a fairly small hobbyist style machine, I don’t need something to cut out bodies or necks for me.

One of my current R & D projects is working out the best process for doing small inlays in one of my pin routers. I'm figuring out how to do the fixture to work in my MGPR (Medium Green Pin Router). It's amusing to see a 2000 lb machine with a 1/16" router bit in its spindle.......

But yeah, I agree that inlays is one job that a small tabletop CNC router could be very good at.
 
Last edited:
Okay, moving on to the neck.

Once I had the neck cut to shape, I inlaid the carbon fiber TOW backstrap, epoxied a filler strip over it and clamped it up. I also installed the brass inserts and epoxied those into place.

Then the neck goes back to the machine to route the truss rod slot. I usually use a router and a jig, but I thought I'd try cheating with the CNC.
20240819_185034.jpg20240819_190954.jpg
With this operation, I routed the channel for the rod and the access port in the headstock. I routed a slight recess above the truss rod channel to glue in a thin filler strip over the truss rod.

I slotted the walnut fretboard...
20240902_171229.jpg


Then the neck goes into the neck jig, first to route the top flat...
20240902_181724.jpg...I routed a slight taper into the top, about .030" over the length. Apparently I cut it a little close...

Then the fretboard gets glued on...
20240902_185138.jpg


Out of the clamps, the excess fretboard gets routed off on the table router...
20240903_103812.jpg

Then the neck goes back into the neck jig to route the taper...
20240908_163408.jpg...aiming for 0.85" at the 1st fret, 0.95" at the 16th.
 
One of my current R & D projects is working out the best process for doing small inlays in one of my pin routers. I'm figuring out how to do the fixture to work in my MGPR (Medium Green Pin Router). It's amusing to see a 2000 lb machine with a 1/16" router bit in its spindle.......

But yeah, I agree that inlays is one job that a small tabletop CNC router could be very good at.

I had the opportunity last year, to use a pin router to route some p-bass pickup cavities. Using a 1/8" bit to clean up the corners, it was cool to see this giant machine doing such delicate operations!
 
These MOP star inlays kicked my a$$! In retrospect, CNC might not have helped much, since these were hand-made in Vietnam, so each one effectively unique. Ideally you'd cut these out of MOP sheet stock using the same CNC pattern for the recesses. Including the knob inlays, I think this took me the better part of two days of eye strain and aching hands vs. something like minutes for CNC.
1WDiPfk.jpg