• TalkBass has been independent since 1998. Add your voice.
    Create a free account to reply to discussions, view embedded media, and browse with fewer display ads.
    Join freeLog in
    Want zero display ads or expanded classifieds tools? Compare plans.

MPU Brown bass

MPU

Sep 21, 2004
3,703
10,692
56
Valkeala Finland
I've always thought that Alembic Stanley Clark bass shape is one of the best looking shapes. Neck heavy, propably yes at least a bit but still I want one. I started with some machining and started to make a brass bridge. I bought 10mm brass rod, 5mmx40mm, 8mmx40mm and 10mmx40mm brass square rod. I have drill press, hacksaw and files. Let's start!

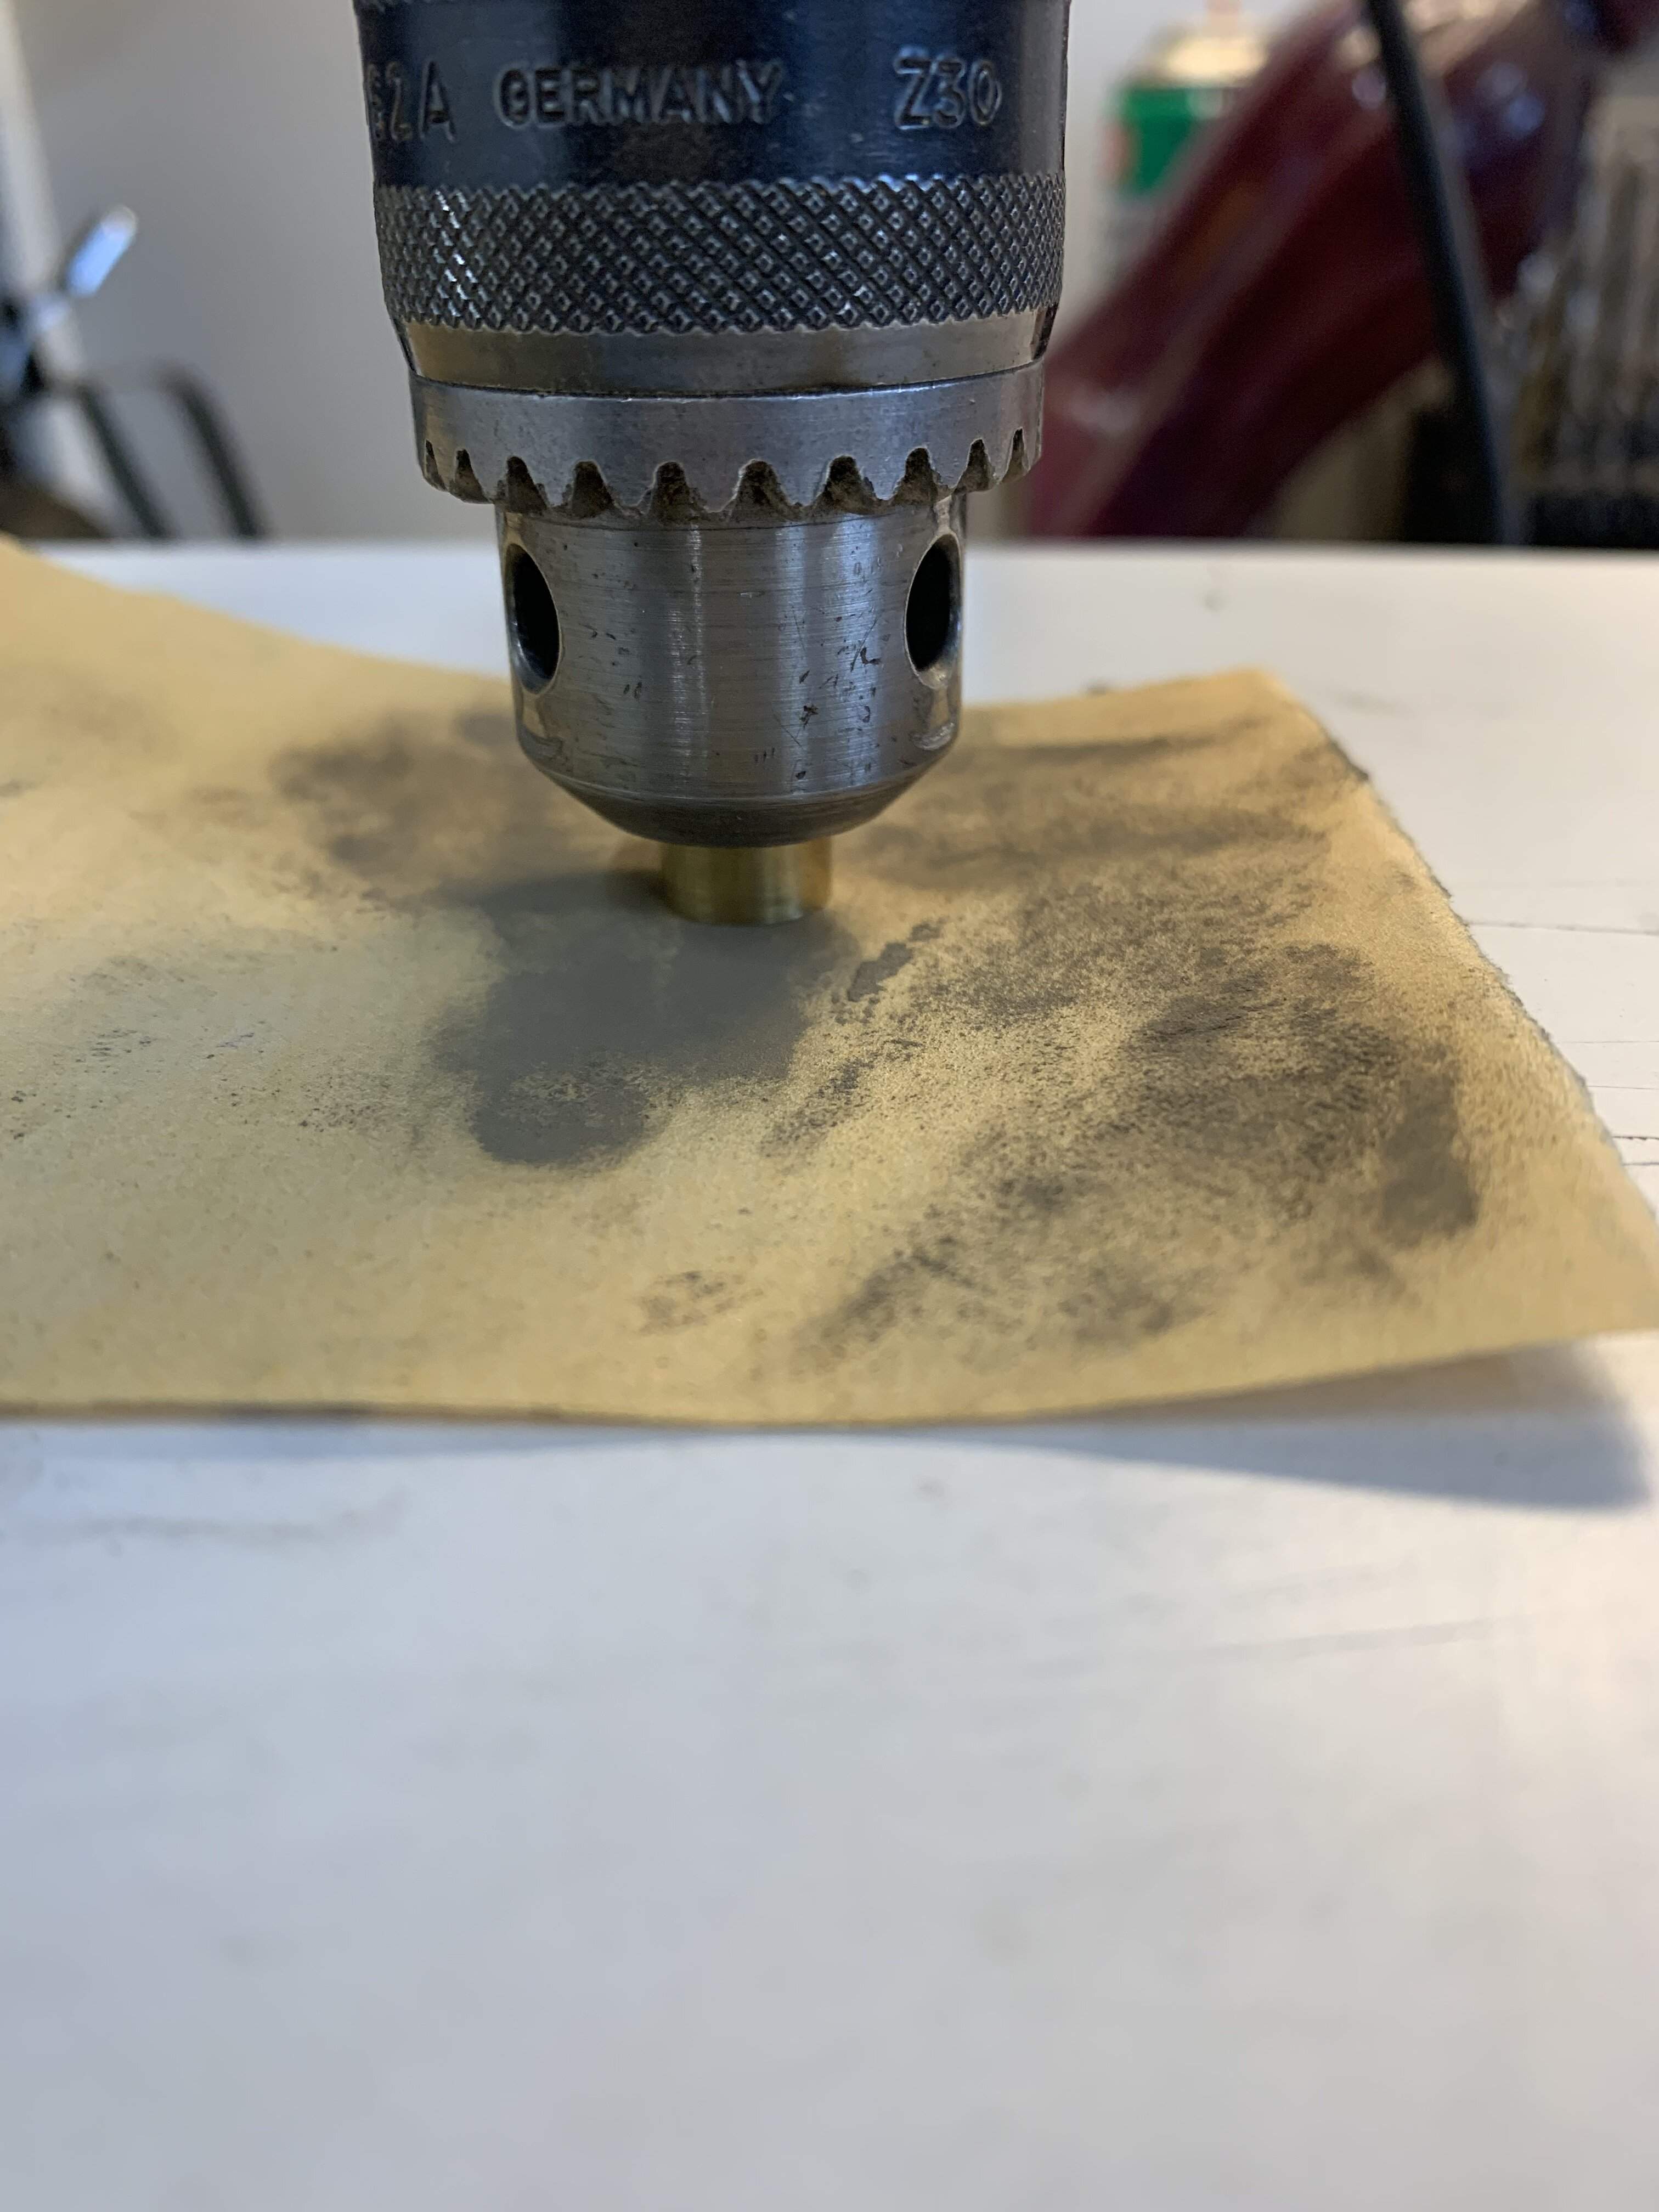
First I had to cut two 10mmx17mm slugs from the round bar and make the ends perpendicular. I used sand paper and drill press.
1CD7D3CA-683E-42DF-961C-69AB96774C37.jpeg


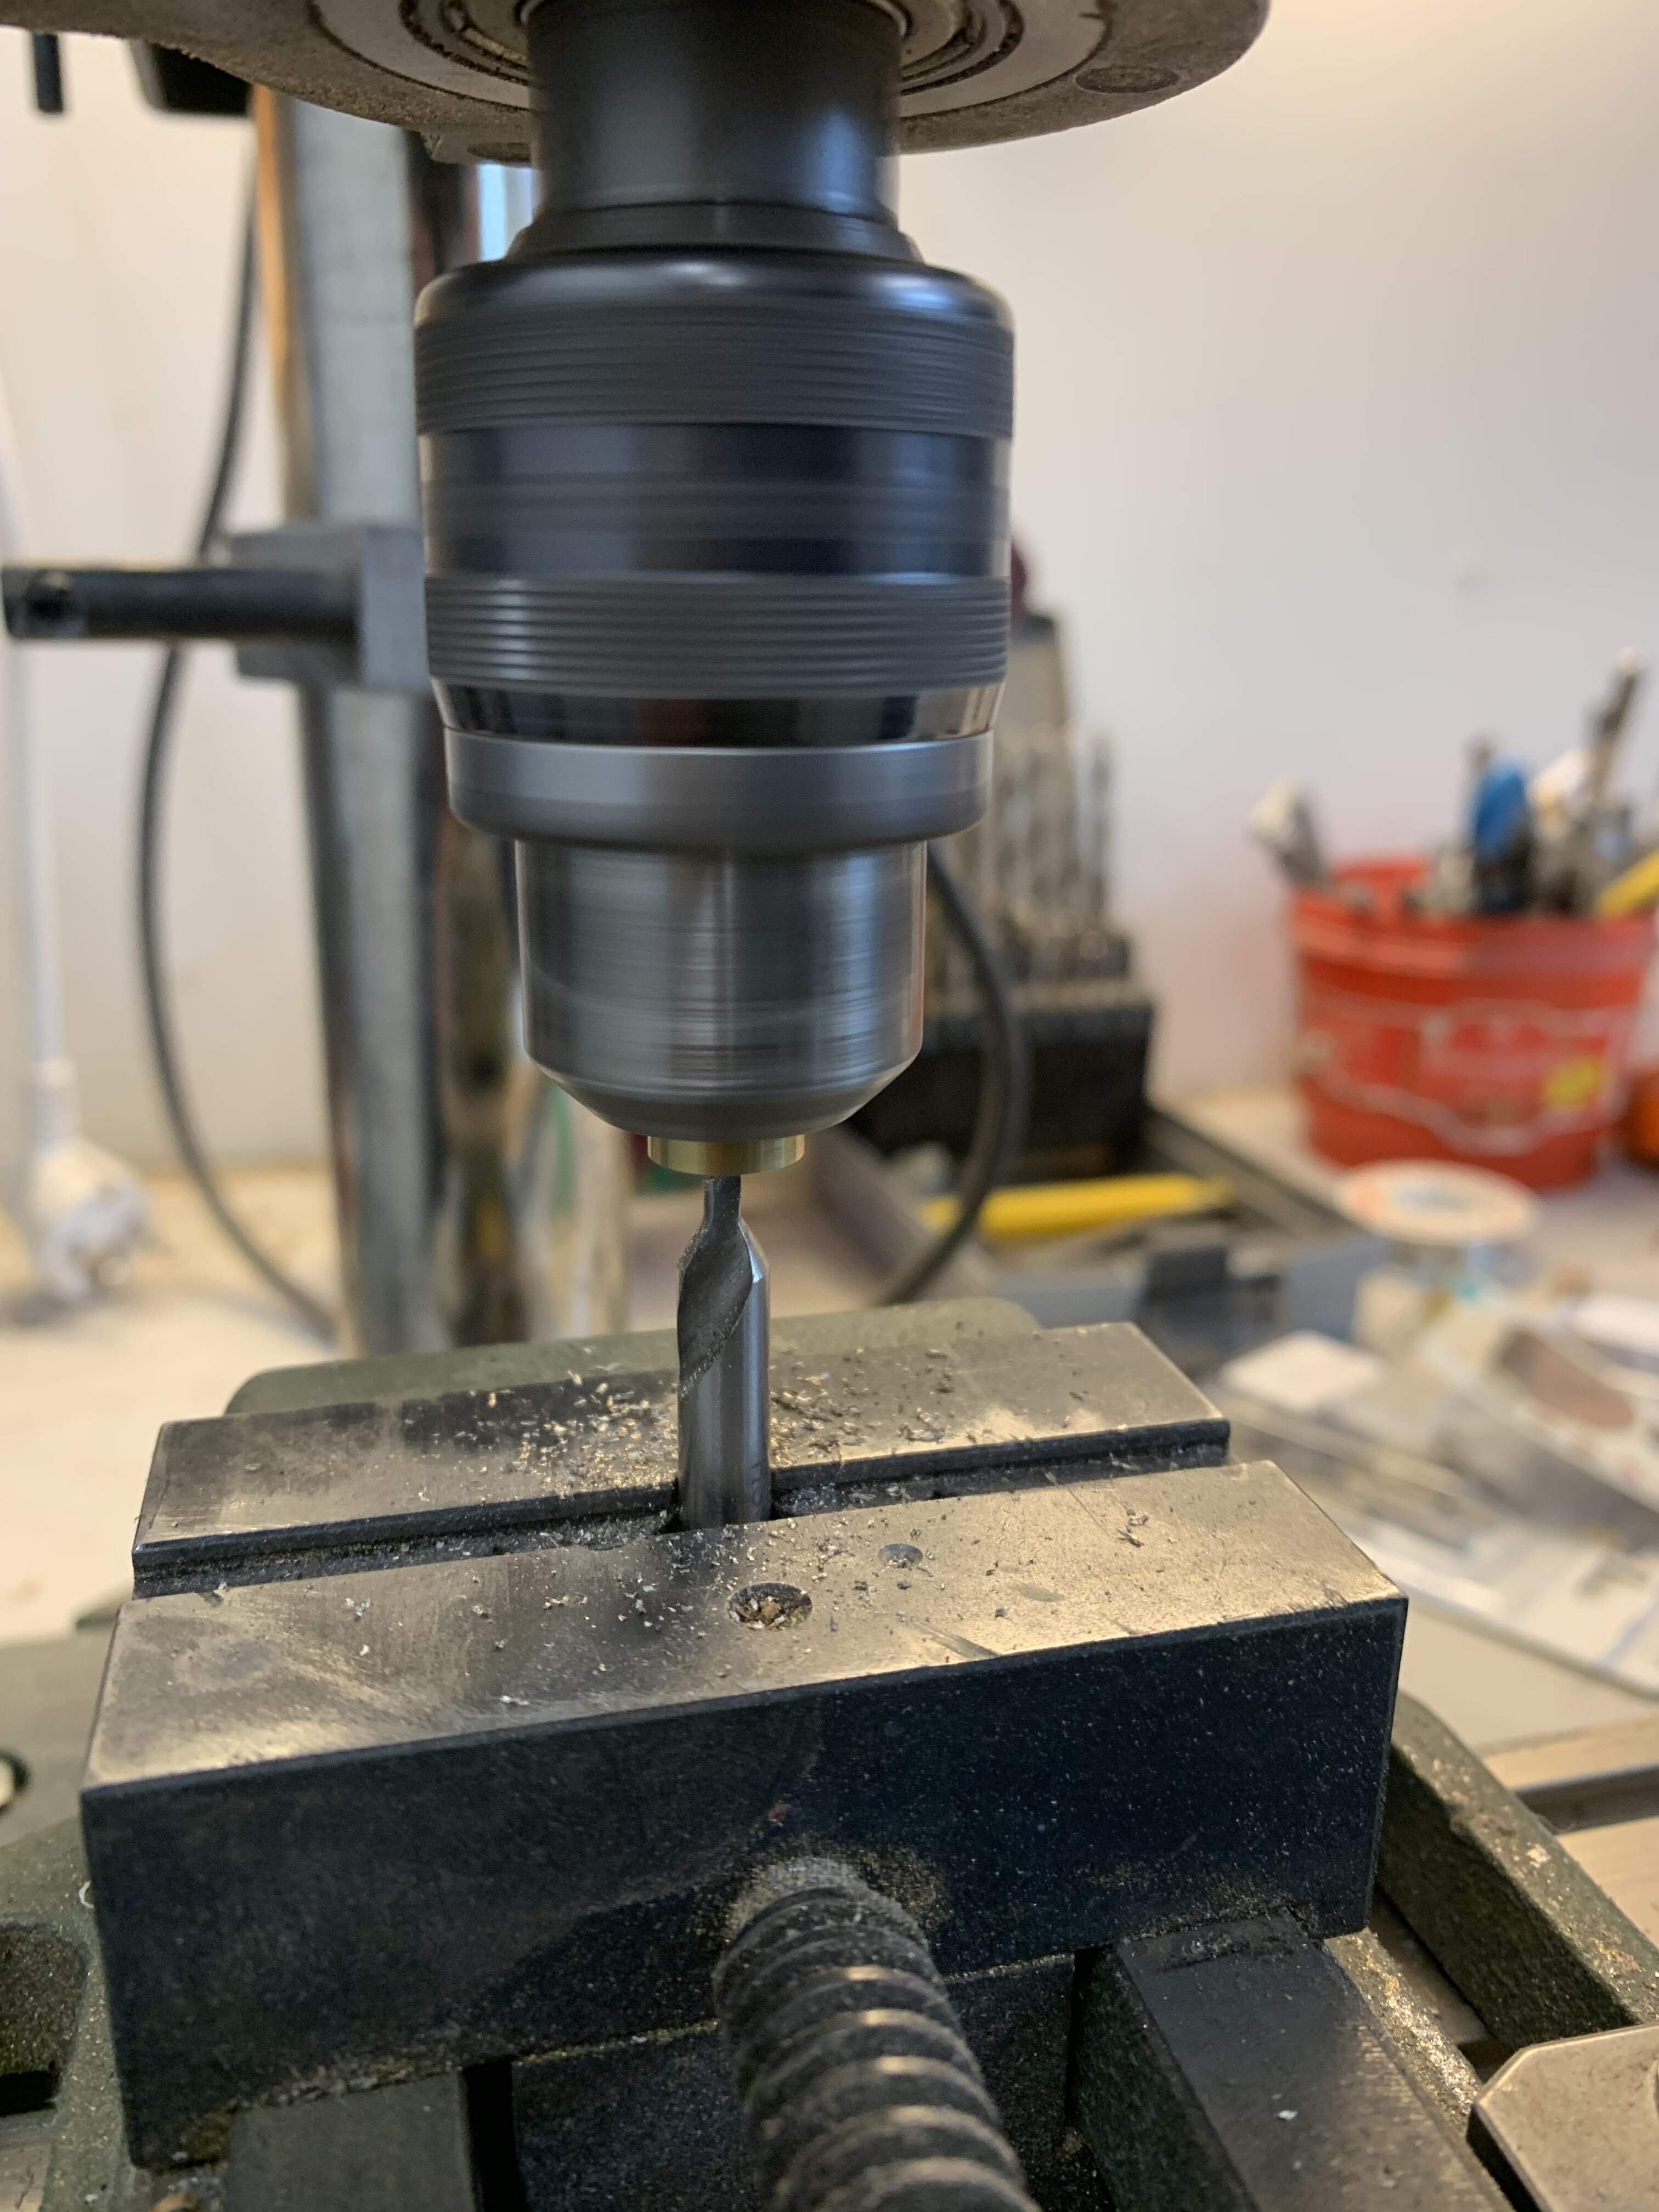
Next was drilling holes for threads in the center of the slugs. With a lathe very easy but without one I had to get creative. I mounted a center drill on the chuck, carefully adjusted my small but very accurate cross feed table so that the drill was exactly in the slot in the jaws. After tightening the drill in the jaws I loosened the jaws and put a slug in the chuck and drilled center marks. Worked great!
C2EAA151-B1FC-42D2-9404-AC533EFE4F69.jpeg


I threaded the slugs with M4 tap.

470D90E1-4EB6-4EAC-B2F9-EDB5B5CC1629.jpeg


Next I hacksawed two 11mm strips from 5mm brass. I needed them exactly 10mm wide so I used Dremel router bit and side feed table to machine them.
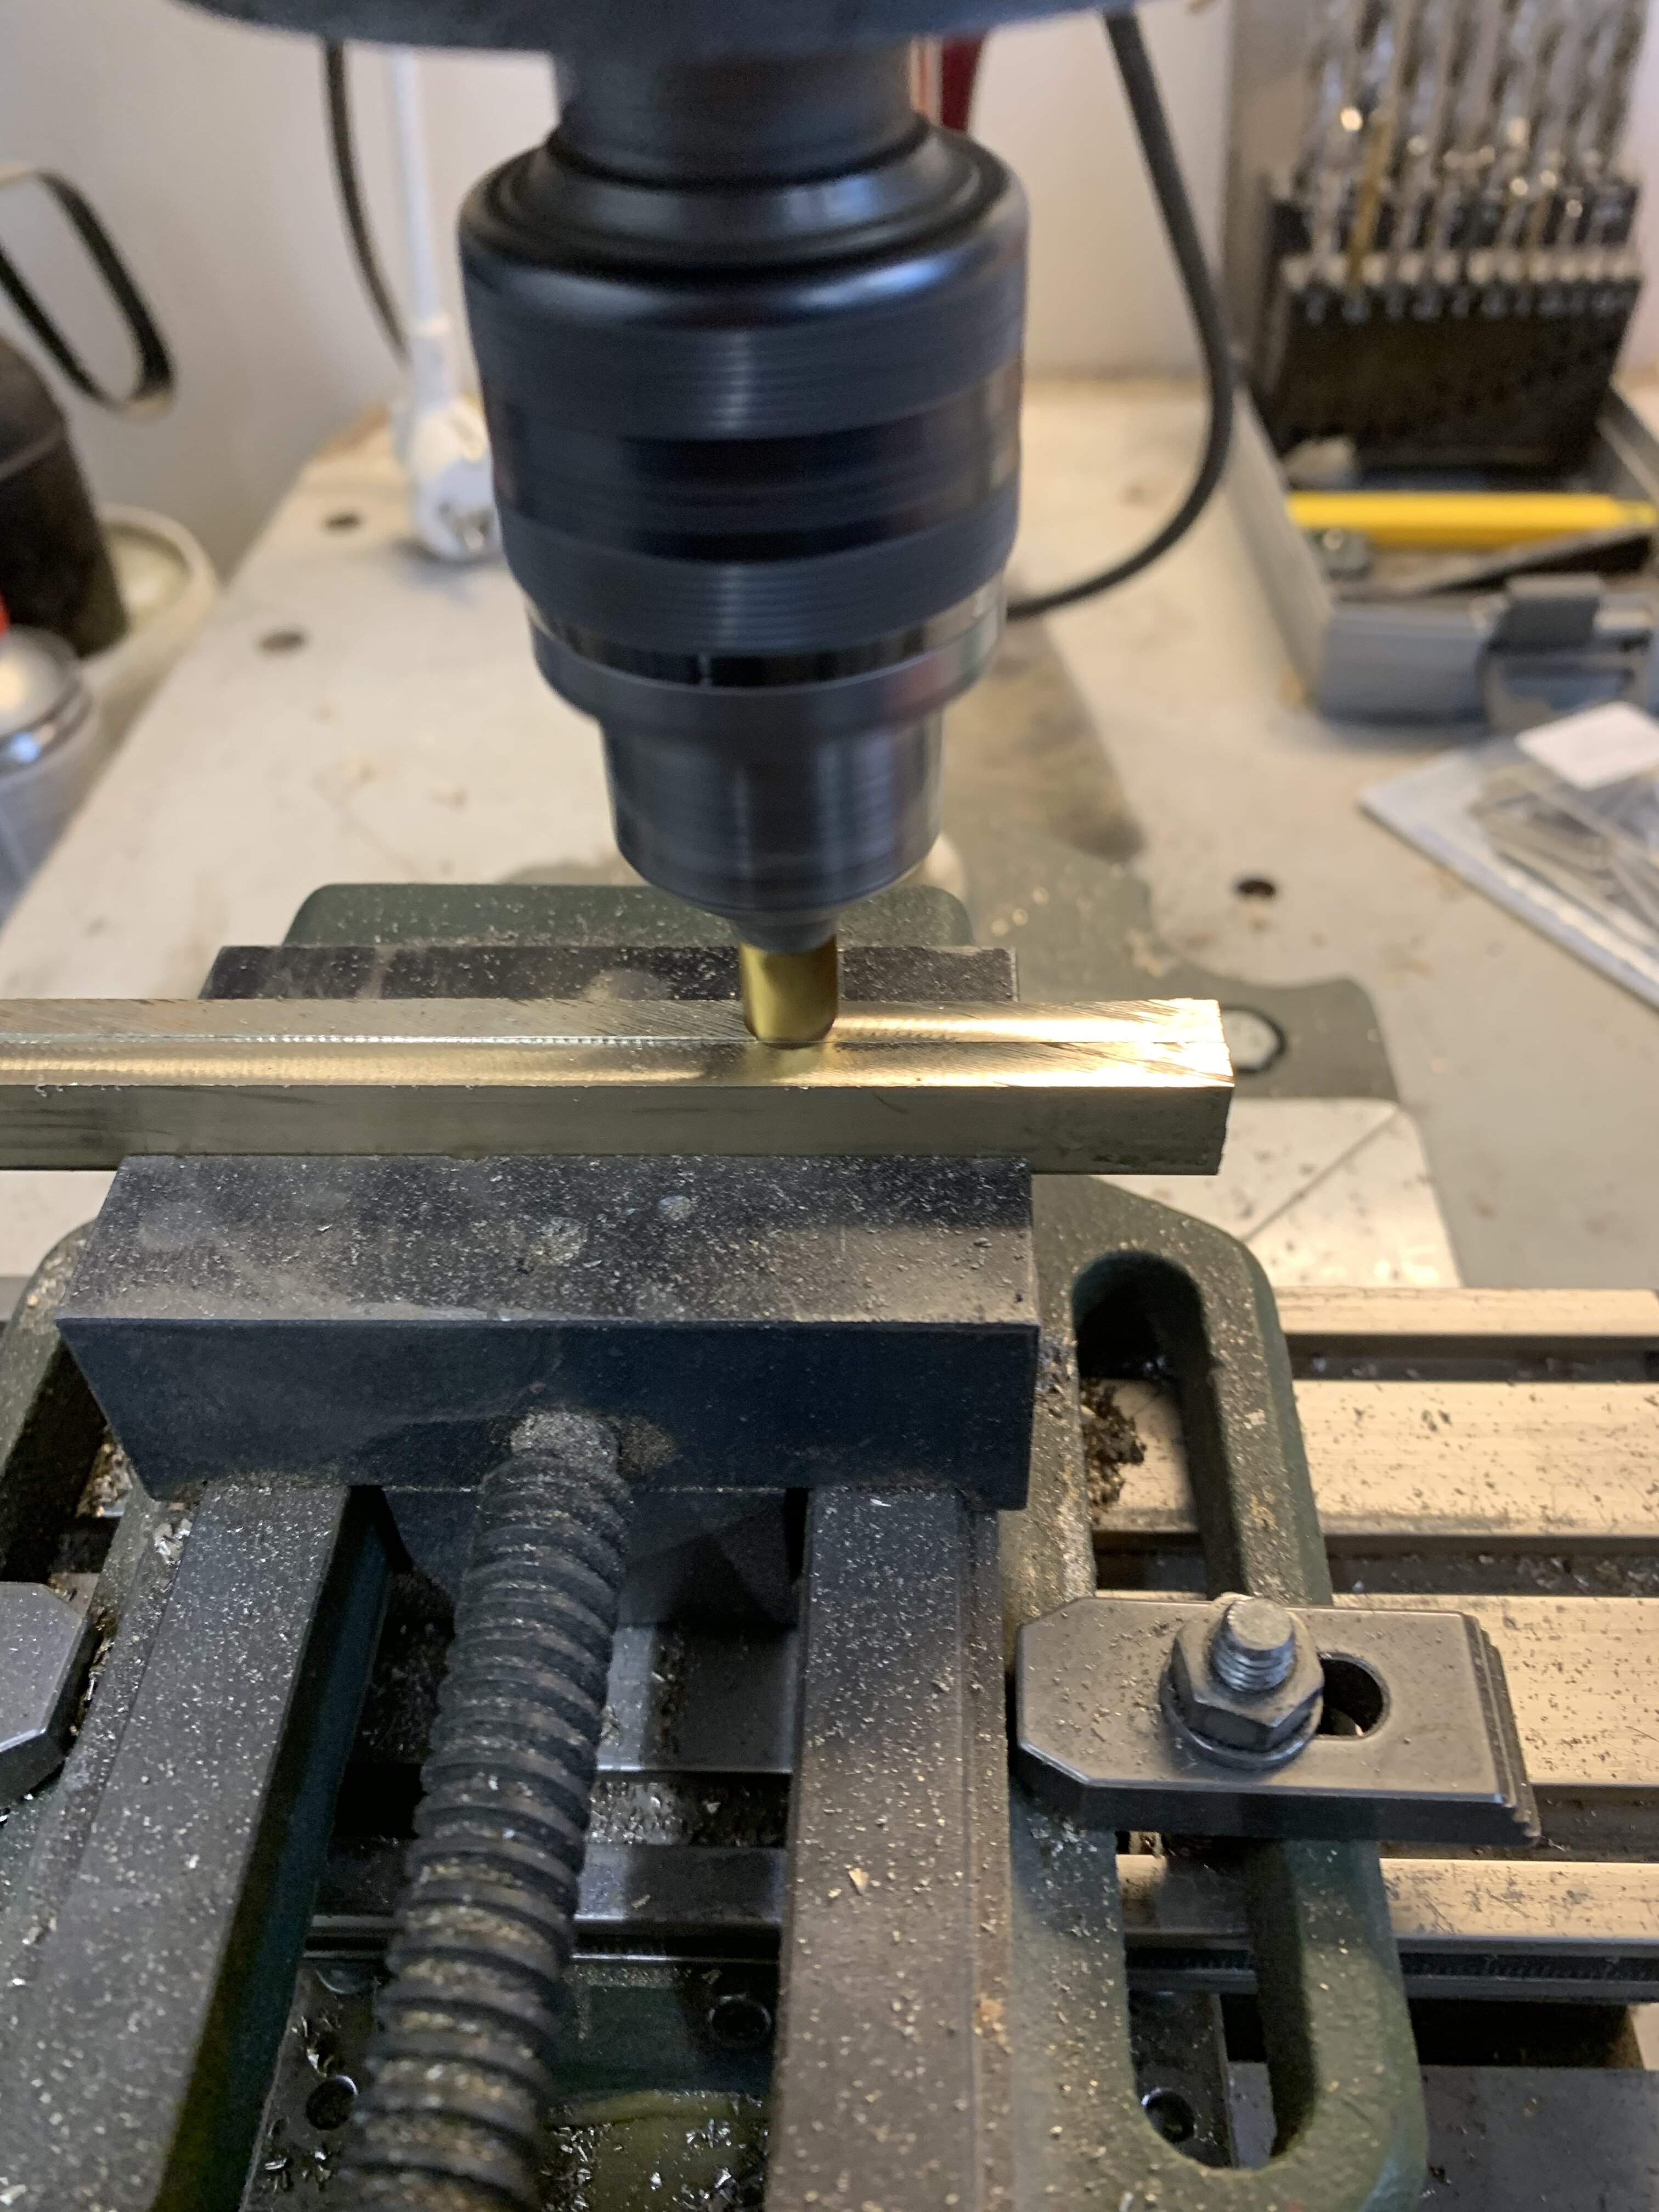
5D11A7D7-1116-480A-8776-B6699596DC3E.jpeg


I sanded machining marks off with 400 grit paper.
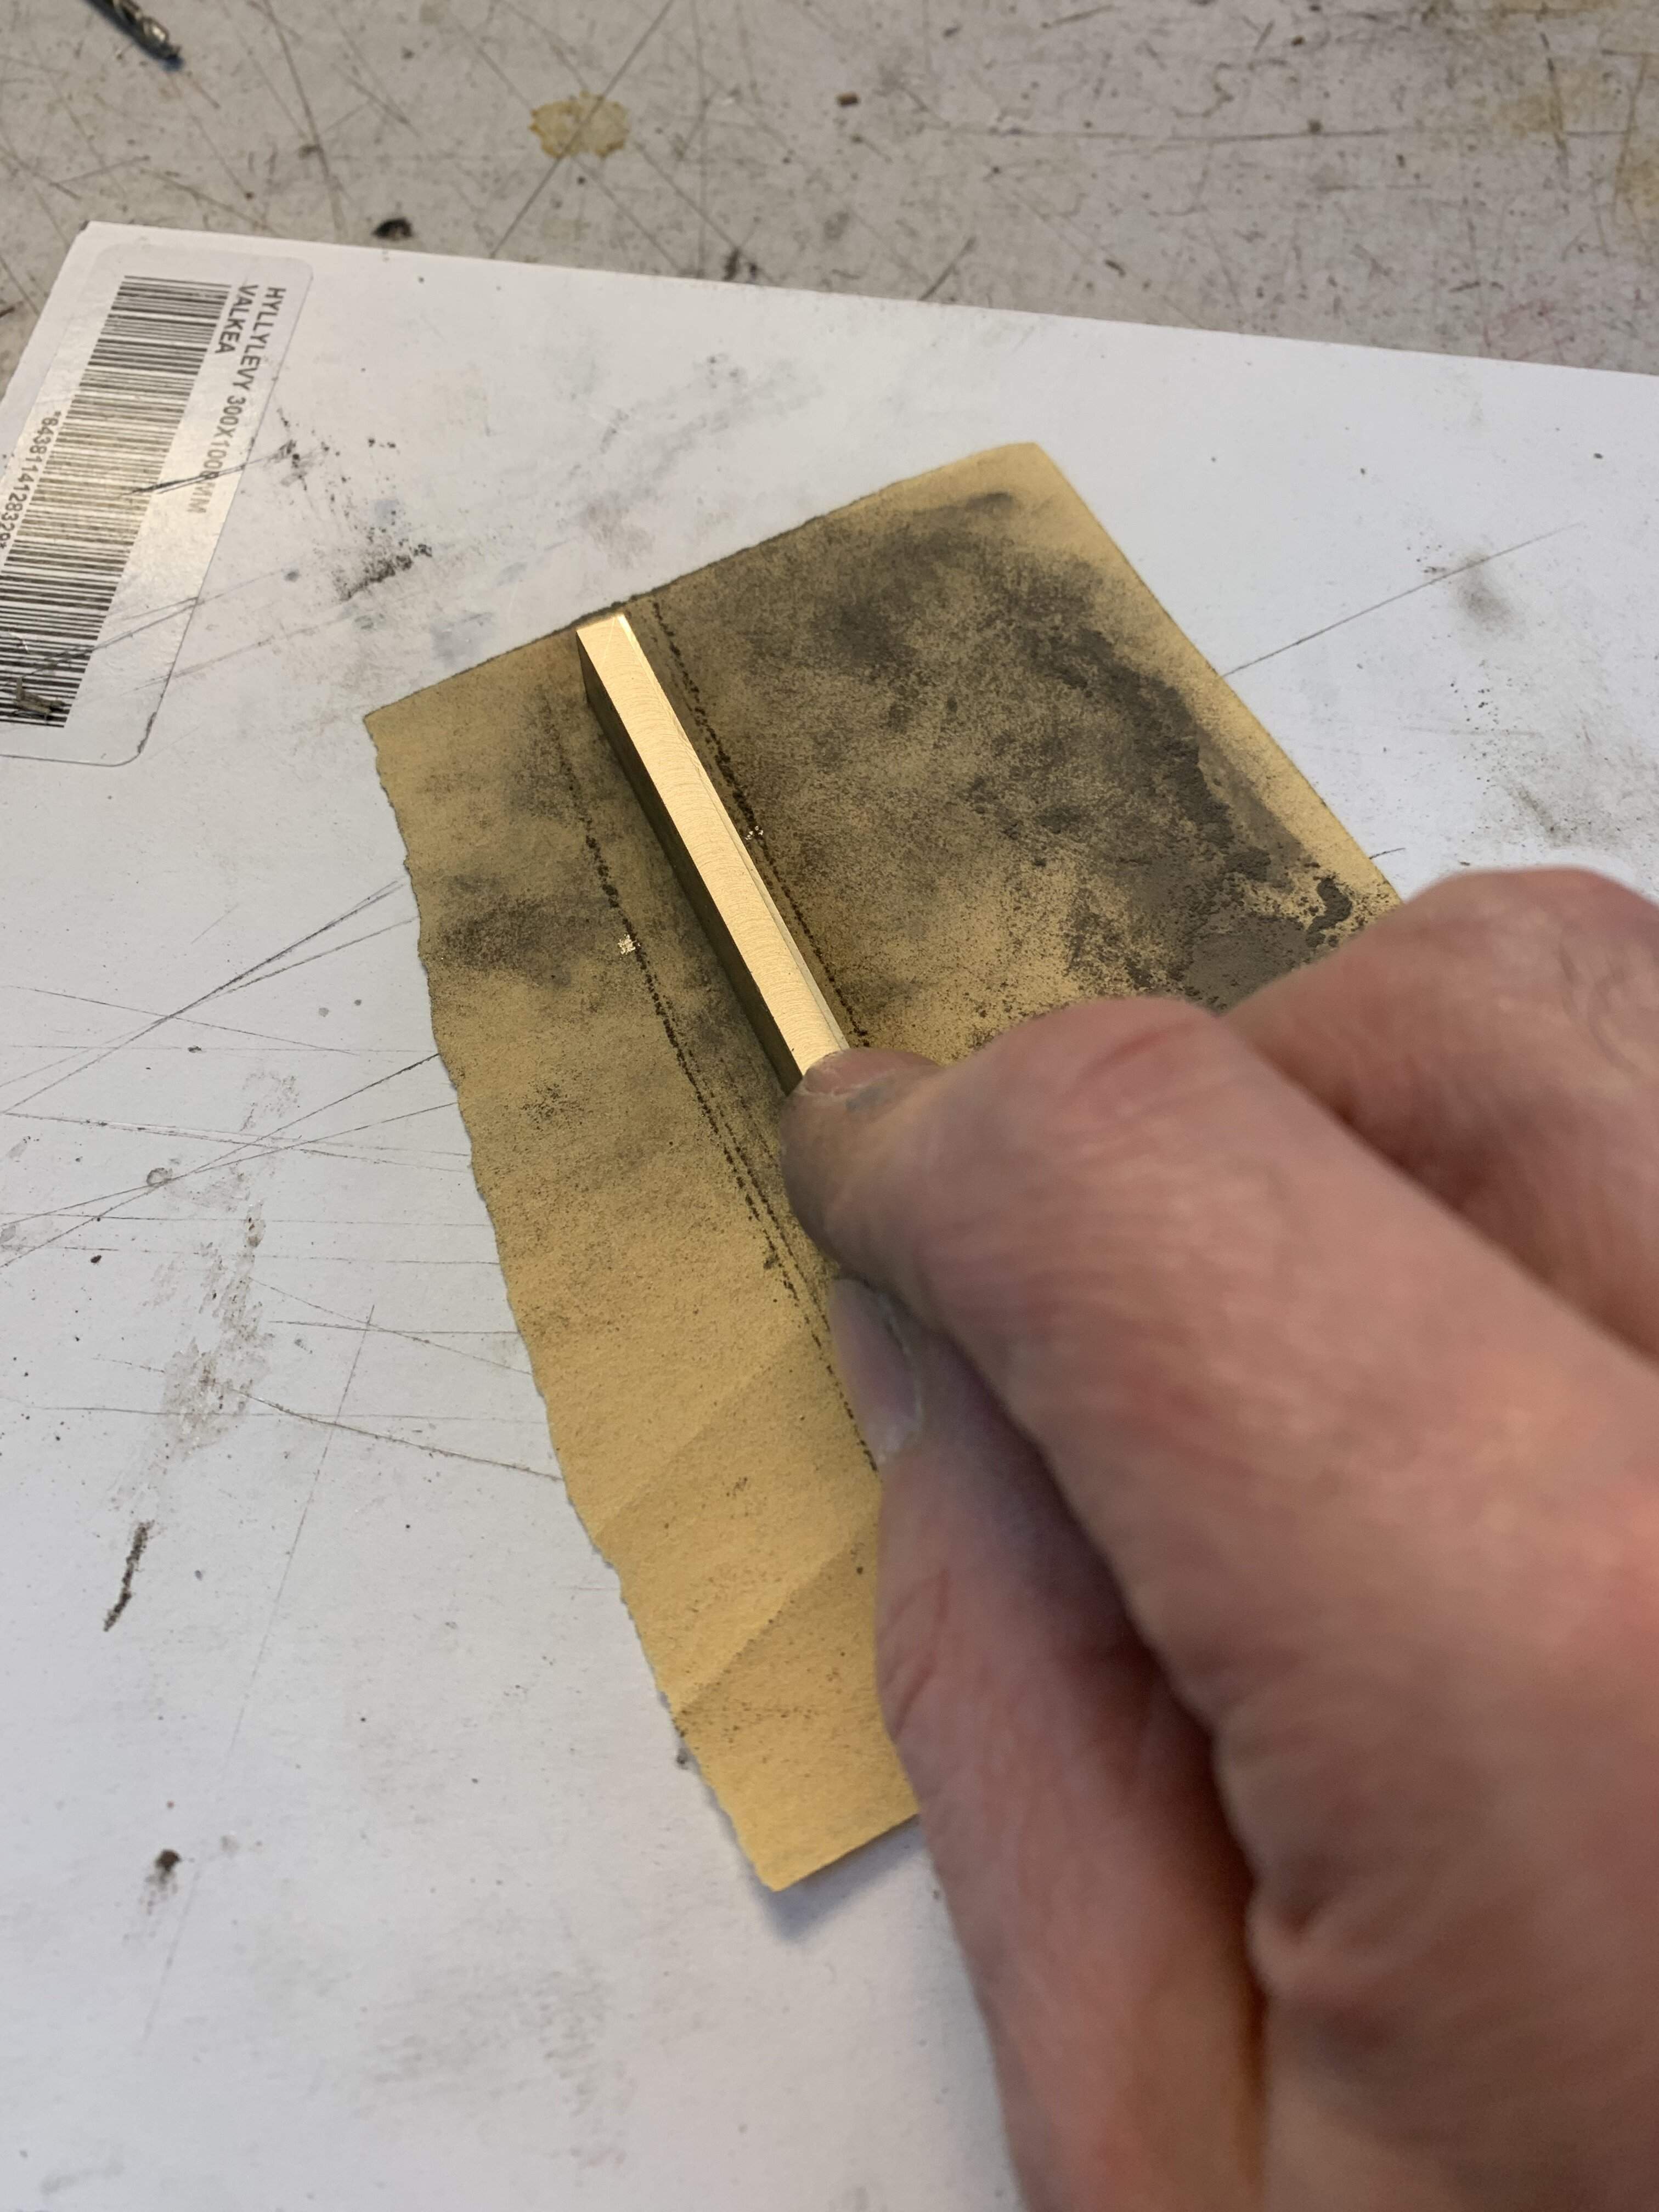
0E52C79F-4D16-408C-B22D-243CCF367623.jpeg


Some drilling and countersinking and the bridge frame is beginning to come together.
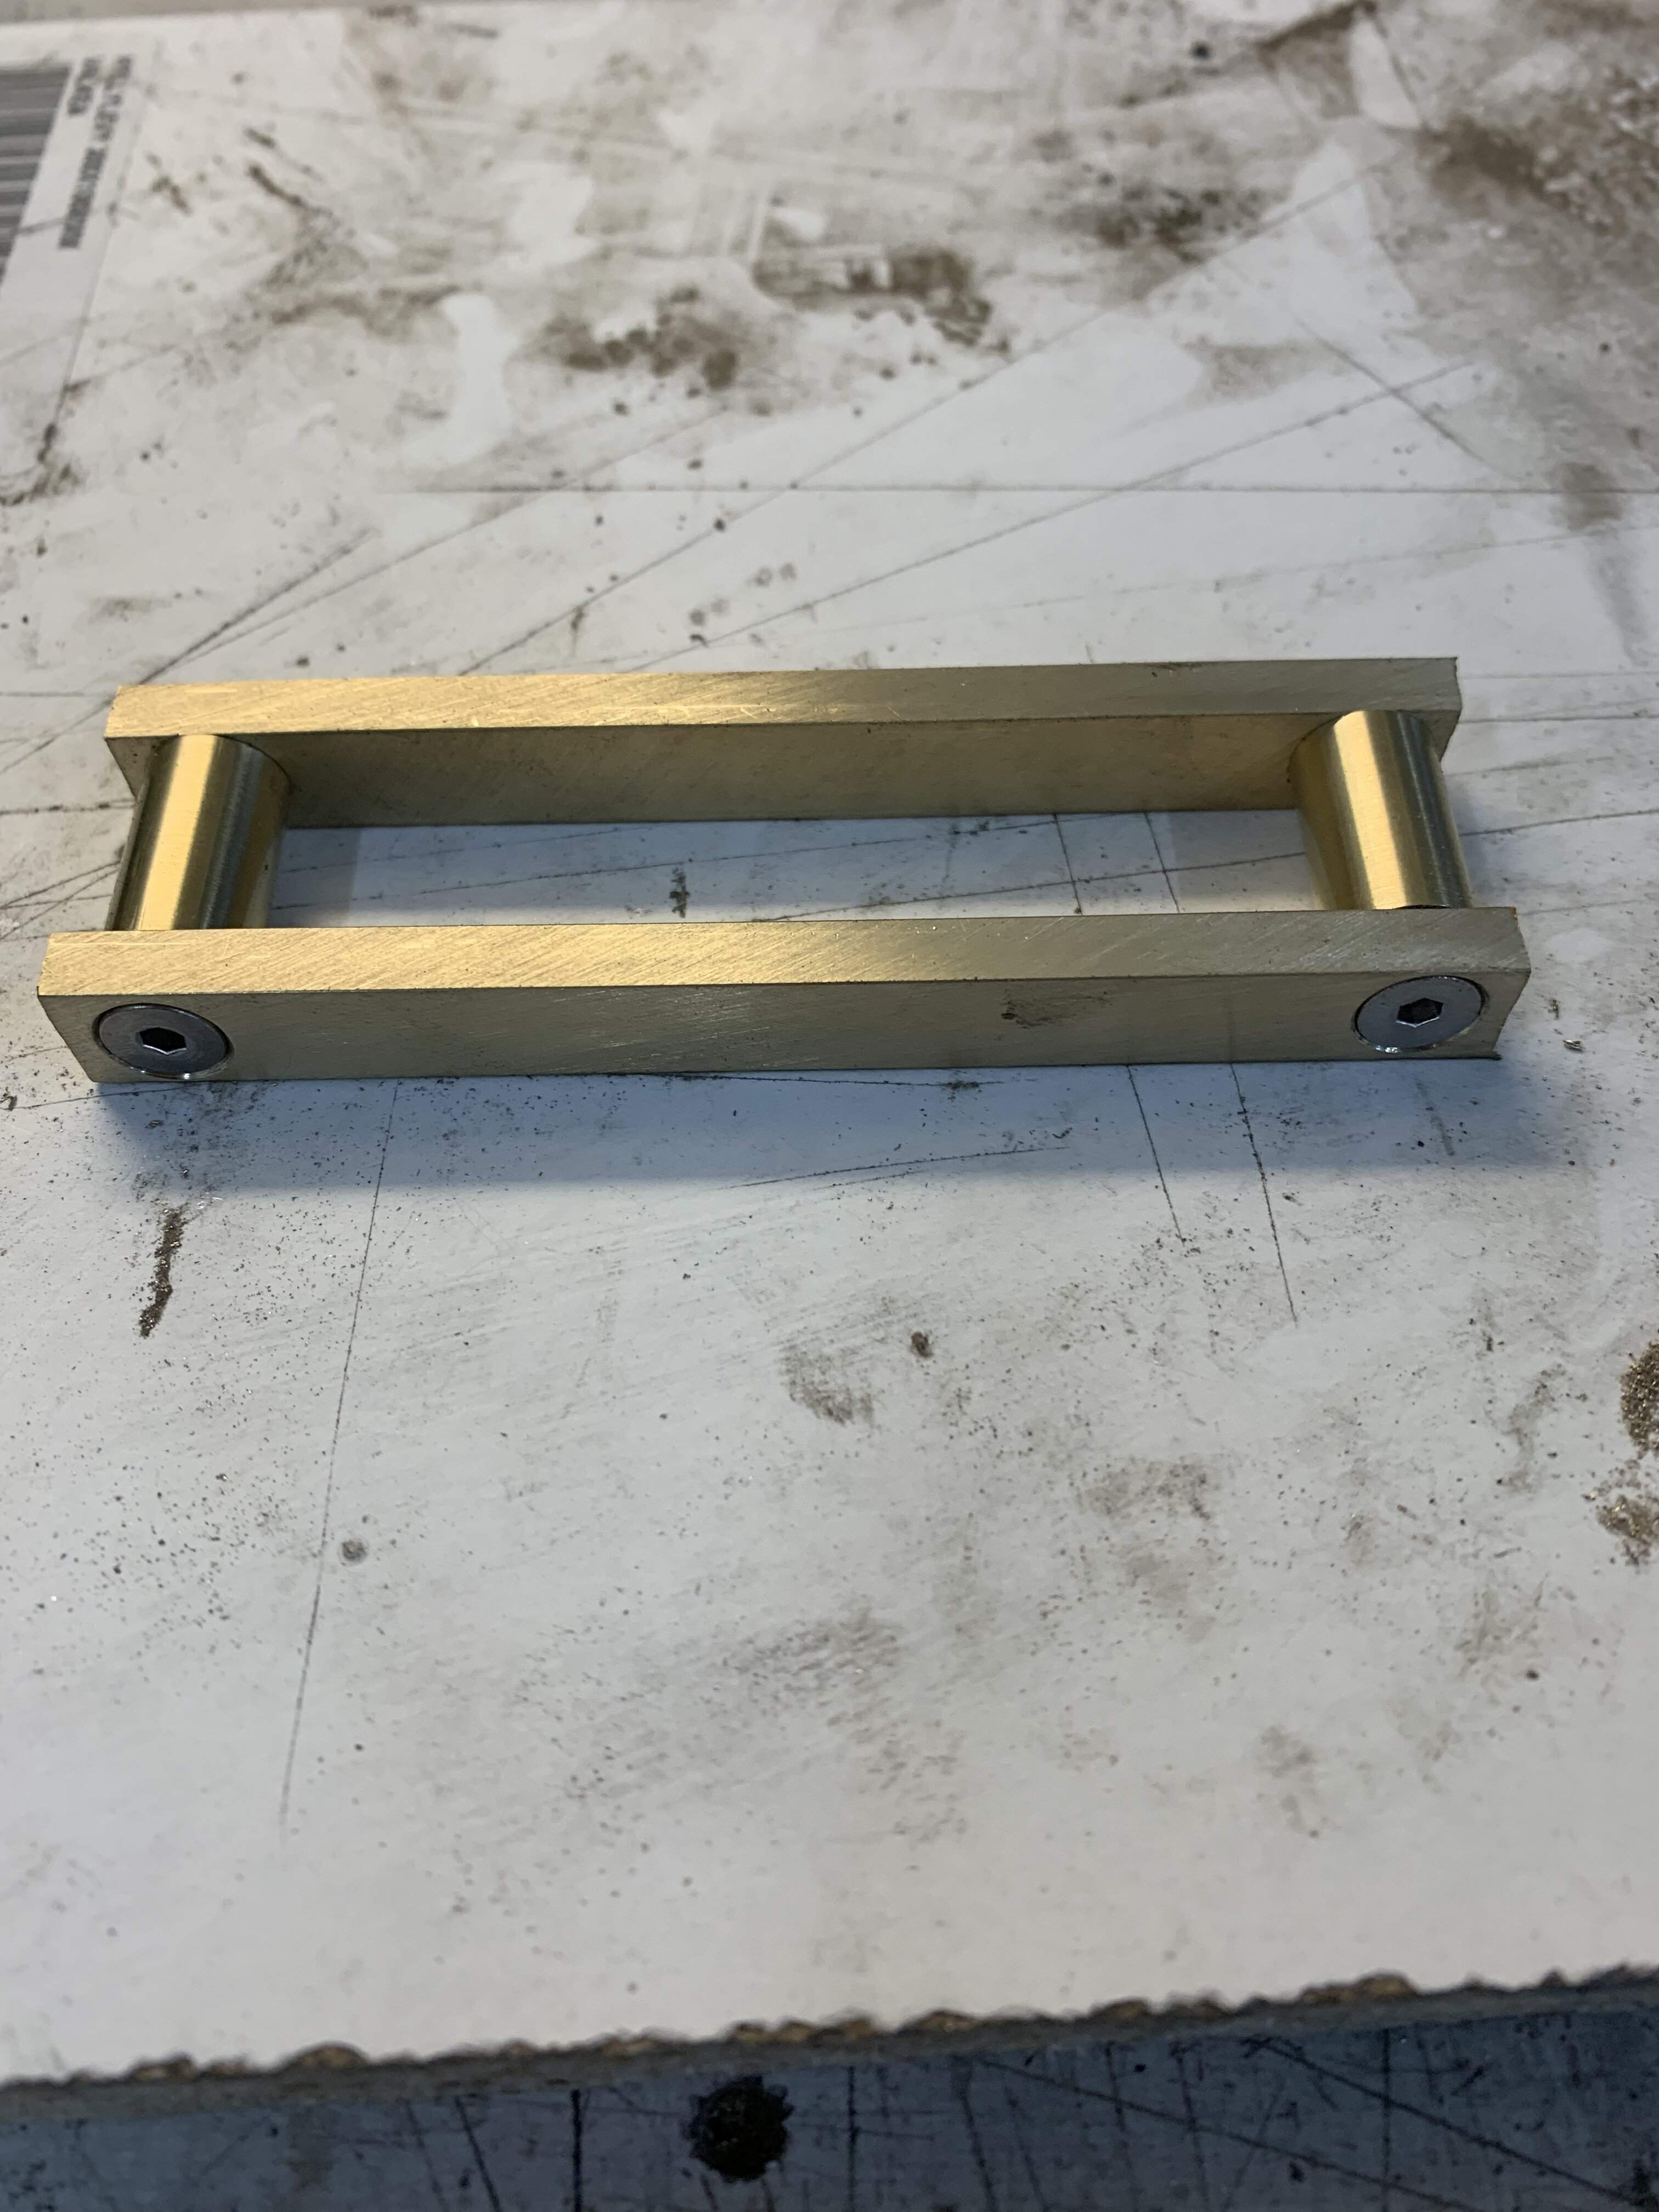
BDEB525F-CD58-4A2E-9DCA-8605AC246F08.jpeg


Some sanding with sanding drum in the drill press and the shape is pretty much done.
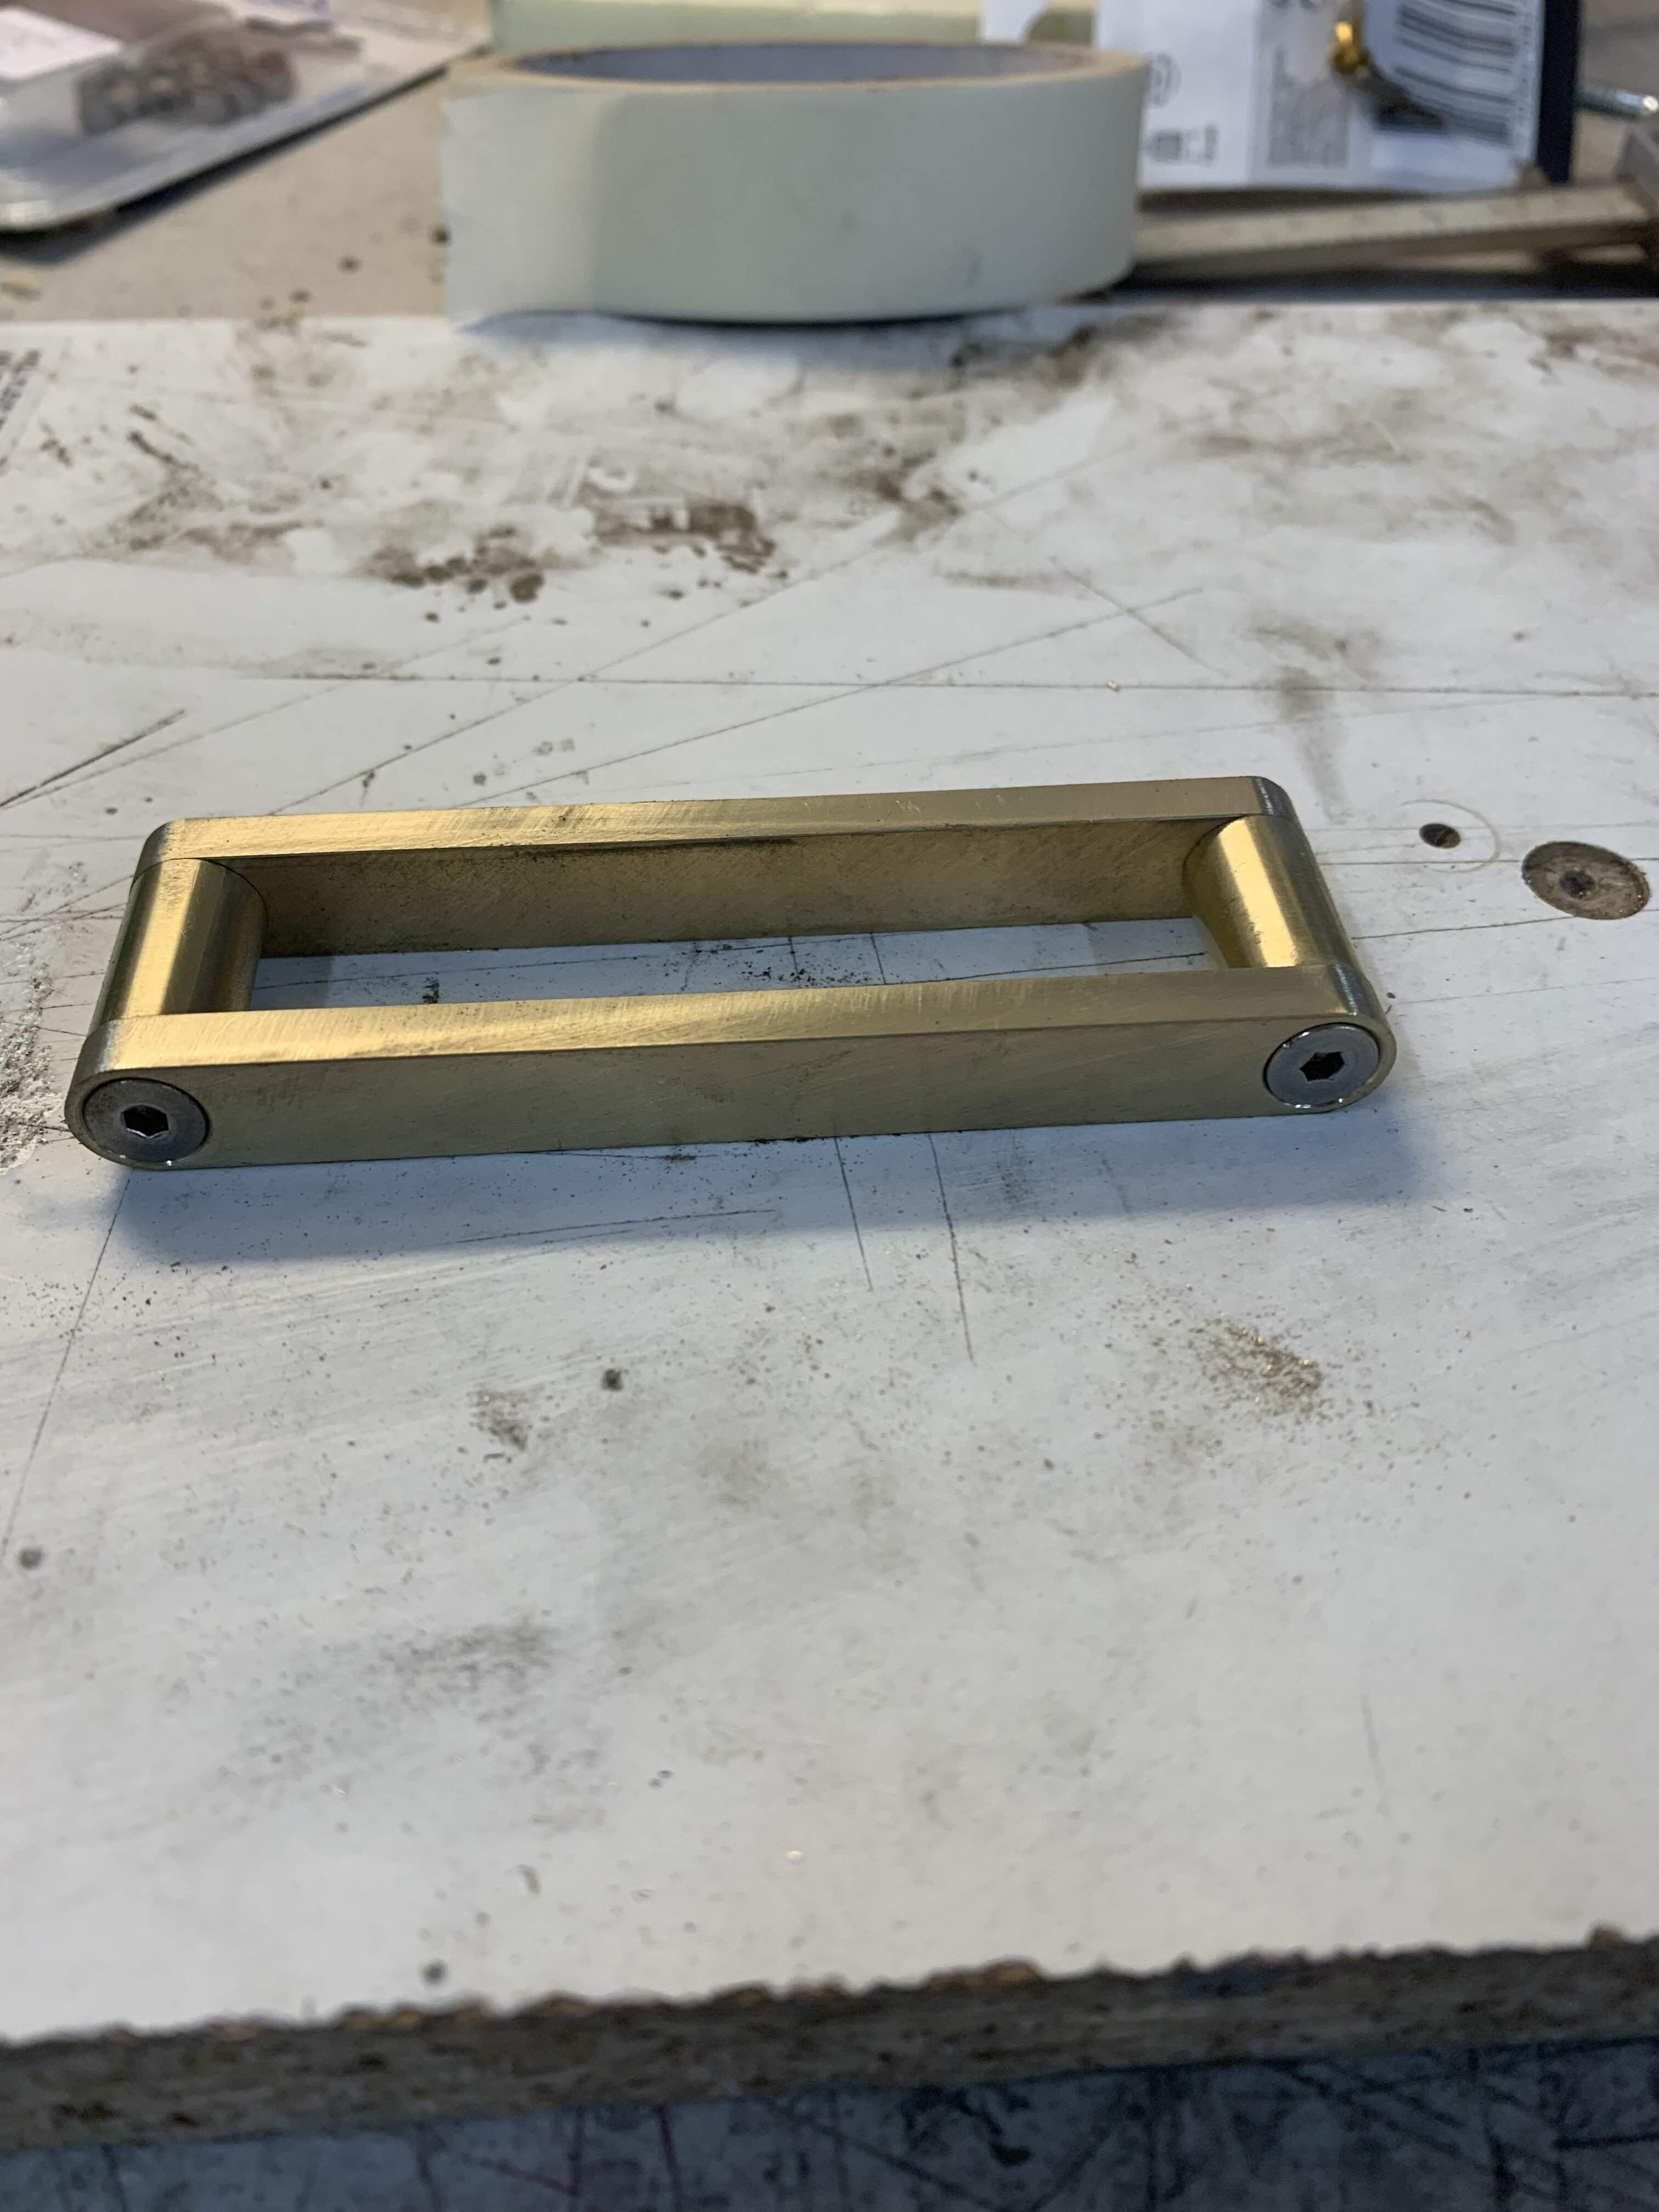
92537784-901D-45CC-99A0-2D13B05A5607.jpeg


Careful measuring and drilling for bridge saddles. I bolted the square pieces together for drilling.
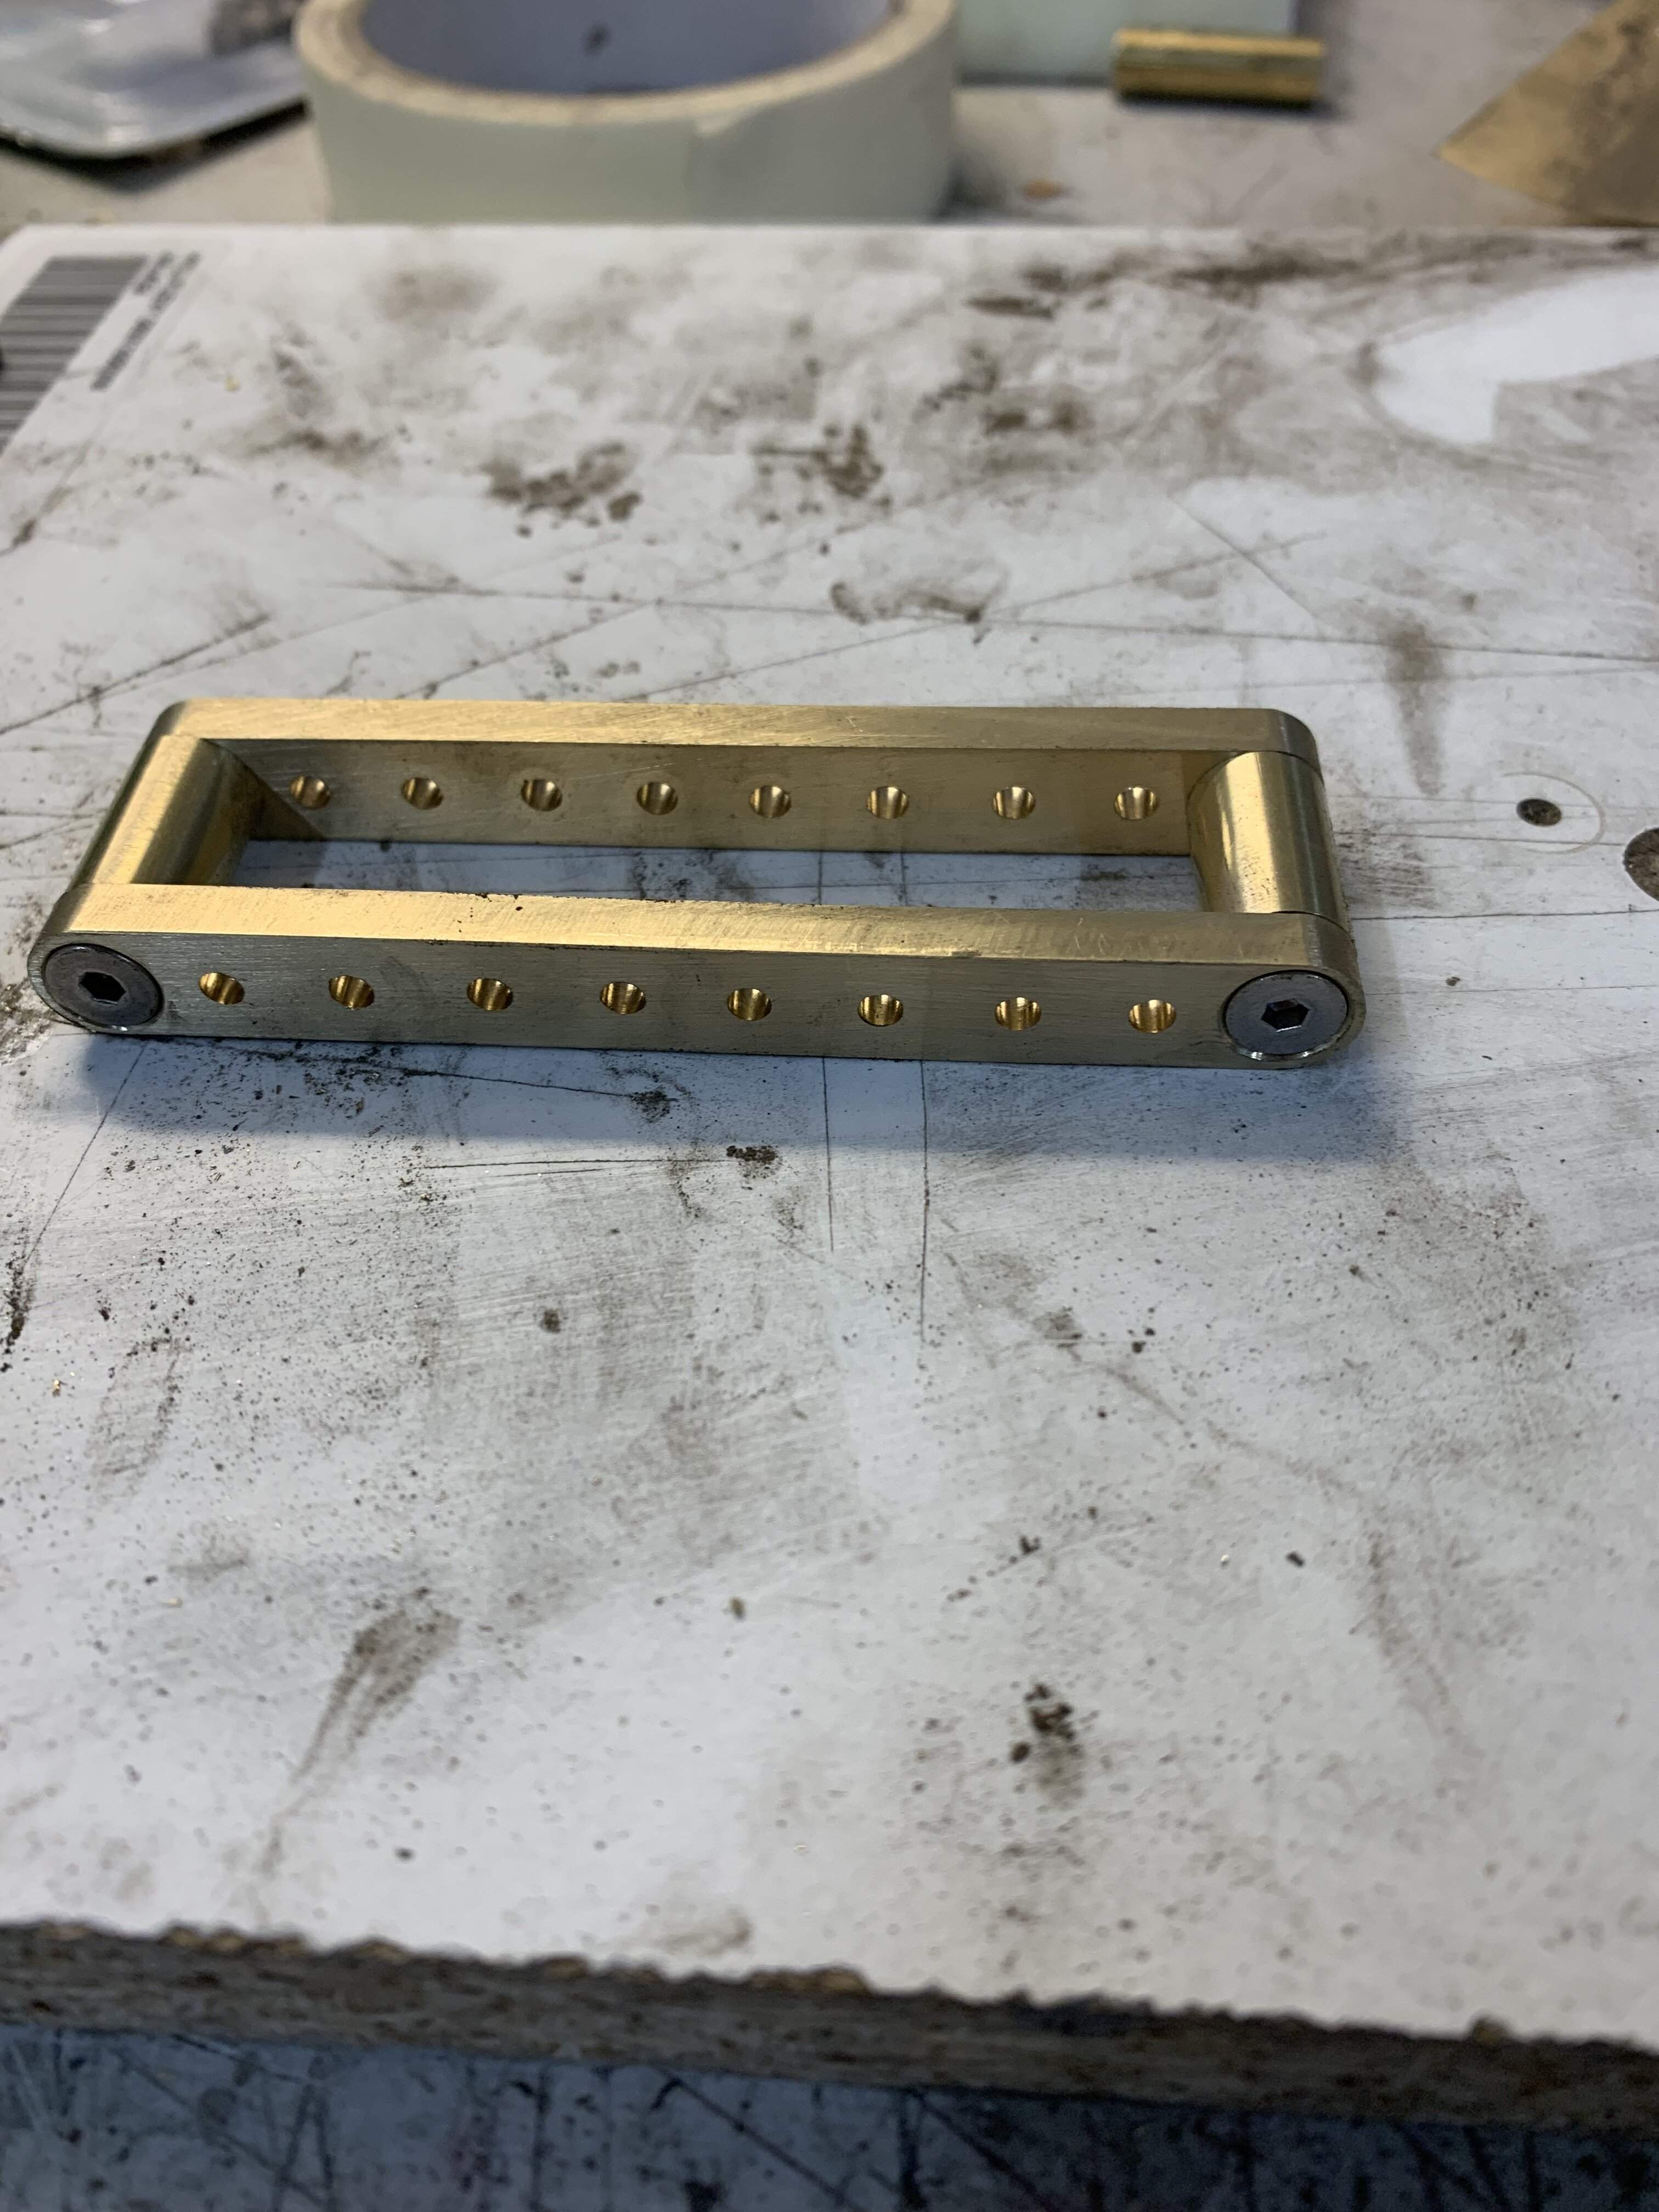
DB4F809B-223E-4B06-8E58-13DE5F542860.jpeg


Hacksaw, drill press machining, drilling and tapping for bridge saddles.
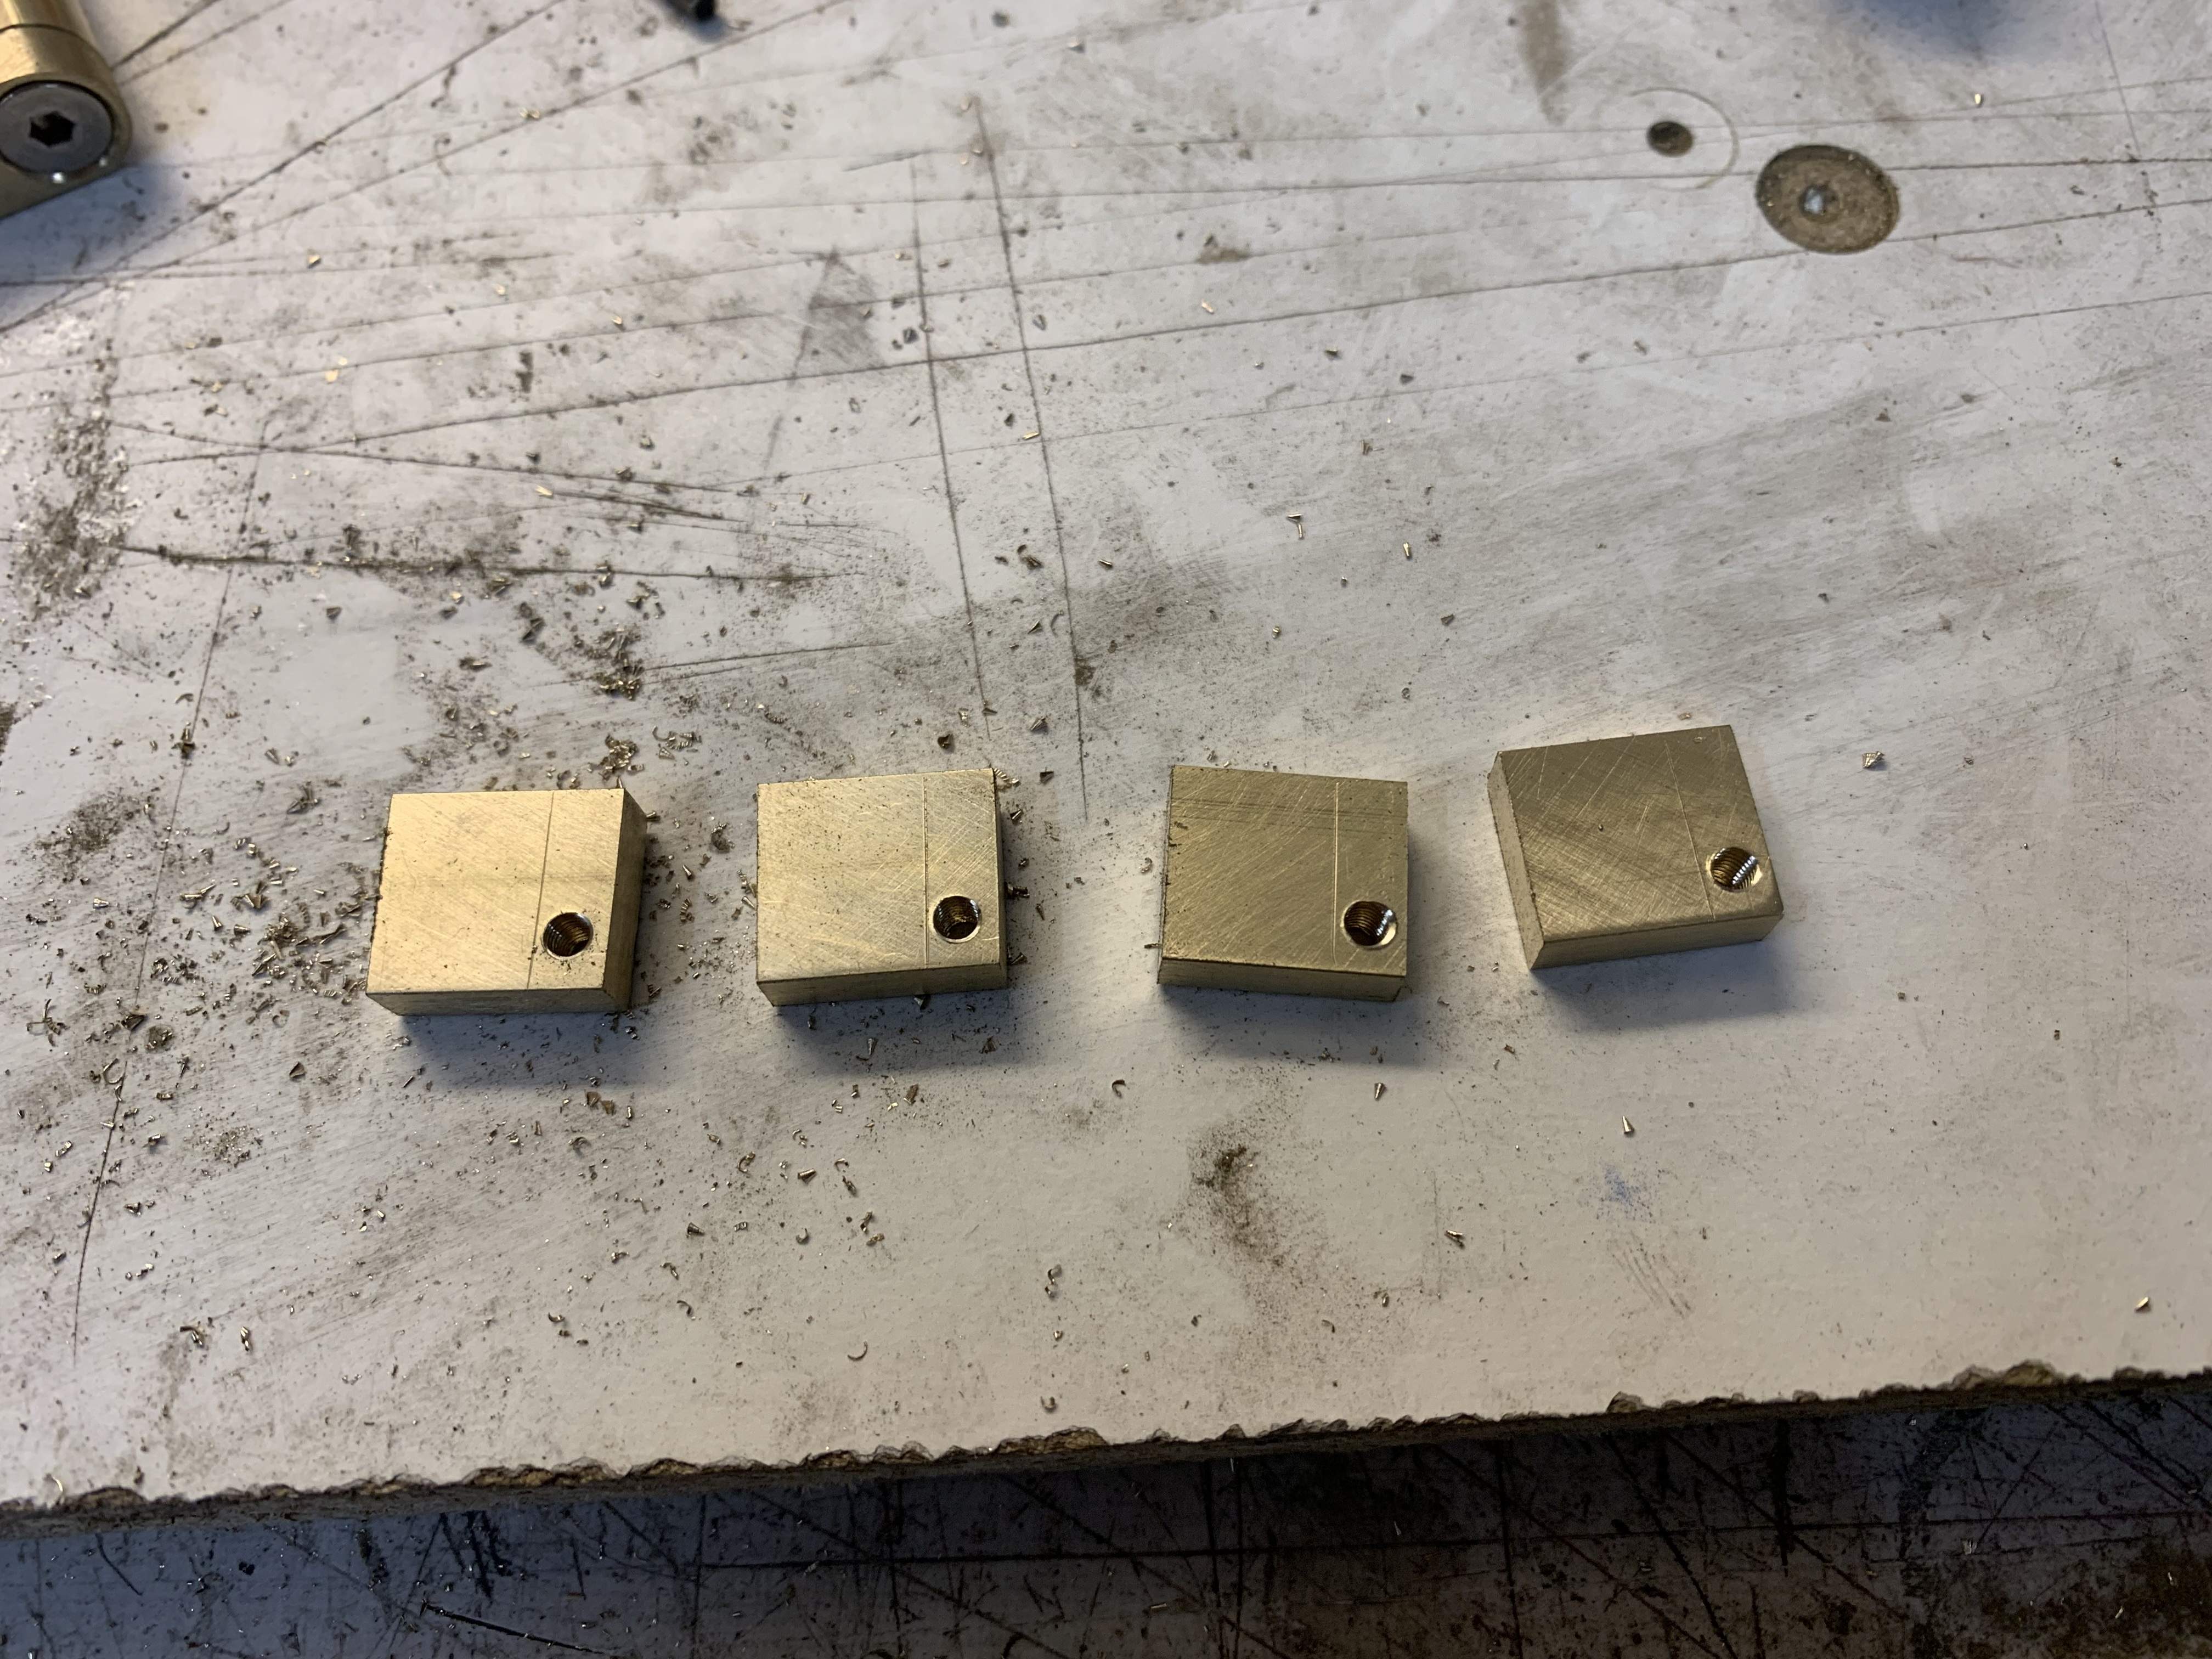
BFDCBEA8-B13D-4E83-9E96-414AAB53182A.jpeg


I mounted the bridge saddles on the bridge and used the bridge as a guide for the other holes in the saddles. Tomorrow I'm cutting pieces of 3mm stainless rod for guide pins. I need to order M3 stainless allen key screws, washers and nyloc nuts and replace the ones in the bridge with them.
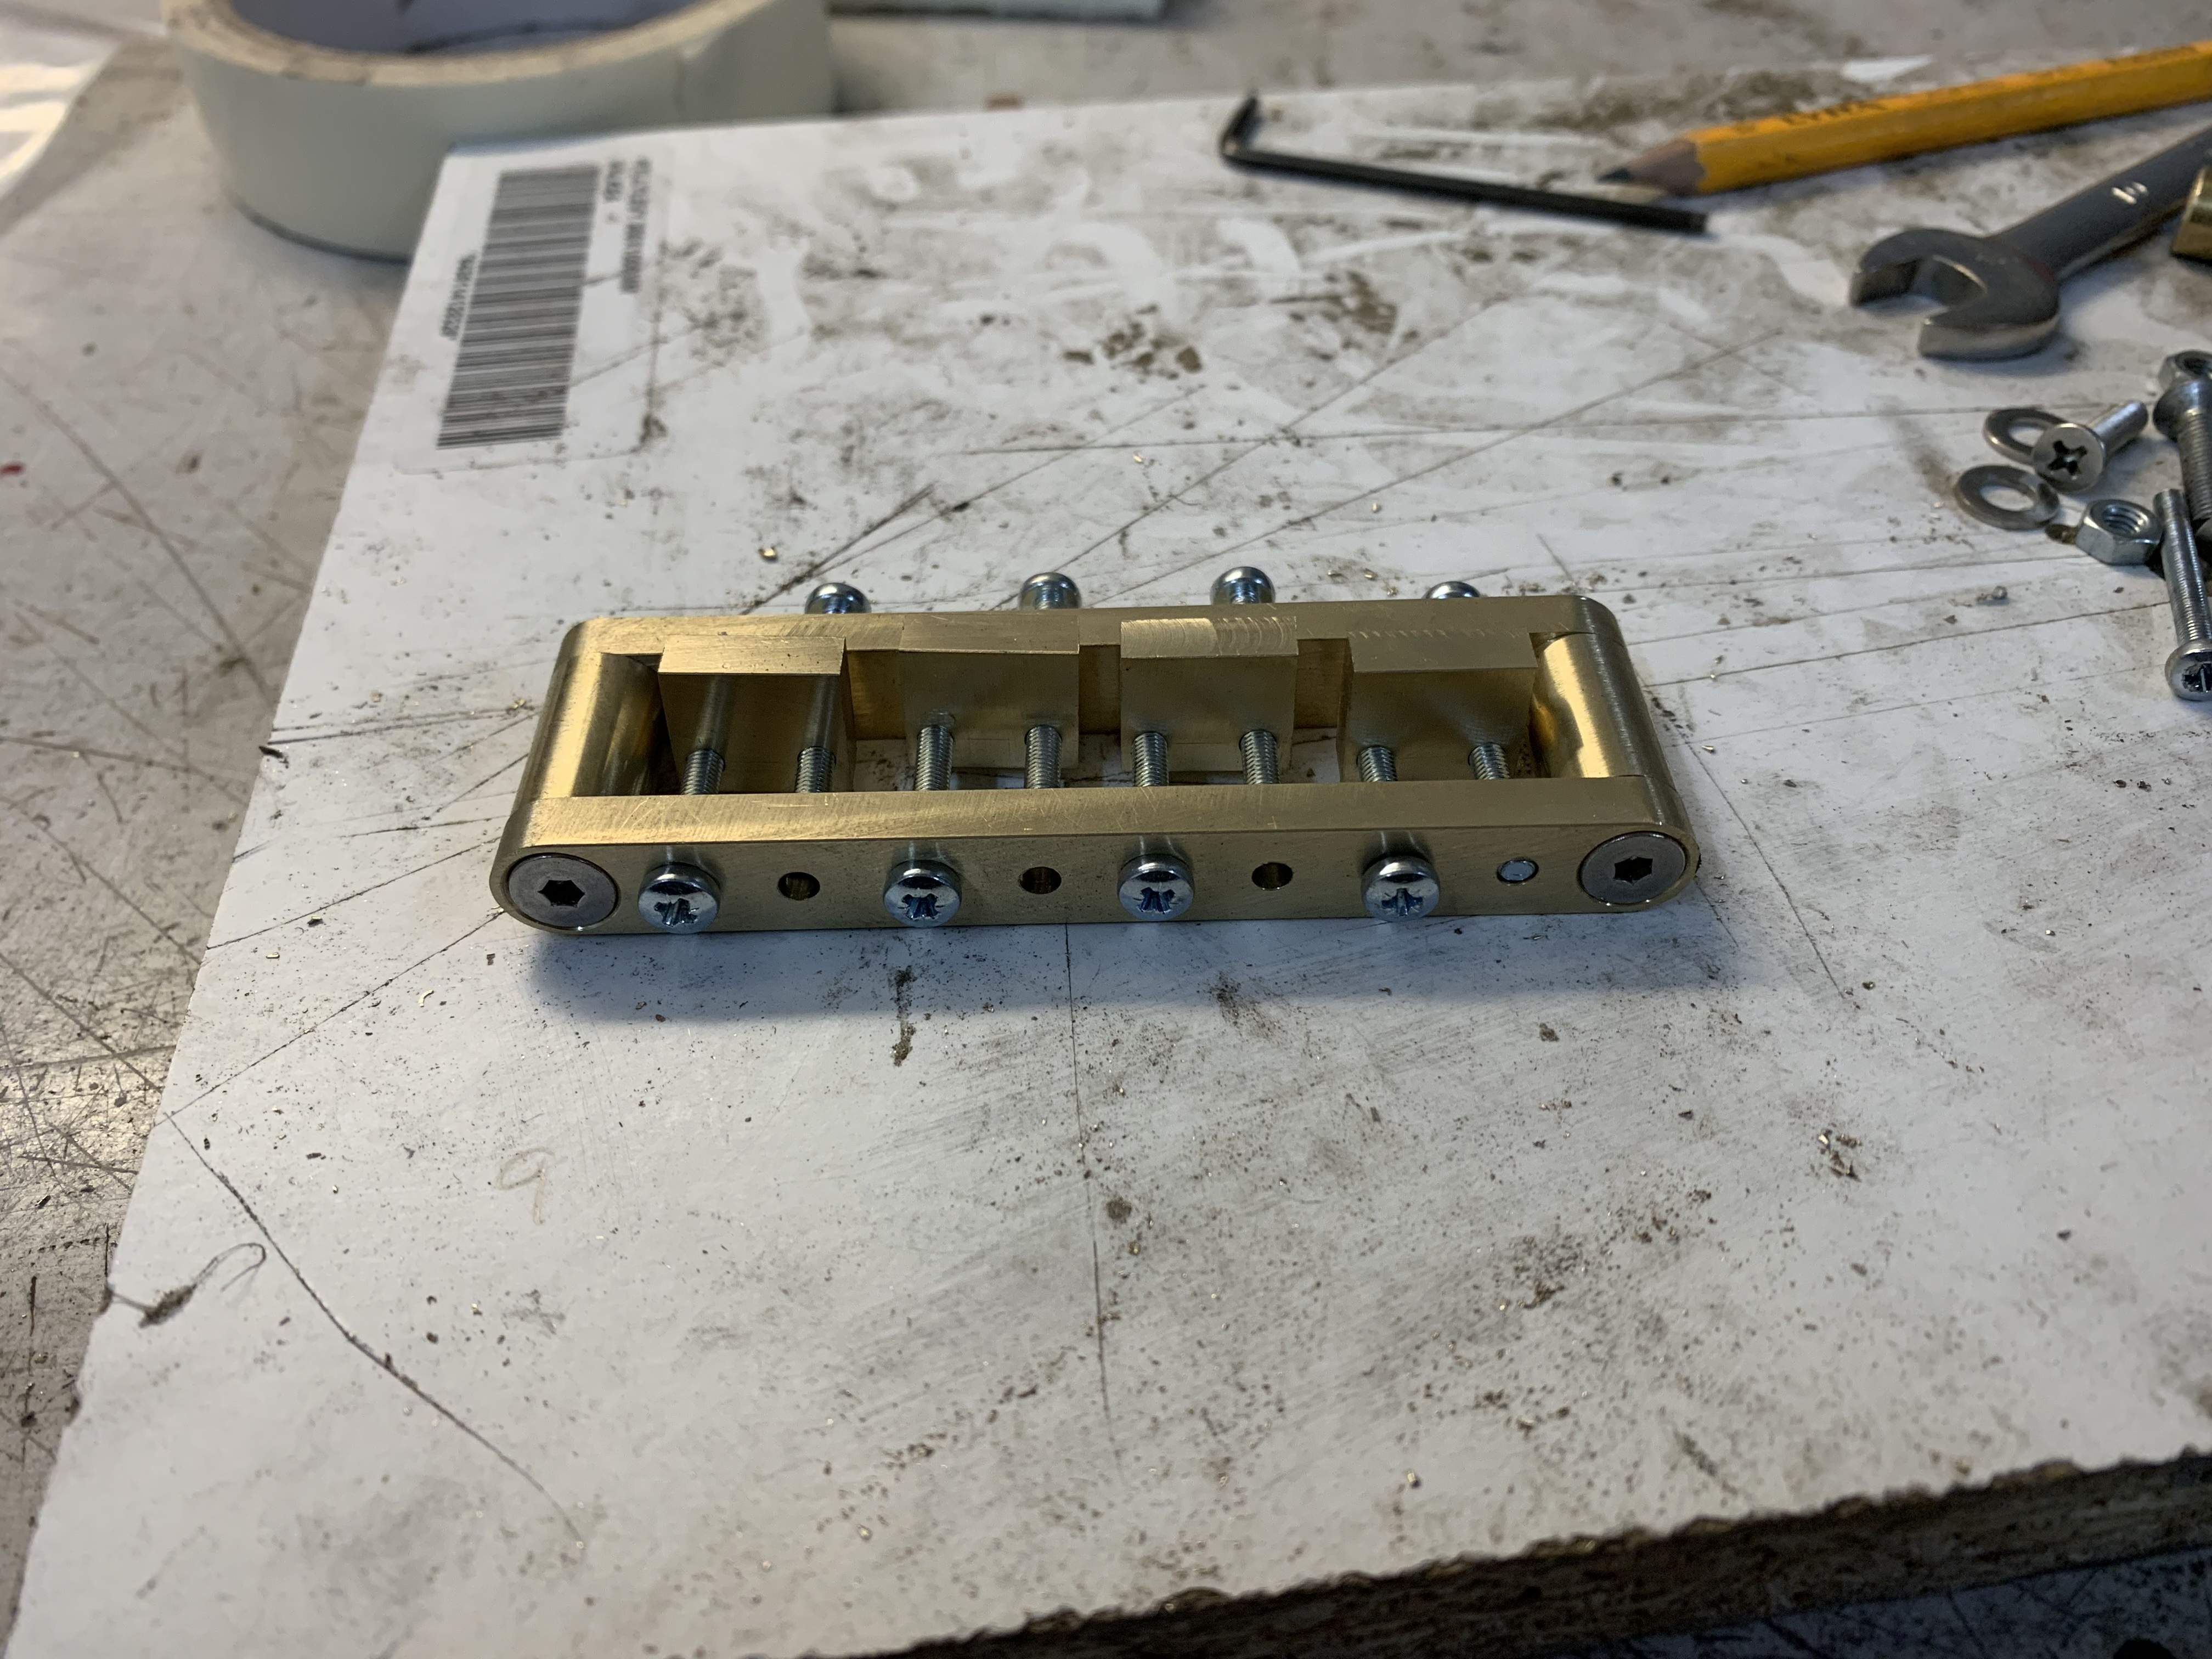
11A8674D-5BC0-497F-9978-DA450BD8E2E5.jpeg


Tailpiece and bridge blocks will be next, maybe tomorrow.
 
Last edited:
I've always thought that Alembic Stanley Clark bass shape is one of the best looking shapes. Neck heavy, propably yes at least a bit but still I want one. I started with some machining and started to make a brass bridge. I bought 10mm brass rod, 5mmx40mm, 8mmx40mm and 10mmx40mm brass square rod. I have drill press, hacksaw and files. Let's start!

First I had to cut two 10mmx17mm slugs from the round bar and make the ends perpendicular. I used sand paper and drill press.

View attachment 5007536

Next was drilling holes for threads in the center of the slugs. With a lathe very easy but without one I had to get creative. I mounted a center drill on the chuck, carefully adjusted my small but very accurate cross feed table so that the drill was exactly in the slot in the jaws. After tightening the drill in the jaws I loosened the jaws and put a slug in the chuck and drilled center marks. Worked great!

View attachment 5007537

I threaded the slugs with M4 tap.

View attachment 5007538

Next I hacksawed two 11mm strips from 5mm brass. I needed them exactly 10mm wide so I used Dremel router bit and side feed table to machine them.

View attachment 5007541

I sanded machining marks off with 400 grit paper.

View attachment 5007542

Some drilling and countersinking and the bridge frame is beginning to come together.

View attachment 5007543

Some sanding with sanding drum in the drill press and the shape is pretty much done.

View attachment 5007544

Careful measuring and drilling for bridge saddles. I bolted the square pieces together for drilling.

View attachment 5007546

Hacksaw, drill press machining, drilling and tapping for bridge saddles.

View attachment 5007547

I mounted the bridge saddles on the bridge and used the bridge as a guide for the other holes in the saddles. Tomorrow I'm cutting pieces of 3mm stainless rod for guide pins. I need to order M3 stainless allen key screws, washers and nyloc nuts and replace the ones in the bridge with them.

View attachment 5007548

Tailpiece and bridge blocks will be next, maybe tomorrow.

Nice work, Marko! A good lesson on how to do basic metalworking of custom instrument hardware, without a full machine shop. Small metal parts really aren't that difficult to make with hand tools and a drill press. That's how mechanical things were made back in the 1800's. The technology still works today.
 
I've always thought that Alembic Stanley Clark bass shape is one of the best looking shapes. Neck heavy, propably yes at least a bit but still I want one. I started with some machining and started to make a brass bridge. I bought 10mm brass rod, 5mmx40mm, 8mmx40mm and 10mmx40mm brass square rod. I have drill press, hacksaw and files. Let's start!

First I had to cut two 10mmx17mm slugs from the round bar and make the ends perpendicular. I used sand paper and drill press.

View attachment 5007536

Next was drilling holes for threads in the center of the slugs. With a lathe very easy but without one I had to get creative. I mounted a center drill on the chuck, carefully adjusted my small but very accurate cross feed table so that the drill was exactly in the slot in the jaws. After tightening the drill in the jaws I loosened the jaws and put a slug in the chuck and drilled center marks. Worked great!

View attachment 5007537

I threaded the slugs with M4 tap.

View attachment 5007538

Next I hacksawed two 11mm strips from 5mm brass. I needed them exactly 10mm wide so I used Dremel router bit and side feed table to machine them.

View attachment 5007541

I sanded machining marks off with 400 grit paper.

View attachment 5007542

Some drilling and countersinking and the bridge frame is beginning to come together.

View attachment 5007543

Some sanding with sanding drum in the drill press and the shape is pretty much done.

View attachment 5007544

Careful measuring and drilling for bridge saddles. I bolted the square pieces together for drilling.

View attachment 5007546

Hacksaw, drill press machining, drilling and tapping for bridge saddles.

View attachment 5007547

I mounted the bridge saddles on the bridge and used the bridge as a guide for the other holes in the saddles. Tomorrow I'm cutting pieces of 3mm stainless rod for guide pins. I need to order M3 stainless allen key screws, washers and nyloc nuts and replace the ones in the bridge with them.

View attachment 5007548

Tailpiece and bridge blocks will be next, maybe tomorrow.

Very cool! I am currently working on the same bridge; also without a lathe so I hadn't figured out to make the slugs, yet. I also don't have a cross feed table...

For some reason, I thought that was an old Warwick bridge design?
 
  • Like
Reactions: chinjazz
I also don't have a cross feed table...

That's what the slots are for, in the base of the vise and the table of your drill press. Bolts and washers. Lock the table clamp, bolt the vise to the table with the bolts loose. Line it up carefully with a slug or a pin in the drill chuck, lightly clamping the vise jaws on it, in the vertical V-notches in the jaws. Then lock down the bolts. Classic drill press setup procedure. Now you can drill centers in a whole batch of round slugs, quickly and accurately.

The cross-feed vise speeds things up, but isn't really necessary.
 
That's what the slots are for, in the base of the vise and the table of your drill press. Bolts and washers. Lock the table clamp, bolt the vise to the table with the bolts loose. Line it up carefully with a slug or a pin in the drill chuck, lightly clamping the vise jaws on it, in the vertical V-notches in the jaws. Then lock down the bolts. Classic drill press setup procedure. Now you can drill centers in a whole batch of round slugs, quickly and accurately.

The cross-feed vise speeds things up, but isn't really necessary.

I do have a small vise with v-notches... I will give it a shot!
 
By the way, with that same setup of the vise bolted to the drill press table, you can easily square up the end of the slug. Clamp the slug in the vise and put an end mill in the drill chuck. A 3/8" or 1/2" diameter 2 flute end mill. Bring it down gently onto the end of the slug and it will square it off nice and smooth. It's easier if you've drilled the center hole first.

Marko squared off his slugs by putting the slug in the drill chuck and bringing it down onto a piece of sandpaper. That works fine too, but is a little slower.
 
  • Like
Reactions: BishopJP
Today I went to a lumber store next town. They have a heated warehouse where all the lumber is stored so wood is pretty much as dry as it gets, especially after winter when air is very dry. I have developed some kind of a relationship (not in romantic way) with the owner. I went to search lumber when he was driving a catepillar and moving snow around the yard. I bought khaya mahogany, walnut and maple for neck laminates and alder for body core. Then I asked him if he had any figured walnut. I asked if gunstock billets would be big enough for my template and at the same phrase I said that I know they will cost a fortune. He picked up one European flame walnut billet and said yes, they are expensive but he can make an exception and sell me one at a fair price. I think 75€ for flame walnut tops, backs and many headstock veneers was a good deal.

9B891AEC-9B35-4566-90D2-6B93B2D36B56.jpeg


I got the stainless pins cut and shaped the saddles a bit. I hope I can make the tailpiece during weekend.

8E8A66BE-1B96-4A3F-B177-B4E98F5C29EE.jpeg
 
Last edited:
Well I woke up at 6.30 and didn't want to just surf around the internet or youtube so I went to the garage and did some machining. I got the bridge part finished and mounting block made. Later today I'm hoping to start the tailpiece.

View attachment 5010195 View attachment 5010196

Wow, it's an authentic Tone Block! :thumbsup: Alembic was, I believe, the first company to embed metal blocks in the body that the bridge attaches to with machine screws. A big advance in the technology of bass building. The Alembic guys were the pioneers of many advances in bass design that we use today. Your whole bridge/tailpiece assembly is almost an exact replica of Alembic's parts from the early '70's. I believe that our late friend Rick Turner was involved in a lot of that mechanical design.

It's a clever bridge design. In particular, the parts are fairly easy to make up in low-production.
 
  • Like
Reactions: BassToGoGo and Lo-E
Here's how I made the tailpiece. After some hacksaw action and drilling I used a sanding drum to shape the tail piece. First with 80 grit, then up to 400 grit. I drilled all the holes before any shaping because square block is easier to clamp.

79EE9E89-08A4-420E-9DB5-B9900A469593.jpeg


I screwed the tailpiece on a block for filing the string slots. That's something I learned from Bruce.

103A5D5F-E3BC-4D7F-8F74-874C4862CAC0.jpeg


After sanding the top to 400 grit it was polishing time. I use a felt polishing wheel with polishing compound.

AEE3ED62-5282-4CBC-96F3-232F3F3D9677.jpeg


And here it is, almost finished tailpiece. I'm going to sand the bottom with a disc sander to make the tailpiece tilted a bit so that the bridge side is lower.

467611A0-5BAE-4EEC-8190-A4FA9BB34265.jpeg
 
Last edited: