• TalkBass has been independent since 1998. Add your voice.
    Create a free account to reply to discussions, view embedded media, and browse with fewer display ads.
    Join freeLog in
    Want zero display ads or expanded classifieds tools? Compare plans.

My first multiscale (experimental)

I got home and took a look. The bridge end of double-ball strings have regular sized balls (ahem) but the other end has smaller balls (ahem ahem). A 1/16” drill bit fits easily inside them, and I see steel dowel pins in 1/16” by 1” on Amazon. Does the smaller diameter raise any concerns?
 
  • Like
Reactions: ctmullins
I got home and took a look. The bridge end of double-ball strings have regular sized balls (ahem) but the other end has smaller balls (ahem ahem). A 1/16” drill bit fits easily inside them, and I see steel dowel pins in 1/16” by 1” on Amazon. Does the smaller diameter raise any concerns?

Ah, guitar-size balls (ahem).

A 1/16" steel dowel pin will have plenty of strength, but a 1/16" brass pin might be too weak. You can also buy 1/16" (0.063") Piano Wire at the hobby shop.

If you didn't already know it, Steel Dowel Pins are made from a strong steel alloy, fully hardened and ground to a very precision size*. You cannot bend them or cut them with a hacksaw. If you have to shorten one, it has to be done by grinding, like an abrasive cutoff wheel.

*Standard Steel Dowel Pins are normally ground to 0.0002" oversize. They are designed to be a press fit into a nominal size hole in steel. So, a 1/16" Dowel Pin will actually measure 0.0627" dia, to press into a 0.0625" dia hole.

If you are lightly pressing them into maple, a drilled 1/16" hole may not provide enough grip to hold the pin securely. Try a test piece. You may want to drill the holes #53 instead.
 
Last edited:
Ah, guitar-size balls (ahem).

A 1/16" steel dowel pin will have plenty of strength, but a 1/16" brass pin might be too weak. You can also buy 1/16" (0.063") Piano Wire at the hobby shop.

If you didn't already know it, Steel Dowel Pins are made from a strong steel alloy, fully hardened and ground to a very precision size*. You cannot bend them or cut them with a hacksaw. If you have to shorten one, it has to be done by grinding, like an abrasive cutoff wheel.

*Standard Steel Dowel Pins are normally ground to 0.0002" oversize. They are designed to be a press fit into a nominal size hole in steel. So, a 1/16" Dowel Pin will actually measure 0.0627" dia, to press into a 0.0625" dia hole.

If you are lightly pressing them into maple, a drilled 1/16" hole may not provide enough grip to hold the pin securely. Try a test piece. You may want to drill the holes #53 instead.


I use piano wire for my pinless acoustic bridges and archtop tailpieces and as Bruce says, it's plenty strong for this application. I'm now curious to try the dowel pins. I cut the piano wire with an abrasive cutoff wheel.
 
Ah Geeze, the steel pin solution is so elegantly simple, and it doesn't risk breaking the string by having a sharp down angle, or rubbing against some kind of ferrule or connector, etc. My mind always supplies the most complicated solution to any problem first, so of course this wouldn't occur to me. If they are friction-fit with a "head" or cap of sorts (like those McMaster Carr pins), then it's a lot like an acoustic guitar bridge pin, holds nicely against tension, but removable with finger grip only, or maybe a padded set of pliers. I LIKE it, depending on what you use, could become a decorative element too. I'd really like to try a "headless" sometime, but with a headstock serving as a purely ornamental function. The bridge screw type tuners are just so superior to traditional post and gear tuners. So many builds, so little time.
 
  • Like
Reactions: wraub and ctmullins
How about a Dog point screw, threaded in from the back of the headstock.
10302680330.jpg
 
Alrighty then!

1/16” by 1” steel dowel pins ordered and received. :thumbsup:

Last night I chopped up bits of toothpick and glued them in the holes. I used a fretting hammer to smash them in nice and tight. :cool:

Multi_0375.jpg


This morning I nipped them flush, sanded them down, and drilled fresh holes for the dowel pins. I drilled 3/4” deep, leaving 1/4” exposed, which is plenty for the ball ends.

Multi_0372.jpg


I’m not going to worry about trying to make the toothpick patches invisible, as this is just a prototype, to see if I like this multiscale thing as much as I hope.

Plus, the black finish should help. After some finish sanding, it was time to apply the dye. First, a last look at the plain, natural wood. As usual, I’ve grown a bit fond of, or at least accustomed to, this view.

Multi_0371.jpg


Multi_0373.jpg


As usual, I’m using TransTint in distilled water, wiped on with a rag. It looks quite dark when it goes on wet.

Multi_0374.jpg


Multi_0376.jpg


It will lighten considerably when dry. I may not need a second coat; we shall see.
 
CT, what are you using for a gun? I used my Harbor Freight cheapo HVLP gun on the Hossenfeffer, but I never did get a real smooth finish out of it, hoping the new Ultimate Varathane goes on smoother, as it seems to for other builders. Bass is looking cool, I can't believe that's just a "prototype".
 
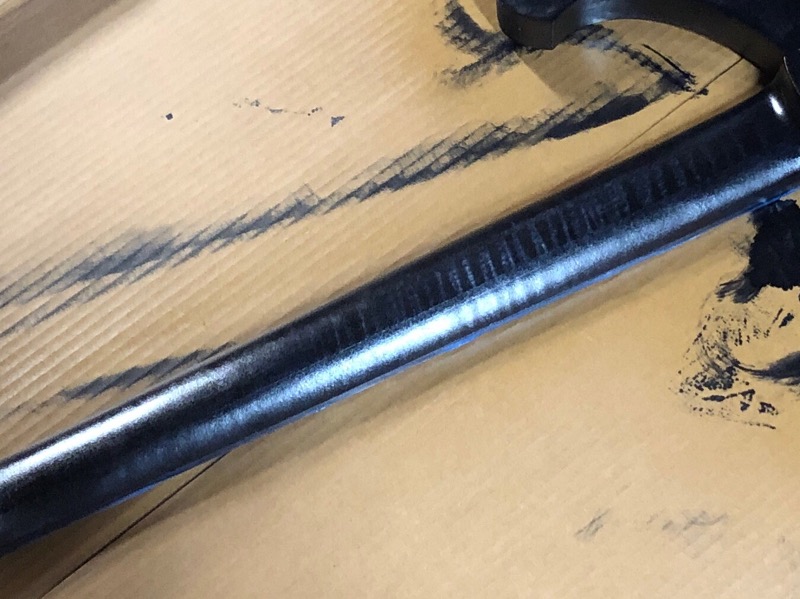
So far so good on Day 1 of the Varathane. It goes on with a rough texture, so I’ve started sanding between coats now that I have five coats on. The neck is looking pretty good, with a nice satin sheen.

Multi_0379.JPG


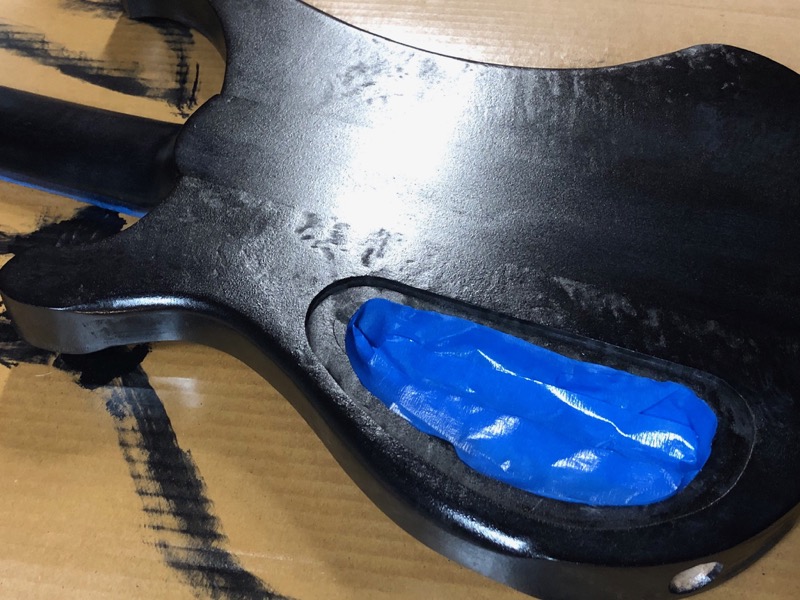
But the mystery maple on the body is determined to give me the finger. There are some weird spots in the figure that I guess needed more sanding? Either that or they’re soaking up more of the Varathane than the more normal sections. Ugh. Probably my fault for not being a little more careful with the prep. Oh well. I’m just going to keep laying down coats and sanding until they’re filled.

Stupid mystery maple.

Multi_0380.JPG
 
That looks a lot like the finish I got out of the “old” Varathane, kind of sandy looking. The WB thread has people putting down about 5 coats as a sealer, sanding level. I got a few spots like that that on the Hossenfeffer, just kept laying on finish and leveling until they went under. Finish work sucks!
 
  • Like
Reactions: ctmullins
I got the best results by wiping on a coat of z-poxy resin first, sanding that smooth, then starting the poly. You might try brushing on the some of the triple-thick as a sealer, leveling, etc. The rattle can stuff, which I used on the danobacker goes on reeeeaaallly thin. You'll want to spray it till it just starts to look a little bluish then stop. it will flow out as it dries.
 
  • Like
Reactions: ctmullins
So far so good on Day 1 of the Varathane. It goes on with a rough texture, so I’ve started sanding between coats now that I have five coats on. The neck is looking pretty good, with a nice satin sheen.

Multi_0379.JPG


But the mystery maple on the body is determined to give me the finger. There are some weird spots in the figure that I guess needed more sanding? Either that or they’re soaking up more of the Varathane than the more normal sections. Ugh. Probably my fault for not being a little more careful with the prep. Oh well. I’m just going to keep laying down coats and sanding until they’re filled.

Stupid mystery maple.

Multi_0380.JPG

Soft maple can require more prep than hard, especially with waterbase. It really helps to raise the grain before sanding. I use a very wet washcloth and clothes iron (no steam) set on stun. Then block sand 80/120 dry paper, another go around of steam and 180 dry paper to whatever grit works for your finish.

Prep is 90% of any finish job. Once you get into the 'wax on, wax off' mentality it goes pretty quickly. Not to mention efficiently as opposed to coat after coat of finish product on an iffy base.

Expensive sandpaper can be well worth the money. I've been buying from this company since the mid 80s. White silicon carbide is the BEST...IMO.
No Load (white) Finishing Paper (Hand/Machine Sanding) - Abrasive Sheets
 
Soft maple can require more prep than hard, especially with waterbase. It really helps to raise the grain before sanding. I use a very wet washcloth and clothes iron (no steam) set on stun. Then block sand 80/120 dry paper, another go around of steam and 180 dry paper to whatever grit works for your finish.

Prep is 90% of any finish job. Once you get into the 'wax on, wax off' mentality it goes pretty quickly. Not to mention efficiently as opposed to coat after coat of finish product on an iffy base.

Expensive sandpaper can be well worth the money. I've been buying from this company since the mid 80s. White silicon carbide is the BEST...IMO.
No Load (white) Finishing Paper (Hand/Machine Sanding) - Abrasive Sheets

So true! I like the 3M Fre-Cut paper, but will happily try alternatives. No more corner-store sandpaper for me, learned that the hard way.

This weekend I’ll sand it all back as far as I dare. I just don’t want to blow through my dye layer...
 
  • Like
Reactions: Beej and Dadagoboi