
Enjoy the benefits of a premium membership!
Upgrade Account
-
TalkBass has been independent since 1998. Add your voice.
Create a free account to reply to discussions, view embedded media, and browse with fewer display ads.
Join free Log in
Want zero display ads or expanded classifieds tools? Compare plans.
You are using an out of date browser. It may not display this or other websites correctly.
You should upgrade or use an alternative browser.
You should upgrade or use an alternative browser.
My first multiscale (experimental)
- Thread starter ctmullins
- Start date
More options
Who Replied?


- Apr 18, 2008
- 16,015
- 1
- 31,729
- Disclosures
- I'm highly opinionated and extremely self-assured
Thanks for the kind words my friends!
Ground wire for what? Bridge? I don’t do that.
Last night I glued up the lower wing...
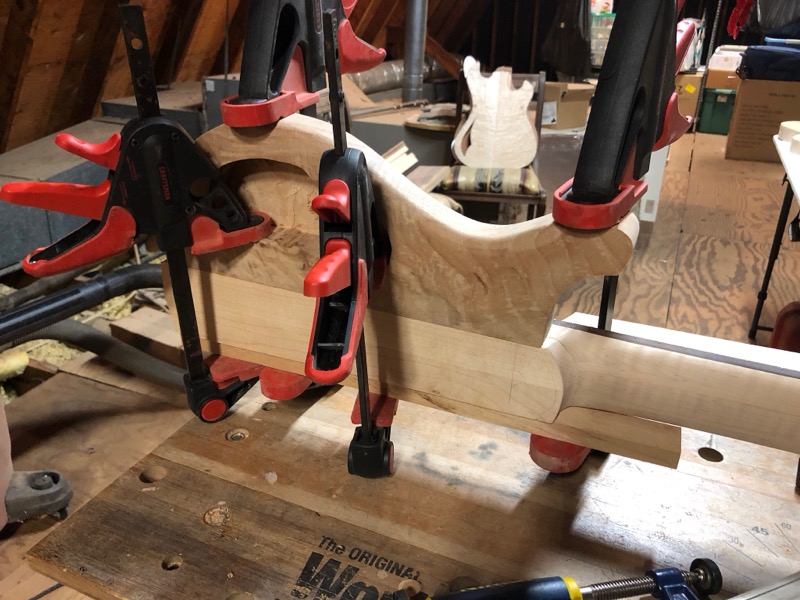
... and tonight the upper wing, after drilling the strap button hole.
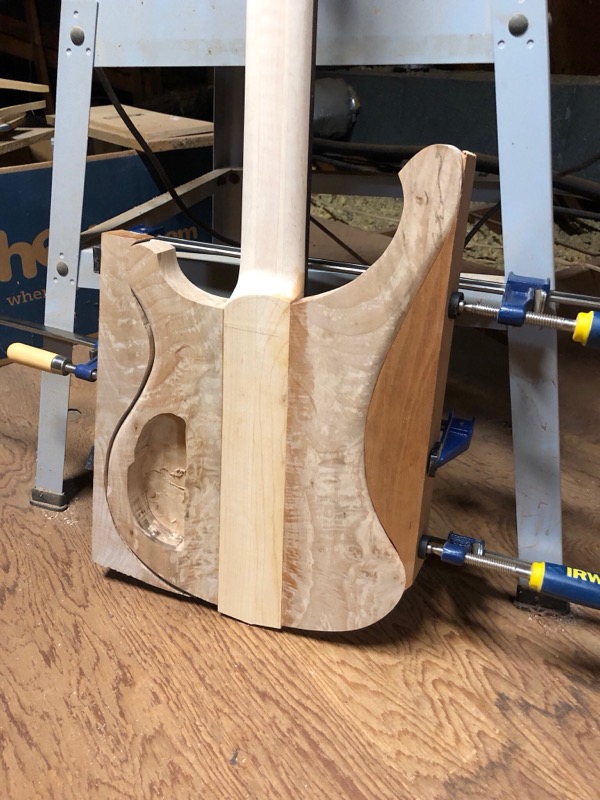
It’s good to have cutoffs to use as clamping cauls.
Ground wire channel drilled?
Ground wire for what? Bridge? I don’t do that.
Last night I glued up the lower wing...
... and tonight the upper wing, after drilling the strap button hole.
It’s good to have cutoffs to use as clamping cauls.


Do you do any biscuits or doweling to help with keeping things aligned when you glue up the body?
- Apr 18, 2008
- 16,015
- 1
- 31,729
- Disclosures
- I'm highly opinionated and extremely self-assured
Do you do any biscuits or doweling to help with keeping things aligned when you glue up the body?
No, I just position them manually while I gradually tighten the clamps.
There is a slight bit of misalignment that I will sand out.
My bad... I saw two body halves and it seemed like a good pre-glue question.
Thanks for the kind words my friends!
Ground wire for what? Bridge? I don’t do that.
Last night I glued up the lower wing...
... and tonight the upper wing, after drilling the strap button hole.
It’s good to have cutoffs to use as clamping cauls.


This is looking awesome, can't wait to see the finished project!
- Apr 18, 2008
- 16,015
- 1
- 31,729
- Disclosures
- I'm highly opinionated and extremely self-assured
It’s a BSO!
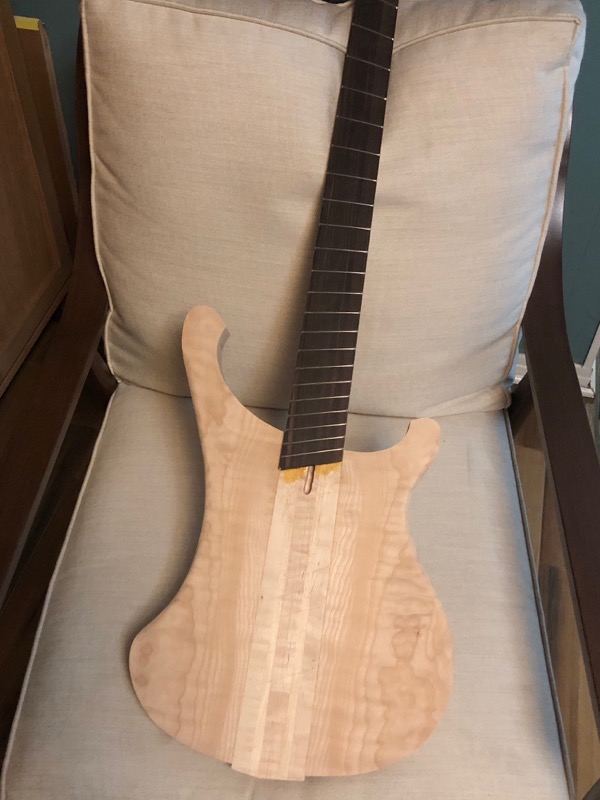
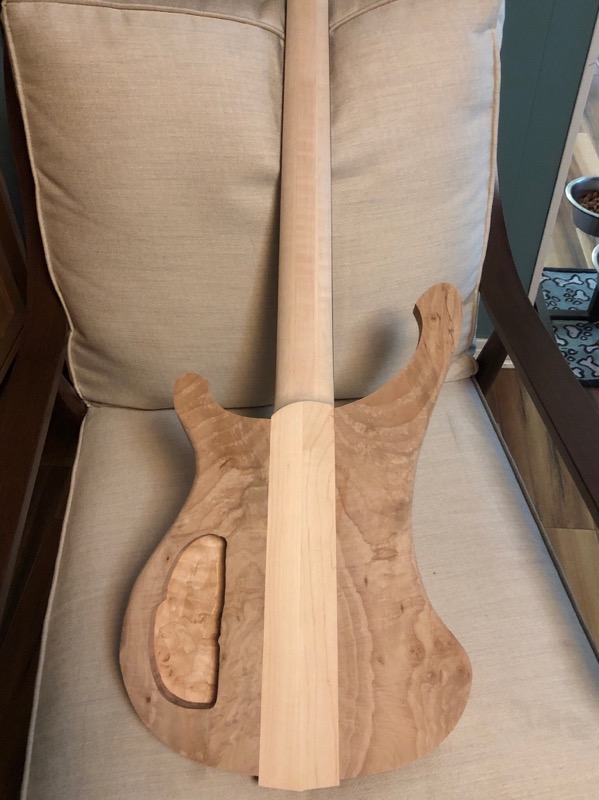
6.5 lb / 2.9 kg at this point.
6.5 lb / 2.9 kg at this point.
- Apr 18, 2008
- 16,015
- 1
- 31,729
- Disclosures
- I'm highly opinionated and extremely self-assured
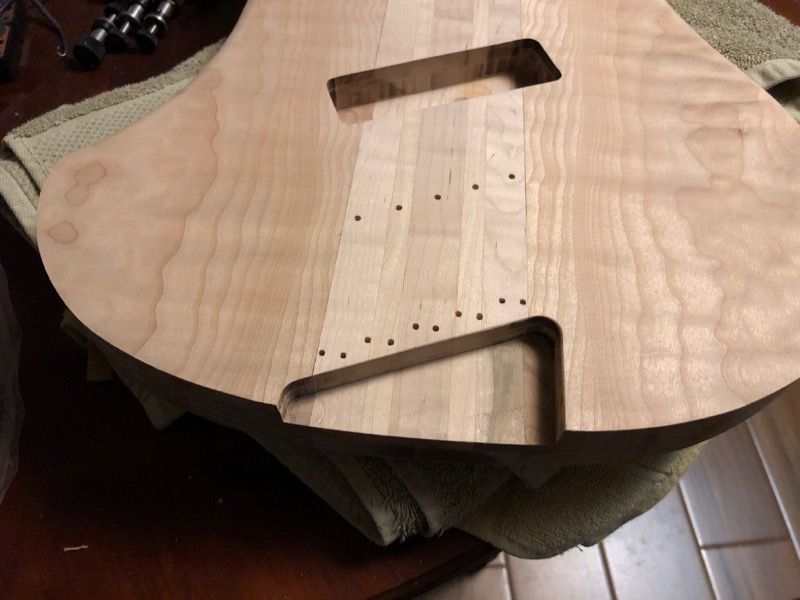
Went ahead and routed pickup cavities before calling it a night. They’re in approximately the “lowered” 4004 positions.
I did the bridge cavity first, and in my enthusiasm I made it rather deeper than necessary, so I’ll probably glue a piece back into the bottom of it. I didn’t want to make the same mistake in the neck pickup cavity, for structural reasons.
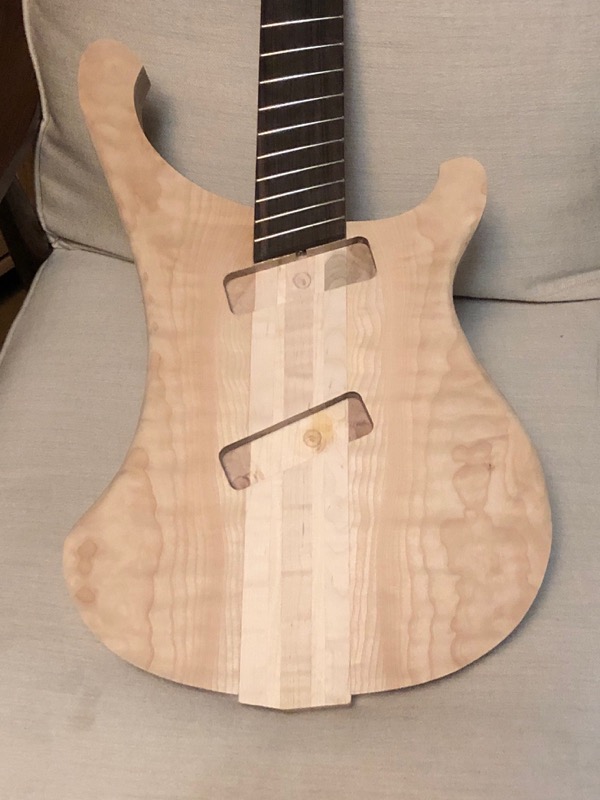
I did the bridge cavity first, and in my enthusiasm I made it rather deeper than necessary, so I’ll probably glue a piece back into the bottom of it. I didn’t want to make the same mistake in the neck pickup cavity, for structural reasons.
- Apr 18, 2008
- 16,015
- 1
- 31,729
- Disclosures
- I'm highly opinionated and extremely self-assured
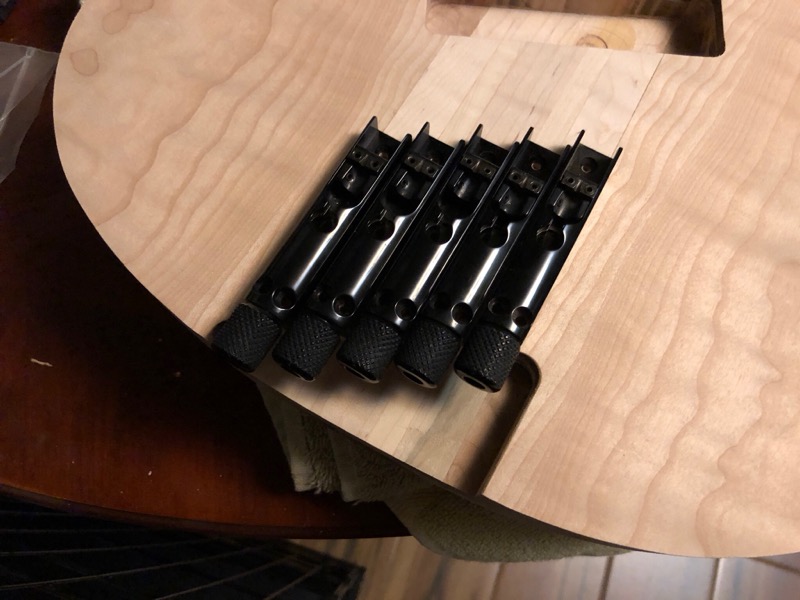
Saturday’s progress - bridges.
Five times as many bridges means lots more measuring and drilling.
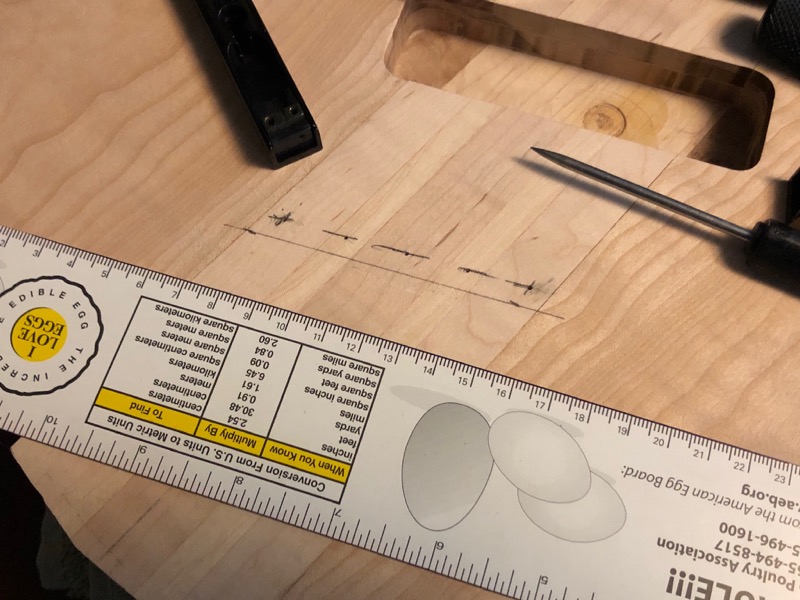
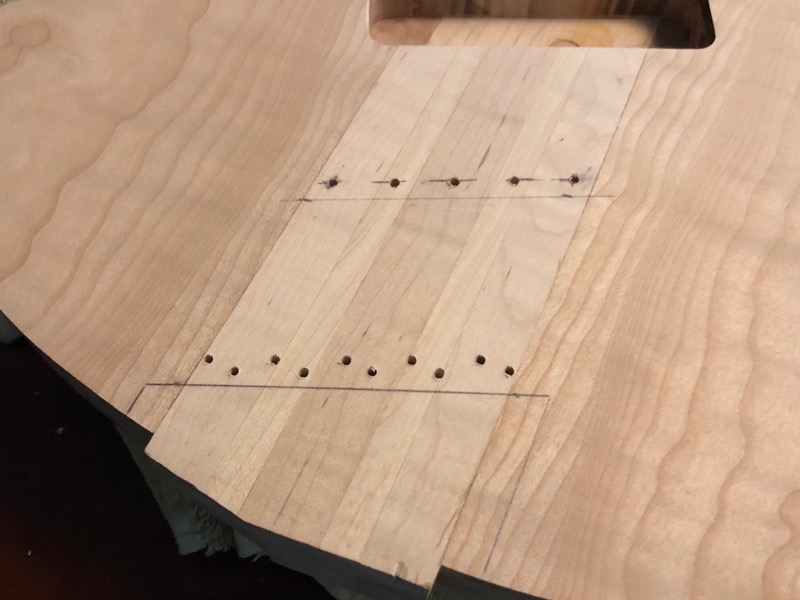
Plus a recess for the tuning knobs.
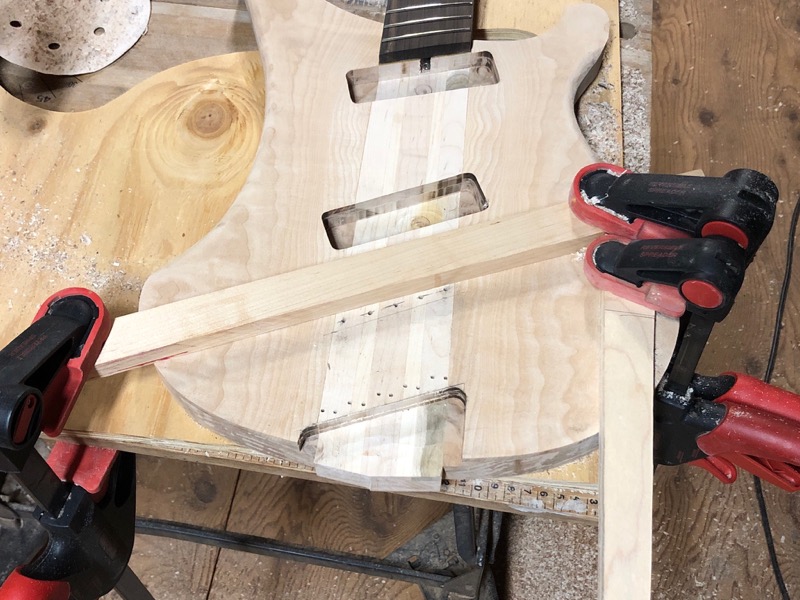
I think it came out pretty well.
Nice tight string spacing!
Five times as many bridges means lots more measuring and drilling.
Plus a recess for the tuning knobs.
I think it came out pretty well.
Nice tight string spacing!
- Apr 18, 2008
- 16,015
- 1
- 31,729
- Disclosures
- I'm highly opinionated and extremely self-assured
Almost stuffed this up yesterday. Jury’s still out, actually.
Rossmeisl’s original design for Rickenbacker is such a creatively homogenous design, and I wanted to preserve it in this build, so even though we’re doing headless, I wanted the silhouette of the original “cresting wave” headstock. So I glued some ears on, and shaped it to a scaled-down version of the original. That went well. In my enthusiasm I neglected to snap any photos however...
Since I’m using ABM individual bridge/tuner units, and since I want the option of using double-ball strings, I purchased five of ABM’s new single headpieces, the Invalid Link Removed. They’re pretty small, but (as with everything ABM) nicely machined.
The geometry of these little fellas, with the extra-thick fretboard, meant that I wanted them up closer to the plane of the top of the fretboard, to avoid excessive down-angle at the nut. So I cut out a piece from the scrap from my drop-top in the shape of the traditional Rick truss rod cover, and glued it on. That went well, but again, no photos.
When the glue was cured I unclamped everything, and set to work drilling the mounting holes for the individual headpieces, and this is where things went a bit pear-shaped. In my enthusiasm I forgot to consider how much width would be required for mounting five of the little fellas. When I cut my faux truss rod cover, I cut the shape out by eye, and while it has the proper curvature, it only just barely has enough width to mount the headpieces, and even so they will have to be mounted at something of an angle. So my attempt to preserve traditional aesthetics with modern hardware may not be as successful as I had hoped.
Test fitting, before the nut is installed, just to see:
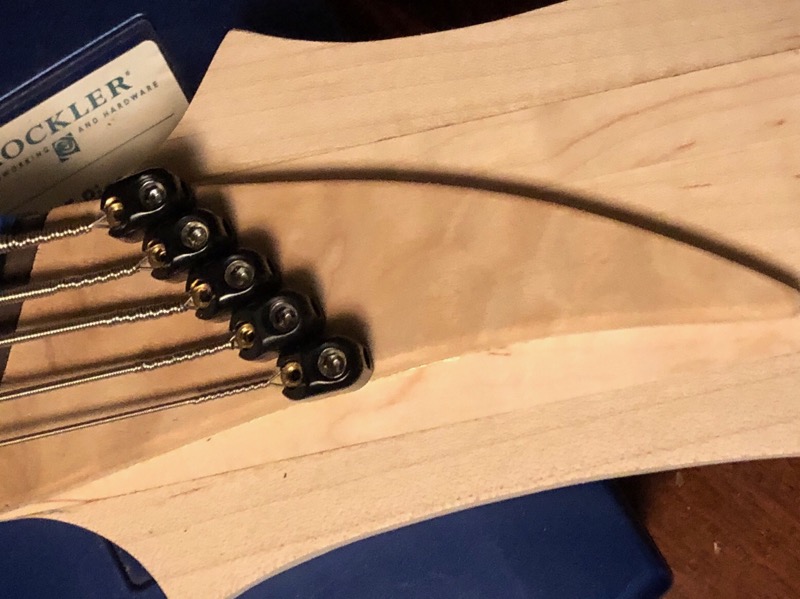
At this point I have to remind myself that this is a test build from scrap woods, and I can always try again if this one goes south.
Rossmeisl’s original design for Rickenbacker is such a creatively homogenous design, and I wanted to preserve it in this build, so even though we’re doing headless, I wanted the silhouette of the original “cresting wave” headstock. So I glued some ears on, and shaped it to a scaled-down version of the original. That went well. In my enthusiasm I neglected to snap any photos however...
Since I’m using ABM individual bridge/tuner units, and since I want the option of using double-ball strings, I purchased five of ABM’s new single headpieces, the Invalid Link Removed. They’re pretty small, but (as with everything ABM) nicely machined.
The geometry of these little fellas, with the extra-thick fretboard, meant that I wanted them up closer to the plane of the top of the fretboard, to avoid excessive down-angle at the nut. So I cut out a piece from the scrap from my drop-top in the shape of the traditional Rick truss rod cover, and glued it on. That went well, but again, no photos.
When the glue was cured I unclamped everything, and set to work drilling the mounting holes for the individual headpieces, and this is where things went a bit pear-shaped. In my enthusiasm I forgot to consider how much width would be required for mounting five of the little fellas. When I cut my faux truss rod cover, I cut the shape out by eye, and while it has the proper curvature, it only just barely has enough width to mount the headpieces, and even so they will have to be mounted at something of an angle. So my attempt to preserve traditional aesthetics with modern hardware may not be as successful as I had hoped.
Test fitting, before the nut is installed, just to see:
At this point I have to remind myself that this is a test build from scrap woods, and I can always try again if this one goes south.
Stupid question, but could they be through-headstock ferrules of some kind in the traditional tuner locations? That would sacrifice straight string pulls, but that doesn’t seem to matter much on s Ric.
- Apr 18, 2008
- 16,015
- 1
- 31,729
- Disclosures
- I'm highly opinionated and extremely self-assured
Stupid question, but could they be through-headstock ferrules of some kind in the traditional tuner locations? That would sacrifice straight string pulls, but that doesn’t seem to matter much on s Ric.
They sure could, if I were willing to sacrifice double-ball compatibility.
We might end up there anyway though!
- Apr 18, 2008
- 16,015
- 1
- 31,729
- Disclosures
- I'm highly opinionated and extremely self-assured
Almost stuffed this up yesterday. Jury’s still out, actually.
Rossmeisl’s original design for Rickenbacker is such a creatively homogenous design, and I wanted to preserve it in this build, so even though we’re doing headless, I wanted the silhouette of the original “cresting wave” headstock. So I glued some ears on, and shaped it to a scaled-down version of the original. That went well. In my enthusiasm I neglected to snap any photos however...
Since I’m using ABM individual bridge/tuner units, and since I want the option of using double-ball strings, I purchased five of ABM’s new single headpieces, the Invalid Link Removed. They’re pretty small, but (as with everything ABM) nicely machined.
The geometry of these little fellas, with the extra-thick fretboard, meant that I wanted them up closer to the plane of the top of the fretboard, to avoid excessive down-angle at the nut. So I cut out a piece from the scrap from my drop-top in the shape of the traditional Rick truss rod cover, and glued it on. That went well, but again, no photos.
When the glue was cured I unclamped everything, and set to work drilling the mounting holes for the individual headpieces, and this is where things went a bit pear-shaped. In my enthusiasm I forgot to consider how much width would be required for mounting five of the little fellas. When I cut my faux truss rod cover, I cut the shape out by eye, and while it has the proper curvature, it only just barely has enough width to mount the headpieces, and even so they will have to be mounted at something of an angle. So my attempt to preserve traditional aesthetics with modern hardware may not be as successful as I had hoped.
Test fitting, before the nut is installed, just to see:
At this point I have to remind myself that this is a test build from scrap woods, and I can always try again if this one goes south.
I’m irked. Disassembling, I had to actually pry three of the five strings out of the retainers. So either there’s some variability in double-ball sizing standards, or the ABM headpieces are sized too small. Or both. I could probably fix it by carefully opening up the ball recess with a drill, but I shouldn’t have to.
I had high hopes for these little guys, since ABM is a quality shop. Grrrrr.
Time to set this aside for a while and let the subconscious mind work through a new plan.
The “jaws” on each retainer look pretty thin, I’d worry drilling them out. I keep picturing string ferrules in the headstock, but they’d have to be something like a keyhole slot to work with double ball. I’m hoping you’ll figure this out so I can shamelessly copy you! Is there anything like a pure string clamp, almost like a locking tuner, but no rotation? I can picture the widget taking the place of traditional tuners, which would work with single ball. I suppose it could be as simple as a threaded rod with a hole drilled through it for the string, turning a locking nut would clamp it. Steinberger makes these, but they are really tuners, not clamps:
[Invalid or Expired Link Removed]
[Invalid or Expired Link Removed]
- Apr 18, 2008
- 16,015
- 1
- 31,729
- Disclosures
- I'm highly opinionated and extremely self-assured
The aft section of each little ABM is designed to clamp down on a normal single-ball string. I suppose I could use them that way, located more conveniently, and forget all about double-ball strings. 

Just for reference, the hole through the ball end of standard bass strings is normally drilled #30, which is 0.128". It will slip nicely over a standard 1/8" steel dowel pin. You can make use of that.
On some various crazy instrument projects in the past, I've made simple anchor points for bass strings by drilling a 1/8" hole in the wood and tapping in a steel dowel pin. Drill the hole at least 1/2" deep into the wood for strength; use a 3/4" long pin. And tilt it back at 5-10 degrees from vertical, so the ball end doesn't slip upward. A very simple and clean solution.
On some various crazy instrument projects in the past, I've made simple anchor points for bass strings by drilling a 1/8" hole in the wood and tapping in a steel dowel pin. Drill the hole at least 1/2" deep into the wood for strength; use a 3/4" long pin. And tilt it back at 5-10 degrees from vertical, so the ball end doesn't slip upward. A very simple and clean solution.
- Apr 18, 2008
- 16,015
- 1
- 31,729
- Disclosures
- I'm highly opinionated and extremely self-assured
Thanks Bruce! I’ve actually imagined something similar, I just haven’t found a source for suitable pins...
Thanks Bruce! I’ve actually imagined something similar, I just haven’t found a source for suitable pins...
Steel Dowel Pins, 1/8" dia x 3/4" long; any hardware supplier.
You can also use 1/8" brass rod stock from the hobby store. Saw off the lengths; round off and polish the tips.

- Jul 1, 2005
- 4,291
- 21,932
- 80
- Disclosures
- CataldoBasses: Designer/Builder ThunderBuckerPickups:Consultant
Cold rolled 1/8" steel rod is available at HD, less than $250 for 36". They also have brass.Thanks Bruce! I’ve actually imagined something similar, I just haven’t found a source for suitable pins...


