Hi, first time poster here (been reading TB for a while now though) with his first project bass! So without further ado, greetings from Finland in the form of PICS! 
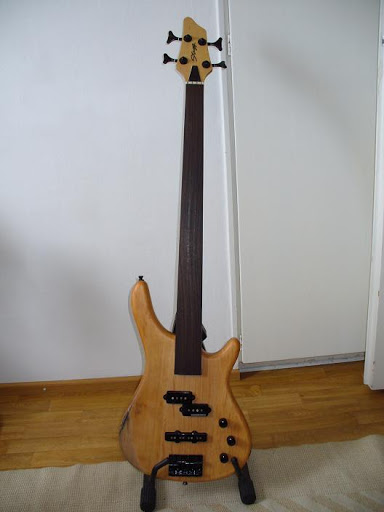
The project bass is a Stagg BC300 fretless that I bought couple of months ago as my first experiment with the fretless world. It was dirty cheap (if I remember correctly I paid 140 euros for it (which is like 185 U.S. dollars I guess)) and it's decent enough, but still needed a bit remedying in my opinion. The stock pups were rubbish, so they had to go. I put Duncan Basslines in their place, SPB-2 for the P-pup and SJB-1 for the bridge. Now, these pups are very different in character (and the SPB-2 is a bit hotter), but I am very pleased with them, as I can get so many different tones from this bass now. Funny thing is, the pups cost me about as much as the bass itself.
I'm not sure what the so called 'natural satin' finish on this bass was, but I knew it had to go also. I really wasn't too happy about it, as I prefer oil and wax finishes. Also the bass didn't have anykind of contour (I don't know if that's the right word for it) for the right arm, so I sanded some wood of the edge, and put some spray varnish temporarily on it to protect it. The black stuff is some lint that got stuck to the varnish from my wristband, as the varnish turned out to be really sticky. The actual project started last week with a lot of sanding. And I mean alot, the finish was really hard to get a rid of. After a couple of days I was done and went to a nearby woodshop for some nice veneer.
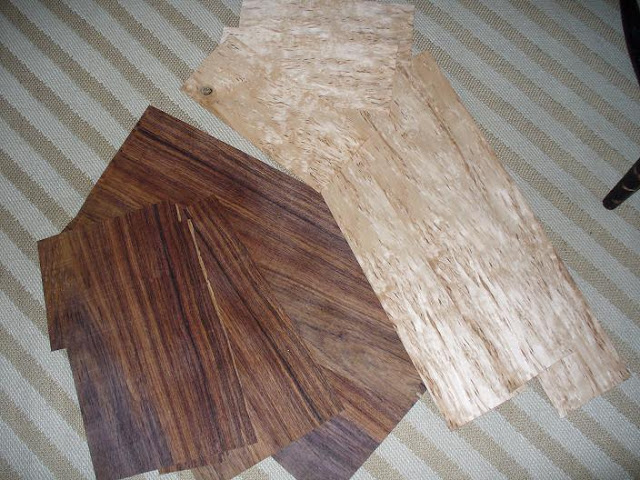
As you might recognize, it's some rosewood and one type of birch (I don't know what it's called in english, wikipedia tells me it's Betula pendula var. carelica, a mutant of silver birch). They were really thin, less than a millimeter, which is something like 0.04 inches. I found them in a leftover corner in the shop, and paid only a few euros for them. This was very lucky, because they were exactly what I was looking for.
So with the sanding done I could start gluing the veneers in place. First I glued a layer of rosewood on the bass in two pieces.
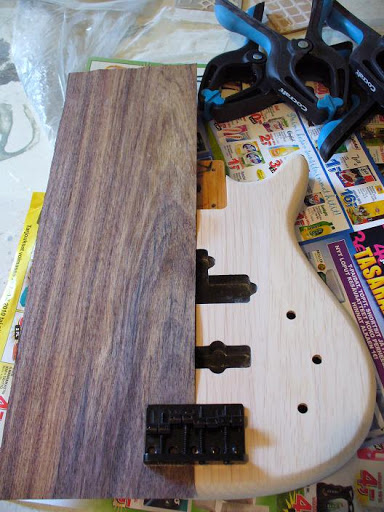
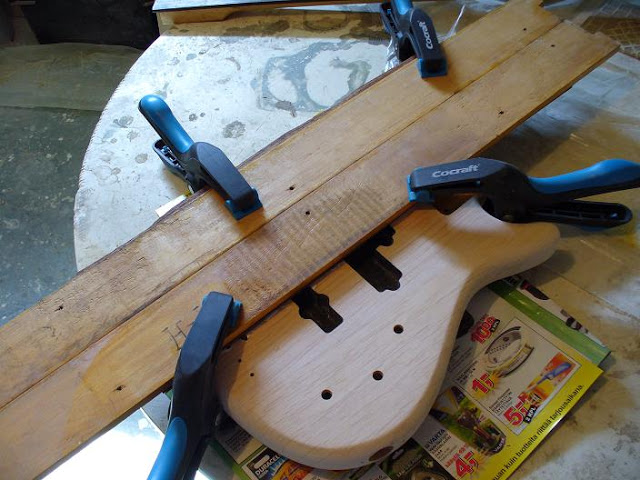
Doing it in two pieces helped me with the pup cavities, and the screw holes and the grounding hole of the bridge. I could always see where they cavities are, and use the bridge as a template for the screw holes I couldn't see.
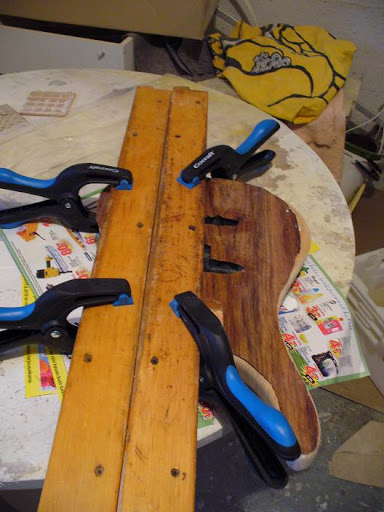
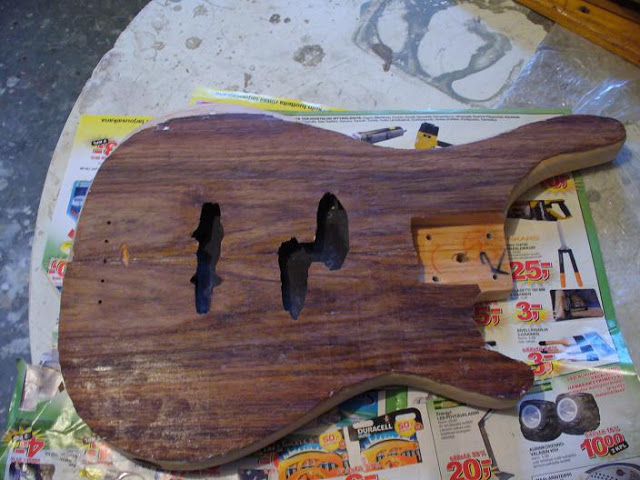
Here's a picture of both halves glued and some rough work with the cavities.
More in next post, and please, excuse me if my english isn't too great.
The project bass is a Stagg BC300 fretless that I bought couple of months ago as my first experiment with the fretless world. It was dirty cheap (if I remember correctly I paid 140 euros for it (which is like 185 U.S. dollars I guess)) and it's decent enough, but still needed a bit remedying in my opinion. The stock pups were rubbish, so they had to go. I put Duncan Basslines in their place, SPB-2 for the P-pup and SJB-1 for the bridge. Now, these pups are very different in character (and the SPB-2 is a bit hotter), but I am very pleased with them, as I can get so many different tones from this bass now. Funny thing is, the pups cost me about as much as the bass itself.
I'm not sure what the so called 'natural satin' finish on this bass was, but I knew it had to go also. I really wasn't too happy about it, as I prefer oil and wax finishes. Also the bass didn't have anykind of contour (I don't know if that's the right word for it) for the right arm, so I sanded some wood of the edge, and put some spray varnish temporarily on it to protect it. The black stuff is some lint that got stuck to the varnish from my wristband, as the varnish turned out to be really sticky. The actual project started last week with a lot of sanding. And I mean alot, the finish was really hard to get a rid of. After a couple of days I was done and went to a nearby woodshop for some nice veneer.
As you might recognize, it's some rosewood and one type of birch (I don't know what it's called in english, wikipedia tells me it's Betula pendula var. carelica, a mutant of silver birch). They were really thin, less than a millimeter, which is something like 0.04 inches. I found them in a leftover corner in the shop, and paid only a few euros for them. This was very lucky, because they were exactly what I was looking for.
So with the sanding done I could start gluing the veneers in place. First I glued a layer of rosewood on the bass in two pieces.
Doing it in two pieces helped me with the pup cavities, and the screw holes and the grounding hole of the bridge. I could always see where they cavities are, and use the bridge as a template for the screw holes I couldn't see.
Here's a picture of both halves glued and some rough work with the cavities.
More in next post, and please, excuse me if my english isn't too great.
 I had some problems with that, and you might see exactly where from the next pictures.