Site Construction Days Nine and Ten
(part 2 of 3)
Don't miss part 1 of 3 for this update on page 16.
My relationship with the vibratory compactor might have been in turmoil, but that's okay because what is no doubt going to be my ultimate man crush on a piece of equipment pulled onto my property moments later. THIS. THING. WAS. EPIC. ..........behold.........
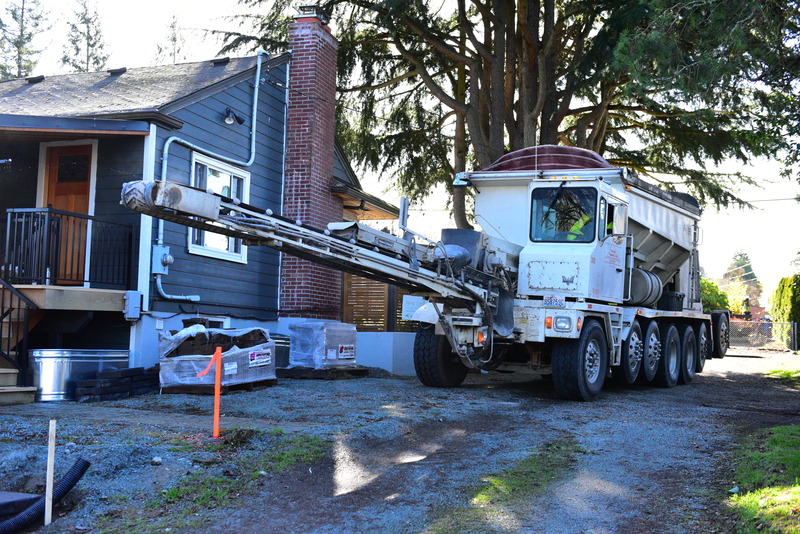
It was the much heralded slinger truck. This thing was unreal. I had serious doubts about its ability to deliver rock as precisely inside of the walls as I'd seen in video clips online. I expected a lot of little piles that I was going to have to spread out and level manually, and given the size of the rocks in the first load I was not looking forward to it. The beast roared in defiance of my skepticism and immediately proved me wrong.
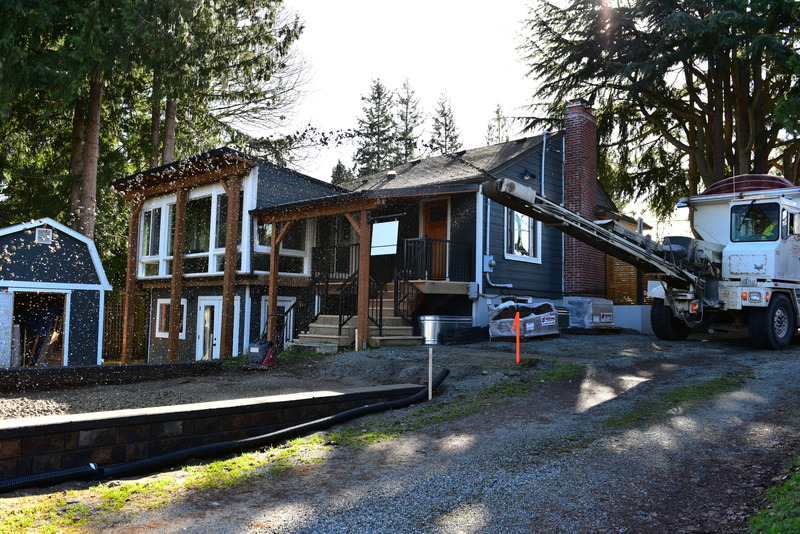
A buddy of mine called it a "rock breathing dragon" and I don't think he was wrong.
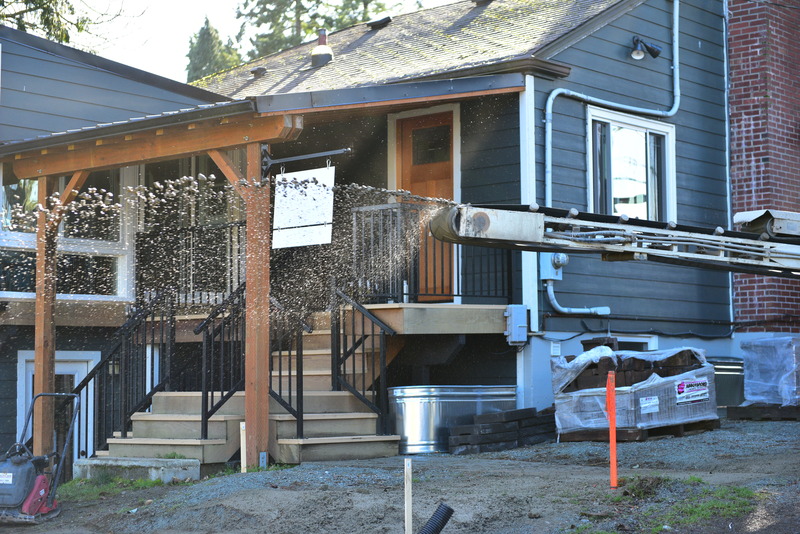
Awesome... Just awesome...
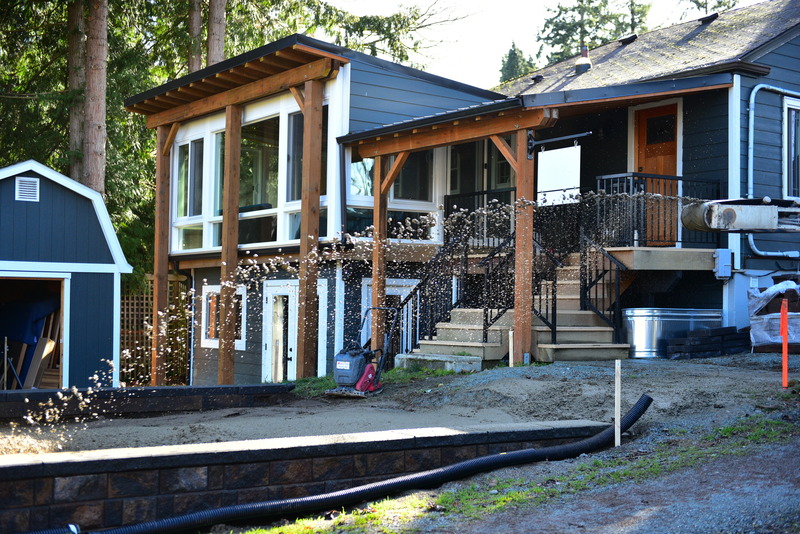
As you can see, the operator isn't even in the truck. He has a remote control in a lunchbox sized orange box with two levers and a button. He could use that to pretty ably move the conveyor from left to right, up and down, in and out, adjust the speed of the conveyor, and make it do a little pulsing jump move like a low rider with hydraulics. Very very cool.
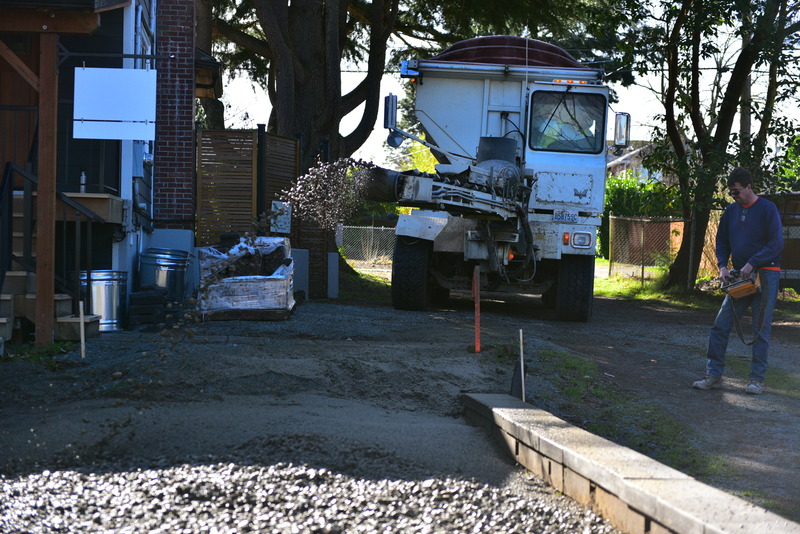
This was after we had the first six cubic yards of 1-1/4" minus crushed rock installed. This is big, heavy, scary when flying off the end of a conveyor belt sized rock that will make a superb base course for construction. A few rocks went rogue and came only several feet from hitting my neighbor's relatively new Mercedes-Benz. I'm REALLY glad that didn't happen as they're pretty new neighbors and we haven't even been properly introduced yet. That conversation would have sucked.
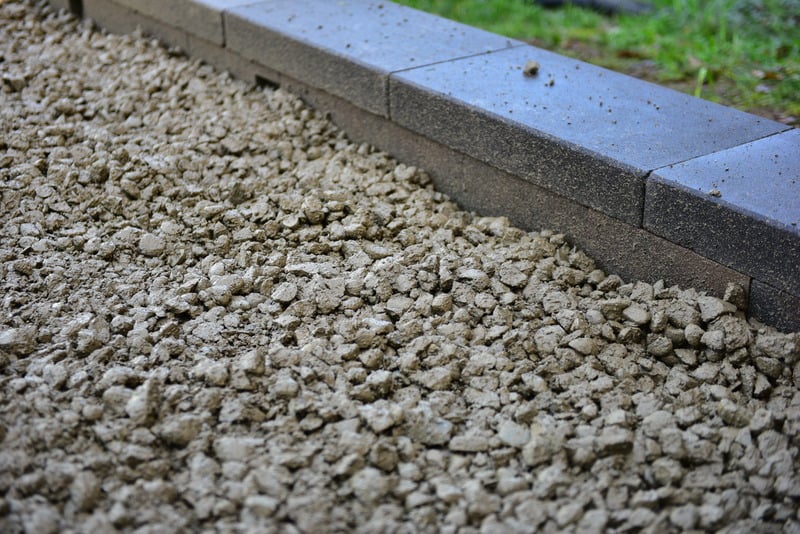
Here's a closeup of the 1-1/4" minus crushed rock after I raked it all out, but not yet compacted it.
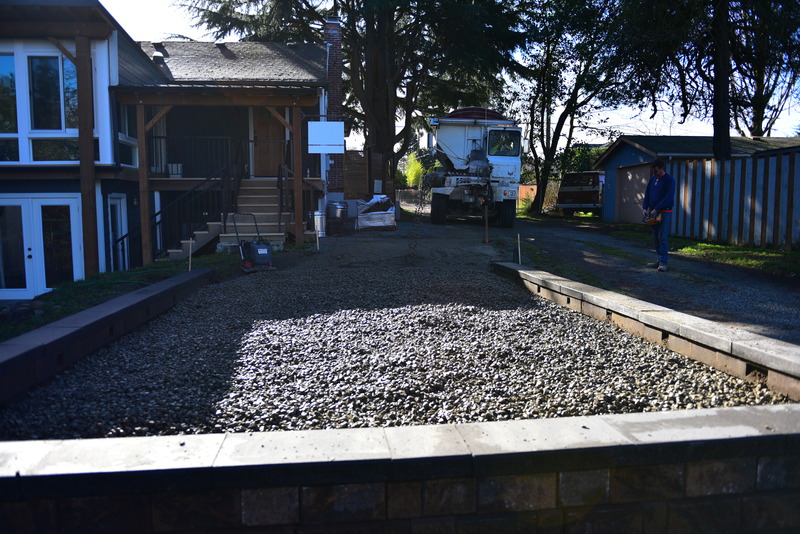
The driver finished up the first load and then headed out to grab the following load, which was smaller 5/8" minus crushed rock. While he was out I was able to spread and rough level the first load and hit it with the plate compactor three times. It was very solid. I could have easily driven my car on it with little repercussions. I grabbed a sandwich, talked briefly with my dad on the phone, and then he was back. I hopped off the phone and ran out to meet him and we began unloading the 5/8" material.
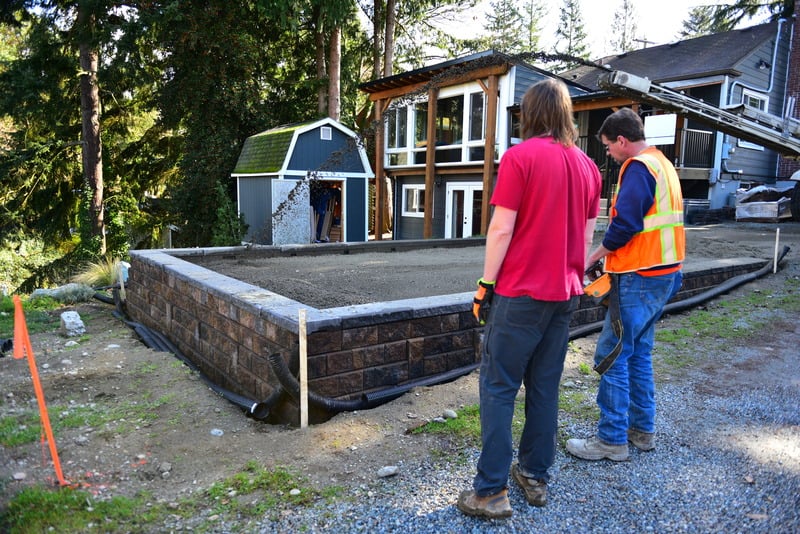
I was still in awe of how well the machine (and the operator) were performing. Man crush continues unabated.
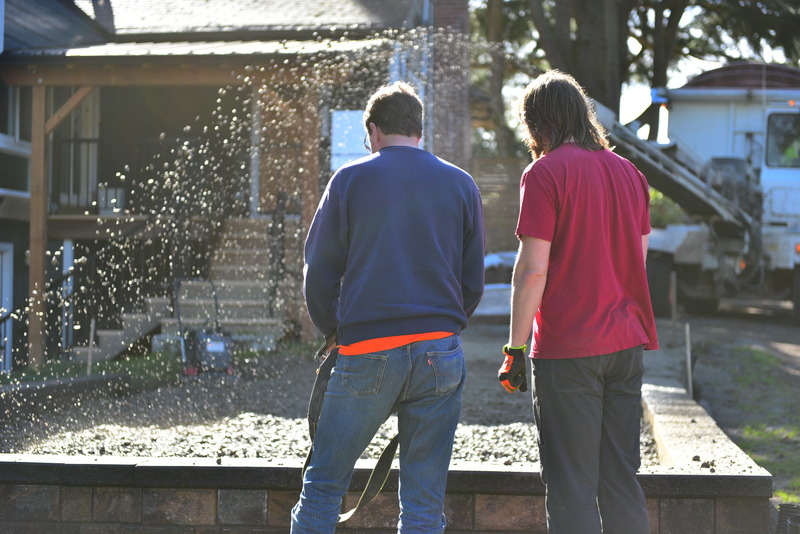
Unlike the 1-1/4" material, the 5/8" stuff was safe enough to work on while it was being delivered. It came out in a much more controlled manner which is saying a lot because the 1-1/4" was far from wild.
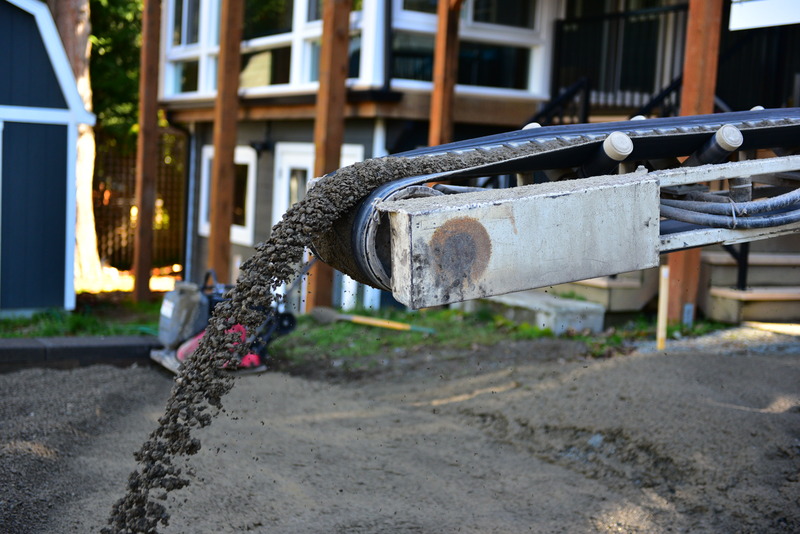
To give you an idea of just how controlled it was, take a look at this picture. You can see how tightly the rock is "clumped" together as it's coming off of the conveyor.
Here's a quick video of the 5/8" material being unloaded. I'm still blown away by how well this thing worked.
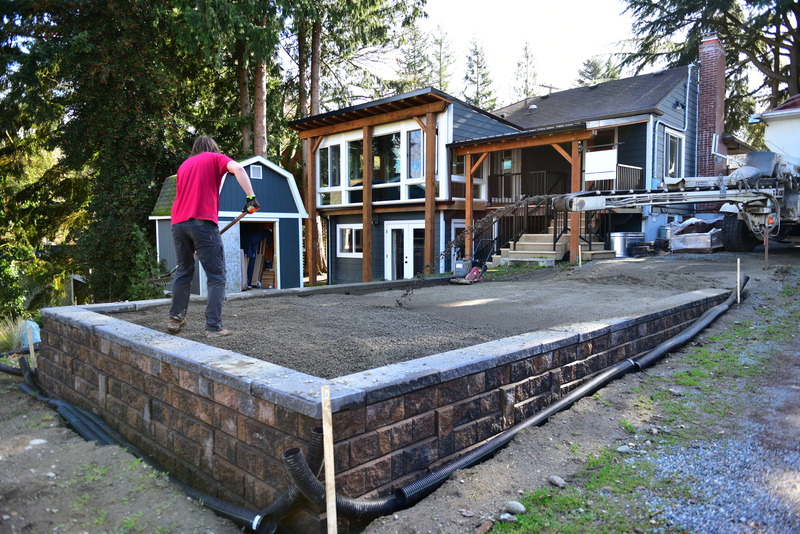
This was the scene when we hit the end of the second load.
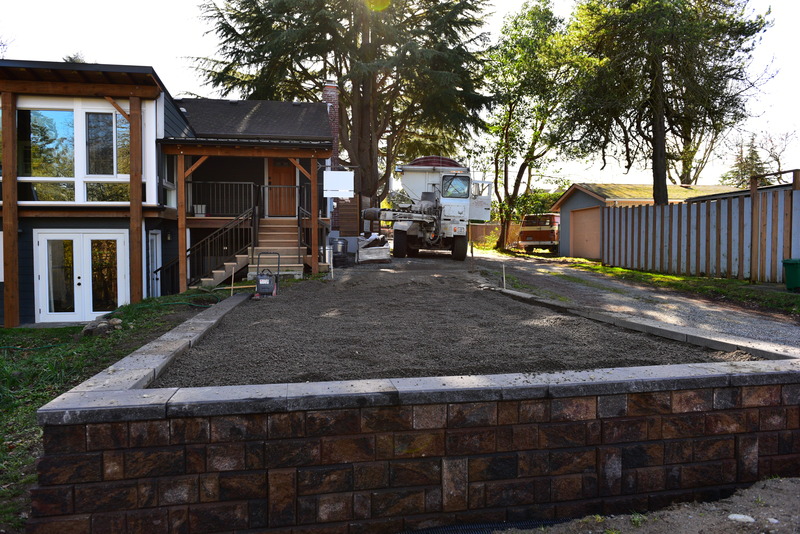
Here it is from the other direction.
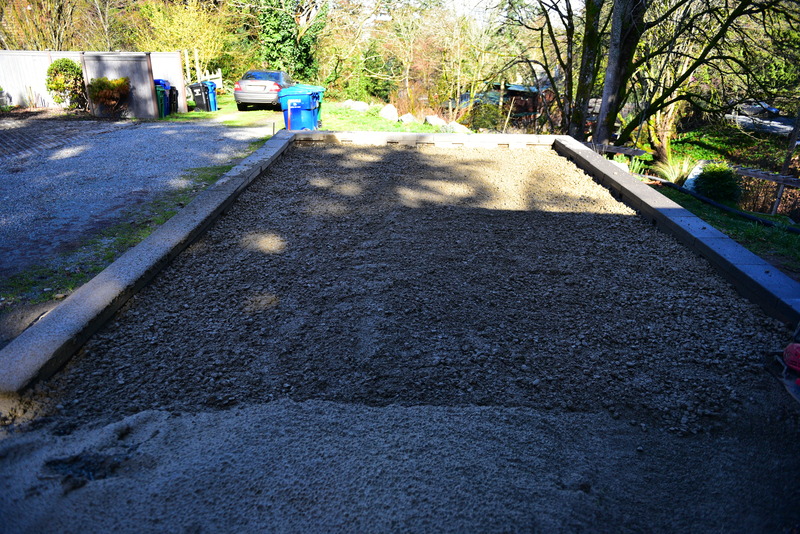
I'm still shocked by how well it worked. I'm going to take an opportunity to give a free plug to the guys who made it possible and saved me a lot of effort. The delivered cost for these materials via the slinger truck compared to companies that would just show up with a dump truck, plop the material in my driveway and leave me to it with a shovel and wheelbarrow was only SLIGHTLY higher. Well worth the tiny bit of added cost relative to the effort and time it would have taken. To put it lightly I still wouldn't be anywhere close to done as I'm typing this. If you're doing something similar, give these guys a shout.
(part 2 of 3)
Don't miss part 1 of 3 for this update on page 16.
My relationship with the vibratory compactor might have been in turmoil, but that's okay because what is no doubt going to be my ultimate man crush on a piece of equipment pulled onto my property moments later. THIS. THING. WAS. EPIC. ..........behold.........
It was the much heralded slinger truck. This thing was unreal. I had serious doubts about its ability to deliver rock as precisely inside of the walls as I'd seen in video clips online. I expected a lot of little piles that I was going to have to spread out and level manually, and given the size of the rocks in the first load I was not looking forward to it. The beast roared in defiance of my skepticism and immediately proved me wrong.
A buddy of mine called it a "rock breathing dragon" and I don't think he was wrong.
Awesome... Just awesome...
As you can see, the operator isn't even in the truck. He has a remote control in a lunchbox sized orange box with two levers and a button. He could use that to pretty ably move the conveyor from left to right, up and down, in and out, adjust the speed of the conveyor, and make it do a little pulsing jump move like a low rider with hydraulics. Very very cool.
This was after we had the first six cubic yards of 1-1/4" minus crushed rock installed. This is big, heavy, scary when flying off the end of a conveyor belt sized rock that will make a superb base course for construction. A few rocks went rogue and came only several feet from hitting my neighbor's relatively new Mercedes-Benz. I'm REALLY glad that didn't happen as they're pretty new neighbors and we haven't even been properly introduced yet. That conversation would have sucked.
Here's a closeup of the 1-1/4" minus crushed rock after I raked it all out, but not yet compacted it.
The driver finished up the first load and then headed out to grab the following load, which was smaller 5/8" minus crushed rock. While he was out I was able to spread and rough level the first load and hit it with the plate compactor three times. It was very solid. I could have easily driven my car on it with little repercussions. I grabbed a sandwich, talked briefly with my dad on the phone, and then he was back. I hopped off the phone and ran out to meet him and we began unloading the 5/8" material.
I was still in awe of how well the machine (and the operator) were performing. Man crush continues unabated.
Unlike the 1-1/4" material, the 5/8" stuff was safe enough to work on while it was being delivered. It came out in a much more controlled manner which is saying a lot because the 1-1/4" was far from wild.
To give you an idea of just how controlled it was, take a look at this picture. You can see how tightly the rock is "clumped" together as it's coming off of the conveyor.
Here's a quick video of the 5/8" material being unloaded. I'm still blown away by how well this thing worked.
This was the scene when we hit the end of the second load.
Here it is from the other direction.
I'm still shocked by how well it worked. I'm going to take an opportunity to give a free plug to the guys who made it possible and saved me a lot of effort. The delivered cost for these materials via the slinger truck compared to companies that would just show up with a dump truck, plop the material in my driveway and leave me to it with a shovel and wheelbarrow was only SLIGHTLY higher. Well worth the tiny bit of added cost relative to the effort and time it would have taken. To put it lightly I still wouldn't be anywhere close to done as I'm typing this. If you're doing something similar, give these guys a shout.
Last edited: