

Enjoy the benefits of a premium membership!
Upgrade Account
-
TalkBass has been independent since 1998. Add your voice.
Create a free account to reply to discussions, view embedded media, and browse with fewer display ads.
Join free Log in
Want zero display ads or expanded classifieds tools? Compare plans.
You are using an out of date browser. It may not display this or other websites correctly.
You should upgrade or use an alternative browser.
You should upgrade or use an alternative browser.
My New Studio Build (perhaps overly detailed)
- Thread starter silky smoove
- Start date
More options
Who Replied?
Cool!As I've mentioned previously my plan thus far is to use a Slate Raven MTi as the screen and DAW controller once my studio is done. Slate and Zaor have released a custom desk for the Raven MTi called the Core Station. It's enormous. It's meant for running two Ravens side by side, and the option for only running one Raven is to just put it in the middle of the bay, but still have a gigantic desk. For me that's a non-starter. It's simply too big for my modest space. That said, I found a reference online to a sidecar desk that someone built for a user that has a Raven MTX (Slate's $10,000 flagship model) with an MTi as a sidecar for VCAs, busses, etc. As it would happen the Zaor sidecar MTi setup is PERFECT for what I want in a desk. I got a quote from them and depending on options it'll be between $750-900 to custom order one. That's cheaper than the Argosy Halo desk I was considering by a large margin, it has a smaller footprint and will satisfy my needs completely. I'm very excited to work using this setup.
View attachment 3025557
You may want to have a fold-down wing installed on each side to give you more flexibility.
Great project!
The studio I was working at in Syracuse ended up having custom desks built for their Raven pairs, with 4 rack spaces on either side, each holding a pair of Ampex preamls like Les Paul used to use.
Like he said^^^.

OK, so. Actual recording equipment I don’t know much about.
I know how to keep an engineer sweet so that he doesn’t turn up the “suck” slider to 11.
Just checked out Slate. Wow.
Might be missing something but I assume you’ll still have a physical console desk? Or all mics etc get hooked into the Raven?
I know how to keep an engineer sweet so that he doesn’t turn up the “suck” slider to 11.
Just checked out Slate. Wow.
Might be missing something but I assume you’ll still have a physical console desk? Or all mics etc get hooked into the Raven?

They sell matching Zoar monitor stands at Vintage King. The one that I saw was $399 each as I recall.
Is the sidecar that you are looking at wide enough to hold the monitors? If not, would an extension on each side work or do you want them located behind the desk.
Is the sidecar that you are looking at wide enough to hold the monitors? If not, would an extension on each side work or do you want them located behind the desk.

The Raven is just a DAW controller. No part of the audio or its digital counterpart once inside the box passes through the Raven. I'll be working entirely ITB, which means no physical console. Two interfaces, one computer, one controller, done.Might be missing something but I assume you’ll still have a physical console desk? Or all mics etc get hooked into the Raven?
Monitors should never be placed on a desk if it can be avoided. Always put them on stands if space allows. Always. I'll have sufficient space to place them to the sides of the desk and slightly behind in an equilateral triangle arrangement with the listening position.Is the sidecar that you are looking at wide enough to hold the monitors? If not, would an extension on each side work or do you want them located behind the desk.

I accomplished nothing today. Not just a lack of studio work, but a complete lack of anything
After two very long days of doing this (see below), I was understandably stiff and sore to the point that lifting pieces of drywall was the last thing on my mind. Back to it in the coming week!
View attachment 3023566
View attachment 3023563 View attachment 3023564 View attachment 3023565
You are a masochist in so many ways! But keep up the posts - it's going to be a great room!
Masochist? Wouldn't that imply doing something I don't like in spite of the fact I don't like it? I absolutely love rock climbing, so if anything I'm a hedonistYou are a masochist in so many ways!

Monitors should never be placed on a desk if it can be avoided. Always put them on stands if space allows. Always. I'll have sufficient space to place them to the sides of the desk and slightly behind in an equilateral triangle arrangement with the listening position.
I suppose that’s the problem, many times it can’t be avoided in smaller spaces.
I’ve seen pads or vibration stands (for example, Invalid Link Removed) under near field monitors on consoles. A Neve Genesys Black that I worked with came with Neve monitor pads on top.
In my case at least, I mostly work at low volume levels so it isn’t much of an issue.
Last edited:
The issue isn't necessarily vibration transfer through the desk (often giving a false impression of low end that's not necessarily there), it's that setting up your monitors in an equilateral triangle and at the right height is usually impossible when placed on a desk.
Two full width panels on the hoist, and then two 1' wide panels (like the ones around the light boxes) that my wife will have to help me lift into place. Tonight should be the night that I put the lid to bed and retire the hoist. Fingers crossed that it works out like that given how slow the panels go up when they're full width and rotated 90-degrees on the hoist as I pictured previously. So close!
Tomorrow I’ll start putting up the Whisper Clips and hat channel for the north wall. This will be the most complicated of all the walls as the clips have to account for not only the drywall, but also the mini split and the HRV. Additionally, before I put up the drywall on the north wall I’ll have to pop a “sacrificial” hole out the exterior wall so I can correctly locate two studs for the mini split’s outdoor air handler unit. It gets placed on a wall-mounted support system and I’ve not been able to successfully find a stud from the outside, so I’ll need to deal with it before I make the studs go bye-bye.
Edit: It’s worth mentioning that the sacrificial hole will be the size of a small drill bit, and super easy to seal.
Edit: It’s worth mentioning that the sacrificial hole will be the size of a small drill bit, and super easy to seal.
This was me finishing off the lid. To say I was happy at this point would be a massive understatement.
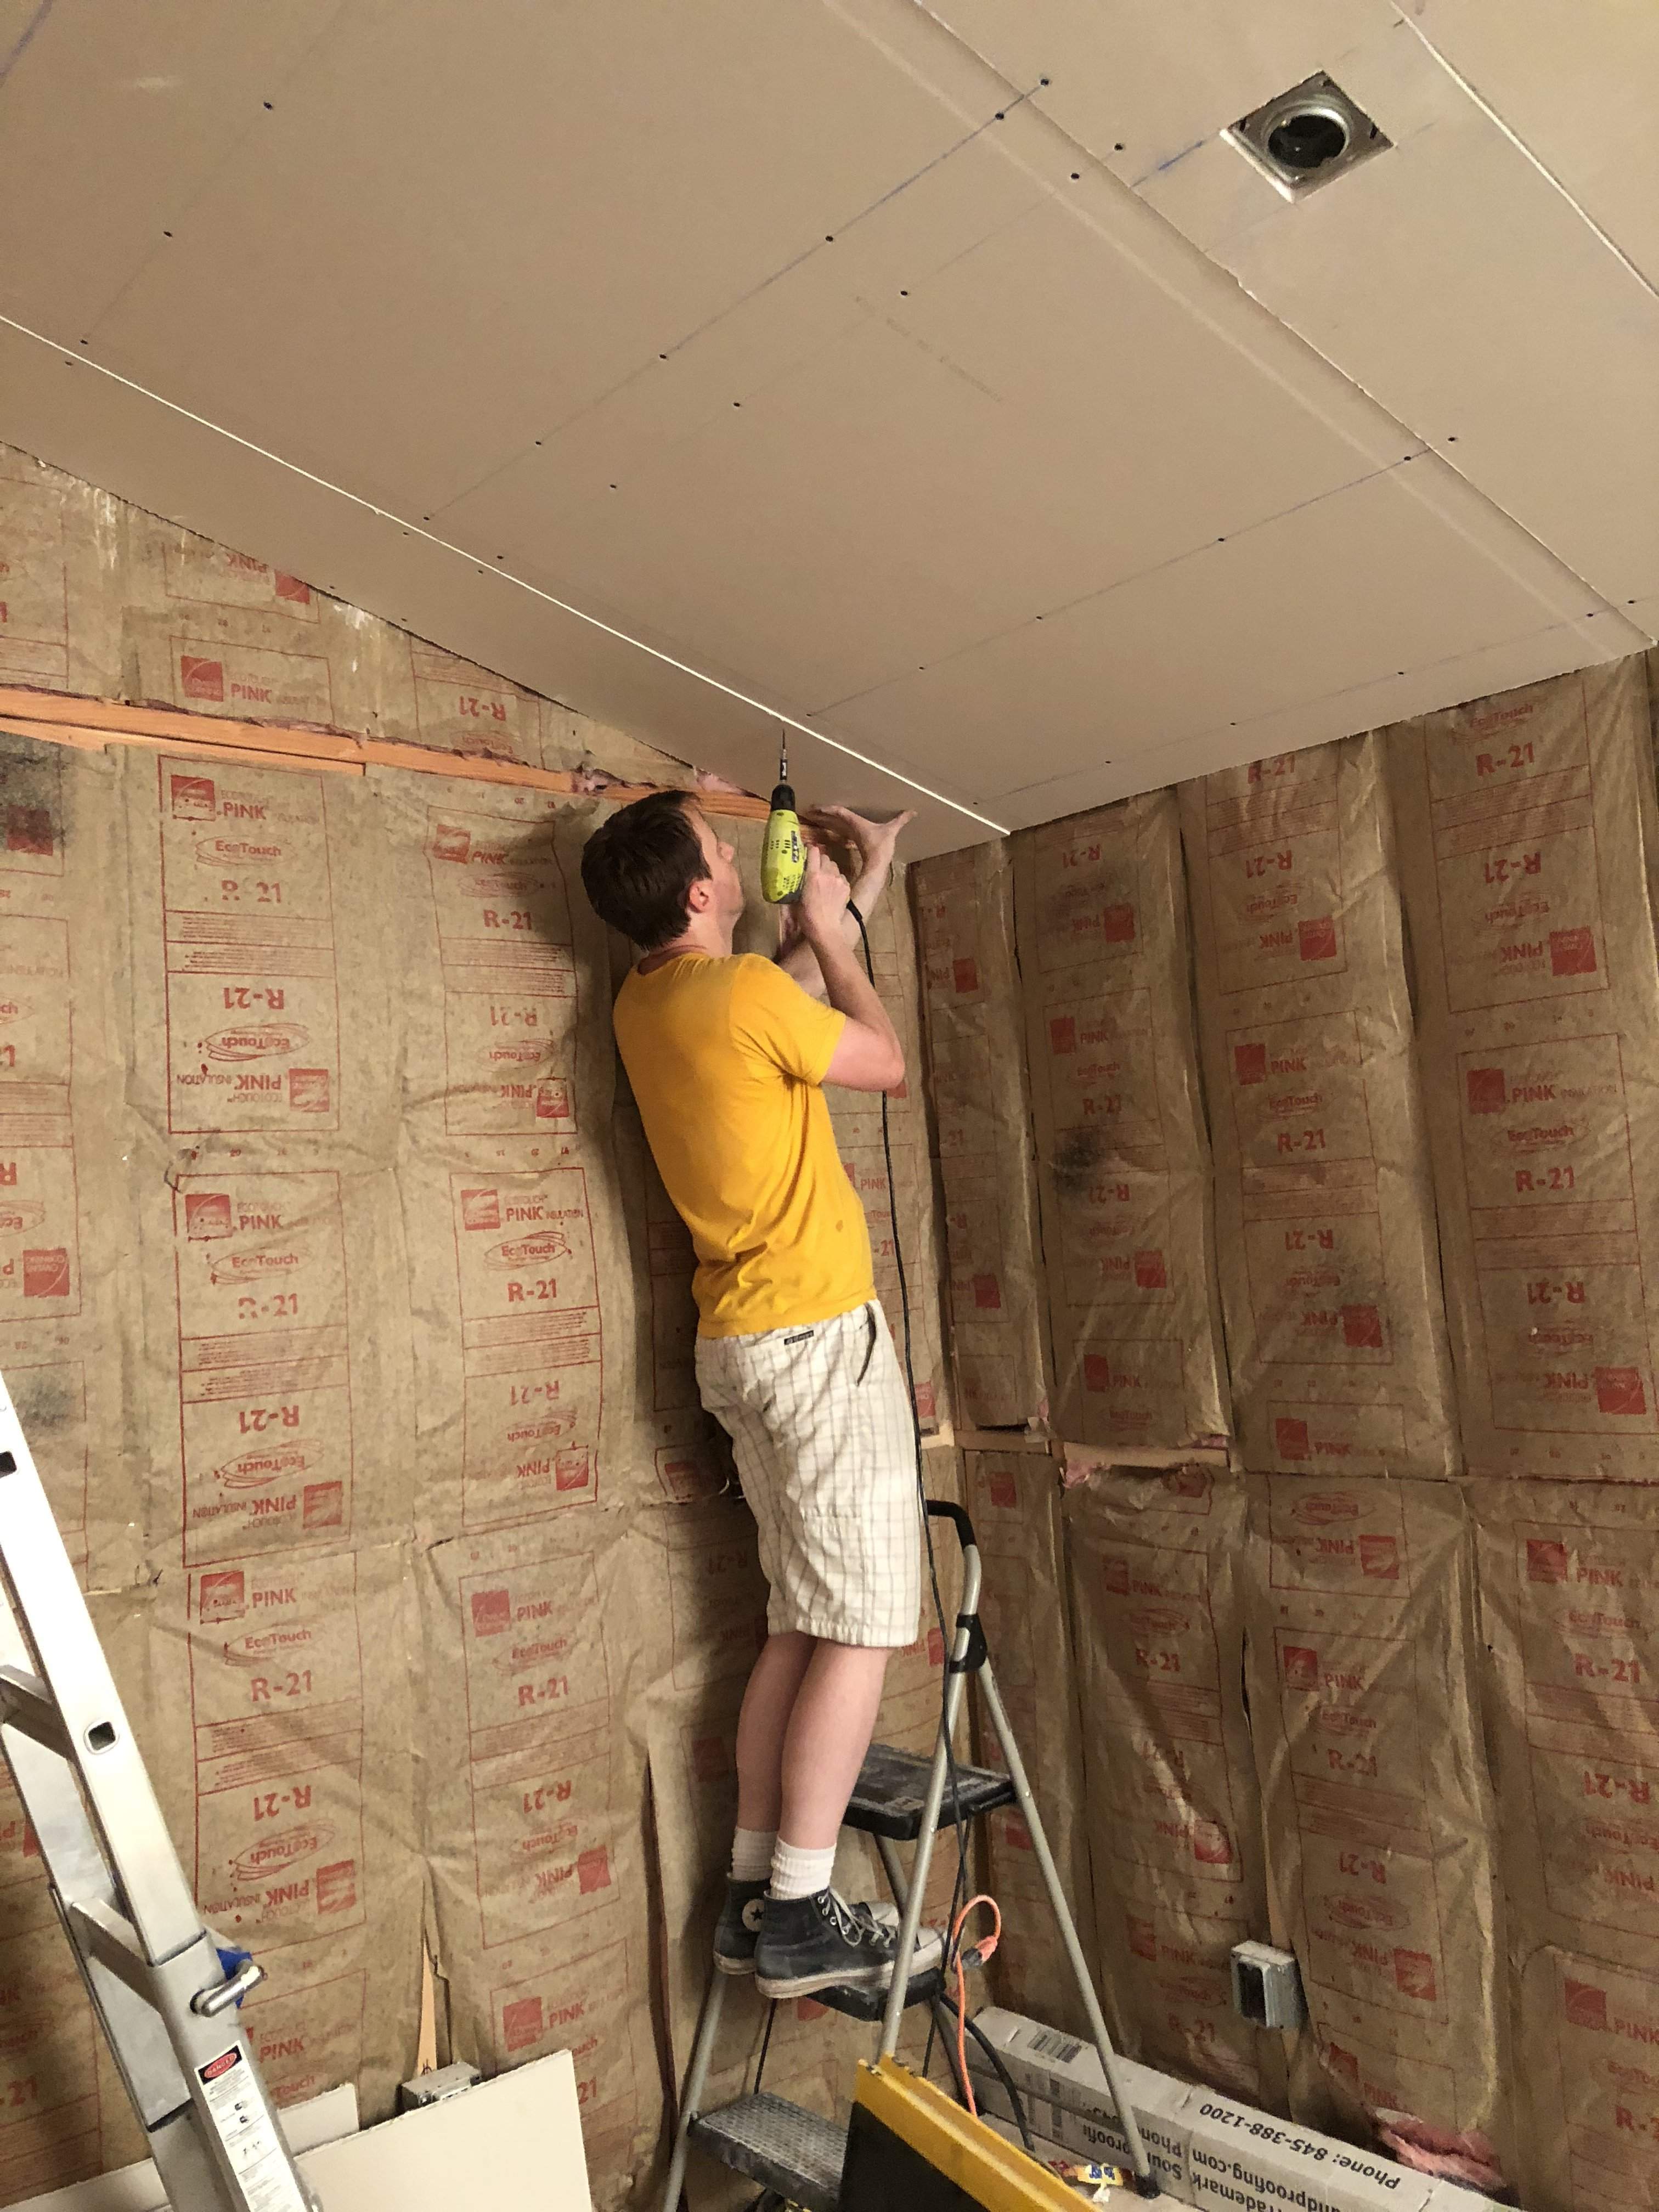
This was me finishing off the lid. To say I was happy at this point would be a massive understatement.
View attachment 3027167

Attempting to install the wall mount bracket for the outdoor condenser unit, and I’m running into a bit of a math problem.
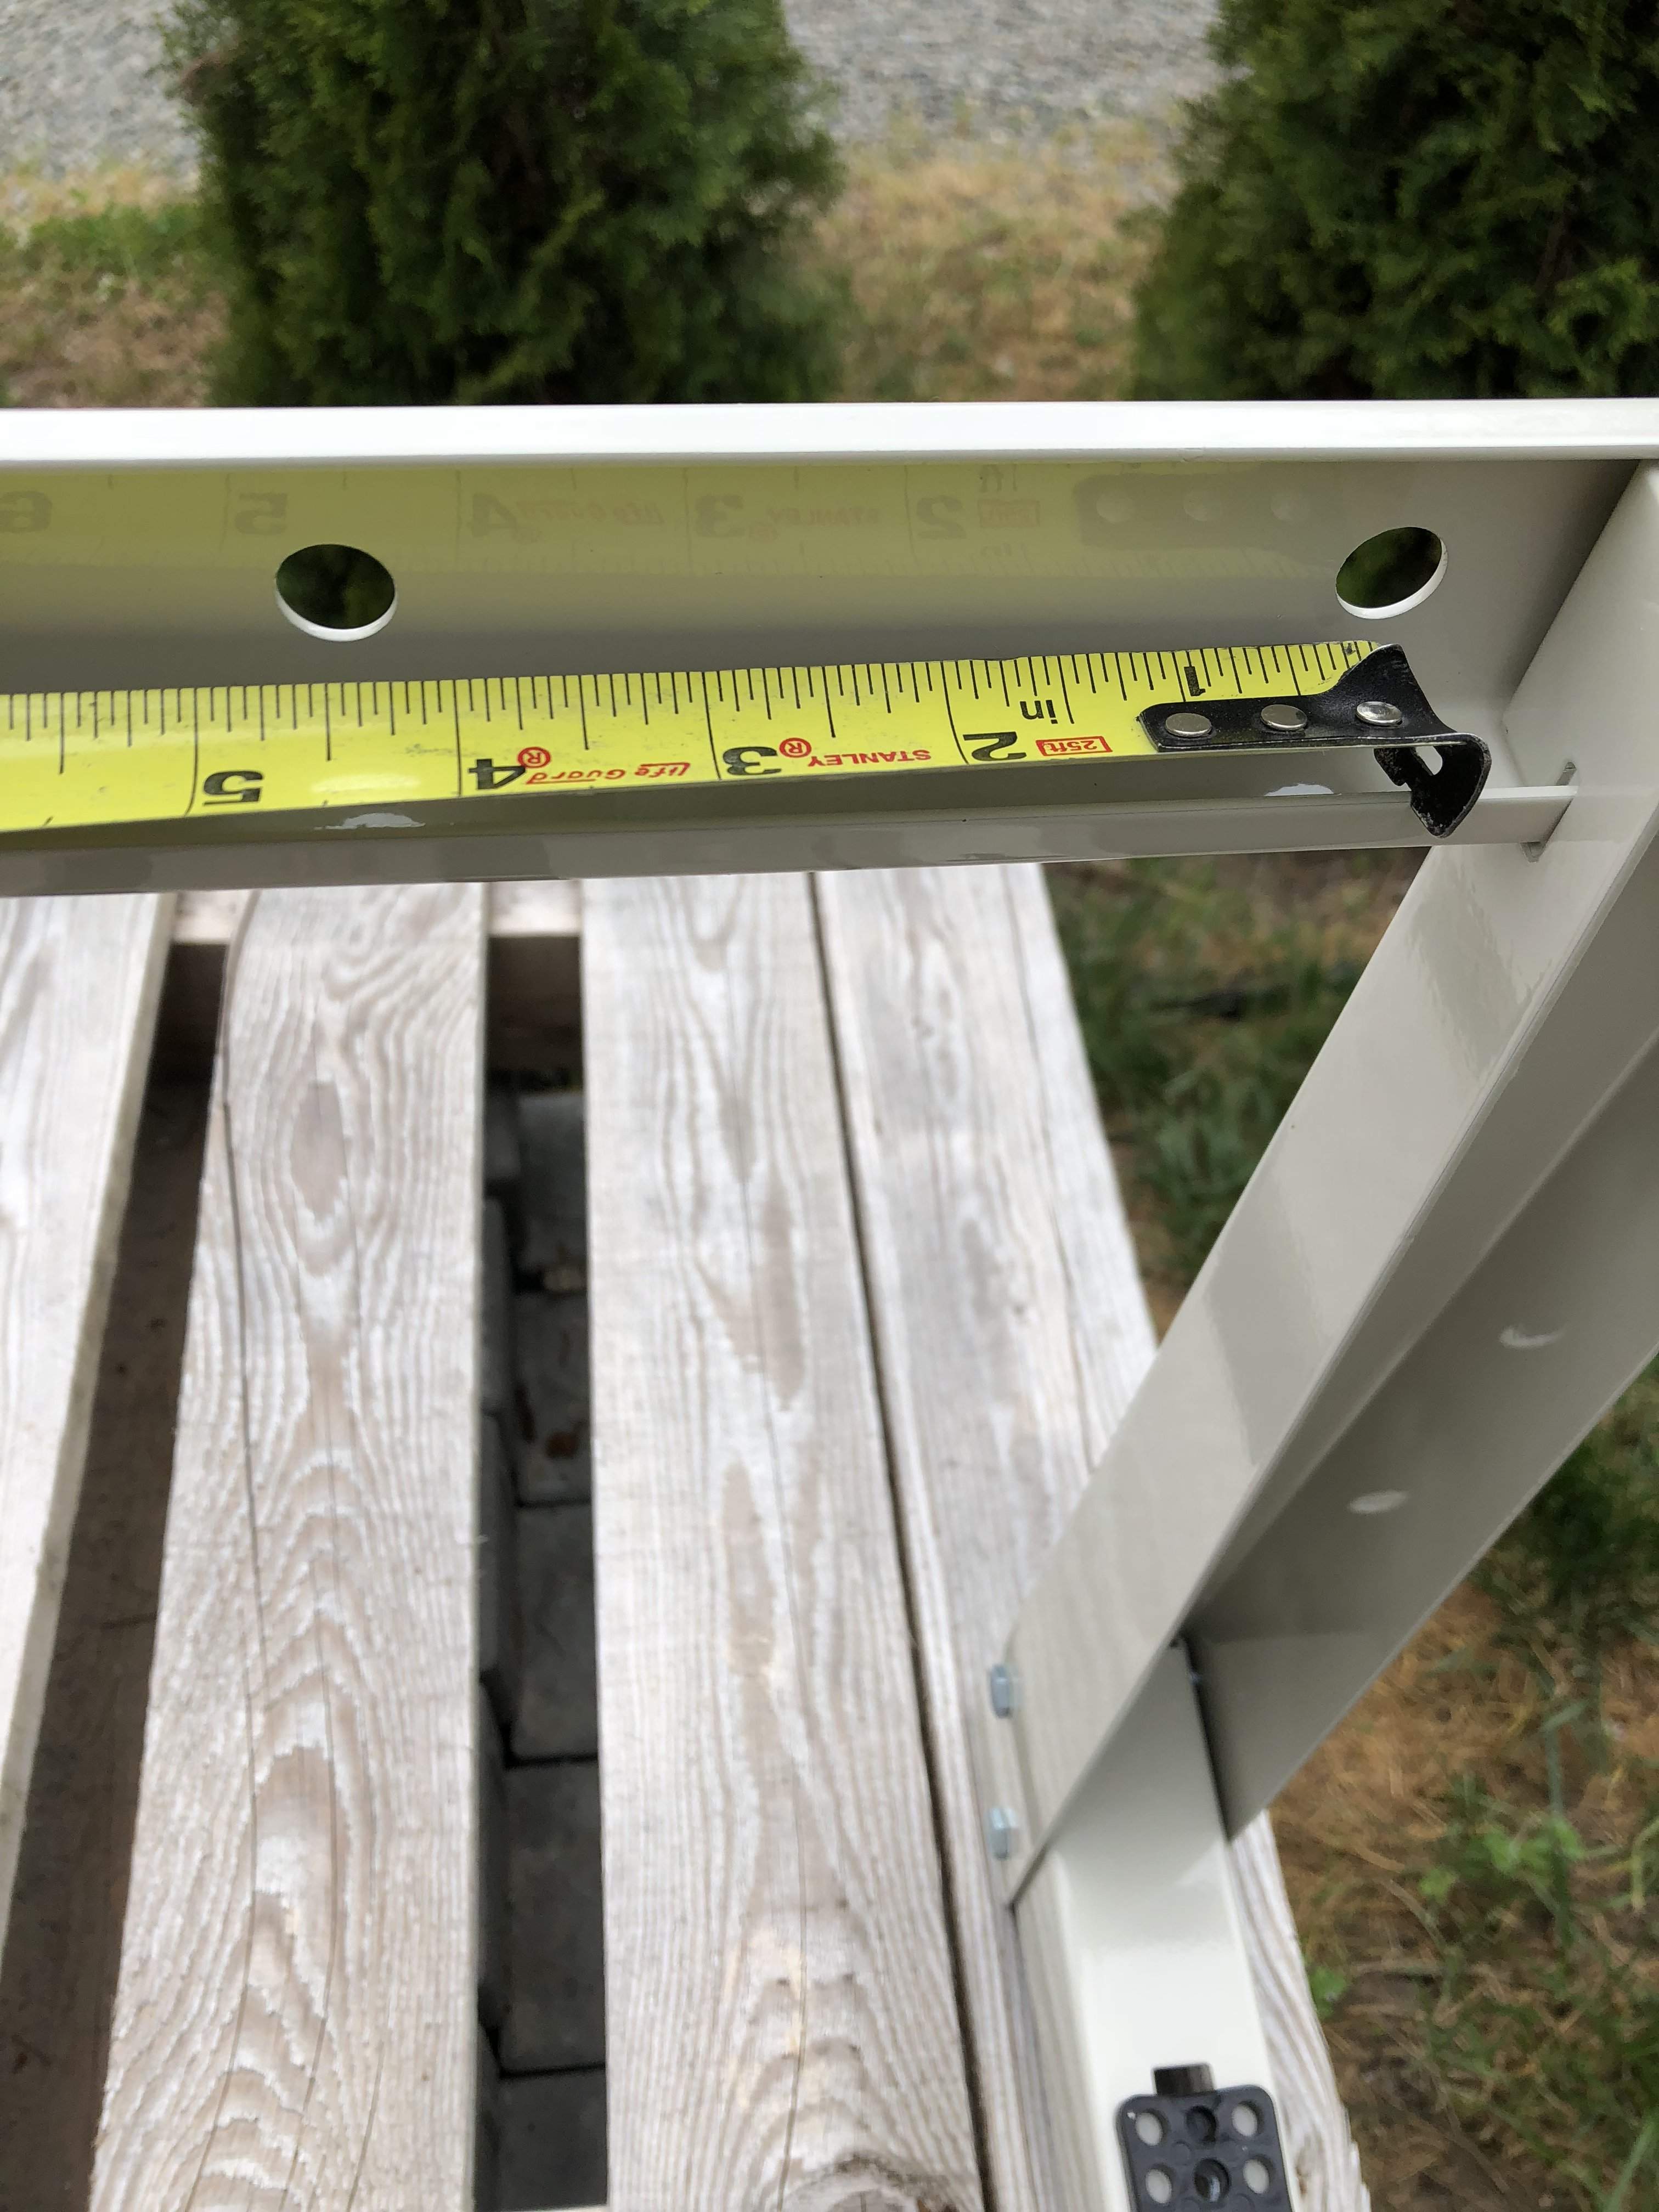
How does one mount a wall bracket to studs spaced 16” on-center when the holes in the crossbar are spaced 4 3/8” on-center? This of course results in a hole centered on one stud, and then four holes down it’s missed the center of the next stud by 1 1/2”.
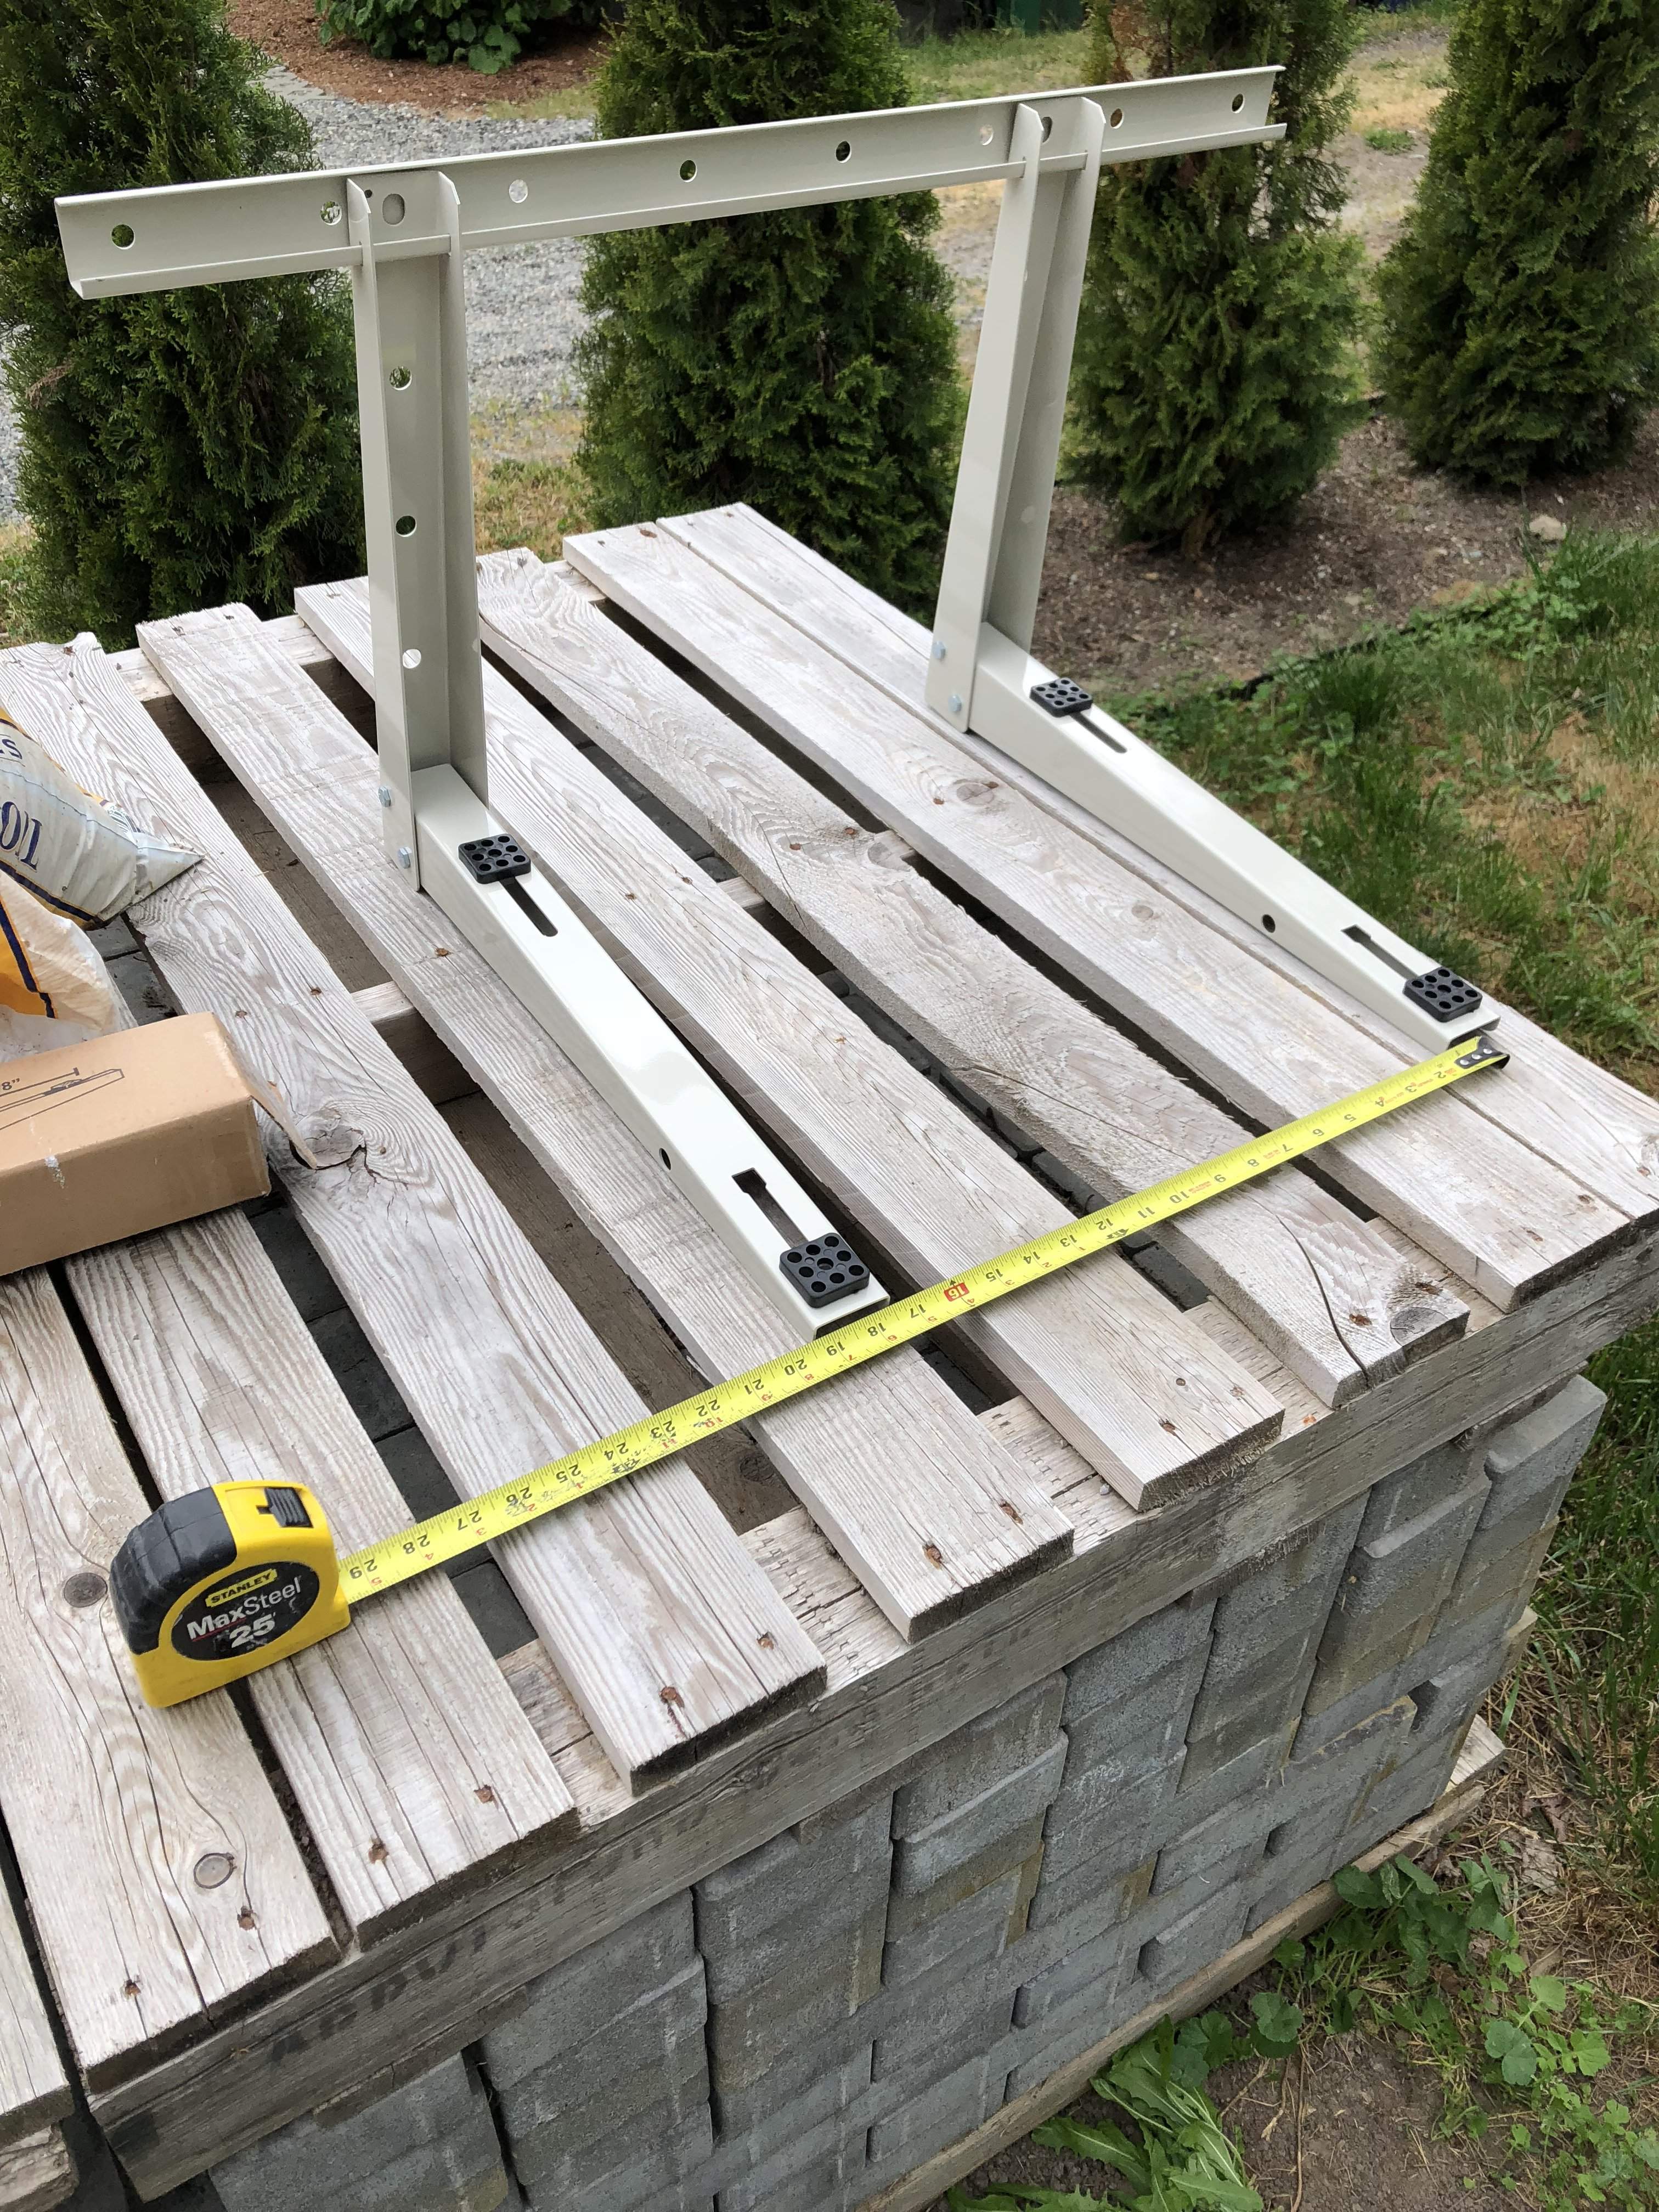
My next idea was that the vertical extensions are where the lag screws were to be placed given the fact that there are lag screw sized holes in them. They’re freely adjustable along the crossbar so achieving 16” on-center would be no challenge at all. The problem is that the feet for the outdoor condenser unit are 18 1/2” apart and the vertical members of the wall bracket must be centered on said feet. That rules them out.
What am I missing? Achieving 16” OC seems impossible with the available items.
18 1/2” on-center outdoor condenser unit feet
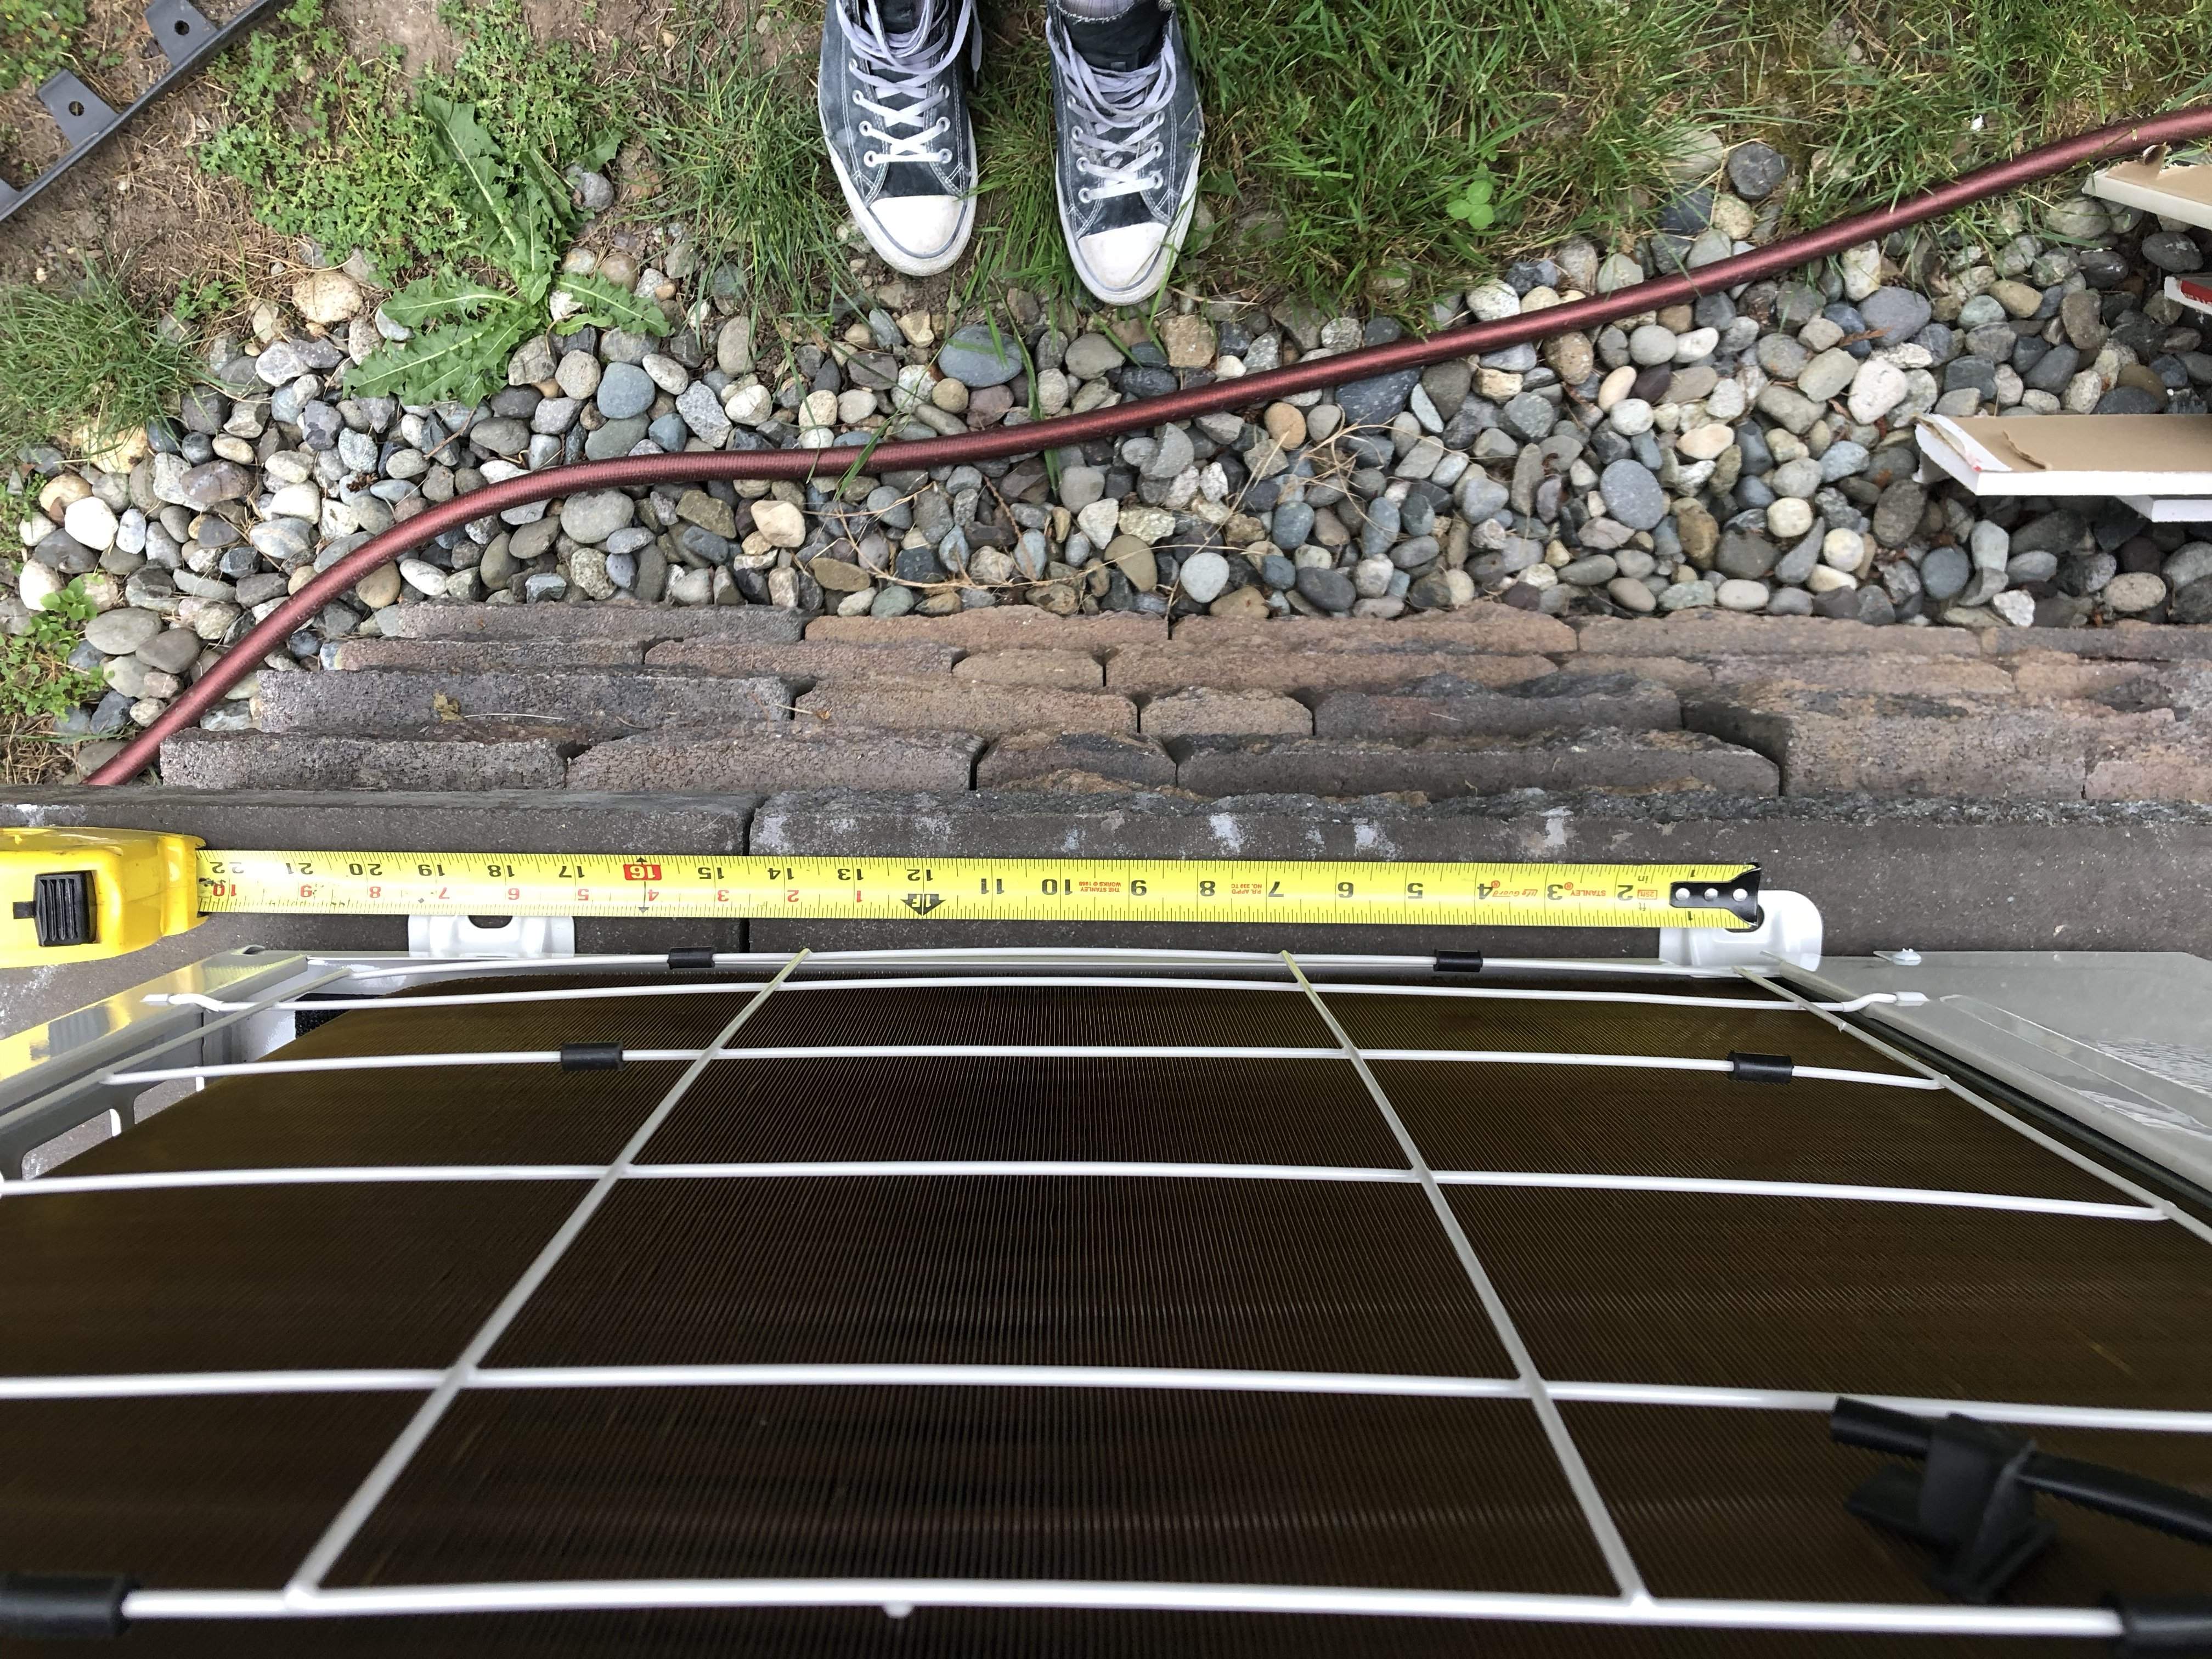
The wall bracket itself with the legs positioned 18 1/2” on-center
Horizontal crossbar lag holes spaced 4 3/8” on-center
How does one mount a wall bracket to studs spaced 16” on-center when the holes in the crossbar are spaced 4 3/8” on-center? This of course results in a hole centered on one stud, and then four holes down it’s missed the center of the next stud by 1 1/2”.
My next idea was that the vertical extensions are where the lag screws were to be placed given the fact that there are lag screw sized holes in them. They’re freely adjustable along the crossbar so achieving 16” on-center would be no challenge at all. The problem is that the feet for the outdoor condenser unit are 18 1/2” apart and the vertical members of the wall bracket must be centered on said feet. That rules them out.
What am I missing? Achieving 16” OC seems impossible with the available items.
18 1/2” on-center outdoor condenser unit feet
The wall bracket itself with the legs positioned 18 1/2” on-center
Horizontal crossbar lag holes spaced 4 3/8” on-center

Can you “sister” more 2” x 4” “cripple studs” to an existing wall stud in order to give you a wider area to attach the lag screws? Or, am I totally misunderstanding your dilemma?Attempting to install the wall mount bracket for the outdoor condenser unit, and I’m running into a bit of a math problem.
How does one mount a wall bracket to studs spaced 16” on-center when the holes in the crossbar are spaced 4 3/8” on-center? This of course results in a hole centered on one stud, and then four holes down it’s missed the center of the next stud by 1 1/2”.
My next idea was that the vertical extensions are where the lag screws were to be placed given the fact that there are lag screw sized holes in them. They’re freely adjustable along the crossbar so achieving 16” on-center would be no challenge at all. The problem is that the feet for the outdoor condenser unit are 18 1/2” apart and the vertical members of the wall bracket must be centered on said feet. That rules them out.
What am I missing? Achieving 16” OC seems impossible with the available items.
18 1/2” on-center outdoor condenser unit feet
View attachment 3028954
The wall bracket itself with the legs positioned 18 1/2” on-center
View attachment 3028955
Horizontal crossbar lag holes spaced 4 3/8” on-center
View attachment 3028956
That was something I had considered. I’d need to bust out the fire blocking in order to do so, but it’s a definite possibility. I was hoping someone would have a brilliant idea that I’d simply overlooked. Not seeming like that will be the case here.Can you “sister” more 2” x 4” “cripple studs” to an existing wall stud in order to give you a wider area to attach the lag screws? Or, am I totally misunderstanding your dilemma?


