• TalkBass has been independent since 1998. Add your voice.
    Create a free account to reply to discussions, view embedded media, and browse with fewer display ads.
    Join freeLog in
    Want zero display ads or expanded classifieds tools? Compare plans.

The playing is particularly beautiful on this one. I have to say, the third finger of the left hand makes me a little uneasy in a "tutorial" setting. On the one hand it is text book Billie, but I am not sure that is what is going on.
I guess it should just be said that 1-4, 1-2 & 2-4 are more standard fingerings for 7ths and 10ths.
A dominant 7 chord does seem to work best 1-2-3, however.
 
Thanks for the playing comment. Fingering was covered in the last video, and while I play them this way several options were offered; the suggestion was that each player should play them with the fingering that is the most comfortable for their hand and allows them to best be played in tune. In lessons over the past few years, my observation has been that students with larger hands tend to finger them this way, and students with smaller hands or whose 3rd fingers aren't comfortable in this "fixed" position tend to use the 4th finger on the top string.
 
Of course with my criticism, we need to consider the source - I am very strict about orthodox technique for orthodox music. I have the same issue with Rabbath "teaching" collapsed lefthand knuckles, so you are in good company.

None of us gets away without some idiosyncrasies in our playing, I feel it is important to separate our playing from our teaching at least in that sense.

I feel the same about your "free hand" idea, I think that is cool in the context of your playing but not a helpful thing to pass on. I get fine vibrato playing pizz by just lifting the other fingers but holding position.

If these were videos of you playing, I wouldn't get so picky, but I don't think these things are super responsible to pass on. I think more orthodoxy is reasonable in tutorial videos posted online in a University context.

I don't buy the "those can do, those who can't teach" but I think some distance between our playing and teaching practice can be helpful.
 
Chris, I really appreciate your doing these videos because they are very helpful for us intermediate jazz bassists. When you get ready to do the next one, I hope you'll consider two topics I struggle with: 1) transitioning into and out of thumb position and 2) hammer-on pull-offs. The first, I've received conflicting advice as well as observed different methods. Sometimes players will bring their thumb up and sometimes not. How do you do it for different scales? and the 2nd, I haven't seen that much material about. It'll probably be a while before I see my teacher next - he's a very busy guy - so I'd love to hear your insights on this.
 
Chris, I really appreciate your doing these videos because they are very helpful for us intermediate jazz bassists. When you get ready to do the next one, I hope you'll consider two topics I struggle with: 1) transitioning into and out of thumb position

Thanks, Tom. When I do the first thumb position video, it'll probably be much like the master class you attended, since that's the material I find most useful to pass on that tends to really get people rolling. As far as transitioning to TP, there are three basic things that I do:

1) when actually transitioning via line or arpeggio, I'll almost always get up into the TP area without using the thumb and then place it down behind a fingered note that has already played. This allows me to find keep my intonation without losing the left hand connection to the fingerboard. Once a higher finger is playing, it's pretty easy to gauge the distance to where the thumb should be.

2) For ascending linear passages where the line goes way up high in TP, I'll sometimes cross the thumb into the line in place of another finger, but I much prefer the method mentioned above. In general, when practicing 2 octave scales, I don't use the thumb at all even when technically crossing into and out of TP - instead focusing on two-note/two-finger groupings in the LH. But if the line goes so high that this starts to feel awkward, I'll cross the thumb in.

3) For cold leaps up into TB, I do the same things most other players do - using physical landmarks on the bass, using a slight, almost imperceptible LH scoop or gliss into the note to try to center it. I don't know if you noticed, but every single faculty member at the workshops has their own personal way of finding this range. I've been watching this for years, and it still fascinates me.

and 2) hammer-on pull-offs. the 2nd, I haven't seen that much material about. It'll probably be a while before I see my teacher next - he's a very busy guy - so I'd love to hear your insights on this.

I'll definitely do a hammer on/pull off/ghost note video at some point, but I think I'll have to backtrack and do a couple of walking bass topics next since that's such a big part of what we as bassists do when playing jazz, and since I want the series to kind of build from the ground up; the only reason I haven't done so so far is that there are so many walking bass methods and vids out there already. Having said that, I'll mention a few things about hammers and pulls:

Hammer on: just as the name suggests, hammer-on technique is just like the name describes - using force and velocity to to press down an ascending note from an existing sounding note without necessarily re-striking the string with the right hand. As such, it sounds like a separate technique, but in point of fact I actually try to do this to some extent with the left hand whenever I play any ascending interval on the same string whether I'm re-striking the string or not as I think doing so produces consistently better stops. If you read back a page or so into the thread, you'll see some criticism of my left hand technique which from a certain pedagogical perspective has some validity; specifically, that in the lyrical examples in the video I had too much distance between my outer fingers of the left hand and the fingerboard (I call this "free/vibrato position" in the video). The reason I like to play this way at slower tempos is that it allows for left hand hammer velocity in ascending passages.

As an example, try this exercise: play an ascending octave G scale from the open G in 8th notes along the G string up to the octave. Phrase/finger the scale in note groups starting on the strong beats so that the scale finger 0-1, 1-2, 2-4, (insert your favorite fingering for the last two). Strike each note with the right hand as you ascend. Next, try the same thing striking only the first note in each group and letting the left hand articulate the second note. Unless your string height/setup is very low, you'll notice a marked drop off in volume on the second note of each group. Now with the first two groups only, raise the hammering finger farther away from the board so that it travels more distance before striking the second note and try to drop your elbow/arm weight into the finger dropping onto the string. When you do this, you should hear more volume on the second note. Then shift without lifting your arm weight off the board and do the same thing on the next pairing. Practicing scales like this - in 2 note groups with a hammer on the second note - is a great addition to traditional scale practice and helps develop good strong hammer technique that comes from the body rather than from the hand or arm. It's not a replacement for traditional technique or hand shape/placement, but can be extremely effective in certain circumstances, and can also help develop a fluidity of line since often it is the right hand that limits tempo rather than the left.

I'm out of time but will try to address the concept of pull offs later.
 
"When you get ready to do the next one, I hope you'll consider two topics I struggle with: 1) transitioning into and out of thumb position."

tcl-
To get used to entering and exiting thumb position, try the following:
Play a C major arpeggio starting on the "written" middle C up on the D string with your 4th finger, then play the E with your 2nd finger and "land" on the G harmonic with your thumb, and complete the arpeggio with your 3rd finger on the C ( a perfect fourth above), while keeping the thumb on the G. Now reverse the arpeggio.
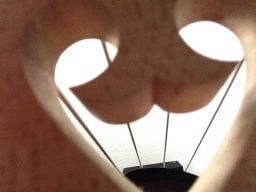
It helps to develop a callus on the side of your thumb, so that you can eventually "land" on a note that is not a harmonic.( G# for example).
( see the attached photo ).

Keep in mind that you do not want to change your posture drastically, ( whether standing or sitting), when moving into and out of thumb position.
You may need to revisit your "posture", if you feel you are needing to drastically reposition your bass or yourself to move into/out of thumb position.

A good "test" (for posture), is to play a C major arpeggio starting on the A string low C (in the second space of the bass clef), "C,E,open G", then move your left hand up into the position mentioned above for the second triad, with minimal "fuss".

Thanks for your time and interest.
 

Attachments

  • IMG_5257.jpg
    IMG_5257.jpg
    68.1 KB · Views: 106
I just saw your Video of Walking bass lines, great material thanks for sharing, I can't wait for the following video on this, and of course I got questions :smug:

Three types of approach.

1-From Root to Root
2-Diatonic approach
3-Chromatic approach

I do sometimes use (when I playing in a band) an approach to the next rood that is withing the scale that I am playing, it could be half steep or Whole step depending the on scale, approaching from above or bellow. is that could be effectively implemented in Jazz bass lines?

Thanks always looking forward to more videos
 
Three types of approach.

1-From Root to Root
2-Diatonic approach
3-Chromatic approach

I do sometimes use (when I playing in a band) an approach to the next rood that is withing the scale that I am playing, it could be half steep or Whole step depending the on scale, approaching from above or bellow. is that could be effectively implemented in Jazz bass lines?

Absolutely! That what I described (or tried to :ninja:) as "Stepwise Diatonic Approach" in the video.

No mention of the new video Chris? It's really good.

I got super busy and forgot about this thread, and was just relieved to get the video done and uploaded. I also always wonder if it's kind of spammy to announce each video... anyway, since someone else brought it up, I'll post the index of topics here in case they might be useful. Thanks to you both for the positive feedback. :)

(Index)

0:00 Walking bass line playing example (traditional)
0:44 General topic list
1:33 Introduction/Disclaimer
3:50 Bass line priorities
7:40 Target notes
11:41 Repeated notes
13:24 Approach notes (general)
14:43 Stepwise approach notes (general)
15:19 Diatonic stepwise approach notes
21:55 Chromatic stepwise approach notes
28:00 Filling the space between target and approach notes
34:17 "Correct" notes vs. good time
37:45 Walking bass line playing example (advanced)
 
Update:

A number of people have contacted me about when the next video might be coming out and what it's about. It's going to be the first multimedia theory presentation I've ever done, basically a narrated book chapter with the screen split to show videos of each example being played as the music is displayed on the other part of the screen. It will be called "Walking Bass Line Theory Basics" and go into more depth over many of the topics covered in the last video. After the chapter is finished, transcriptions and analysis of the two choruses of "Confirmation" will be shown and discussed, again with the music on the left and hands playing the bass on the right.

As far as when it will be done, I'm not sure yet. It's a big project, will be long but indexed, and presents some technical challenges that I will have to figure out with the software. It'll be done when I can get it done right! Thanks to those who have expressed interest and concern. :)
 
The new video, entitled "Walking Bass Line Theory Basics", is now up here. Because of the length of the narrated portion and the musical playing examples, I had to split the video up into the narrated chapter in this vid, and I'll focus on the the complete walking line examples with analysis in the next video.

Here's the index of topics by video timestamp (clicking on the timestamp for each topic on youtube will take you directly to that spot in the video):
0:00 Walking bass line audio intro (Rhythm Changes at 308)
0:53 Spoken introduction
4:10 Basic terms, Target/Approach line building concepts
11:47 Non Stepwise Approach Notes
13:04 Ex. 7 (arpeggiated blues line)
13:57 Ex. 8 (arpeggiated boogie woogie line)
15:56 Stepwise Approach Notes (General)
17:00 Diatonic Stepwise Approach Notes (General)
19:33 Rhythm Changes Examples begin
20:36 Ex. 10 (Rhythm Changes 2 feel)
22:00 Ex. 11 (Rhythm Changes diatonic approach from above)
23:40 Ex. 12 (Rhythm Changes diatonic approach from below)
25:45 Ex. 13 (Rhythm Changes diatonic approach, mixed)
26:20 Chromatic Stepwise Approach Notes (General)
29:40 Ex. 14 (Chromatic approach from above)
31:40 Ex. 15 (Chromatic approach from below)
34:50 Ex. 16 (Chromatic approach, mixed)
37:50 Ex. 17 (Diatonic and Chromatic approach mixed)
39:39 Spoken conclusion and looking ahead

It was an interesting project, and I learned a lot about shooting and editing video. The whole thing was shot on an iPad Air as an experiment and imported directly into Final Cut, then synced with the audio inside the program.