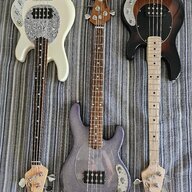
I finally pulled the trigger and recently bought a Peavey Cirrus 5-string off the TB classifieds (Thanks Mike!). While the instrument appeared and sounded incredible, I had some regret for not getting one with a satin finish rather than the glossy polyurethane finish this one had. I know some would shrug it off and enjoy the glossy finish, but I thought I'd take a *risk* and use it as an excuse to take the whole thing apart and get some experience doing some refinishing work. There's just something sexy about a silky smooth satin finish on natural wood.
I just finished the project and thought I'd post some pictures and share some insight in case anyone out there crazy enough decides to do something similar.
Goals
- Remove the polyurethane finish.
- I decided to apply a Tru-Oil finish, buffing to a nice satin finish.
Concerns
- Trashing the guitar. Obviously the biggest concern was that attempting to remove the poly coating would somehow wreck the wood. I enjoy wood working, but have very little experience removing or applying wood finish.
- Removing the electronics. I’ve never gutted a guitar before, or really done any fiddling with pickups or preamps. I’m also no pro at soldering.
Tools
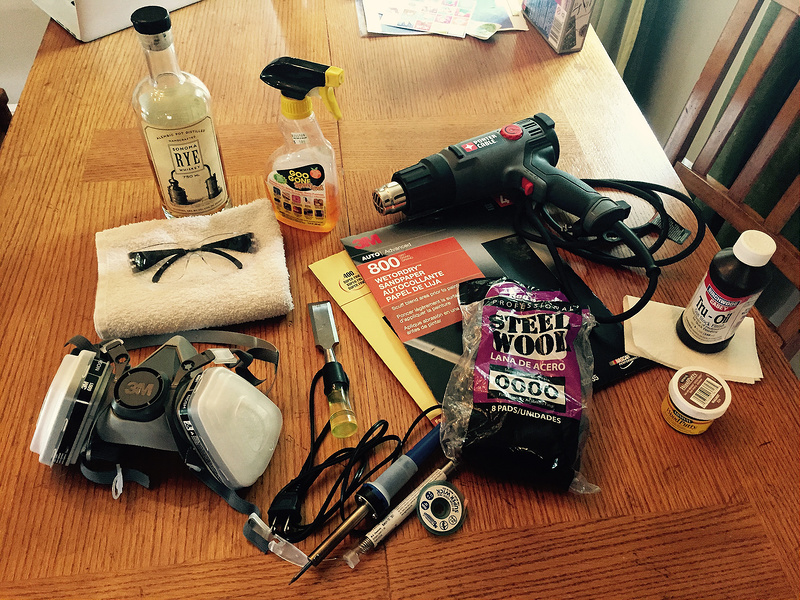
Heat gun - to remove poly finish
http://www.talkbass.com/threads/peavey-millennium-preamp-upgrade-step-by-step.395853/ - for removing poly finish
http://www.talkbass.com/threads/tru-oil-tips.762307/ - to prevent inhaling polyurethane
recently bought - to protect eyes from poly chips (and nerf wars)
http://www.talkbass.com/threads/peavey-millennium-preamp-upgrade-step-by-step.395853/ - to remove leftover poly and sand down any nicks from chisel
http://www.talkbass.com/threads/tru-oil-tips.762307/ - to prepare for finish
Invalid Link Removed - final sanding before applying finish
Invalid Link Removed - the glorious oil finish
Invalid Link Removed - to apply Tru-Oil finish
Invalid Link Removed - to remove Tru-Oil from hands after applying
Invalid Link Removed - to buff Tru-Oil finish
Invalid Link Removed - to solder wires to preamp
Invalid Link Removed - to solder wires to preamp
Invalid Link Removed - to remove wires from preamp
Saw horses - for stripping and sanding
Invalid Link Removed - for when you mess up
Serial Podcast - to make sanding more enjoyable
Assorted Rags
Some Online References
Preamp Removal
Invalid Link Removed
Removing Poly finish
[Invalid or Expired Link Removed]
Invalid Link Removed
Tru-Oil Tips
Invalid Link Removed
Invalid Link Removed
Process I used
0. Remove pickups and all electronics. I had to disconnect 8 wires from the preamp to remove.
1. Use heat gun / chisel to remove poly finish.
2. Start with 80 grit sand paper to remove left over poly, moving to 120, 150, 220, 400, and finally 800 grit to get things super smooth. I also sanded the neck and headstock with 400 and 800 even though they already had a satin finish on--I wanted everything sanded and oiled together.
3. Apply a first coat of Tru-Oil, let sit for 5 hours, buff with 0000 steel wool, then apply another coat. Wait 24 hours.
4. Buff with 0000 steel wool, then repeat step 3 three times, until 6 coats have been applied.
5. Do a final buff with 0000 steel wool to remove the shine until its to the desired satin.
6. Put pickups back on and solder wires to preamp.
7. String up, and enjoy
Pictures!!
Tools:
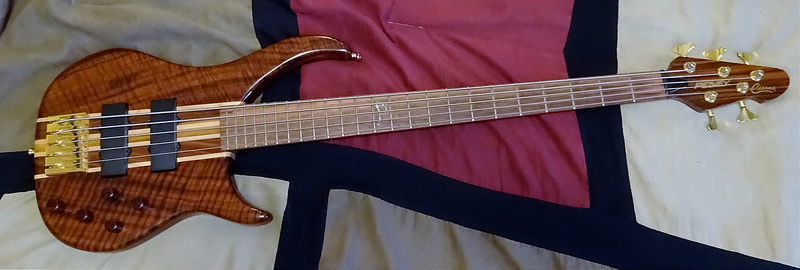
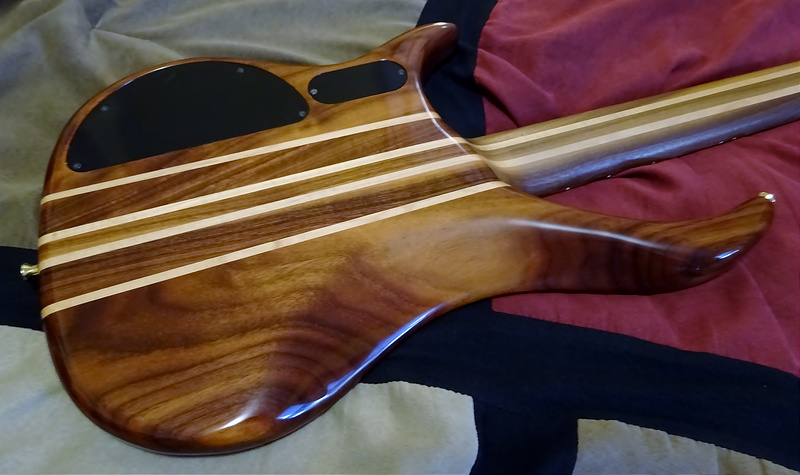
Before:
Let's do this:
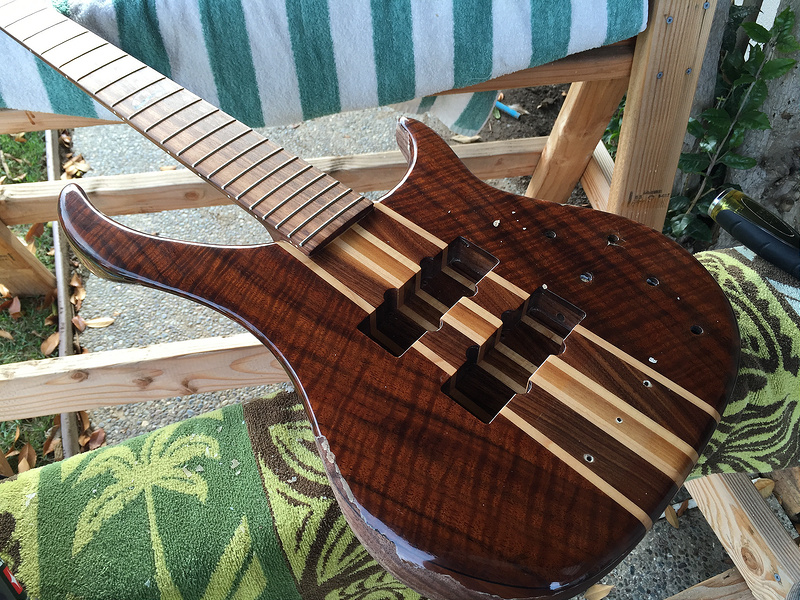
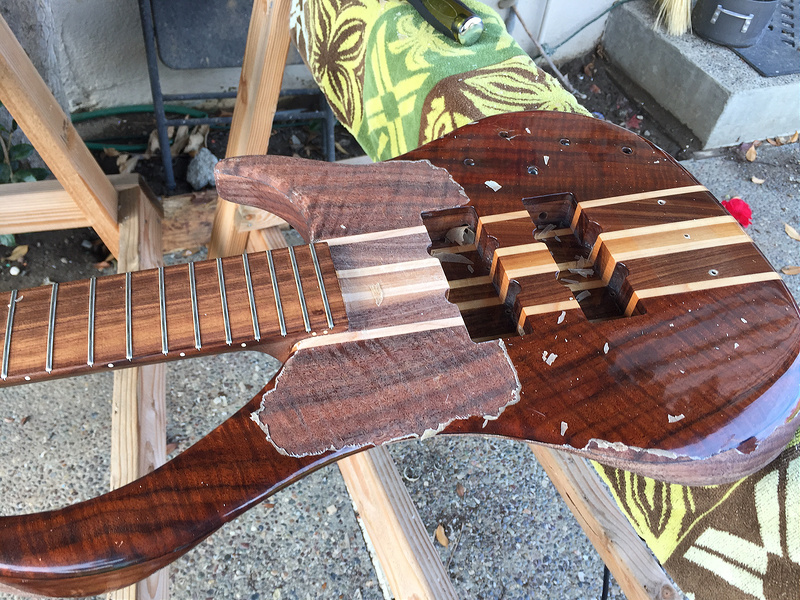
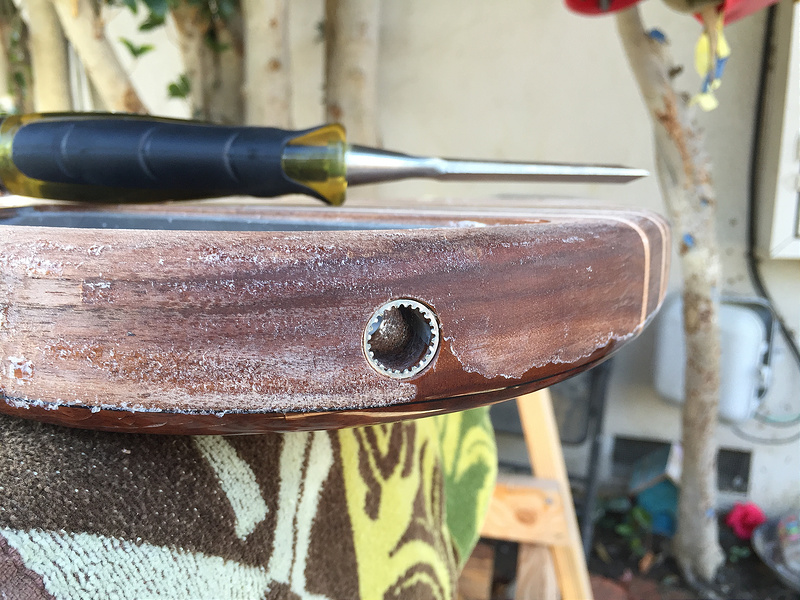
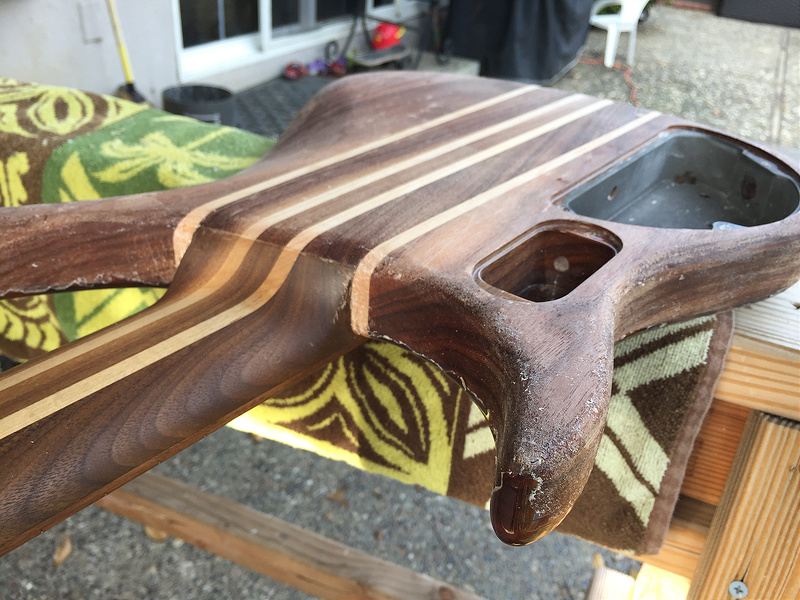
Sanded from 80 to 120 grit:


Sanded from 400 to 800 grit:
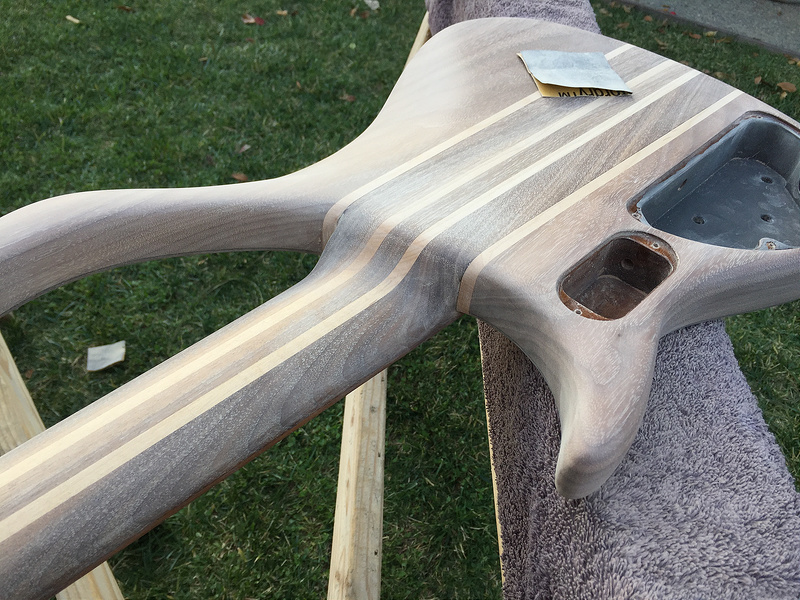
Six coats of Tru-Oil done:
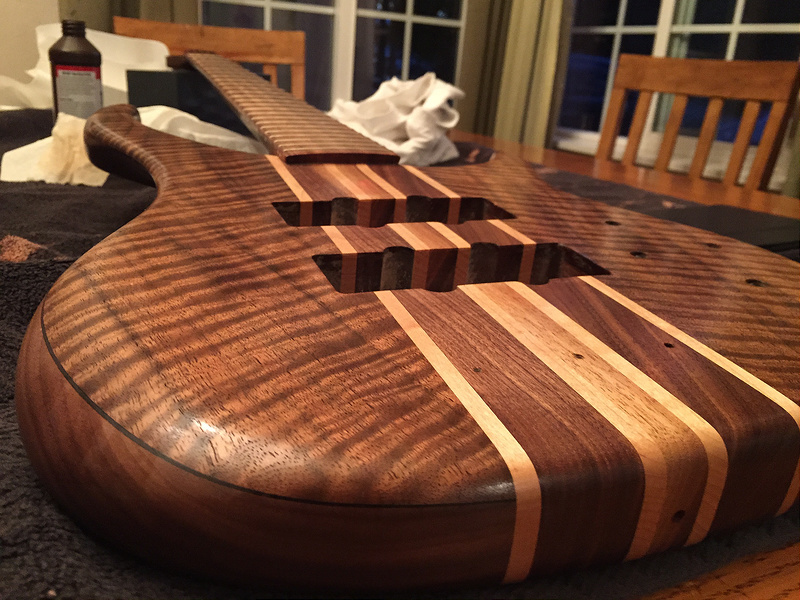
Buffing with 0000 steel wool. Notice the difference:
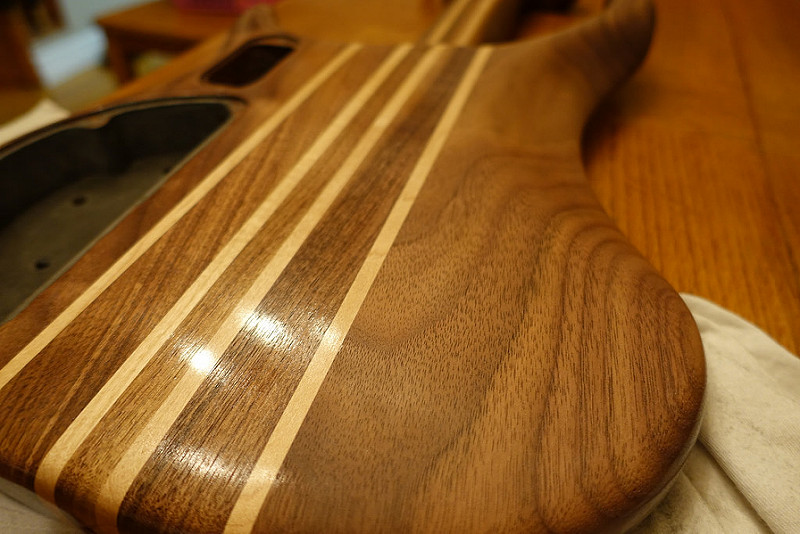
All done buffing:
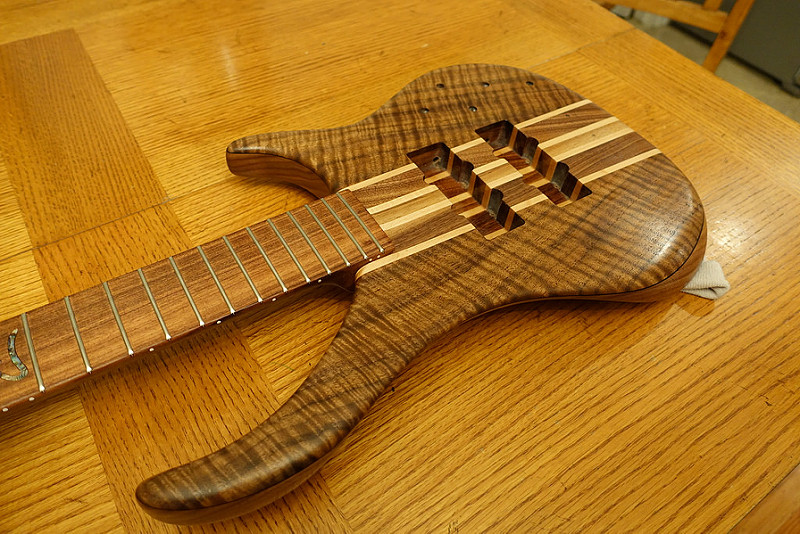

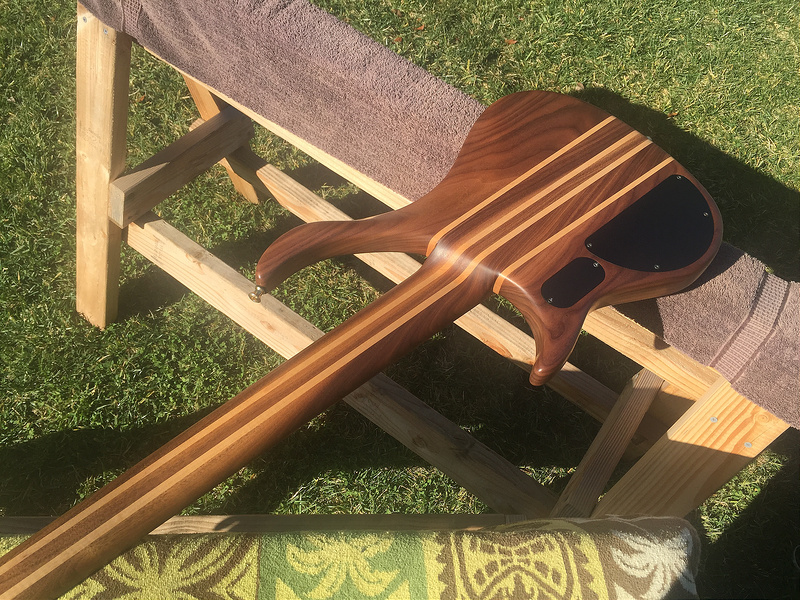
Nice blend from the satin neck to our new satin back:

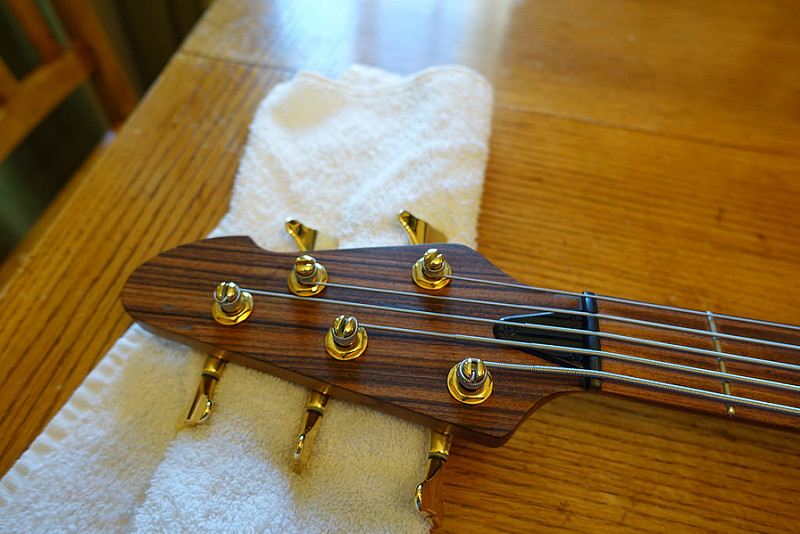
My biggest regret, messing up the headstock. The walnut overlay was super thin and needed way more delicacy than the rest of the body. I was hoping that the decals were better embedded in the wood, but they came off with the poly finish. In hindsight, I wish I'd been way more careful in removing the decals so I could've reapplied them later. I called the factory and they said it's not possible to get new ones. Guess I'll need to come up with some custom decal now
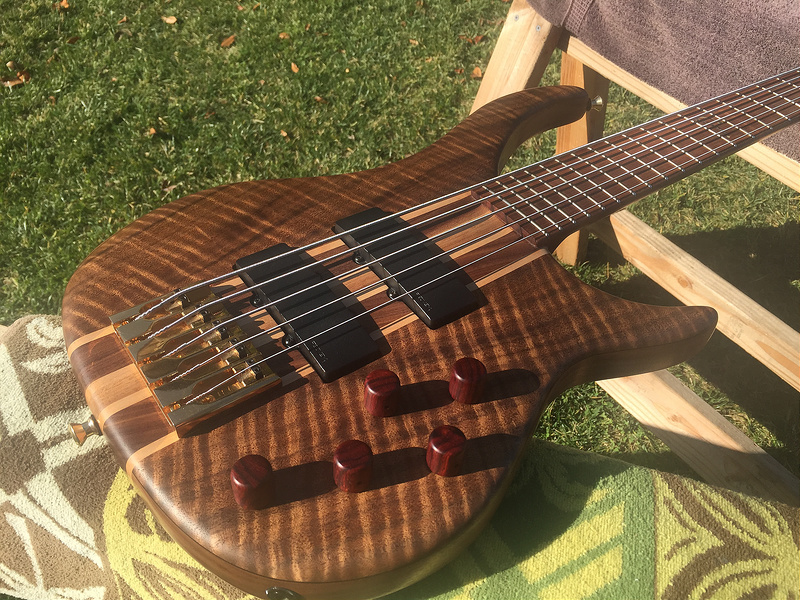
Electronics back in, all stringed up:
I'd like to talk to the person at Peavey who decided to use these reddish wood knobs on a claro walnut body and ask them what they were thinking. I called the factory and got these new matte black ones to replace them, but alas they're too small... I'm going to bore them out sometime to fit.
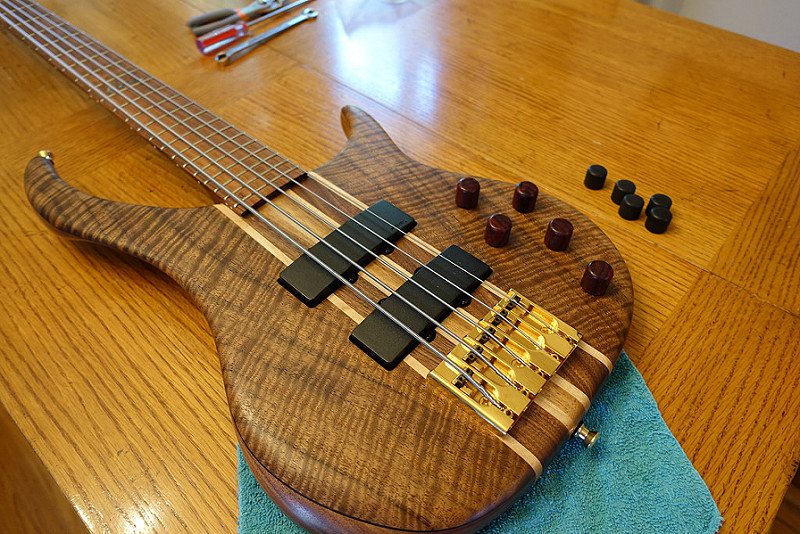
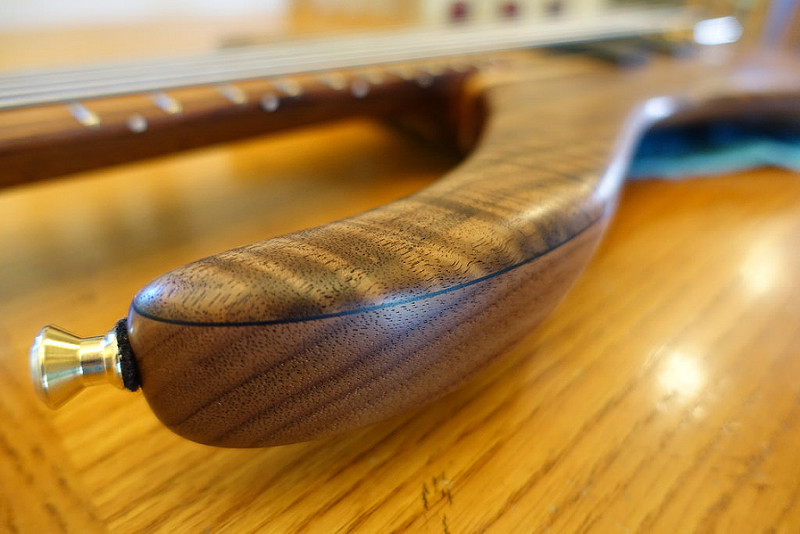
So silky...love it
Full album for anyone interested:
https://www.flickr.com/photos/garthjantzen/sets/72157650114614516/
Overall, the body turned out beautifully. I know some prefer the glossy poly finish, but I think this Tru-Oil satin looks great on the claro walnut top. As I mentioned above, my only regret is messing up the headstock. At some point, I'll probably take it to a luthier and have them come up with something custom.
If you've actually made it this for in the post, thanks for reading! Hope it helps someone out at some point!
Garth
I just finished the project and thought I'd post some pictures and share some insight in case anyone out there crazy enough decides to do something similar.
Goals
- Remove the polyurethane finish.
- I decided to apply a Tru-Oil finish, buffing to a nice satin finish.
Concerns
- Trashing the guitar. Obviously the biggest concern was that attempting to remove the poly coating would somehow wreck the wood. I enjoy wood working, but have very little experience removing or applying wood finish.
- Removing the electronics. I’ve never gutted a guitar before, or really done any fiddling with pickups or preamps. I’m also no pro at soldering.
Tools
Heat gun - to remove poly finish
http://www.talkbass.com/threads/peavey-millennium-preamp-upgrade-step-by-step.395853/ - for removing poly finish
http://www.talkbass.com/threads/tru-oil-tips.762307/ - to prevent inhaling polyurethane
recently bought - to protect eyes from poly chips (and nerf wars)
http://www.talkbass.com/threads/peavey-millennium-preamp-upgrade-step-by-step.395853/ - to remove leftover poly and sand down any nicks from chisel
http://www.talkbass.com/threads/tru-oil-tips.762307/ - to prepare for finish
Invalid Link Removed - final sanding before applying finish
Invalid Link Removed - the glorious oil finish
Invalid Link Removed - to apply Tru-Oil finish
Invalid Link Removed - to remove Tru-Oil from hands after applying
Invalid Link Removed - to buff Tru-Oil finish
Invalid Link Removed - to solder wires to preamp
Invalid Link Removed - to solder wires to preamp
Invalid Link Removed - to remove wires from preamp
Saw horses - for stripping and sanding
Invalid Link Removed - for when you mess up
Serial Podcast - to make sanding more enjoyable
Assorted Rags
Some Online References
Preamp Removal
Invalid Link Removed
Removing Poly finish
[Invalid or Expired Link Removed]
Invalid Link Removed
Tru-Oil Tips
Invalid Link Removed
Invalid Link Removed
Process I used
0. Remove pickups and all electronics. I had to disconnect 8 wires from the preamp to remove.
1. Use heat gun / chisel to remove poly finish.
2. Start with 80 grit sand paper to remove left over poly, moving to 120, 150, 220, 400, and finally 800 grit to get things super smooth. I also sanded the neck and headstock with 400 and 800 even though they already had a satin finish on--I wanted everything sanded and oiled together.
3. Apply a first coat of Tru-Oil, let sit for 5 hours, buff with 0000 steel wool, then apply another coat. Wait 24 hours.
4. Buff with 0000 steel wool, then repeat step 3 three times, until 6 coats have been applied.
5. Do a final buff with 0000 steel wool to remove the shine until its to the desired satin.
6. Put pickups back on and solder wires to preamp.
7. String up, and enjoy
Pictures!!
Tools:
Before:
Let's do this:
Sanded from 80 to 120 grit:
Sanded from 400 to 800 grit:
Six coats of Tru-Oil done:
Buffing with 0000 steel wool. Notice the difference:
All done buffing:
Nice blend from the satin neck to our new satin back:
My biggest regret, messing up the headstock. The walnut overlay was super thin and needed way more delicacy than the rest of the body. I was hoping that the decals were better embedded in the wood, but they came off with the poly finish. In hindsight, I wish I'd been way more careful in removing the decals so I could've reapplied them later. I called the factory and they said it's not possible to get new ones. Guess I'll need to come up with some custom decal now
Electronics back in, all stringed up:
I'd like to talk to the person at Peavey who decided to use these reddish wood knobs on a claro walnut body and ask them what they were thinking. I called the factory and got these new matte black ones to replace them, but alas they're too small... I'm going to bore them out sometime to fit.
So silky...love it
Full album for anyone interested:
https://www.flickr.com/photos/garthjantzen/sets/72157650114614516/
Overall, the body turned out beautifully. I know some prefer the glossy poly finish, but I think this Tru-Oil satin looks great on the claro walnut top. As I mentioned above, my only regret is messing up the headstock. At some point, I'll probably take it to a luthier and have them come up with something custom.
If you've actually made it this for in the post, thanks for reading! Hope it helps someone out at some point!
Garth
Last edited: