- Aug 27, 2003
- 1,413
- 183
- Disclosures
- Endorsing Artist: See Profile
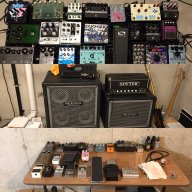
Last weekend, I had my pedalboard completely disassembled so I figured you guys would get a kick out of a "pedalboard assembly" thread. So I took a few pics as I put it together and jotted down some notes/thoughts. Shall we?
Laying Down the Foundation:
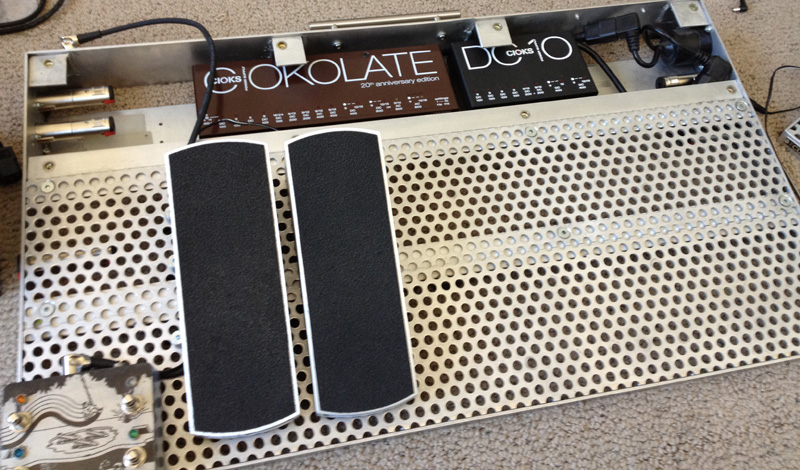
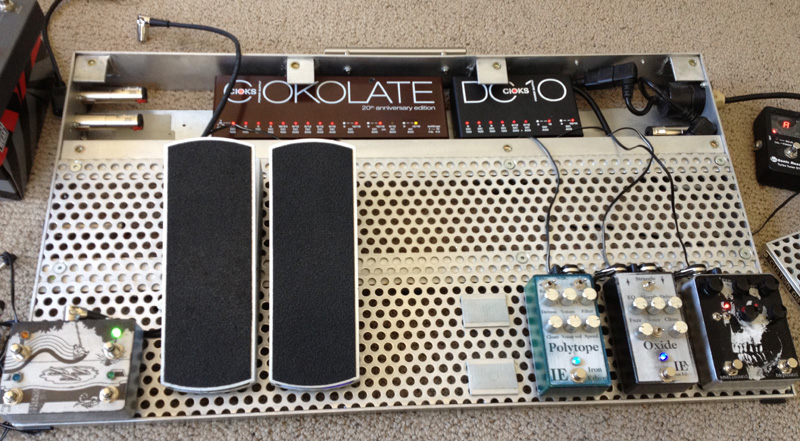
From this pic, I'm figuring out my basic layout (which isn't that different from previous iterations). I'm starting with the EB Juniors (Volume on the right, and the one on the left is modded for expression). This Custom District pedalboard (www.customdistrictpedalboards.com) was designed for 3 tiers... This time I'm rolling with just two, so the middle tier has been collapsed to be flush with the bottom.
The DMC-4 (etched by Dan W) in the bottom left corner controls three of the pedals on the top tier (Mobius, Timeline, and PitchFactor). It also controls the Looper in the TimeLine so it's essential it gets a solid and clear spot on the bottom left corner.
You can also see the the power supplies (Ciokolate and DC-10) that will be hidden under the top tier. There's also an AC out with 2 plugs on the right as well as multiple I/O (x5) for audio signal as well as external additional expression pedal routing (if needed - each plug takes TS or TRS).
Bottom Row:
Here I'm getting the bottom row put together with the ss/bs TAFM and Iron Ether pedals.
You can see the plates for the FrantaBit. Every pedal on the board uses these plates that utilize wing nuts under the board to mount them. It only takes a few seconds to move them. I use 3M dual-lock, instead of velcro, to mount the pedals to the plates. Solid connection and the sticky residue is easy to remove from the pedals if I end up selling any of them.
I connect power and cabling as I go.
Bottom Row Finished, Middle Row:
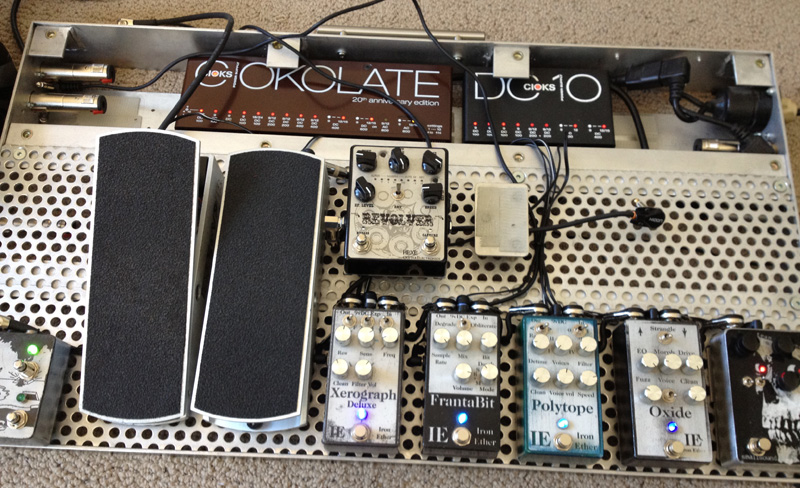
The bottom row is complete and now I'm moving to the middle row. One thing to note is the gap between all the pedals - This was done intentionally to make it "Future Proof" - Iron Ether's Subterranea will be added between the TAFM and Oxide, and all I will need to do to make it fit is to dismount the bottom pedals and get them all snug.
Now, the middle tier pedals will be mounted on plates that have longer screws and spacers, (basically turning the mounting plates into risers). Not only does it make the pedals higher and easier to stomp on, it effectively lets me route/hide cabling under the pedals. I grouped the bottom row's power and expression cables with a cable tie through one of the holes (these wires will be hidden under the POG2). The cable for the Xerograph, being the last in the chain on the bottom row, is routed under the Revolver and POG2. (I had to stop here and solder some cables).
Under the Hood, So Far:
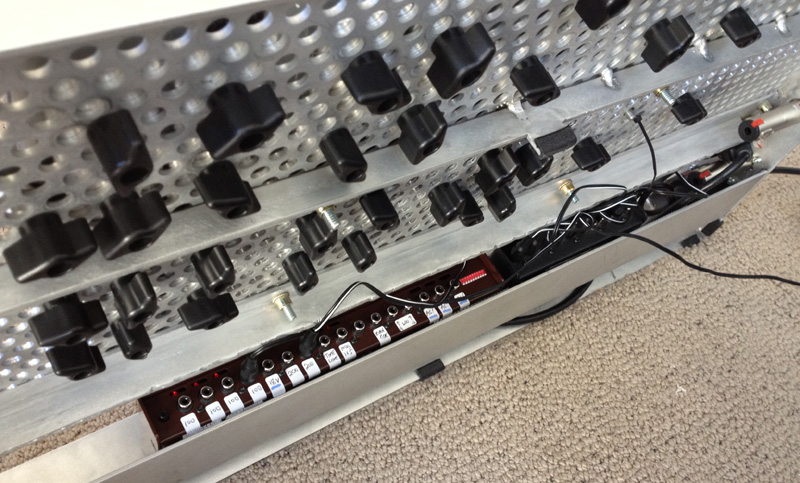
Here you can see the wing nuts for the plates the power supplies. I labelled the Ciokolate, as I don't have the power requirements for each port memorized for them quite yet, and the top of the power supply (where they are identified) will be blocked from view when the top tier is on.
Continued in next post....
Laying Down the Foundation:
From this pic, I'm figuring out my basic layout (which isn't that different from previous iterations). I'm starting with the EB Juniors (Volume on the right, and the one on the left is modded for expression). This Custom District pedalboard (www.customdistrictpedalboards.com) was designed for 3 tiers... This time I'm rolling with just two, so the middle tier has been collapsed to be flush with the bottom.
The DMC-4 (etched by Dan W) in the bottom left corner controls three of the pedals on the top tier (Mobius, Timeline, and PitchFactor). It also controls the Looper in the TimeLine so it's essential it gets a solid and clear spot on the bottom left corner.
You can also see the the power supplies (Ciokolate and DC-10) that will be hidden under the top tier. There's also an AC out with 2 plugs on the right as well as multiple I/O (x5) for audio signal as well as external additional expression pedal routing (if needed - each plug takes TS or TRS).
Bottom Row:
Here I'm getting the bottom row put together with the ss/bs TAFM and Iron Ether pedals.
You can see the plates for the FrantaBit. Every pedal on the board uses these plates that utilize wing nuts under the board to mount them. It only takes a few seconds to move them. I use 3M dual-lock, instead of velcro, to mount the pedals to the plates. Solid connection and the sticky residue is easy to remove from the pedals if I end up selling any of them.
I connect power and cabling as I go.
Bottom Row Finished, Middle Row:
The bottom row is complete and now I'm moving to the middle row. One thing to note is the gap between all the pedals - This was done intentionally to make it "Future Proof" - Iron Ether's Subterranea will be added between the TAFM and Oxide, and all I will need to do to make it fit is to dismount the bottom pedals and get them all snug.
Now, the middle tier pedals will be mounted on plates that have longer screws and spacers, (basically turning the mounting plates into risers). Not only does it make the pedals higher and easier to stomp on, it effectively lets me route/hide cabling under the pedals. I grouped the bottom row's power and expression cables with a cable tie through one of the holes (these wires will be hidden under the POG2). The cable for the Xerograph, being the last in the chain on the bottom row, is routed under the Revolver and POG2. (I had to stop here and solder some cables).
Under the Hood, So Far:
Here you can see the wing nuts for the plates the power supplies. I labelled the Ciokolate, as I don't have the power requirements for each port memorized for them quite yet, and the top of the power supply (where they are identified) will be blocked from view when the top tier is on.
Continued in next post....