• TalkBass has been independent since 1998. Add your voice.
    Create a free account to reply to discussions, view embedded media, and browse with fewer display ads.
    Join freeLog in
    Want zero display ads or expanded classifieds tools? Compare plans.

Rattle Can Refinish Club

I have a hollow danelectro type of bass that is already black and a previous owner had installed a thumb rest and then removed it and filled the holes with epoxy and sanded it so now there is a pretty large area where the black is sanded thru to the primer. I'd like to just spray a coat of black over the whole top - not refinish the entire instrument since its older and well used but just get the splotches off the front and spot touching up has not proved something I'm good at 8>) so the question is if i want to spray black over the whole front, what grit paper to knock down the existing finish so I'll get good adhesion? I've read everything from 320 to 600 wet sand. I will use a rattle can and dont plan a clear coat over it - again going for a consistent black finish not a new guitar look. Any advice on sanding/prepping and brand of paint for gloss black would be greatly appreciated!
320 is too course IMO just for adhesion. If you need to remove a lot of material or wear that’s one thing. 400 at the most then finish off with 6-800 before spraying. I almost never wet sand my basses. Also, I like rust oleum or duplicator auto paints. Rust oleum makes a great sandable auto primer. They carry it at harbor freight if you have one nearby. You barely have to touch it with 800 dry for a super smooth finish (as long as you prepped well).

good luck.
 
  • Like
Reactions: murphy
I have a hollow danelectro type of bass that is already black and a previous owner had installed a thumb rest and then removed it and filled the holes with epoxy and sanded it so now there is a pretty large area where the black is sanded thru to the primer. I'd like to just spray a coat of black over the whole top - not refinish the entire instrument since its older and well used but just get the splotches off the front and spot touching up has not proved something I'm good at 8>) so the question is if i want to spray black over the whole front, what grit paper to knock down the existing finish so I'll get good adhesion? I've read everything from 320 to 600 wet sand. I will use a rattle can and dont plan a clear coat over it - again going for a consistent black finish not a new guitar look. Any advice on sanding/prepping and brand of paint for gloss black would be greatly appreciated!
Hey don for what you are doing I would hit it with 600 grit or if you have wet sand paper just don’t wet it, use it dry.
I find 600 is perfectly fine for roughing up existing paint/primer to create a little ‘tooth’ for the new topcoat to grab onto. I have had perfectly good results using most major brands of black gloss be-it Krylon, Dupli-Color, Rust-Oleum etc. :thumbsup:
 
Thank for the helful info - I felt like 320 was just too coarse so this makes me feel better using 400-600. Also I noticed dry vs wet for the paper?

Well, I've never seen 600 grit paper for sale that wasn't "wet". Not that it likely can't be found. Anything I see in the hardware/auto store is wet grade in the higher grits.

Just use what you have (a new sheet!) and don't wet it. Best to use a sanding block on the flat parts.
 
  • Like
Reactions: murphy
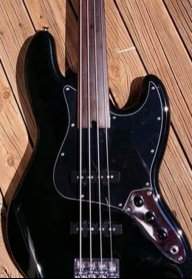
That’s an interesting bass. I made that before Geddy Lee’s were a thing. I made it because I was in a Rush tribute band and was going for the look (my red PRS wasn’t doing it). It’s a no name ash body with 70’s spacing off eBay, used AllParts neck I got for next to nothing because of a small crack in the headstock, no name vintage tuners and whatever 70’s pickups Fender was selling at the time (20 years ago or so). I sanded the body and sprayed a light coat of black auto lacquer gloss then knocked off the gloss with 0000 steel wool.

then I gigged it to death for 20 years. It started with a light relic but wound up quite banged up after very hard playing.

I didn’t take the “build” very seriously at the time, but it wound up being a STELLAR playing and sounding bass. It’s far and away the best in my stable just by dumb luck. I’ll never get rid of it, it’s an amazing stroke of luck. Plays better than any ‘Geddy’ I’ve ever put my hands on, Mex/Japan/USA or any combination.
Thanks...I love it!
 
Also, READ AND FOLLOW the instructions on whatever can you get regarding drying and re-coat times. VERY important. Different solvents off-gas at different rates. Also, give the color ample time to cure if you’re going to do a clear coat.

Can't stress the color cure time enough. I think I did less than a week and it took MONTHS for it to harden up after I did the clear.
 
  • Like
Reactions: murphy
Being born 2000 I’m a huge fast and furious fan lol
And was obsessed with the eclipse and supra


The producer from the first movie noted the orange is tangelo by house of kolor! so, I hope somewhere I can find some rattle cans!
DA781454-15F7-4794-9077-44150F341824.jpeg
94ECC708-6261-4534-9ACC-C37CF0B64249.jpeg
 
I should have said in my post above that had I just been doing a solid color I would have sanded the spattered bits back and just done another coat, but as it was a spatter of red on black I didn't want to risk making things worse.
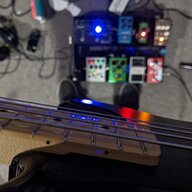
While it's not a great finish it looks good in the right lighting.

The One-man-rhythm-section rig.
View attachment 4921037

I like the reverse-burst paint scheme. Looks great and you will always see more imperfections than anyone else.
 
I like the reverse-burst paint scheme. Looks great and you will always see more imperfections than anyone else.

Thanks... and you are right. I'm the only one who sees the imperfections and overall it looks pretty good, particularly under coloured lighting.

It's not really finished, and probably never will be as I view it as a bit of a test-bed. I've picked up an EB3 Mudbucker that I'm going to put into the neck position. I was given a Dremel tool for Xmas and decided to try my hand at routing the pickup rout myself for the first time. It would have been cheaper and easier to just get a luthier to do the rout for me but I wanted to see if I could do it myself.

Did a bit of a test on a scrap piece of wood, set it all up on the body for routing, drilled out most of the wood and started routing. I did a couple of small passes with the larger bit and switched to the thin bit to get to the edges..... went to swap back to the larger bit for another pass and the locking collar wouldn't unlock. Something has gone wrong in the body of the tool so now the bass body is sitting on the bench half routed while I wait for the shop to repair or replace the Dremel. :rage:
20230121_134353.jpg
 
Ended up starting my project P over. Too much too quick and it's still soft to a fingernail 4+ months later.

Didn't dig the color after all, so seemed like a good enough reason to start over and do some things differently

Whats the best way strip and remove stripper/paint from the cavities, other than just carefully scooping it out with a scraper?

Is there a particular reason you want to remove the paint from the cavities? If it were me, I'd just mask them off and start over. You won't see it once the pickguard goes on anyway.