• TalkBass has been independent since 1998. Add your voice.
    Create a free account to reply to discussions, view embedded media, and browse with fewer display ads.
    Join freeLog in
    Want zero display ads or expanded classifieds tools? Compare plans.

Ricky Build

That sounds spot on. For the boo-boo at the back end you could thin out the neck blank and add a nice piece of wood to the back to bring back to the thickness you want? Tie it in with the body wing wood maybe?

Thats a great idea. The neck i'm using for this build had the same problem. I added 3-4 layers of maple laminate to build it up. Glued + sanded 1 layer at a time. But i can see narrowing the neck [reducing the taper starting at the end of the fretboard] and even doing something similar to your teak / ebony project.
 
Last edited:

Refretting it would allow you clean up all the problems, including the chipped out maple along the neck/binding edge, and have the added benefit of you learning fretwork. You pretty much have nothing to lose, if it goes South on you, so what, but based on how well you did on everything else, I'm guessing it will come out much better cosmetically and functionally. They use the cheapest possible fretwire on those necks, I played a Chickenbacker in a pawnshop a few years back, the bass looked nearly brand new, but the frets had yellowed, basically some kind of corrosion. You can get Fender standard medium jumbo pre-cut and radiused fretwire on Amazon, that's what I used for both of my clones. My boards were 10" radius, so I got 9.5" radius wire, worked perfectly with minimal hammer work. If you get any chipout on the neck yanking the frets, you could infill with black tinted CA glue, and it would be nearly invisible.
https://www.amazon.com/Genuine-Fend...jbGlja1JlZGlyZWN0JmRvTm90TG9nQ2xpY2s9dHJ1ZQ==
 
As an Amazon Associate, TalkBass may receive commissions from qualifying purchases made via links on this site.
Back to the build - Again i didn't take too many pics, so were skipping over stuff. After i made the wings, started the control cavity and drilled holes for pickup wire pass through. [remembered this time..] Then began gluing the wings on 1 at a time.
I made the front of the neck and wings as level as possible before hand, knowing i would be using my router sled to plane the back level and to the right thickness later. I ran the back of the neck through the band saw just to get rid of extra wood before i started gluing. Came close in a couple spots but the wings are about 1/4" too thick at this point on purpose.

DSC_0927.JPG


Funny thing is i didn't realize that the part of the neck where the lower wing attaches wasn't square with the top surface of the neck. So when i tightened the clamps, the whole thing lifted! I level sanded the whole thing lengthwise so the surface of the wing + neck mated nicely, but did not realize the side of the neck wasn't square to the top of the neck.. Luckily the upper wing - which was glued on first - didn't have the same problem. After that was fixed, things began to come together.

Here's a quick mock-up. The hook type cut-out behind the bridge is from necessity. Ill explain next but you can probably guess..

DSC_0916.JPG
 
Last edited:
Watching! Love me some Ricky builds. Especially ones that use non-traditional parts. :thumbsup:

Honestly, if you have enough woodworking skills to make those body wings, you have enough skills to make a neck-thru neck. I know it’s too late now, but with the amount of time you’ll have to spend cleaning up that overseas neck, you could have built your own, correctly.
 
Watching! Love me some Ricky builds. Especially ones that use non-traditional parts. :thumbsup:

Honestly, if you have enough woodworking skills to make those body wings, you have enough skills to make a neck-thru neck. I know it’s too late now, but with the amount of time you’ll have to spend cleaning up that overseas neck, you could have built your own, correctly.

Thanks for the kind words - I've been checking out your builds too for inspiration. The 4004CTM is incredible. Hope you don't mind if i pick your brain about neck building when the time comes!
 
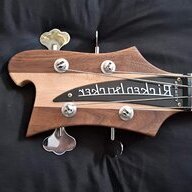
So about that hook shape behind the bridge.... Of course since i made the wings before the neck came in, and as much as i tried to stick to my original drawing, the radius / contour of the wings on the rear was too tight. The contour wouldn't continue from one wing, around the back of the neck and on to the other wing. So i started thinking about an Alembic type thing and went back to the drawing board. I eventually started playing with a hook shape and thought it looked familiar...So i just copied the hook / wave shape directly from the headstock. Finally a mistake that actually paid off.

DSC_0311 (2).JPG
DSC_0331.JPG
DSC_0332.JPG
DSC_0333.JPG