• TalkBass has been independent since 1998. Add your voice.
    Create a free account to reply to discussions, view embedded media, and browse with fewer display ads.
    Join freeLog in
    Want zero display ads or expanded classifieds tools? Compare plans.

SBO 2022 - BTSGSIMBDS

'51P-influenced partial build.
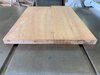
Woodpile - Copy.jpg
An Allparts Jazz Bass neck was purchased for this build. I did a little work on it a couple of years ago and will detail that before getting into the new work.
The door will be the donor for the body. It is on what counts for my garage. It was sagging when we bought the place and has progressed to the point of not being closable. I have repaired old doors like this before - it's a lot of work, and I would rather have a steel door in its place, so parts it is. I'm expecting old pine heartwood - we'll see what I get!

Parts - Copy.jpg
Other parts include; plain-Jane Grover tuners, knurled dome knobs, electrosocket, Fender Deluxe bridge (body-through & top-loading), and Seymour Duncan 51 P Stack pickup.

Yee-ha!
 
My main player is an SR800. I like the narrow fretboard, but wish it was a little meatier. This Allparts Jazz neck seemed to fit the bill, now it needs to imitate a '51 Precision.
I had downloaded full-size drawings back when they were available from. . . Fenderish(?) and used those as a pattern to reshape the headstock. Not a perfect match because it had to fit within the material already there, but I'm happy with how it came out. I left most of the Jazz profile on the back instead of thinning it out like the original Precision.
Headstock-Front - Copy.jpg

Headstock-Back - Copy.jpg

Headstock-Side - Copy.jpg

While not a faithful copy, I want to keep some of the '51 P vibe. For me, that includes the squared end of the neck. To the belt sander for that. Not bad, but that leaves the truss rod nut proud - had to trim that to match.
Trimmed Heel - Copy.jpg

TR Nut - Copy.jpg

Trimmed TR Nut - Copy.jpg

Squared Heel - Copy.jpg

That is the way it has been patiently waiting for me to get back to it. Summer Build-Off, here we go!
 
I've thought about building a bass for a very long time. Laminations of beautiful woods and a pair of choice pickups were always things I considered. When I started really planning a build, I decided that my playing tended to fit something simpler. I have an SR800 if I want a modern sound. . . what I don't have is a simple P-bass, and what's simpler than a '51 copy? Still may do a coffee-table bass sometime in the future though. :D
 
Played with finish a little today.
Lacquer alone looks nice, but I'm wanting more contrast between the body and the maple neck. I use powdered transtint dyes in water for wood and leather, and already have bottle that's a mix of red mahogany, mission oak, and dark walnut. It gives me a nice cordovan color on leather, and looked like an easy thing to start with on this pine.
No dye at all on one end, and almost as dark as it will get on the other.
Dye Test - Copy.jpg
 
I'm thinking about a soft-fade burst - from pretty light to dark but not opaque. I put the dye sample next to a piece of lacquered maple and covered the end so only the intended portions show. It looks a little different depending on the light and the angle. Going to spend some time looking at this - too hot for me to spend a lot of extra time in the shop anyway!
Sample 1 - Copy.jpg

Sample 2 - Copy.jpg

Sample 3 - Copy.jpg
 
I haven't been drawn to traditional Fender sunbursts. After pouring through alternative takes on it by Talkbass member examples, BigD guitars, Pittman guitars. . . I'm going to try it.
I'm not sure how to explain my vision for this bass. Not an over-the-top custom bass with a classic design. Not a "reliced" bass. More along the lines of a well-preserved seventy year old bass, or maybe a seventy year old bass that has been carefully refurbished? This pine is soft, and a lacquer finish will settle into it quickly - it'll gain honest wear on its own.
The worst that could happen is that I'm not happy with it and have to build another one, right?!? ;)
 
For those unfamiliar with the construction of old doors; the rails and stiles are cope and stick molded so they all fit together. Instead of serious mortices and tenons, they are held together with dowels that are five or six inches long.
Door const 1 - Copy.jpg

Door const 2 - Copy.jpg

The reason these things are so frustrating to repair is the glue on enough dowels fails allowing the door to sag, but stay stuck enough to make them very hard to completely disassemble.
My top pieces all avoided the dowel holes, but the back pieces have several that I'll need to deal with.
Problem Dowels - Copy.jpg

In addition to that, I discovered that the wood around of them is cracked, and - the crack runs the whole length of that board.
Problem Dowels - Copy.jpg

Crack 2 - Copy.jpg

Tough to see, but it's there, and it won't get better on its own.
 

Attachments

  • Crack 1 - Copy.jpg
    Crack 1 - Copy.jpg
    49 KB · Views: 60
  • Like
Reactions: Matt Liebenau
There is just enough width, probably, to rip that doweled section out and glue the pieces back together.
Measure carefully, rip. Measure carefully, rip. Not bad. A pass over the jointer - just enough to take the saw marks out. Speaking of which, I really like my jointer. Six inch Davis & Wells from the Rankin Brothers era. Kind of fun because My last name is Rankin, although I'm unaware of any connection between those Rankin brothers and mine.
The paint not only looked bad, but had also adhered the tables to the base. I've picked up almost all of my machines used and needing some level of refurbishment. This is the only one that required stripping and a repaint to work well. I think it was worth it.
jointer1 - Copy.JPG

Jointer - Copy.jpg

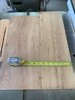
The result - center to outside is 6 31/64". Good enough to get it done, so I glued it back together.
Width - back - Copy.jpg

Repair 1 - Copy.jpg
 
I have an old Doug fir door that I'm thinking of doing the exact same thing with.
It's also 1" thick and just under 1/2" panels.
I'm hoping the panels don't go too far into the stiles. Hoping to get 3" of width. If so, I can build the entire bass from the door, save maybe a thin maple center lam in the neck-thru.
Also hoping the panels are solid fir. Were your panels solid?
Since I'll have to laminate the body, I'm thinking of using the panels to make a one piece top and back.
 
Last edited:
I have an old Doug fir door that I'm thinking of doing the exact same thing with.
It's also 1" thick and just under 1/2" panels.
I'm hoping the panels don't go too far into the stiles. Hoping to get 3" of width. If so, I can build the entire bass from the door, save maybe a thin maple center lam in the neck-thru.
Also hoping the panels are solid fir. Were your panels solid?
Since I'll have to laminate the body, I'm thinking of using the panels to make a one piece top and back.
You can see the cope & stick profile when you look at the top or bottom end of the door. On all of the doors I've dealt with, the whole stile has that profile - the panels do not extend any more than the rail tenons.
The panels on my donor door were solid, although they were not as wide as yours. They were raised panels; 1/2" thick in the middle and 1/4" at the edges. It's tough to see in your pictures, but both both sides look like that panel is two-pieces joined in the middle. While not conclusive, that makes it less likely to be plywood.

It's good stuff - I hope you can put it to good use!
 
  • Like
Reactions: RichterScale
You can see the cope & stick profile when you look at the top or bottom end of the door.
Yeah, I took it apart and realized after, oh, it says it right there on the end of the stile! :confused:
I ran the circ saw through to pop the stiles off the rails and realized that I was way off on the thickness of the panels. They are full pieces but it's 3 ply and just under 1/4".
I won't be able to sand much off and I'll have to be careful and clever about the edges if I want to use it as a top.
I also found the big dowels in the rails/stiles like yours. So, I'll have to recalculate around those.
Any progress on yours?
 
No visible router jig progress - still in the planning stage.
If I'm building it now, I might as well look forward. I occasionally want the ability to joint and plane boards that are up to 24", but I doubt I'll see much need over that. I like the style that has the router attached to the center, so I'm planning a 50" sled. A Freud plunge router will go in the middle (15 pounds?). My thought is that with the router attached the downward pressure will be consistent, instead of me pushing and pulling the router back and forth.
I have some good 3/4" plywood. 7 1/2" bottom is plenty of room to fit the router. My question is the sides; 4" high? 8" high? Somewhere in between?
 
Finally completed a china cabinet refinish that had been in my shop for way too long. Polyurethane on cabinet pieces and sawdust from a bass project don't go well together, so the bass had to wait that out.
Delivered the cabinet Saturday, combined celebration for the birthdays of Girl-Child and Dear-Sweet-Wife on Sunday, and got a little bass-body work in today.
The remaining dowels in the back needed to be dealt with. Since the dowels were inline, I decided to run a groove straight through two at a time, and fill with strips that run through the full length. Not a great grain match, but there shouldn't be much of them showing, and what does will be under the darkest part of the burst.
Filler Strips - Top - Copy.jpg

Filler Strips - End - Copy.jpg
Will it all be done on time??? Possibly, but the probability of more interruptions is high.
 
A productive day.
Made a router-planer jig. I expect to use this on wider, furniture-related pieces in the future, so I made it 52" long. Not too heavy to move around, and heavy enough to hold itself down. The sides are just barely proud of the bottom, and I'll probably stick some plastic laminate on there to make it easier to slide.
Router Planer - Copy.jpg

Planer Jig end - Copy.jpg

I got the body back and front planed and glued up. That will sit overnight and I'll should be able to get the body shaped tomorrow.
Body Glue-Up - Copy.jpg

Enjoy!