• TalkBass has been independent since 1998. Add your voice.
    Create a free account to reply to discussions, view embedded media, and browse with fewer display ads.
    Join freeLog in
    Want zero display ads or expanded classifieds tools? Compare plans.

SBO 2022 - BTSGSIMBDS

Body blank out of the clamps and cleaned up.
Blank - Cleaned Up - Copy.jpg

I didn't make a body template, just traced it from the full-sized print-out, then rough cut on the bandsaw and sanded to shape.
Shaped Back - Copy.jpg Shaped Front - Copy.jpg

I bought a P-Bass case for this assuming that the '51 Precision body would fit. This is a good time to verify that.
Case - Trial Fit - Copy.jpg

So far so good!
 
Got the neck attached. Holes in the back, and none in the front!
BSO Back - Copy.jpg BSO Front - Copy.jpg
Time for the electro socket.
I still don't have the motor in my big drill press, and the body won't fit under the benchtop drill press. This is what I came up with. The block-shaped Milwaukee is good for aiming.
Drilling Setup - Copy.jpg
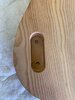
Countersink first, then the hole through to where the control cavity will be.
ES - 1 - Copy.jpg ES - 2 - Copy.jpg
Happy with that!
ES - 3 - Copy.jpg
 
Plan A was to route a space for the pickup cable before I glued the front and back together.
I forgot to do that and had to come up with a Plan B. A 1/4" hole in the bottom of the pickup cavity, and bore to it from the input jack hole.
PU Cable - 1 - Copy.jpg PU Cable - 2 - Copy.jpg
Missed it - that's why they call them plans and not things!
PU Cable - 3 - Copy.jpg
It's workable though. A little expansion, and while it isn't elegant, it will be functional and probably unseen once everything is together.
PU Cable - 4 - Copy.jpg PU Cable - 5 - Copy.jpg
 
It crossed my mind to burn the midnight oil tonight and tomorrow. The lack of sleep would likely trigger a flare-up of hypobassicitis, which would keep me from attending my day job Monday and Tuesday, and might give me enough time to make this thing playable before the deadline. The fact is I'm just not that competitive.
Tomorrow I hope to get the control cavity routed, strap button holes drilled, and maybe the bridge on. I likely have two or three more weekends of work to do.
For those of you who are pretty close, I'm cheering you on!
 
The control cavity was today's main goal.
Drilled the holes for the pots first. Tiny holes all of the way through first to locate the cavity position on the back, then a 3/8" forstner through the front, and 1 1/4" into the back to create the ends of the cavity.
Holes for Pots - Copy.jpg Cavity Ends - Copy.jpg
Routed the sides, then used a rabbeting bit to make a recess for the cover - 3/8" on the sides and 1/2" on the ends to allow some space for the screws.
Cavity Routed - Copy.jpg Cavity Rabbet - Copy.jpg
I made a cover then wrapped it with a few layers of blue tape to keep it centered. Marked for screws, then drilled holes and countersunk them.
Cover Taped - Copy.jpg Cover Marked - Copy.jpg Cover Attached - Copy.jpg
I put the strap buttons on, then reattached the neck.
BSO Again - Copy.jpg
That's where I shut it down for today. Bridge will be next!
 
Today is bridge day. Fender Deluxe - top loading or body through. Measured from the nut to identify the correct placement, then from the bridge end of the body to make a template. Screw holes first, then the string holes. If you say to yourself, "That's easy enough to remember," and then you do remember, then those pieces of tape covering the screw holes won't make sense to you. If have said to yourself (possibly more than once), "That's easy enough to remember," and then you didn't, then you understand why they are there.
Bridge Template - 1 - Copy.jpg Bridge Template - 2 - Copy.jpg
I stopped the string holes about halfway through then moved the template to the back. Drilled the string holes to connect in the middle, then drilled and countersunk for the ferrules. Blasphemous, I know, but I like more space between the ferrules than you get with the original size. Sharp brad-point bit still split out some of the soft, splintery fir. I think I'll wait until the finish is on and then drop fill that.
Bridge Holes - Front - Copy.jpg String Ferrules - Copy.jpg
Speaking of forgetting things, I almost skipped provisions for a bridge ground wire.
Bridge Ground - Top - Copy.jpg Bridge Ground - Cavity - Copy.jpg
Pickup and pots in. Not much clearance between the jack and tone pot. I'll go with it for now. If it ends up being a problem the cavity is wide enough that I can move the pots up a little more.
Jack - Copy.jpg
That looks like everything except the tuners, and I want to put the finish on before installing them. Tomorrow I'll take everything apart and start sanding.
Fabricated - Back - Copy.jpg Fabricated - Front - Copy.jpg
 
Last edited:
If it's any encouragement, once you get to the sanding part, you're halfway done building your bass!

It takes a while, but a good prep job makes the finish come out so much better. The more time you spend getting the surface perfect now, the less time you will need later to go back and re-sand spots.

:D
Water-based dye and clear lacquer certainly don't hide any prep-work flaws. The scratches I'm still finding are on the inside curves of the upper and lower bouts. Wetting the surface highlights them ahead of time (most of them anyway). Once I can't see them wet or dry, or feel any roughness after it has dried, then I'll call it ready for the dye.
 
I'm wanting this to look like an older guitar, so I sanded the lacquer to 3200 grit while it was reasonably fresh, and I'm expecting it to shrink back into the body grain as it cures. I put a little polish on it today.
Body Polished - 3 - Copy.jpeg

Rookie mistake - I didn't pay enough attention to sealing the holes in the body. Water got into them while I was wet sanding and leached the dye. I think it will all be covered except around the string ferrules.