
Enjoy the benefits of a premium membership!
Upgrade Account
-
TalkBass has been independent since 1998. Add your voice.
Create a free account to reply to discussions, view embedded media, and browse with fewer display ads.
Join free Log in
Want zero display ads or expanded classifieds tools? Compare plans.
You are using an out of date browser. It may not display this or other websites correctly.
You should upgrade or use an alternative browser.
You should upgrade or use an alternative browser.
Short scale Eight string?
- Thread starter Jisch
- Start date
-
- Tags
- scale short short scale
More options
Who Replied?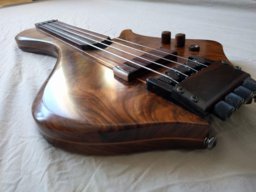


I continued to work on the headstock and got the nut to the right dimensions. I have more tuning, but it's getting there.

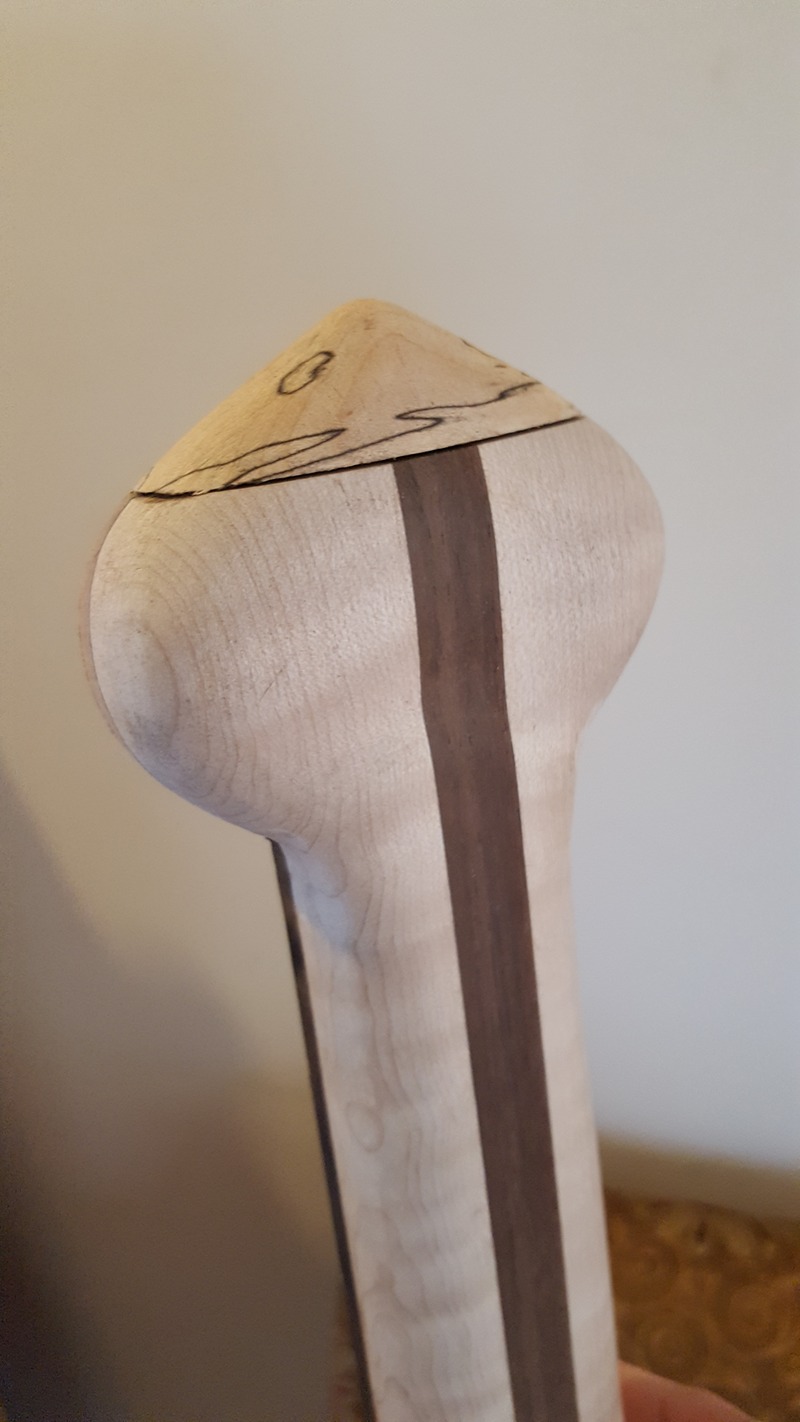
Next up is to slot the nut (one of those phrases that sounds dirty, but it's not), I'm fairly certain this will be version 1.0 of the nut.
Oh and I found that I'm slightly allergic to this macassar ebony I'm using for the nut, sanding/filing it makes me slightly itchy if it gets on my skin and my lips tingly.
Next up is to slot the nut (one of those phrases that sounds dirty, but it's not), I'm fairly certain this will be version 1.0 of the nut.
Oh and I found that I'm slightly allergic to this macassar ebony I'm using for the nut, sanding/filing it makes me slightly itchy if it gets on my skin and my lips tingly.
Just testing the nut slots to make sure the strings will play nice. Seems OK right now - lots more to do, but conceptually it's looking good.

Time to figure out the bridge. I'm thinking of installing a plate with slots for the brass rod string saddles. The slots would be cut for correct intonation for each string


Then I thought what a nightmare it would be to change strings with all those tiny pieces of brass rod falling out, so I drilled one and put a screw in. I ran out of time, but I'll likely do this, but use a set screw instead to hold it in place.

Incidentally it really wasn't too hard to install the string and tune it. Lots more work and testing to be done, but everything seems possible!
Then I thought what a nightmare it would be to change strings with all those tiny pieces of brass rod falling out, so I drilled one and put a screw in. I ran out of time, but I'll likely do this, but use a set screw instead to hold it in place.
Incidentally it really wasn't too hard to install the string and tune it. Lots more work and testing to be done, but everything seems possible!
Last edited:
The next thing is to get two individual string saddles so the strings are 3.5mm apart, that's hardest to accomplish on the lowest/thickest strings as the diameter of the string takes up most of that distance. It looks like with some careful work I can make it work. If I take a little off each of these the strings will be perfect.

I think what I need to do is make eight of these things, slot them for a specific string, figure out where each one needs to be for intonation, mark that spot and then make a board with grooves to accommodate each saddle. It's going to take me a couple of hours to sit down and do this. I got two strings up earlier today, but it will take being a lot more careful and deliberate to figure it all out.
I think what I need to do is make eight of these things, slot them for a specific string, figure out where each one needs to be for intonation, mark that spot and then make a board with grooves to accommodate each saddle. It's going to take me a couple of hours to sit down and do this. I got two strings up earlier today, but it will take being a lot more careful and deliberate to figure it all out.
So I've been thinking about how to make eight individual string saddles. I decided to do a search for eight string headless basses to see how others have conquered this problem. You would think I would have done a search like this earlier in the process, eh? Oh well. I found this bass, I'm assuming that it's properly intoned, and you see that the intonation points for the primary and octave strings are very different for the E string, but by the time you get to the G string, there is very little difference. I suppose I could make something complex like this for the string saddles, but I'm not so inclined and I want it to look simpler than this.
I think I am going to make compensated string saddles. I'll run two slanted parallel brass bars, the back one will be for the primary strings and I'll file the string slot to fine tune the intonation, the front one will be used for the octave strings. I'll file down the front one where the primary strings cross it and the rear one where the octave strings cross it, except on the G string where I suspect that front bar is where the intonation point will be. String height will be dictated by the depth of the string slot I file. The bars will be mounted on a piece of maple, so I can make it perfect rather than worrying about getting the slot right on the body where I'd get one shot.
[Invalid or Expired Link Removed]
I think I am going to make compensated string saddles. I'll run two slanted parallel brass bars, the back one will be for the primary strings and I'll file the string slot to fine tune the intonation, the front one will be used for the octave strings. I'll file down the front one where the primary strings cross it and the rear one where the octave strings cross it, except on the G string where I suspect that front bar is where the intonation point will be. String height will be dictated by the depth of the string slot I file. The bars will be mounted on a piece of maple, so I can make it perfect rather than worrying about getting the slot right on the body where I'd get one shot.
[Invalid or Expired Link Removed]
Kids came home this weekend, so I didn't get a lot of time to work on the bass. I did get the tuner block glued in and finished off the tuning blocks, I have to drill and tap two holes in each block, and widen the slot in the middle.

Next I have to start working on the string saddles. I have a couple ideas, as stated above. I think I'll have to bite the bullet and clamp strings in to do the saddles. I don't want to wreck the set I have putting them in and out, but it looks like I'll need to do it now, worst case I'll buy another set, I suppose.
Next I have to start working on the string saddles. I have a couple ideas, as stated above. I think I'll have to bite the bullet and clamp strings in to do the saddles. I don't want to wreck the set I have putting them in and out, but it looks like I'll need to do it now, worst case I'll buy another set, I suppose.

I'm not sure this helps, but here's something I did about 35 years ago with tandem saddles.So I've been thinking about how to make eight individual string saddles. I decided to do a search for eight string headless basses to see how others have conquered this problem.
If you look closely, the saddles closest to the neck have clearance for the low strings. A similar trick accommodates the adjustment screws.
That's exactly what I should do for maximum flexibility and adjust-ability, I will probably be more lazy than that though and probably go with a compensated bridge, I can always change it later if needed.
I started working on the cover for the tuning block last night. I figured this first one would be a "test" as I knew it would not be easy to make. I've already broken and glued it back together twice (ok, one was just a chip out). I might make another one, we'll see how this one comes out. This is one of those things that looks easy, but there are a lot of curves and lines to match up.

I got it mostly done from a fit perspective and realized that I had carved the whole thing out of the wrong part of the piece of wood I was using, leaving a rough cut on the bottom that needed to be sanded down. I added a couple of strips of black laminate to compensate. It's now a feature. It might be cool to make this whole thing out of a bunch of different laminated wood for the real one.

The cover fits tight in all other spots, so it should be good to go after I get this laminate sanded down and fit in. I am concerned that this cover will be strong enough after I drill the holes in it to access the hex head screws I'm using for tuning. I'll have to see how that works out.
I got it mostly done from a fit perspective and realized that I had carved the whole thing out of the wrong part of the piece of wood I was using, leaving a rough cut on the bottom that needed to be sanded down. I added a couple of strips of black laminate to compensate. It's now a feature. It might be cool to make this whole thing out of a bunch of different laminated wood for the real one.
The cover fits tight in all other spots, so it should be good to go after I get this laminate sanded down and fit in. I am concerned that this cover will be strong enough after I drill the holes in it to access the hex head screws I'm using for tuning. I'll have to see how that works out.

- May 1, 2014
- 2,494
- 2,341
- 56
- Disclosures
- Owner Melodious Resonance Constructs
@Jisch - Fantastic job! Outside the box, inventive, and very nice looking. I love what you are doing.
Thanks! that means a lot to me coming from you!@Jisch - Fantastic job! Outside the box, inventive, and very nice looking. I love what you are doing.
I spent an hour sanding at lunch today, it's getting closer. This is not exactly what I had in mind when I started, but it actually looks pretty good. On the fly engineering wins again.
Cover from the back - the cover isn't sanded thin enough yet on the back there, it will be flush when I'm done. I need to put some screws in it to hold it in place while I hit it with the orbital sander:

and from the front - the bottom of the cover is slightly proud of the body. I can theoretically make it flush, but I feel like it would get too thin at that point - I figured I'd try this out first, I could always go thinner, I like the way it looks, so it stays. I routed in a little concave slot from the front for interest - again not what I was planning on doing, but it works:

I've got a lot more shaping to do to smooth it all out, then I have to figure out the holes for access to the tuning bolts. The cover seems strong enough overall but I'll probably laminate a thin piece of maple underneath, just to be sure. I've had thinner covers warp on me before, although this one probably isn't big enough where that will be a problem.
After routing out the pocket for the tuners I was cleaning it up with a chisel and I cracked the wood one the bottom of the bass, I glued it back together and the tuning block (hard maple) is glued in against it. I'm sure it's strong, but you can see the crack, I'm doing a clear finish, so it's not going anywhere. I think I'm going to route channel and inlay another wood - maybe the same wood as is in on the cover, so you can't see the crack - another "feature".
Cover from the back - the cover isn't sanded thin enough yet on the back there, it will be flush when I'm done. I need to put some screws in it to hold it in place while I hit it with the orbital sander:
and from the front - the bottom of the cover is slightly proud of the body. I can theoretically make it flush, but I feel like it would get too thin at that point - I figured I'd try this out first, I could always go thinner, I like the way it looks, so it stays. I routed in a little concave slot from the front for interest - again not what I was planning on doing, but it works:
I've got a lot more shaping to do to smooth it all out, then I have to figure out the holes for access to the tuning bolts. The cover seems strong enough overall but I'll probably laminate a thin piece of maple underneath, just to be sure. I've had thinner covers warp on me before, although this one probably isn't big enough where that will be a problem.
After routing out the pocket for the tuners I was cleaning it up with a chisel and I cracked the wood one the bottom of the bass, I glued it back together and the tuning block (hard maple) is glued in against it. I'm sure it's strong, but you can see the crack, I'm doing a clear finish, so it's not going anywhere. I think I'm going to route channel and inlay another wood - maybe the same wood as is in on the cover, so you can't see the crack - another "feature".
As I mentioned I have a repaired crack in the bottom of the body, it's glued up nicely and supported by the tuning block, but it doesn't look good and I'm sure it will show even more when I put finish on it. I routed out a slot over the crack and put a piece of maple in over it. It's now a feature, not a mistake.
Here you can see the crack after my first pass with the router. I meant for this to be my only pass, but I was slightly off center, then the second pass was slightly off center to the other side before I finally got it right with the third pass - it just made the inlay a bit wider than planned :-D

The inlay glued in, I'll finish shaping it after the glue is dry. It's such a tiny piece of wood, but getting it to fit in the slot with the grain oriented correctly took me a good 45 minutes - this is counting the first one I made that had the grain oriented incorrectly, which I noticed right before I glued it in.

Here you can see the crack after my first pass with the router. I meant for this to be my only pass, but I was slightly off center, then the second pass was slightly off center to the other side before I finally got it right with the third pass - it just made the inlay a bit wider than planned :-D
The inlay glued in, I'll finish shaping it after the glue is dry. It's such a tiny piece of wood, but getting it to fit in the slot with the grain oriented correctly took me a good 45 minutes - this is counting the first one I made that had the grain oriented incorrectly, which I noticed right before I glued it in.
I will probably sand this down a bit more, but it looks a lot better. The very bottom of the body is somewhat flat, so I think adding some stuff down there for interest is a good idea. As I was forming the inlay and getting everything in line I realized just how much sanding I have to do on this body - lots more!


- May 1, 2014
- 2,494
- 2,341
- 56
- Disclosures
- Owner Melodious Resonance Constructs
One of the things I love about building is watching the "rough" work transform into polished deliciousness. As you are refining the curves and cuts it's looking sexier and sexier. Great job man!
I ran into a problem in holding the strings in the tuner. I need a bit more investigation - I was getting tired, so I walked away. I was determining where the intonation points would be fore the E and G strings. The E string tuned up fine but the G string popped before it got to tension (it popped as it was going from F# to G - so close!). At that point the outer wraps stripped off the core. I'll have to look at alternatives to the set screw to holding the string. The octave strings are even thinner - the octave string for the G isn't even wrapped, it's just a solid string, I don't think it will survive being pinched under the spinning set screw.
- May 1, 2014
- 2,494
- 2,341
- 56
- Disclosures
- Owner Melodious Resonance Constructs
Based on my experiences with my own single string headless tuning system I know that it will work, and work well. I say that to encourage you and hope I am not coming off arrogantly or as a know it all. When designing my own single string tuning system I went through this very same exercise and hope my failures and successes will prove useful to you. My own system has been successfully tested with string gauges ranging from from .135" down to .008".
What kind of set screws are you using? I have found that using dog point set screws work the best for this application, and wider screws (greater diameter) provide more surface area to grip the string, which in turn requires less downward compression pressure to get the same holding power. Conical and cup set screws introduce the most risk for breaking strings, though they can be filed down to work in this application. Here's my unasked for advice:
1. If using conical set screws file them down flat on the ends to remove the cone edges and flatten the point out. This will reduce the "cutting" effect of the set screw. Smooth out the threads at the end of the screw to reduce any sharp edges that could be contributing to scoring the string rather that compressing it.
2. Use dog point screws if you have some. I have a ton of 10-32 dog points and would be happy to send you a set to experiment with if you PM me with your address. You may also want to file the very outer edges of the "point" of these kinds of set screws to "soften" the impact on the string - it all depends on the angle at which the string is being pulled against the point when under tension.
3. Tighten them down only only slightly more than is needed to keep the string held under tension. Going too tight will deform the string enough to introduce more risk of breakage.
Your idea is sound! You can do this!
What kind of set screws are you using? I have found that using dog point set screws work the best for this application, and wider screws (greater diameter) provide more surface area to grip the string, which in turn requires less downward compression pressure to get the same holding power. Conical and cup set screws introduce the most risk for breaking strings, though they can be filed down to work in this application. Here's my unasked for advice:
1. If using conical set screws file them down flat on the ends to remove the cone edges and flatten the point out. This will reduce the "cutting" effect of the set screw. Smooth out the threads at the end of the screw to reduce any sharp edges that could be contributing to scoring the string rather that compressing it.
2. Use dog point screws if you have some. I have a ton of 10-32 dog points and would be happy to send you a set to experiment with if you PM me with your address. You may also want to file the very outer edges of the "point" of these kinds of set screws to "soften" the impact on the string - it all depends on the angle at which the string is being pulled against the point when under tension.
3. Tighten them down only only slightly more than is needed to keep the string held under tension. Going too tight will deform the string enough to introduce more risk of breakage.
Your idea is sound! You can do this!
Last edited:
Nice! thanks for that. I will try taking the edge off the set screw - that's a good idea. I am also "testing" with flat wounds and the final strings will be round wounds. I'll report back. I'm working off the bass now with the tuner just screwed into a piece of 1x4 until I get this proven out. Trust me I'm not giving up - and I truly appreciate your advice!
Man, sometimes I can really chase my tail. I filed down a set screw as suggested and I still couldn't get it up to pitch. I watched the tuner end and really couldn't see it moving, but I figured out must be slipping just enough.
I decided I'd try an old round would string, just for fun. When I took the clamp off the ball end, I could see where it had made a track in the pine, the clamp wasn't holding it in place!

Back to your regularly scheduled program. I mounted the string block in place with a sheet rock screw and it held fine, up to pitch, no problem. Back to the bass!
I decided I'd try an old round would string, just for fun. When I took the clamp off the ball end, I could see where it had made a track in the pine, the clamp wasn't holding it in place!
Back to your regularly scheduled program. I mounted the string block in place with a sheet rock screw and it held fine, up to pitch, no problem. Back to the bass!


