
• TalkBass has been independent since 1998. Add your voice.
    Create a free account to reply to discussions, view embedded media, and browse with fewer display ads.
    Join freeLog in
    Want zero display ads or expanded classifieds tools? Compare plans.

Singlecut semi-hollow body

I've got a commission starting soon, but while I'm waiting for the parts to come in I thought I'd start working on a new instrument. This one will get put aside once I get started on that one.

I was looking around the web at various semi-hollow body instruments and found Veillette Guitars and one of their instruments looks interesting. I've adapted their design a bit, putting the neck a bit deeper into the body and making it a 35" scale.
20190310_171949.jpg


I'm not 100% set on much, but as of right now I'm thinking five string 35" scale, through neck fretless with a single pickup.

I want it to have a mellow "organic" sound. I've got both Bartonlini and EMG pickups here. I think the EMG will be too bright for this, but the Barts are a brand new Jazz set, I'm not sure I want to break up the set. I'm open to suggestions. Same with a preamp, I could do without one entirely.

I'll make the bridge and a tailpiece out of wood. It will have a carved top with a hole of some kind on the bass side bout. I haven't figured out body or fingerboard woods yet, but likely a mahogany/maple neck (as I know I have that in stock).

I have this amazing redwood figured bookmatch top. I was looking at how I could orient the wood when I realized I could make the whole thing fit on one side of the bookmatch if I made the body just a bit narrower (the below is the wider body before I thinned it down). I could still do the bookmatch, but I'm liking the way this looks.
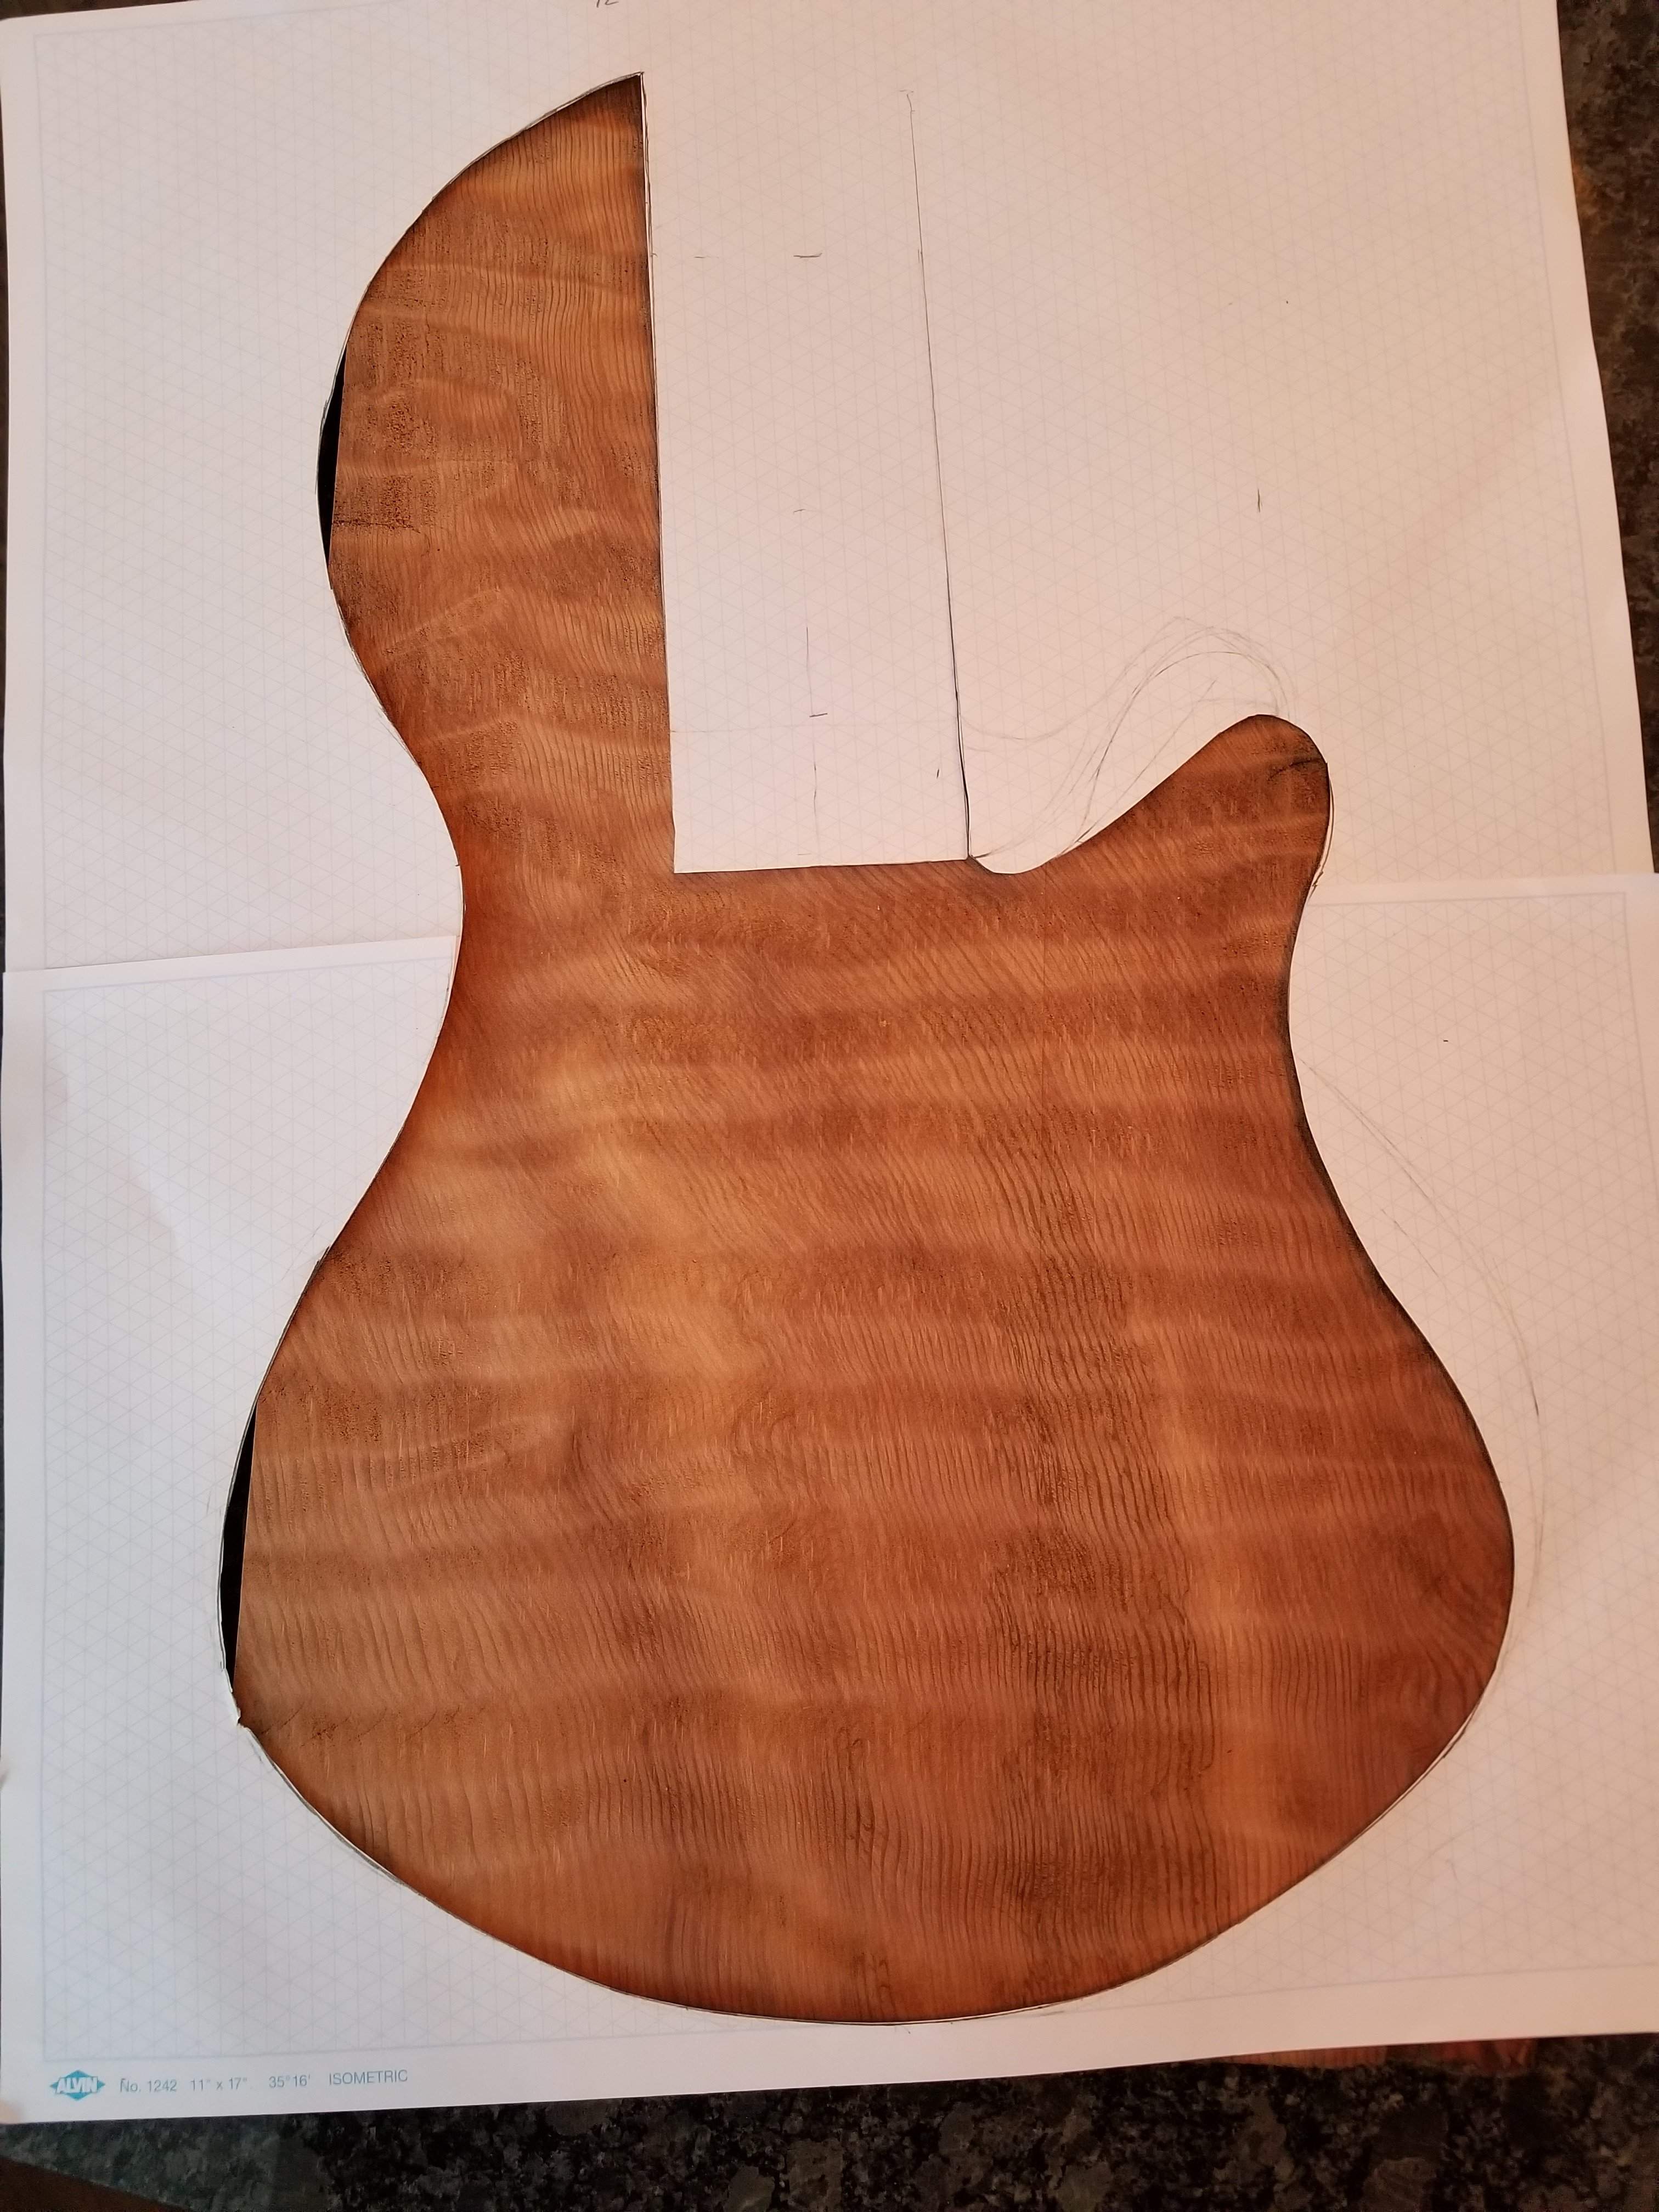
20190310_171957.jpg

This piece is just over 1/4" thick, so I'll glue 1/4" of walnut to the back of the redwood so I can carve the front a bit more. I've got a lot of decisions to make, this is just the starting point.
 
I can fit everything in by just narrowing the upper horn a bit, I think this looks good, but I'll stare at it for a few minutes. The alternative (which is in play and a good one) is to cut this top in half and put some kind of stringer down the middle. I'll think on it.
20190311_081043.jpg

I got some wood cut for the neck this morning. I considered a lot of different options. I'm going to go with a 3 piece neck - mahogany/wenge/mahogany. I'm going for a "dark" theme here. The wenge will be much thinner than in this pic. I only need a little more than a 1/4" of it.
20190311_084734.jpg
 
I recently got a piece of curly redwood for a bass project and I have to say, I absolutely love it. When it's quartersawn you get the tight parallel grain lines on top of the figure and it's just stunning. I'm surprised it's not more popular. That piece you have looks really nice.
 
  • Like
Reactions: Bobro
I got a surprising amount done considering I worked a full day. I did some at lunch and got some of the thought work done while on conference calls so I guess I was able to hit the shop full steam ahead after work.

Truss rod channel routed (fingerboard to the right there)
20190312_183132.jpg

I got the middle walnut pieces planed down and cut
20190312_183149.jpg

and finally got the back cherry cut, planed and glued up.
20190312_184008.jpg

Next up I'll do some neck blank cutting, lots of interesting stuff going on there. I've got it all marked out, I just have to be sure to do the right cuts in the right order.
 

Attachments

  • 20190312_084137.jpg
    20190312_084137.jpg
    805.4 KB · Views: 259
I thought about this a bunch and decided to go for it, I cut out the middle of the middle pieces, the cherry for the back is sitting there as well.
20190313_182905.jpg

I cut out the neck pocket for the top:
20190313_182929.jpg

Then drilled out the back and cleaned it up a bit with a router. I need to go deeper so you can't see the divots, at least on the bass side as there will be a cutout on that side.
20190313_184614.jpg

I know what you're thinking, "how is he going to glue that together?". I have a few ideas, but it's not going to be easy.

I also made a lot of cuts on the neck blank, it's crazy looking with all the different stuff going on, but I forgot to take pics of it.
 
I'm going to put a single Bartolini XXM45M-T Deep Tone (EMG-40 shape) in it with just a passive volume and tone. I'll start without a preamp, but if history is any indication, I'll be putting one in eventually. I usually like a preamp so I can do tone shaping on the instrument. I'm also putting nylon wrapped strings on, so it's tone is going to be pretty muted to begin with.

This morning I got up early and got some more done. I'm really looking forward to getting this glued up so I can start carving.

I finished up the rough cuts on the neck - not much left from that huge neck blank I started with.
20190314_081445.jpg
20190314_081500.jpg

Then I routed the chambers and control cavity deeper. I left about 1/4" on the back. Besides weight savings I also want the instrument to look hollow when you look into the hole in the top. It's not a super thick body (~1.6"), so there's only so much I can do.
20190314_075729.jpg

And finally I marked the frets on the back of the fingerboard and rough cut it. I need to finalize the width before cutting the side fret markers and doing the side dots. I lucked out with the grain on this fingerboard, by cutting it strategically the grain follows the taper of the neck almost perfectly. Of course with rosewood most of that grain disappears when you put oil on it, but it will be there.
20190314_084307.jpg

Before glue up I've got to cut out the control cavity cover, the pickup hole in the top and route in the body, sand and seal the chambers. Pretty happy with progress so far. I always find singlecut bodies to be more complicated to figure out, this one is no different. I think this is my third one and first where I didn't make any mistakes (that I know of!). I am planning on making this a very round body. I don't think there will be much top carving due to the thin top and the way I'm doing the chambers. I plan on having the walnut show from the front on the roundover.
 
It took me a bit to figure out what you could possibly be talking about. That's a template for a mountain biking fender, I cut a few out of sheet plastic. You bend it so it fits between the fork stanchions and zip tie it to the bike (that's what the holes are for).
Mystery solved! I assumed it was a toy or something.

Joking aside, this build is looking awesome
 
  • Like
Reactions: Jisch
I got the fingerboard flush with the sides of the neck, cut the side markers and put some maple in there, there should be plenty of contrast!
20190314_180652.jpg

I figured out a shape for the cutout, well ok, I figured out the shape for the cutout six or seven times before settling on this one and this position. I started with a paper cutout and put it where I thought it should, but after drawing it on the top, I didn't like it, so I started over again, many times. I like this one. I broke one of my cardinal rules and cut the pickup hole without having the pickup in hand. It's a well known size, or I hope it is! Usually when I do this I route a clearance hole underneath the top before I glue the top on, that way all I have to worry about is getting the top cut close to the pickup. In this case if I route it out to full depth it will cut away the remaining part of the neck, so I'll have to wait until I get it glued up before routing.
20190314_164237.jpg

Then I sanded the hole to make the lines clean on it.
20190314_180637.jpg

and finally I started thinking about gluing and clamping. I think I'm going to go from back to front. I drilled some holes in the neck blank and I'll clamp it down with sheetrock screws (what did we do before sheetrock screws were common?). Then I'll glue on the walnut, then the top. Hopefully with this sequence I can get a good clamping along the way. I marked out the control cavity cover, I have to get over my dad's to use his pinless jigsaw to cut it out. I think I'll get it glued up tomorrow if I can get over there tonight to cut it out.
20190314_180627.jpg
 
I got the control cavity cover cut out, I'll rate this as my third best one, a little wiggle, I might be able to minimize it with a little roundover on the cover. I went a bit smaller than drawn, this is always my downfall, small cavities and smaller covers.
20190315_081818.jpg

But I still think this is the best overall look for a control cover.
20190315_081836.jpg

So with the cover cut I got the neck blank glued up to the back. The screws worked awesome, nice squeeze out all the way along. This is an important connection as the back is really going to be providing the support over the pickup route where there will be very little left of the mahogany/wenge. It's more than a 1/2" of solid cherry, so I'm sure it will be fine (assuming this glue up goes well).
20190315_083631.jpg


Next I have to fine tune the walnut spacers so there are no gaps against the neck blank, then I'll glue them on. The pickup should be here tomorrow, so I might wait to get the pickup hole perfected before I glue the top on. I love this part of the build where little parts become the bass.
 

Latest posts


