• TalkBass has been independent since 1998. Add your voice.
    Create a free account to reply to discussions, view embedded media, and browse with fewer display ads.
    Join freeLog in
    Want zero display ads or expanded classifieds tools? Compare plans.

Squier Owners Club

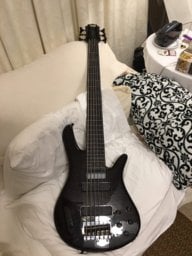
photo (3).jpg

Was in Guitarworks in Calgary with my wife on one of my "no-intentions-of-buying" browsefests of the store when this little number caught my eye. I have been wanting a precision for quite some time now, and had never seen a MF in Regina so I plugged it in and played for probably 20 minutes. I never really thought about buying a Squier, but had read good things about the CV's and VM's and it played like a dream. The neck is probably my favorite part; no complaints of the glossy finish here.
 
Moderators: please feel free to insert this in a better thread if needeed..Thanks..]

I used my 2009 Squier Jazz 5 Active on a live-outdoors gig last Saturday. Stayed in pretty fair tune from house into over 50 mile commute in vehicle. I opened the case back stage to let it get used to the Georgia outdoors temp and humidity; both were high.
G string ws slightly flat others were either on or very close. I re-set tuning on all strings and checked throughout the afternoon, until just before our set.

Stayed in tune from last setting and never had to tweak it durung LOOONG live outdoors set. I was as proud of my Squire as others were of their basses, which were : Custom No-Name hand made 5, Cort Curbow 5 fretless, 1993 Fender Jazz and a Traben which was never used.
 
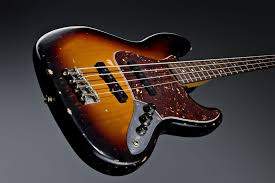
Picked this up as a scratch and dent from MF. First Squier I've owned. Change out the pots here - [Invalid or Expired Link Removed], and added the jazz knobs that I prefer. The pickups sound OK, but will probably swap those out at some point too. Need some new strings and a set-up and will be a killer bass.
 

Attachments

  • Photo Aug 23, 7 11 22 PM.jpg
    Photo Aug 23, 7 11 22 PM.jpg
    84.7 KB · Views: 219
  • Photo Aug 23, 7 11 13 PM.jpg
    Photo Aug 23, 7 11 13 PM.jpg
    76.7 KB · Views: 190
I modified my new Squier Vintage Modified Jazz 70's bass. So I guess it's a Modified Vintage Modified (oh brother!). I needed a two channel setup where each pickup has it's own output jack. It's part of an http://www.talkbass.com/forum/f36/experimental-fully-modular-bass-rig-902681/ setup that I'm doing. It ended up being so easy to do, so inexpensive, and so darned successful -- so here it is.

I started with this brand new Squier Vintage Modified Jazz 70's Bass. I bought this bass specifically for this project knowing full well that I was going to modify it. I picked it up about three weeks ago.

A few days ago I completed the installation of the full-length thumbrest. It's a piece of 1/2" aluminum angle that I installed across the entire length of the playing field, with that thing I have an even reference spanning both extremes of the playing area. It may look odd but it friggin WORKS! It's just a set up experiment for something more elegant later on. My thumb just glides along it's length when I fingerplay to give me the sound I like. It also works for using a pick, my wrist just sorta slides along the length and gives me a perfectly even reference distance no matter where I decide to pick the strings. I can get a super even sound when going from string to string by moving my picking/plucking position to given areas - it really makes life easier. I scribed a line on the pickguard with a cargo knife, then removed the pickguard and completed the cut by scribing that same line over and over with the cargo knife until the unwanted section just came off. Nice straight cut that's nearly dead-flush with the edge of the aluminum. There is less than 1mm gap between the thumbrest and the pcikguard. The only "aw shyte" is the visible screwhole in the wood from the piece of the pickguard that was removed. I only had to drill one hole, I ended up using one of the pickguard holes on the neck-end of the thumbrest. It only needs two screws to anchor it. This thing really works!
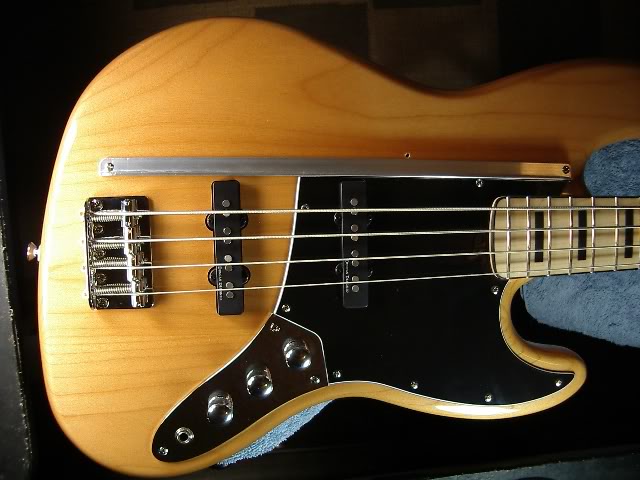
IMGP6367.jpg


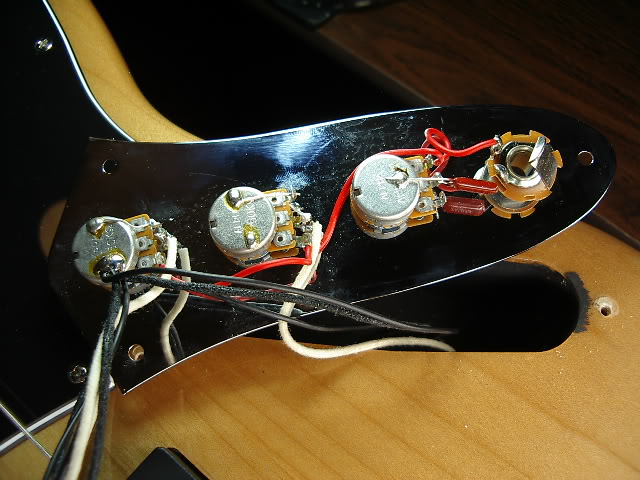
After getting the thumbrest project done, and playing it for a few days to get used to it like that, I began the 2-channel modifications. I removed the control plate and found typical *low-cost electric guitar wiring* inside. It was your average ~done quickly~ wiring job in an economy-priced bass. Some of the factory soldering joints actually just broke off while I was fiddling with the wiring (cold/hasty soldering joints). So it all needed to be resoldered anyhow.
IMGP6368.jpg


For the electrical mods, first I removed the stock tone control. I also removed the stock output jack and replaced it with a high quality Switchcraft #11. That one was connected to the Bridge pickup's volume control. I added a Switchcraft #12A for the Neck pickup's output and connected it to the neck pickup's volume control and placed it where the tone control used to be. I had to ream out both holes to accept the slightly larger barrel diamter of the Switchcraft jacks. That was easy to do with a handheld "T" reamer. The Neck pickup jack is a "normally closed switching jack" that has a switching terminal. I connected the switched terminal to the bridge pickup jack's Tip terminal (purple wire)

What this setup provides is double functionality. If I want 2-channel operation, I insert a cord into each jack. But if I want to use only one cord and still have both pickups available (just like stock) I insert only one cord into the Bridge pickup's jack. Since the two jacks are connected together via the switched terminal on the neck's jack both pickup's signals are available at the Bridge jack as long as no cord in inserted in the neck's jack. As soon as a second cord is inserted into the neck's jack, that connection between the two is broken (the normally closed connection is opened) and the jacks (and pickups) become fully independent.

So I can have it both ways ... single channel (exactly like stock) by using only the bridge pickup's jack, or 2-channel by simply inserting cords into both jacks. In single channel operation both pickups signals come out of the bridge pickup's jack. In 2 channel operation each pickup's signal is sent out it's own jack. Cool, right?

Yea, I could have used a "stereo" jack but that would mean using a special "stereo" cord, and then making some sort of special splitter box or "Y" cord adaptor. Totally not worth it. This way is easier, and is easier to apply to sending each pickup to it's own destination. On the finished Race Bass I'm building from this prototype, I may end up using an XLR connector, it depends on how I end up making the off-bass preamp section. But for prototyping out the design, two cords made a lot more sense.

For the two new Switchcraft jacks, I used thick stainless steel flat washers on top of the control plate, stainless steel inside-star lock washers underneathe the plate, and used Blue Loctite (#242) on the jacks' threads before torque-ing them down good and tight.

IMGP6390.jpg


Ok, all done .... and it works PERFECTLY. In fact since I replaced the all of the wiring, resoldered everything, added actual ground wiring (that bare copper wire that runs full length connecting all of the components' grounds together with a single wire), used high quality jacks, and removed the tone cap and tone control, this bass sounds better (to me). Clearer, more detail. And the jack switching logic works perfectly, just like I had planned it out.

IMGP6392.jpg


Here's what was removed....

IMGP6401.jpg


And here's the end result .....

IMGP6397.jpg


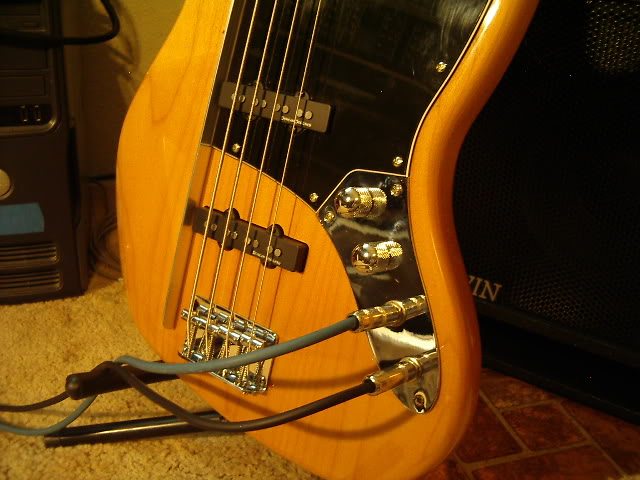
It works far better than I had hoped. Even without connecting it up to any of the panning/fading setup in my experimental rig made with modular synthesizer components (see that thread I linked up at the top of this post). I just started to experiment with it a little bit using the Line-6 M13 and the results were stellar, it sounds great. I used the bridge pickup as the "FX" chain and the neck pickup as the "clean chain". I was able to use the volume knobs like a wet/dry mixer. I tried phasers, flangers, overdrives, EQs, distortions, wild combinations of up to FOUR FX all connected to just the bridge pickup's output while leaving the neck pickup clean and dry. It's so cool that way! I connected the two chains to a two-channel mixer and fed that to my bass amp (details in that thread linked above). The levels were set evenly so all of the mixing was done right at the bass while playing. Friggin Mondo Cooly!!
IMGP6413.jpg


And using the single jack/single channel method worked perfectly as well. Both pickups' signals came out of the bridge's jack with full volume control available if I just didn't insert a cord into the neck pickup's jack. The volume controls worked just like stock in that mode as well.

So it's going well. The funky big thumbrest is getting me to learn exactly how much thumbrest I'll actually need. And the 2-channel set up is Thuh Bawlz. The doors that got "kicked wide open" by this set up will lead me to many different ideas. Once I get a few more things figured out I can start working up the actual end-result Race Bass that I'll be building next year. This one is my prototype "proof of concept" bass that is allowing me to work out some new ideas.

Man that 2-channel set up is just mondo cooly.
 
I just put this comment in another thread and I figured it was a pretty important feature of the 2-channel setup, so I've added it here ...

"I've been using a mic preamp on each output. I run both pickups' volume knobs at full-on to retain the humbucking affect and then use the mic-pres to adjust the pickup mix to obtain whatever sound it is that I want. This works very well, and it keeps the noise and hum to absolutely minimum levels. Something not available with standard Jazz bass wiring schemes. I found that if I changed the pickup mix using the volume knobs on the bass, the instant I went from full-on with both knobs there would be little noises, a little hum and such (I guess because it upsets the humbucking balance between the two pickups, or something along those lines). Using both pickup volumes wide open cures the heck out of that problem and using the level controls on the mic-preamps restores pickup mixing ability so I can still produce different sounds. This works well."

So there's that. :)
 
Your idea seems better to me than "rik-o-sound", as when using ROS, it's either-or: Stereo in R O S or mono in Mono, but cannot use two cords simultaneously. When mono cord in inserted into R O S jack; only bride PUP works. Your idea seems in a way; even better.

Jury is out with me, regarding looong thumb rest, but obviously it works for you.

GREAT JOB, BTW...
 
Your idea seems better to me than "rik-o-sound", as when using ROS, it's either-or: Stereo in R O S or mono in Mono, but cannot use two cords simultaneously. When mono cord in inserted into R O S jack; only bride PUP works. Your idea seems in a way; even better.

Jury is out with me, regarding looong thumb rest, but obviously it works for you.

GREAT JOB, BTW...
Thank you! :)

Keep in mind the looooooonnngg thumbrest is a test-piece to be shortened later on to whatever length I find I actually need. It will most likely be different material as well.

The whole bass is a "test piece" .. haahaa. :)

I am a complete convert on the 2-channel output setup. I have both standard single channel and the 2-channel setup available just by using one or two cords. With the right supporting gear, the 2-channel setup is amazingly versatile, and very musical as well. I'm getting sounds that I used to struggle to obtain, very easily. I like more bridge pickup in the mix, but doing that with the standard J-bass wiring means putting up with noise and hum. With this setup I just push the bridge pickup signal harder with whatever preamp I have on that channel. Done, with no added noise or hum. Cool bones!

I can add dirt or compression to either/or pickup this way as well. Yea, I'm sold. Totally. And it was so inexpensive to do. If you don't replace both jacks (as I did) then your total cost involves buying a Switchcraft 12A (N/C 1/4" TS Jack - that's probably how it will be described in parts websites. "N/C" meaning "normally closed".). Those are about $2 or $3. That, and some solder, a little bit of wire, and a little bit of time. Done. And reversible.

You ~could~ use stacked pots to put a tone control on each pickup if you like, as well. So each one would have it's own volume control, and it's own tone control. As well as the 1-or-2 channel output jack setup to boot. There are several variations to this modification.
 
(...)
I like more bridge pickup in the mix, but doing that with the standard J-bass wiring means putting up with noise and hum. With this setup I just push the bridge pickup signal harder with whatever preamp I have on that channel. Done, with no added noise or hum. Cool bones!
(...)
You ~could~ use stacked pots to put a tone control on each pickup if you like, as well. So each one would have it's own volume control, and it's own tone control. As well as the 1-or-2 channel output jack setup to boot. There are several variations to this modification.
Sooner or later Fender is going to copy this concept... no, rather those really inventive guys at Squier's: they'll add the Modified Vintage Modified to the VM range! Now imagine that: a headstock that says "Modified Vintage Modified", going down in history as the already legendary "MVM"! Since apparently they have "carte blanche" for putting on the market designs and combinations that didn't happen with genuine Fenders...
 
Sooner or later Fender is going to copy this concept... no, rather those really inventive guys at Squier's: they'll add the Modified Vintage Modified to the VM range! Now imagine that: a headstock that says "Modified Vintage Modified", going down in history as the already legendary "MVM"! Since apparently they have "carte blanche" for putting on the market designs and combinations that didn't happen with genuine Fenders...
Uh .. wow! Thanks .. I'm very flattered. To think that I own the prototype "MVM" too! ;) Heheh ...

(thanks!).
 
Wow, good concept.

I was about to put a stereo jack and a switch in my bass, but your design is simpler and more clever. Can I please borrow it?
Thank you! And sure, you most certainly may use it! :) Let me know if you have a handle on it, otherwise I can draw up a diagram and take a picture of it to further explain how to wire it up.

The only thing I may need to remind you of is that you will need to enlarge the holes in the jack plate to deal with the new jack(s). The barrels of the jacks are a little larger than the barrel of the tone control pot. If you put in TWO new jacks both the old jack hole and the tone control hole will have to be enlarged slightly to deal with the two new jacks. Switchcraft jacks are standardized in their size, but the stuff that Squier uses is some odd (possibly metric?) sized stuff.

However if all you do is replace the tone control with a "Normally closed switching jack - Switchcraft #12A") all you'll be required to do is enlarge that one hole a little bit. I didn't need to use a drill, a handheld "T-reamer" worked fine. But a power drill will do just as well. Just make sure to sufficiently protect the bass from accidental man handling so you don't turn an easy job into a cluster fek by gouging some big gash or scratch in your bass's finish because "the drill slipped". A few minutes of preparation will make certain the job looks seamless.

I'd also suggest hitting every solder joint with the soldering pen and a little bit of solder. It can't hurt and might help to make sure Squier didn't leave you with any hastily done solder joints.

It took me about an hour to completely replace all of the wiring, install the two new Switchcraft jacks, and resolder every single thing. WELL WORTH THE TIME SPENT! Adding a new ground wire across all four components in there is another good idea. The way Suier wired it up, they used the control plate as the ground conductor between all of the pots and jacks. This is fine as long as none of them ever come loose. Of course, that NEVER happens, right? :rolleyes:

So I went the extra mile and installed a bare copper wire across all of the ground connection points. That was after I removed the pots and used Loctite 242 ("blue" Loctite - the semi-permanent type) on the pots, and installed inside locking star washers on both jacks PLUS the Loctite to make sure the jacks stay tightand don't get loose. Then and only then did I add that full-length ground wire.

All of those details help prevent a problem at a gig or something, where it seems like a jacks or pot always comes a little loose causing those "crackles" and make you chase down a "bad cable" that doesn't exist. It's a few minutes of preventive maintenance that make life just that much easier.

So let me know if you need drawings or any other help to get this little "Modified Vintage Modified" Jazz bass tweak done. The "2-channel Flux Mod"? :rolleyes: (OK that's my ego sticking it's head up). I'll be glad to help out. :)